Any data entered in the platform is managed on an on-premise cloud infrastructure, **unless different agreements have been made with the provider**. It is always possible to download all project data locally and delete any associated media at any time. **For further support on data management, contact helpdesk@eaglearca.it**
--- ### Creating objects #### Form (non-vector objects) **1.** Open the **Inventory view** of the desired object class. [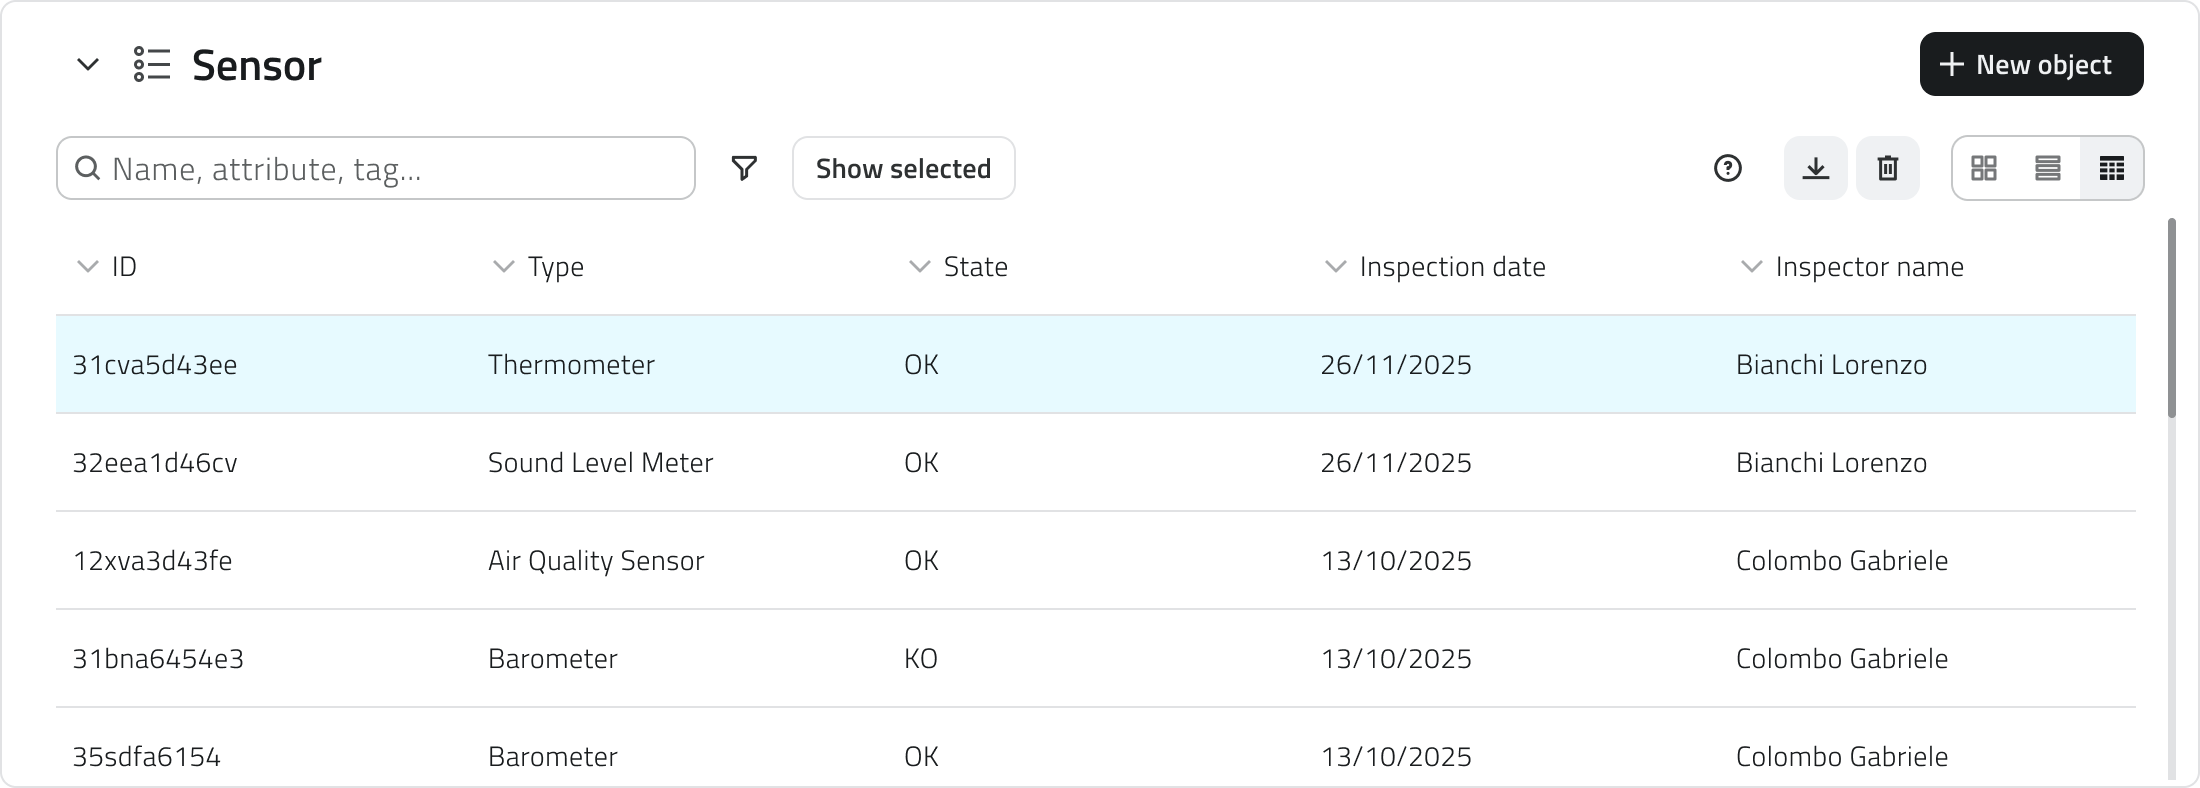](https://wiki.eaglearca.com/uploads/images/gallery/2025-12/5uP1-inventory-view.png) **2.** Click the **New object** button in the top-right corner. **3.** The **attribute panel** opens for data entry.n the **3D view**, objects must be created on the **surface of the mesh or point cloud**.
**4. Once the geometry is confirmed,** the **attribute panel** opens. [](https://wiki.eaglearca.com/link/158#bkmrk-compilazione-degli-a) #### Automatic object creation Some object classes can be configured from the Backoffice to create objects automatically. When this function is active, it is indicated by a **dedicated icon** in the following places: - At the end of the row in the object class list in the **Inventory panel**; [](https://wiki.eaglearca.com/uploads/images/gallery/2026-05/inventory-automatic-creation.png) - At the top of the **Inventory view** of the class; - On **each automatically created element** in the Inventory view list; [](https://wiki.eaglearca.com/uploads/images/gallery/2026-05/inventory-view-automatic-creation.png) - In the label within the **info card** and the **attribute details**, for vector objects next to the 2D or 3D text. In the case of automatic creation, the label, showing **only the icon**, will also be available for **Form objects**. [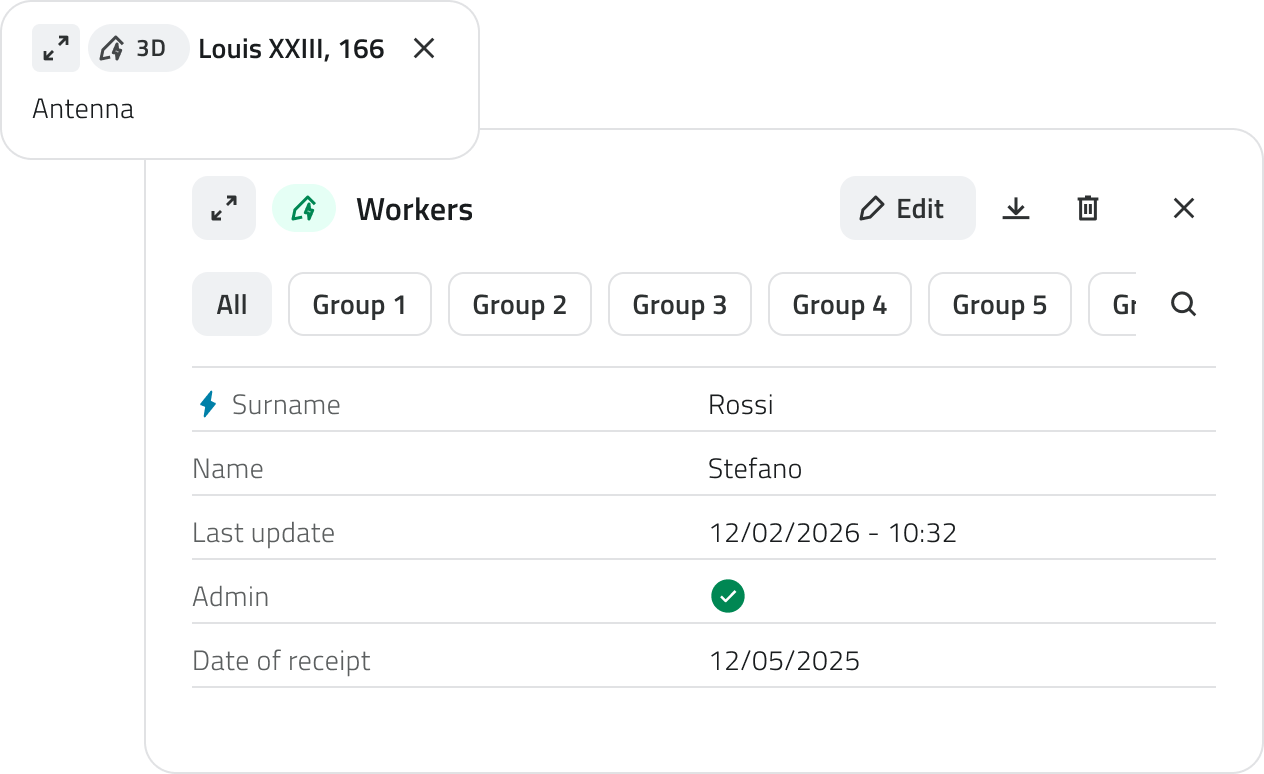](https://wiki.eaglearca.com/uploads/images/gallery/2026-05/chip-automatic-creation.png)Automatically created objects can be edited and, if needed, also created manually within the same object class.
--- ### Filling in attributes After creation, the **attribute panel** allows you to enter the required information.The object cannot be saved until all **required fields** have been filled in.
At the top left is the **Expand button** to open the panel in full screen. The **Cancel** and **Save** buttons are positioned at the top right. If the object class has attributes organised into **groups**, tabs appear at the top of the panel that allow you to **filter attributes by category**. Clicking on a tab shows only the attributes belonging to that group. Next to the groups there is a button to expand the **search bar**. [](https://wiki.eaglearca.com/uploads/images/gallery/2026-05/J0b3-obj-details.png) #### Attribute types Objects can have the following attribute types: - **Text:** Letters and numbers (possible maximum length). [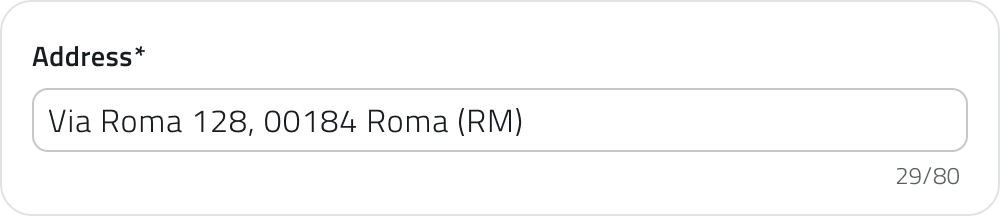](https://wiki.eaglearca.com/uploads/images/gallery/2025-12/4-text-box.png) - **Numbers:** Numeric values (possible predefined range). [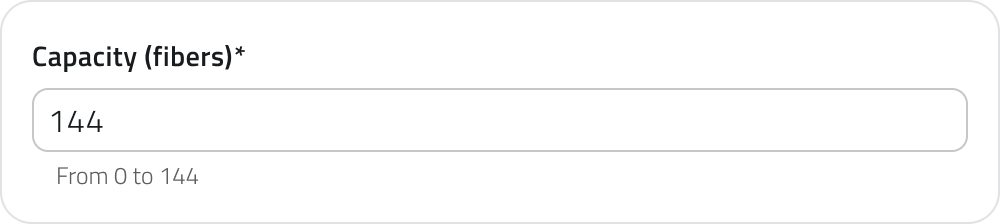](https://wiki.eaglearca.com/uploads/images/gallery/2025-12/5-numbers.png) - **Value list:** Selection of one or more values from a dropdown menu. [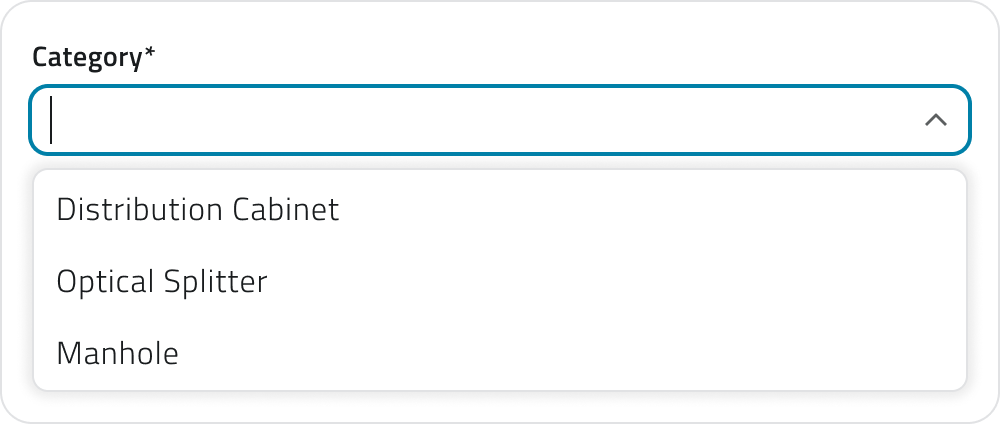](https://wiki.eaglearca.com/uploads/images/gallery/2025-12/6-value-list.png) - **Date:** Selection of a date or date and time. [](https://wiki.eaglearca.com/uploads/images/gallery/2025-12/7-date.png) - **Attachments:** Upload of images, documents or videos. [](https://wiki.eaglearca.com/uploads/images/gallery/2025-12/8-attachments.png) - **Size:** (Vector only) Automatically calculated by the system (coordinates/length/area). [](https://wiki.eaglearca.com/uploads/images/gallery/2025-12/9-size.png) - **True/False:** Choice between the two true/false values. [](https://wiki.eaglearca.com/uploads/images/gallery/2025-12/10-true-or-false.png) - **Object list:** Addition of related sub-attributes (can be of type Text, Numbers, Value list, Date, True/False). [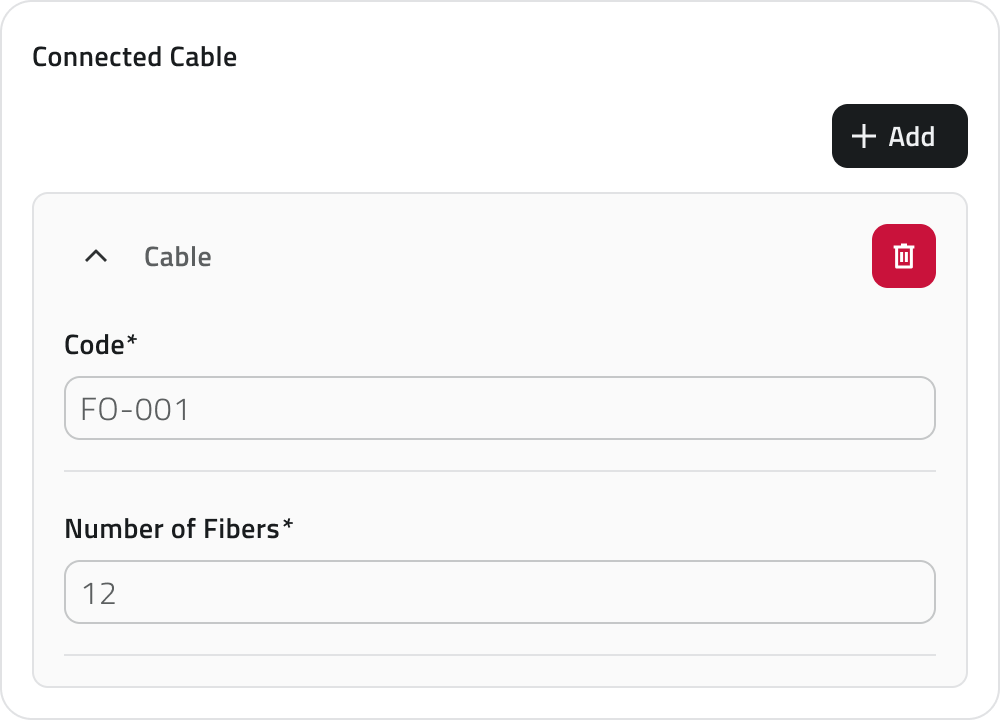](https://wiki.eaglearca.com/uploads/images/gallery/2025-12/11-obj-list.png) - ***[Relation](https://wiki.eaglearca.com/books/app-features/page/manage-object-relations "Manage object relations")*:** link to one or more objects of another object class. Allows you to represent logical connections between project elements (e.g. a road linked to the lighting poles along its route). [](https://wiki.eaglearca.com/uploads/images/gallery/2026-05/1jyrelations.png)Some attributes may be pre-filled with a default value: in this case they may already be ready for saving or locked and not editable.
💡 **Tip:** use the search bar in the attribute panel to quickly find the desired field. Make sure that any pre-filled values in mandatory fields are correct before saving. #### Attribute properties| **Icon/Indicator** | **Property** | **Description** |
| **\*** (Asterisk) | **Mandatory** | The field must be filled in to save the object. It may have an editable **pre-filled value**. |
| **🔒** (Padlock) | **Locked** | The field cannot be edited. |
| **⚡** (Blue lightning) | **Main attribute** | It is mandatory and helps to quickly identify the instance. |
Available only with sensors already associated with the project.
A data source is a source that collects data over time; associated with an object, it allows you to display that data as charts in the Attribute details panel. [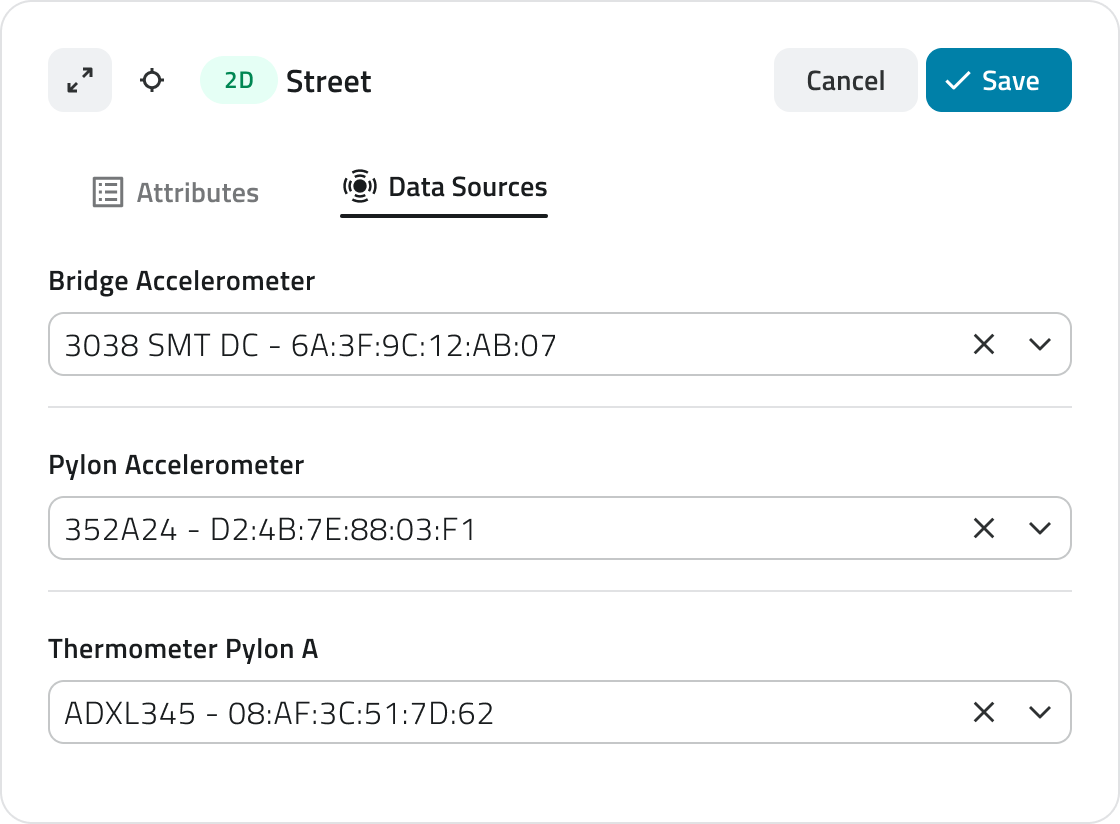](https://wiki.eaglearca.com/uploads/images/gallery/2025-12/12-data-sources.png) It is possible to **assign a data source** at two different points: during **object creation** or **afterwards** by editing an existing object. #### Assignment during creation **1.** During object insertion, the attribute details panel opens in configuration mode. **2.** Navigate to the **Data Sources** section. **3.** Click the selection field and choose one of the available options from the list. #### Assignment during editing **1.** Open the **Attribute details** panel of the object by clicking the **blue Open button** that appears when hovering over the element in the Inventory view, or select it in the 2D or 3D view and click **Expand** in the info card. **2.** Click the **Edit** button. **3.** Navigate to the **Data Sources** section. **4.** Click the selection field and choose one of the available options from the list. --- ### Managing and editing objects in the 2D view This section provides guidance on moving, rotating, editing vertices and deleting objects. #### Moving an object The **Move** tool allows you to reposition selected objects with precision. [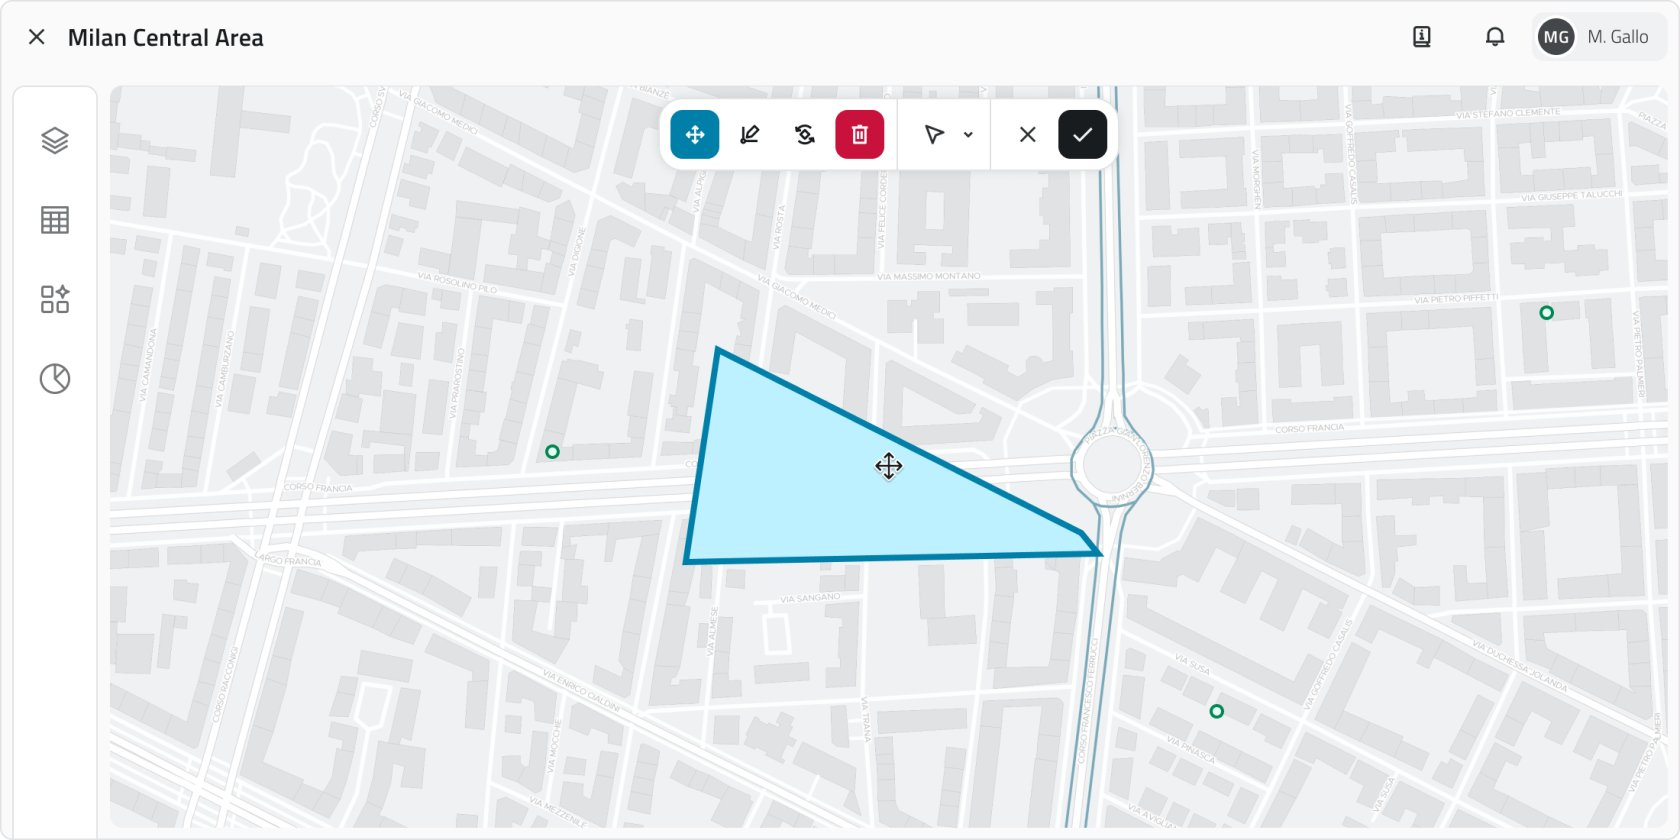](https://wiki.eaglearca.com/uploads/images/gallery/2026-03/13-tool-move.png) **1.** Select one or more objects. **2.** Click the **Move** button in the toolbar. **3.** Grab and freely move the object; snap with other objects on the map is supported. **4.** To save the new position click **Confirm**. If the object has not been moved the button remains disabled. To restore the original position click **Cancel**. #### Rotating an object Rotation modifies the orientation of **Line** or **Polygon** objects. [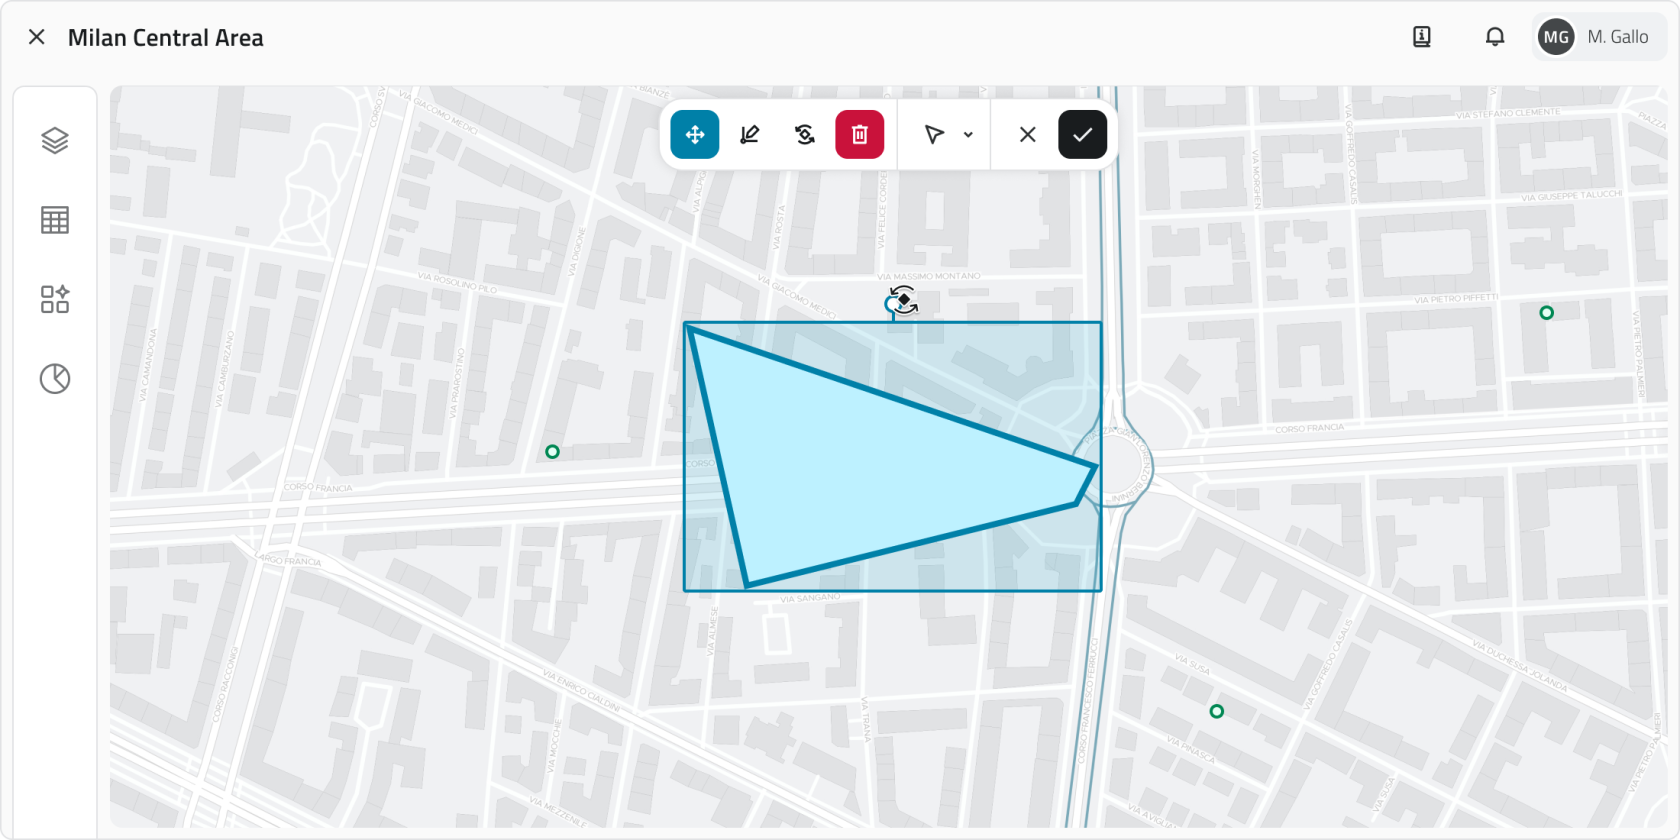](https://wiki.eaglearca.com/uploads/images/gallery/2026-03/14-rotate.png) **1.** Select one or more objects. **2.** Click the **Rotate** button in the toolbar. A rectangle with a handle appears around the object. **3.** Drag the handle to rotate the object. Multiple rotation occurs around the central pivot point. **4.** To save the new orientation click **Confirm**. If the object has not been rotated the button remains disabled. To restore the original orientation click **Cancel**. #### Editing object vertices This tool allows you to move, add or correct the vertices of **Lines** and **Polygons**. [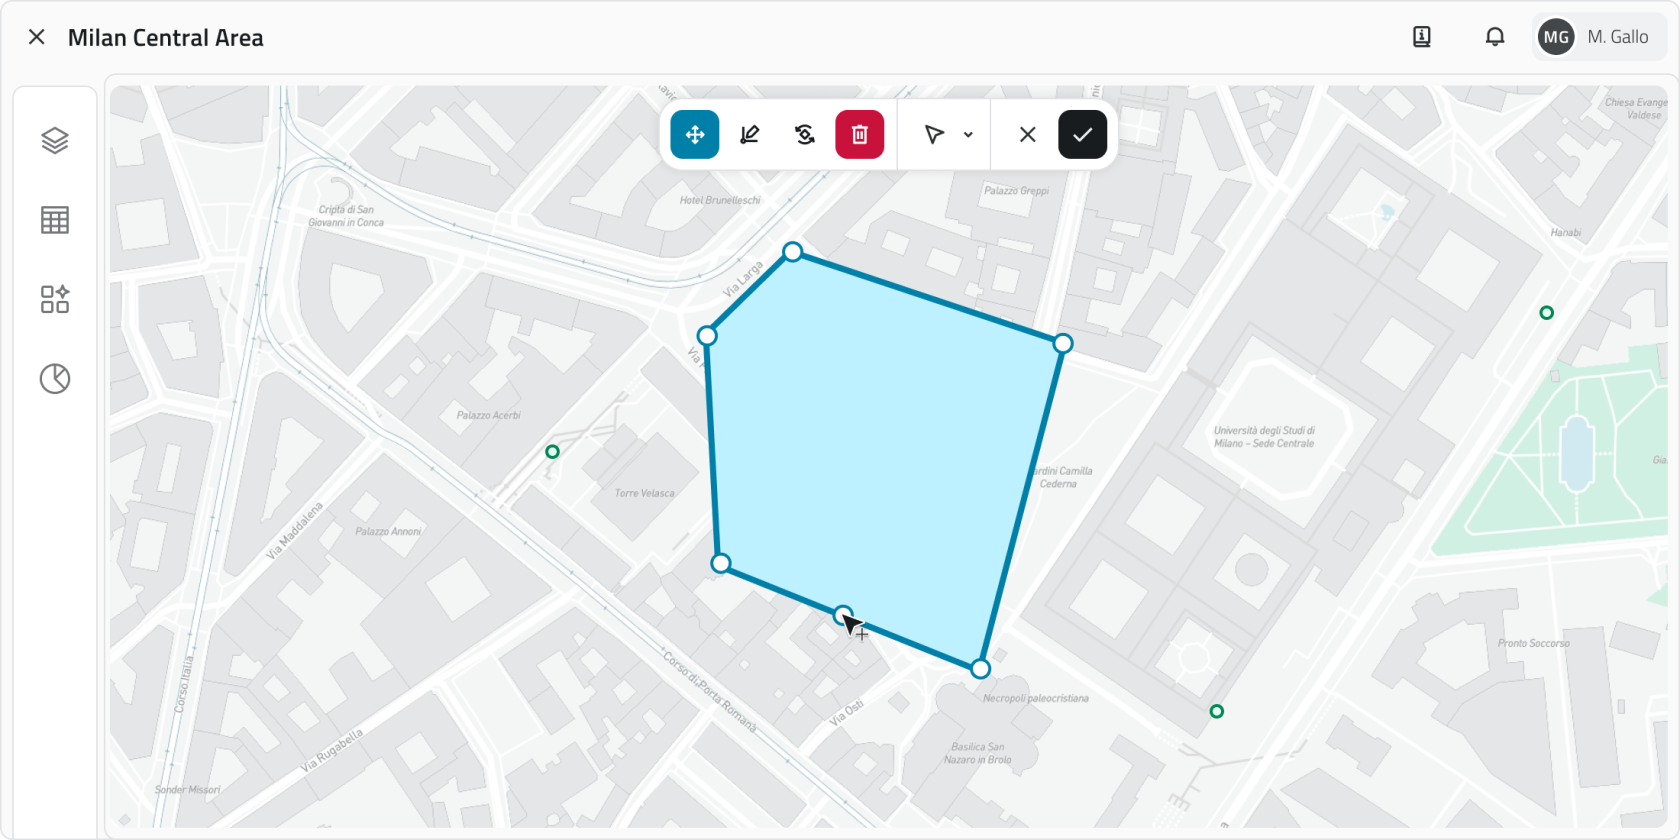](https://wiki.eaglearca.com/uploads/images/gallery/2026-03/15-edit-vertex.png) **1.** Select a line or polygon. **2.** Click the **Edit vertices** button in the toolbar. All vertices become visible. **3.** Drag an existing vertex to move it. To add a new vertex, click the midpoint that appears along the segment. Snap with other geometries is supported. **4.** To save the changes click **Confirm**. If the object has not been modified the button remains disabled. To restore the original shape click **Cancel**. --- ### Deleting an object This function permanently deletes the selected objects in all views. **1.** Select one or more objects in the 2D, 3D or Inventory view. **2.** Click the **Delete** button: in the 2D and 3D views it is located in the toolbar, in the Inventory view at the top right. **3.** A window opens with the list of object classes involved in the selection, each with a checkbox. [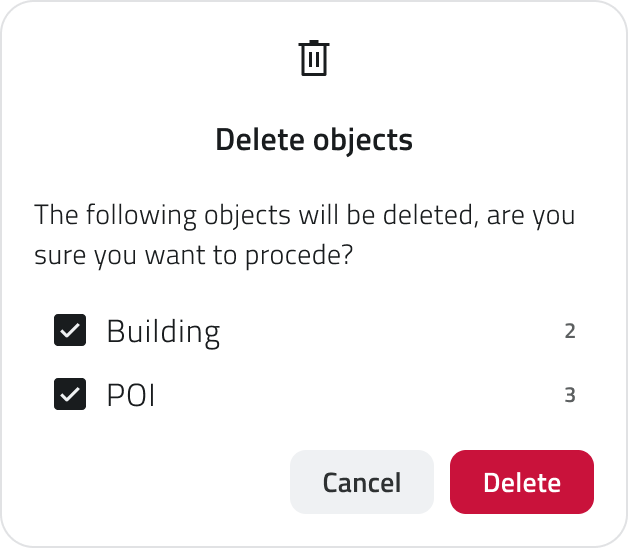](https://wiki.eaglearca.com/uploads/images/gallery/2025-12/16-delete.png) **4.** Select the checkboxes corresponding to the objects to delete. **5.** Click **Confirm** to proceed, or **Cancel** to close the window without making any changes. The **Confirm** button is disabled if all checkboxes are deselected.At the end of the operation a **notification** appears at the bottom left with the **outcome of the deletion**.
💡 **Tip:** always check the checkboxes in the confirmation window before proceeding to avoid deleting unwanted objects. --- ### Links - *[Create and manage Object Classes](https://wiki.eaglearca.com/books/backoffice/page/create-and-manage-object-classes "Create and manage Object Classes")* - *[Introduction to Object Classes](https://wiki.eaglearca.com/books/access-and-overview/page/introduction-to-object-classes "Introduction to Object Classes")* - [Navigating between views](https://wiki.eaglearca.com/books/app-features/page/navigating-between-views "Navigating between views") ---  **Italian version** Questa sezione spiega come creare oggetti all’interno del progetto. Gli oggetti possono essere **geometrie vettoriali**, come punti, linee o poligoni, oppure **oggetti non vettoriali**, detti form. --- ### Tipi di oggetti Nel progetto puoi creare diverse tipologie di oggetti: - **Punti** Elementi singoli posizionabili nelle viste 2D e 3D, come sensori o segnaposto. - **Linee** Sequenze di punti collegati per formare percorsi, come tracciati di infrastrutture. - **Poligoni** Aree delimitate da più vertici, come zone di lavoro o perimetri. - **Form** Oggetti non vettoriali, senza geometria, usati per inserire dati tramite attributi, come moduli informativi.Qualsiasi dato immesso in piattaforma viene gestito su un’infrastruttura cloud on-premise, **a meno di differenti accordi con il fornitore**. È sempre possibile scaricare in locale tutti i dati del progetto ed eliminare qualsiasi media associato in qualsiasi momento. **Per ulteriore supporto alla gestione dati, contatta l'indirizzo helpdesk@eaglearca.it**
--- ### Creazione di Oggetti #### Form (Oggetti non vettoriali) **1.** Apri la **vista Inventory** della classe oggetto desiderata. [](https://wiki.eaglearca.com/uploads/images/gallery/2025-12/5uP1-inventory-view.png) **2.** Clicca sul pulsante **Nuovo oggetto** in alto a destra. **3.** Si apre il **pannello attributi** per la compilazione dei dati.Nella **vista 3D** gli oggetti devono essere creati necessariamente sulla **superficie della mesh o della nuvola di punti**.
**4. Confermata la geometria,** si apre il **pannello attributi**. [](https://wiki.eaglearca.com/link/158#bkmrk-compilazione-degli-a) #### Creazione automatica degli oggetti Alcune classi oggetto possono essere configurate dal Backoffice per creare oggetti in automatico. Quando questa funzione è attiva, è segnalata da un'**icona dedicata** individuabile nei seguenti punti: - A fine riga nella lista delle classi oggetto nel **pannello Inventory**; [](https://wiki.eaglearca.com/uploads/images/gallery/2026-05/inventory-automatic-creation.png) - In cima alla **vista Inventory** della classe; - Su **ogni elemento** creato automaticamente nell'elenco della vista Inventory; [](https://wiki.eaglearca.com/uploads/images/gallery/2026-05/inventory-view-automatic-creation.png) - Nell'etichetta all'interno dell'**info card** e del **dettaglio attributi,** per gli oggetti vettoriali accanto alla scritta 2D o 3D. In caso di creazione automatica, l'etichetta, con **solo l'icona**, sarà disponibile anche per **oggetti di tipo Form**. [](https://wiki.eaglearca.com/uploads/images/gallery/2026-05/chip-automatic-creation.png)Gli oggetti creati automaticamente possono essere modificati e, se necessario, creati anche manualmente nella stessa classe oggetto.
--- ### Compilazione degli Attributi Dopo la creazione, il **pannello attributi** permette di inserire le informazioni richieste.L'oggetto non può essere salvato finché tutti i **campi obbligatori** non sono compilati.
#### In alto a sinistra si trova il **pulsante Espandi** per aprire il pannello a schermo intero. I bottoni **Annulla** e **Salva** sono posizionati in alto a destra. Se la classe oggetto ha attributi organizzati in **gruppi**, nella parte superiore del pannello compaiono delle schede che permettono di **filtrare gli attributi per categoria**. Cliccando su una scheda vengono mostrati solo gli attributi appartenenti a quel gruppo. Accanto ai gruppi è presente un pulsante per espandere la **barra di ricerca**. [](https://wiki.eaglearca.com/uploads/images/gallery/2026-05/J0b3-obj-details.png) #### Tipi di Attributi Gli oggetti possono avere i seguenti tipi di attributi: - **Testo**: Lettere e numeri (possibile lunghezza massima). [](https://wiki.eaglearca.com/uploads/images/gallery/2025-12/4-text-box.png) - **Numeri**: Valori numerici (possibile *range* predefinito). [](https://wiki.eaglearca.com/uploads/images/gallery/2025-12/5-numbers.png) - **Lista valori**: Selezione di uno o più valori da un menu a tendina. [](https://wiki.eaglearca.com/uploads/images/gallery/2025-12/6-value-list.png) - **Data**: Scelta di una data o data e ora. [](https://wiki.eaglearca.com/uploads/images/gallery/2025-12/7-date.png) - **Allegati**: Caricamento di immagini, documenti o video. [](https://wiki.eaglearca.com/uploads/images/gallery/2025-12/8-attachments.png) - **Dimensione**: (Solo vettoriali) Calcolata automaticamente dal sistema (coordinate/lunghezza/area). [](https://wiki.eaglearca.com/uploads/images/gallery/2025-12/9-size.png) - **Vero/Falso**: Scelta tra i due valori vero/falso. [](https://wiki.eaglearca.com/uploads/images/gallery/2025-12/10-true-or-false.png) - **Lista oggetti**: Aggiunta di sotto-attributi correlati (possono essere di tipo Testo, Numeri, Lista valori, Data, Vero/Falso). [](https://wiki.eaglearca.com/uploads/images/gallery/2025-12/11-obj-list.png) - ***[Relazione](https://wiki.eaglearca.com/books/app-features/page/manage-object-relations "Manage object relations")*:** collegamento a uno o più oggetti di un'altra classe oggetto. Permette di rappresentare legami logici tra elementi del progetto (es. una strada collegata ai pali dell'illuminazione lungo il suo tracciato). [](https://wiki.eaglearca.com/uploads/images/gallery/2026-05/1jyrelations.png)Alcuni attributi possono essere precompilati con un valore di default: in questo caso potrebbero essere già pronti per il salvataggio oppure bloccati e non modificabili.
💡 **Suggerimento:** usa la barra di ricerca nel pannello attributi per trovare rapidamente il campo desiderato. Verifica che i valori precompilati nei campi obbligatori siano corretti prima di salvare. #### Proprietà degli Attributi| **Icona/Indicatore** | **Proprietà** | **Descrizione** |
| **\*** (Asterisco) | **Obbligatorio** | Il campo deve essere compilato per salvare l’oggetto. Può avere un **valore precompilato** modificabile. |
| **🔒** (Lucchetto) | **Bloccato** | Il campo non è modificabile. |
| **⚡** (Fulmine azzurro) | **Attributo principale** | È obbligatorio e aiuta a riconoscere rapidamente l’istanza. |
Disponibile solo con sensori già associati al progetto.
Una sorgente dati è una fonte che raccoglie dati nel tempo; associata a un oggetto, consente di visualizzare tali dati come grafici nel pannello Dettaglio attributi. [](https://wiki.eaglearca.com/uploads/images/gallery/2025-12/12-data-sources.png) È possibile **assegnare una sorgente dati** in due momenti distinti: durante la **creazione dell'oggetto** oppure in un **secondo momento** modificando un oggetto già esistente. #### Assegnazione in creazione **1.** Durante l'inserimento dell'oggetto si apre il dettaglio attributi in configurazione. **2.** Spostati nella sezione **Sorgente dati**. **3.** Clicca nel campo di selezione e scegli una delle opzioni disponibili dall'elenco. #### Assegnazione in modifica **1.** Apri il pannello **Dettaglio attributi** dell'oggetto cliccando il **pulsante blu Apri** che compare al passaggio del mouse sull'elemento nella vista Inventory, oppure selezionalo nella vista 2D o 3D e clicca **Espandi** nell'info card. **2.** Clicca sul pulsante **Modifica.** **3.** Spostati nella sezione **Sorgente dati.** **4.** Clicca nel campo di selezione e scegli una delle opzioni disponibili dall'elenco. --- ### Gestione e modifica di oggetti nella vista 2D Questa sezione fornisce le indicazioni relative allo spostamento, alla rotazione, alla modifica dei vertici e all'eliminazione degli oggetti. #### Spostare un oggetto Lo strumento **Sposta** consente di riposizionare con precisione gli oggetti selezionati. [](https://wiki.eaglearca.com/uploads/images/gallery/2026-03/13-tool-move.png) **1.** Seleziona uno o più oggetti. **2.** Clicca sul pulsante **Sposta** nella barra degli strumenti. **3.** Afferra e sposta liberamente l'oggetto; è supportato lo snap con altri oggetti sulla mappa. **4.** Per salvare la nuova posizione clicca **Conferma**. Se l'oggetto non è stato spostato il pulsante rimane disabilitato. Per ripristinare la posizione originale clicca **Annulla**. #### Ruotare un oggetto La rotazione modifica l'orientamento di oggetti di tipo **Linea** o **Poligono**. [](https://wiki.eaglearca.com/uploads/images/gallery/2026-03/14-rotate.png) **1.** Seleziona uno o più oggetti. **2.** Clicca sul pulsante **Ruota** nella barra degli strumenti. Appare un rettangolo con una maniglia attorno all'oggetto. **3.** Trascina la maniglia per ruotare l'oggetto. La rotazione multipla avviene attorno al punto di pivot centrale. **4.** Per salvare il nuovo orientamento clicca **Conferma**. Se l'oggetto non è stato ruotato il pulsante rimane disabilitato. Per ripristinare l'orientamento originale clicca **Annulla**. #### Modificare i vertici di un oggetto Questo strumento consente di spostare, aggiungere o correggere i vertici di **Linee** e **Poligoni**. [](https://wiki.eaglearca.com/uploads/images/gallery/2026-03/15-edit-vertex.png) **1.** Seleziona una linea o un poligono. **2.** Clicca sul pulsante **Modifica vertici** nella barra degli strumenti. Tutti i vertici diventano visibili. **3.** Trascina un vertice esistente per spostarlo. Per aggiungere un nuovo vertice, clicca sul punto intermedio che compare lungo il segmento. È possibile usare lo snap con altre geometrie. **4.** Per salvare la modifica clicca **Conferma**. Se l'oggetto non è stato modificato il pulsante rimane disabilitato. Per ripristinare la forma originale clicca **Annulla**. --- ### Eliminare un Oggetto Questa funzione elimina definitivamente gli oggetti selezionati in tutte le viste. **1.** Seleziona uno o più oggetti nella vista 2D, 3D o Inventory. **2.** Clicca sul pulsante **Elimina**: nelle viste 2D e 3D si trova nella barra degli strumenti, nella vista Inventory in alto a destra. **3.** Si apre una finestra con l'elenco delle classi oggetto coinvolte nella selezione, ciascuna con una casella di spunta. [](https://wiki.eaglearca.com/uploads/images/gallery/2025-12/16-delete.png) **4.** Seleziona le caselle corrispondenti agli oggetti da eliminare. **5.** Clicca **Conferma** per procedere, oppure **Annulla** per chiudere la finestra senza apportare modifiche. Il pulsante **Conferma** è disabilitato se tutte le caselle sono deselezionate.Al termine dell'operazione compare una **notifica** in basso a sinistra con l'**esito dell'eliminazione**.
💡 **Suggerimento:** controlla sempre le caselle nella finestra di conferma prima di procedere per evitare di eliminare oggetti non desiderati. --- ### Collegamenti - *[Creare e gestire le Classi Oggetto](https://wiki.eaglearca.com/books/backoffice/page/create-and-manage-object-classes "Create and manage Object Classes")* - *[Introduzione alle Classi Oggetto](https://wiki.eaglearca.com/books/access-and-overview/page/introduction-to-object-classes "Introduction to Object Classes")* - [*Navigare tra le viste*](https://wiki.eaglearca.com/books/app-features/page/navigating-between-views "Navigating between views") --- ***Last update:** 22 May 2026*