Available only with **sensors configured in advance**.
--- ### Prerequisites The automatic object creation configuration is accessible from the **Data Sources** tab in the object class creation or editing page, in the **Automatic object creation** section at the bottom of the page. To unlock this function, the following must be configured in the object class: - **exactly one** data source - **at least one** chart [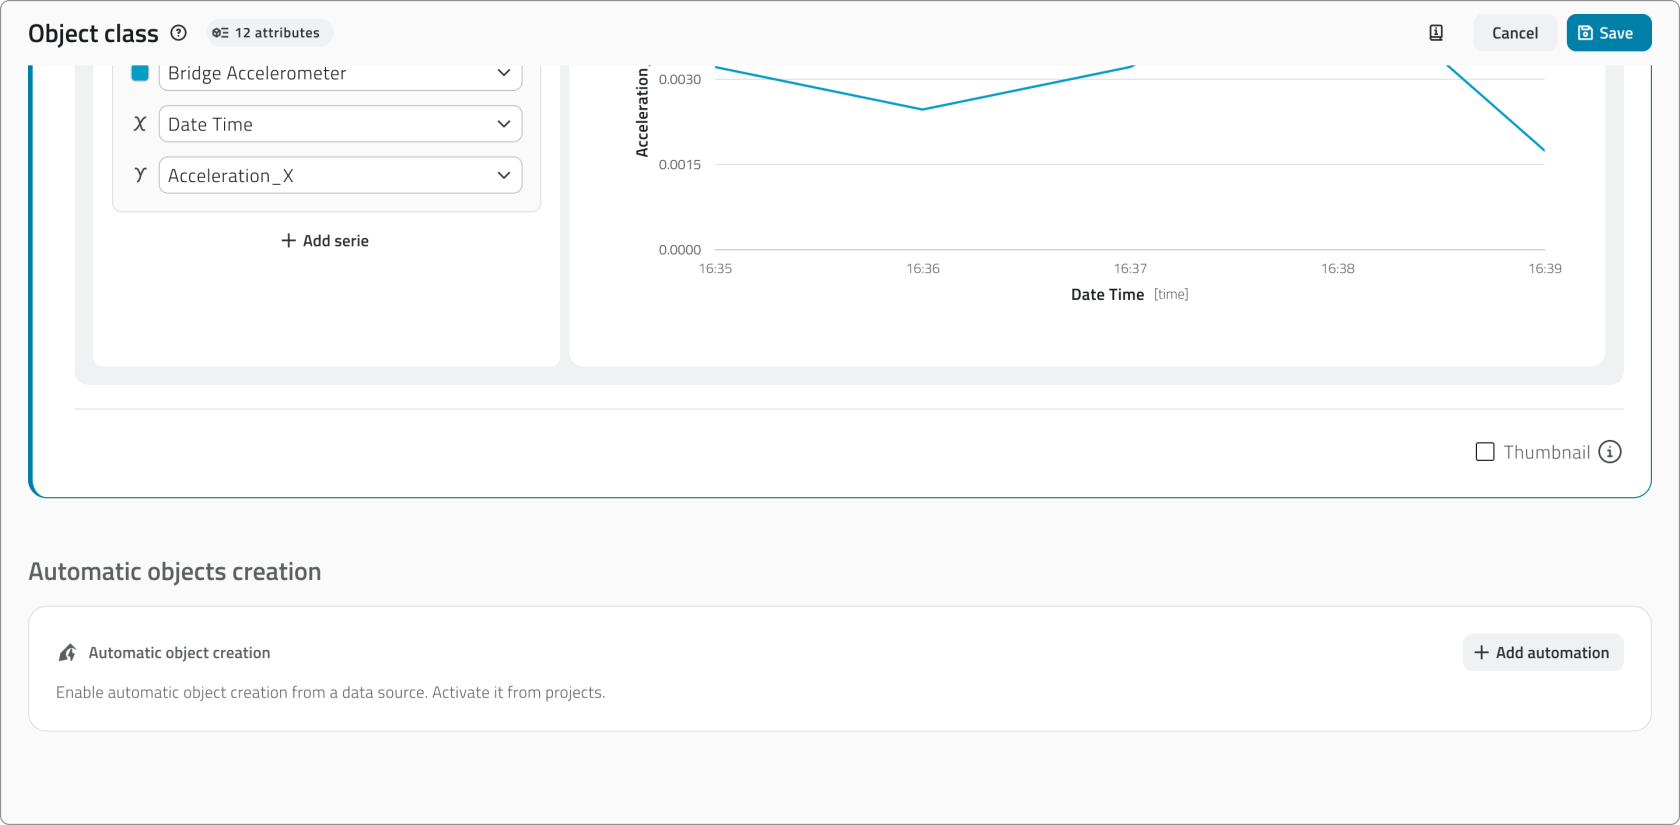](https://wiki.eaglearca.com/uploads/images/gallery/2026-05/automatic-object-creation-section.png) If more than one data source is added, the button to add the automation is disabled. Conversely, if an automation is already configured, the button to add further data sources is disabled.Modifying the data source associated with the object class will cause the **loss of the entire configuration** of the automatic object creation.
--- ### Adding the automation Click the **+ Add automation** button to open the configuration card. [](https://wiki.eaglearca.com/uploads/images/gallery/2026-05/add-automation-button.png) The configuration card is divided into several sections. #### Projects where automation is active Shows the projects in which automatic creation is currently enabled. The configuration is carried out in the project configuration page in the Backoffice. [](https://wiki.eaglearca.com/uploads/images/gallery/2026-05/projects-where-automation-is-active.png) This section is useful when editing the class to have an understanding of where the changes will have an impact. #### Automation start date Select the date from which the automation should be active. The selector defaults to today's date, but past or future dates can be selected. If the date is modified, the **reset button** is enabled to return to the current date. [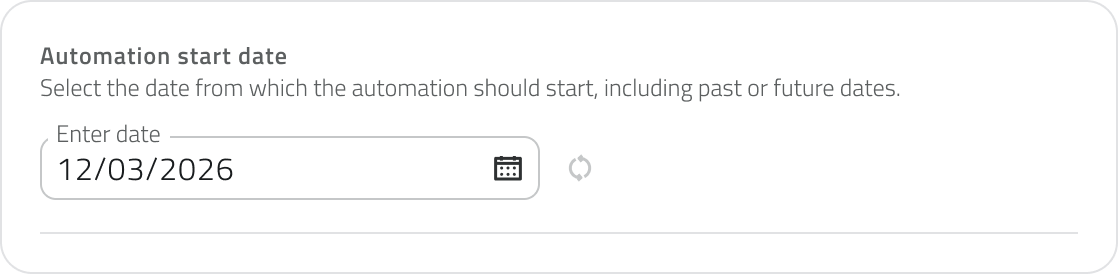](https://wiki.eaglearca.com/uploads/images/gallery/2026-05/automation-start-date.png)When editing the object class, the selector is read-only if the selected date is in the past or is the current day. If the date is in the future, it can still be modified.
#### Creation coordinates Available only for object classes of type **Point**. Defines the coordinates that will be used to position automatically created objects. Values can come from the data source (**Data source**, dynamic) or be entered manually (**Custom**, static). For each coordinate it is mandatory to indicate a **fallback value**, used in case the data source returns a null value. Using the **2D** and **3D** tabs you can choose whether to create objects in 2D or 3D. Selecting **3D** also displays the **Elevation** field. [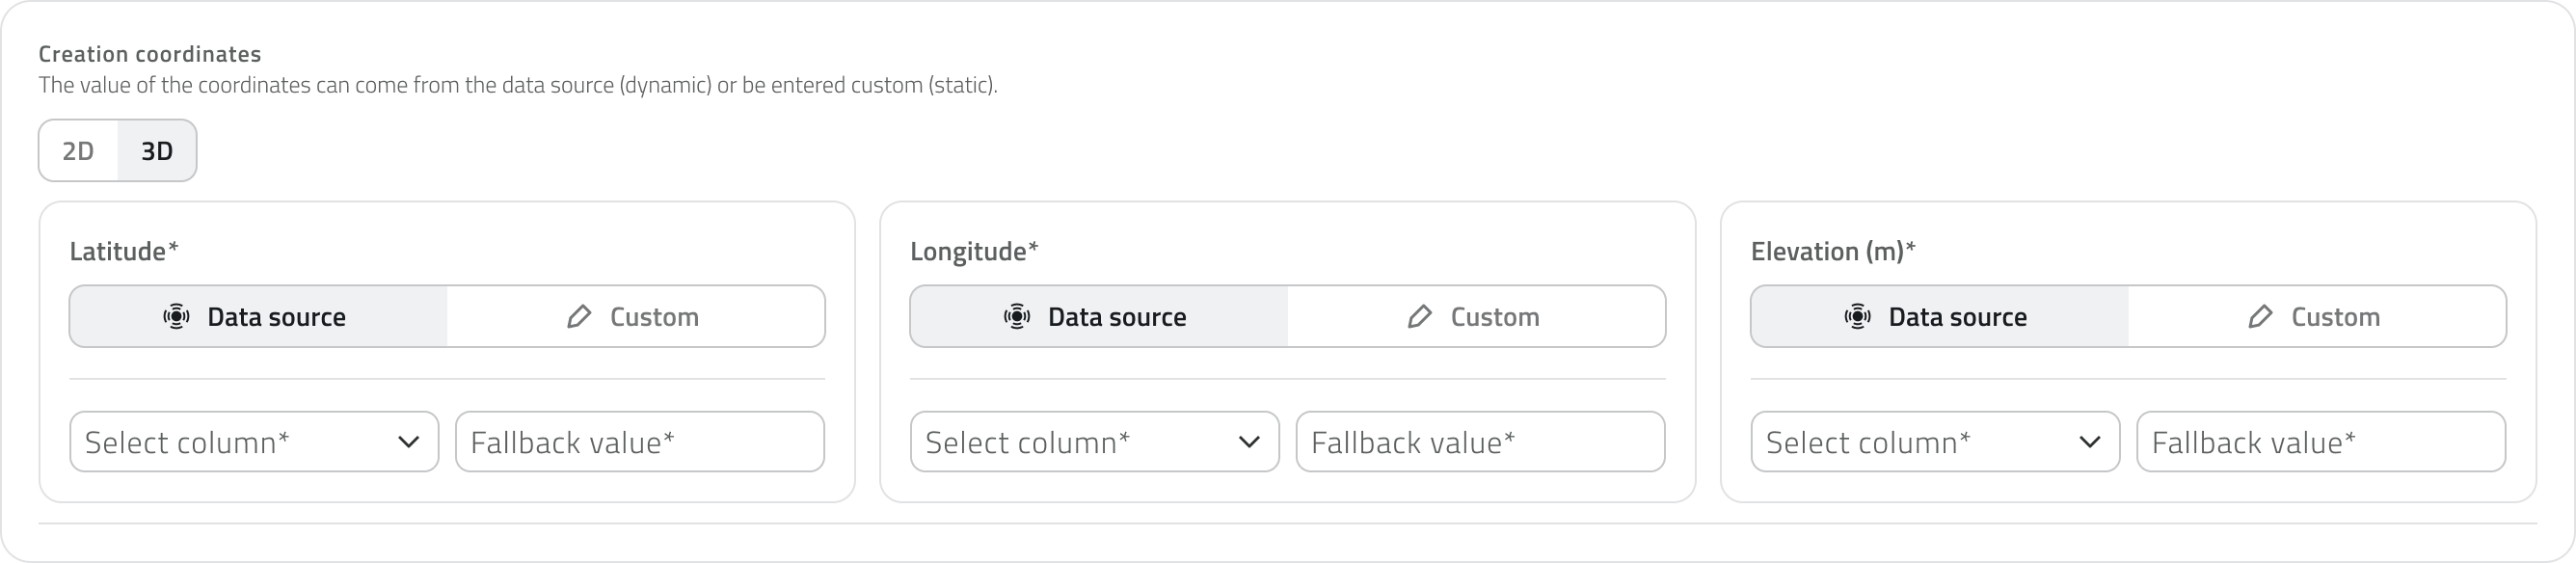](https://wiki.eaglearca.com/uploads/images/gallery/2026-05/MdIcreation-coordinates.png) The **fallback value** is used when the data source **returns a null value** in the selected column. It **ensures** that fields **do not remain empty** and data is always complete. For coordinates, the field is always mandatory.If **Custom** is selected for elevation, the fallback value corresponds to the default height at which objects are created in the platform. If this value is modified, the **reset button** is enabled to return to the original value.
#### Attribute values Defines the values that will be assigned to the attributes of automatically created objects. For each attribute it is possible to choose whether the value should come from the data source (**Data source**, dynamic) or be defined manually (**Custom**, static). The attributes configurable from this section are: **text**, **numbers**, **true/false**, **value list** and **date**. Other attribute types cannot be pre-filled here. [](https://wiki.eaglearca.com/uploads/images/gallery/2026-05/attribute-values.png) The mandatory nature of the fields mirrors what is defined in the **Attributes** tab of the object class. The **fallback value** is used when the data source **returns a null value** in the selected column. It corresponds to the **default value of the attributes** and is only enabled if the attribute is **mandatory**. --- ### Viewing the configuration The configuration card can be collapsed by clicking outside of it. When filled out, it displays a summary of the main settings: start date, coordinates, and elevation. [](https://wiki.eaglearca.com/uploads/images/gallery/2026-05/automatic-object-creation-section-collapsed.png) --- ### New attributes If the **object class is modified** and a **new attribute is added** after the automation was already configured, the attribute to be filled in is indicated by a **label on the card**. Clicking on the card opens it, bringing the new attribute into **focus**, highlighted with a **blue border** for easy identification. The highlight remains visible until the class is saved or the section is changed. [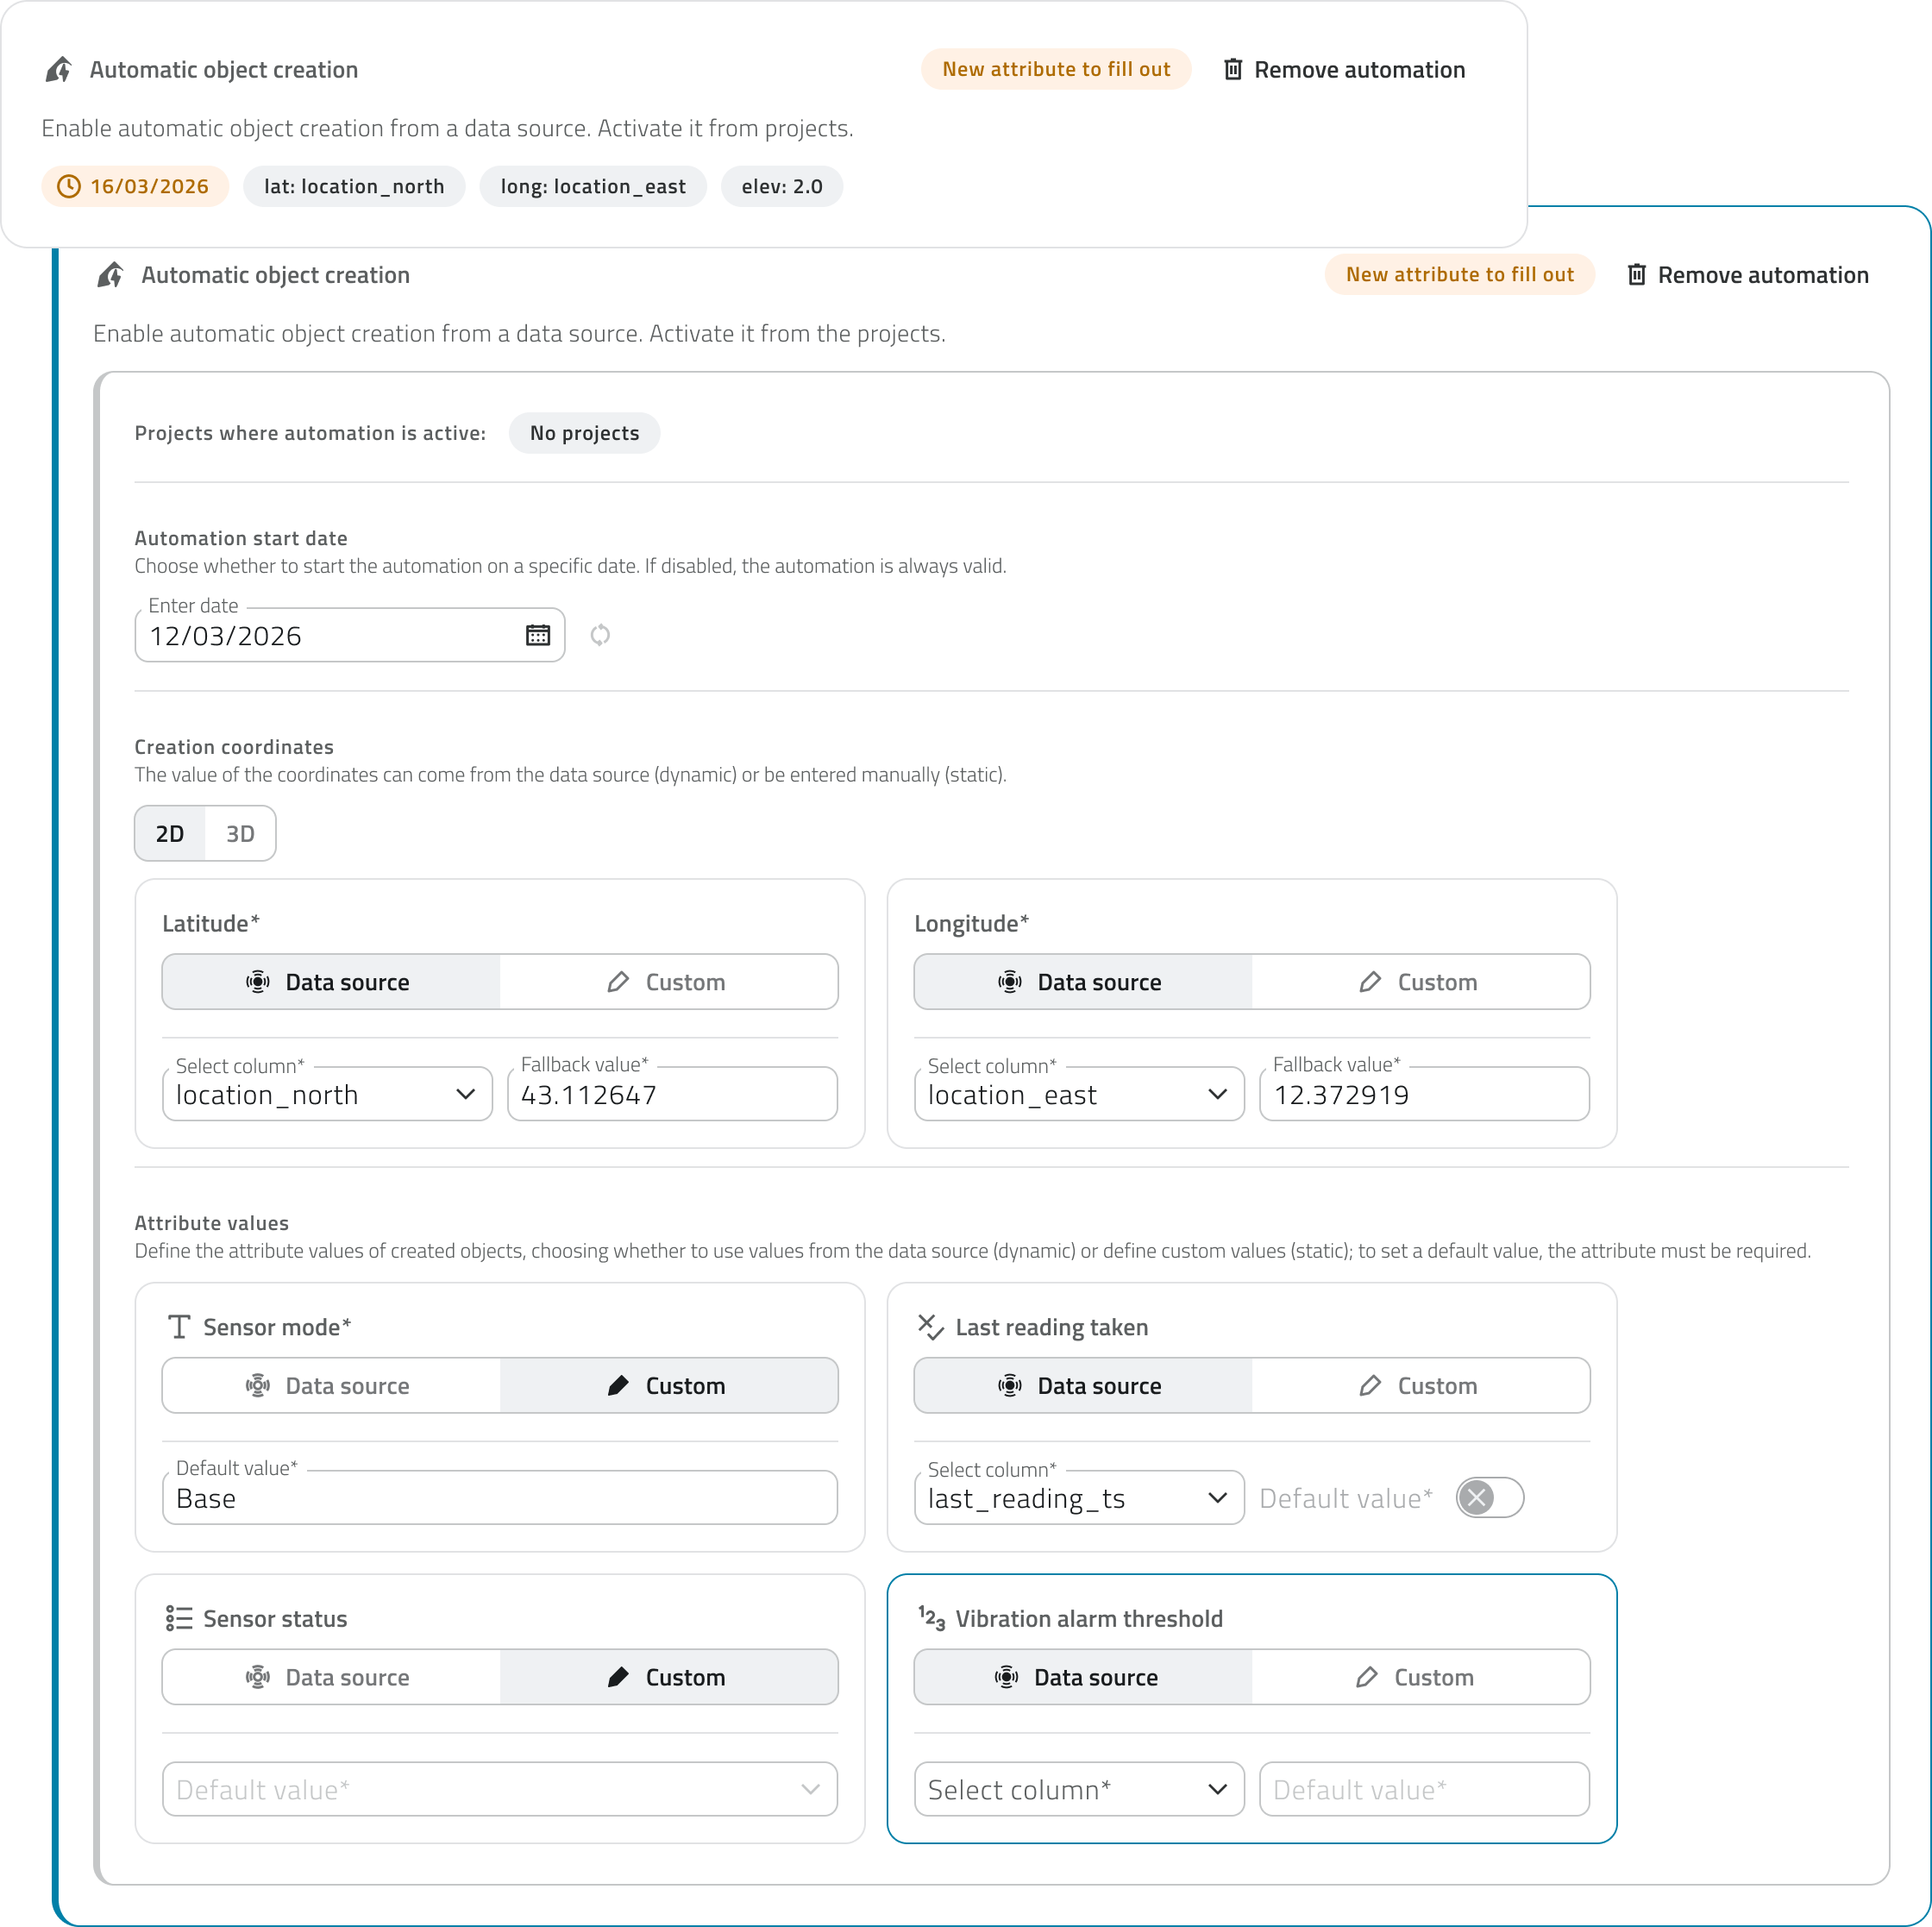](https://wiki.eaglearca.com/uploads/images/gallery/2026-05/new-attribute.png) --- ### Removing the automation To remove the configuration, click the **Remove automation** button in the top-right corner of the card. [](https://wiki.eaglearca.com/uploads/images/gallery/2026-05/Qpgremove-automation.png)**Removing** the automation from an object class **does not delete the instances already created automatically**: the class will simply **stop generating new ones**. Objects **already present in the project** will remain **unchanged.**
--- ### Links - *[Create and manage Object Classes](https://wiki.eaglearca.com/books/backoffice/page/create-and-manage-object-classes "Create and manage Object Classes")* - *[Configure Data Sources and Charts](https://wiki.eaglearca.com/books/backoffice/page/configure-data-sources-and-charts "Configure Data Sources and Charts")* ---  **Italian version** La creazione automatica degli oggetti consente alla piattaforma di generare istanze di una classe oggetto a partire dai dati ricevuti da una data source, senza che l'utente debba intervenire manualmente dal progetto. La creazione automatica è disponibile solo per classi oggetto di tipo **Punto** e **Form**. Le classi di tipo Form non hanno la sezione coordinate, quindi viene configurata solo la compilazione degli attributi.Disponibile solo con **sensori configurati in precedenza**.
--- ### Prerequisiti La configurazione della creazione automatica è accessibile dalla tab **Data Sources** nella pagina di creazione o modifica di una classe oggetto, nella sezione **Creazione automatica oggetti** in fondo alla pagina. Per sbloccare questa funzione è necessario che nella classe oggetto siano configurati: - **esattamente una** data source - **almeno** **un** grafico [](https://wiki.eaglearca.com/uploads/images/gallery/2026-05/automatic-object-creation-section.png) Se viene aggiunta più di una data source, il pulsante per aggiungere l'automazione si disabilita. Al contrario, se è già configurata un'automazione, il pulsante per aggiungere ulteriori data source si disabilita.Modificare la data source associata alla classe oggetto comporta la **perdita di tutta la configurazione** della creazione automatica degli oggetti.
--- ### Aggiungere l'automazione Clicca sul pulsante **+ Aggiungi automazione** per aprire la scheda di configurazione. [](https://wiki.eaglearca.com/uploads/images/gallery/2026-05/add-automation-button.png) La scheda di configurazione è suddivisa in diverse sezioni. #### Progetti dove l'automazione è attiva Mostra i progetti in cui la creazione automatica è attualmente abilitata. La configurazione viene effettuata nella pagina di configurazione dei progetti nel Backoffice. [](https://wiki.eaglearca.com/uploads/images/gallery/2026-05/projects-where-automation-is-active.png) Questa sezione è utile in fase di modifica della classe per avere consapevolezza di dove le modifiche andranno a impattare. #### Data di avvio automazione Seleziona la data a partire dalla quale l'automazione deve essere attiva. Il selettore ha come valore predefinito la data odierna, ma è possibile selezionare date passate o future. Se la data viene modificata si abilita il **pulsante** **di reset** per tornare alla data corrente. [](https://wiki.eaglearca.com/uploads/images/gallery/2026-05/automation-start-date.png)In modifica della classe oggetto il selettore è in sola visualizzazione se la data selezionata è passata o è il giorno corrente. Se la data è futura può ancora essere modificata.
#### Coordinate di creazione Disponibili solo per classi oggetto di tipo **Punto**. Definisce le coordinate che verranno utilizzate per posizionare gli oggetti creati automaticamente. I valori possono provenire dalla data source (**Data source**, dinamico) oppure essere inseriti manualmente (**Personalizzato**, statico). Per ogni coordinata è obbligatorio indicare un **valore di fallback**, utilizzato nel caso in cui la data source restituisca un valore nullo. Tramite le schede **2D** e **3D** è possibile scegliere se creare gli oggetti in 2D o in 3D. Selezionando **3D** viene visualizzato anche il campo **Elevazione**. [](https://wiki.eaglearca.com/uploads/images/gallery/2026-05/MdIcreation-coordinates.png) Il **valore di fallback** viene utilizzato quando la data source **restituisce un valore nullo** nella colonna selezionata. Serve a **garantire** che i campi **non rimangano vuoti** e i dati siano sempre completi. Per le coordinate il campo è sempre obbligatorioSe per l'elevazione viene selezionato **Personalizzato**, il valore di fallback corrisponde all'altezza predefinita con cui gli oggetti vengono creati nella piattaforma. Se questo valore viene modificato si abilita il **pulsante di reset** per tornare al valore originale.
#### Valori degli attributi Definisce i valori che verranno assegnati agli attributi degli oggetti creati automaticamente. Per ogni attributo è possibile scegliere se il valore deve provenire dalla data source (**Data source**, dinamico) oppure essere definito manualmente (**Personalizzato**, statico). Gli attributi configurabili da questa sezione sono: **testo**, **numeri**, **vero/falso**, **lista valori** e **data**. Gli altri tipi di attributo non sono precompilabili da qui. [](https://wiki.eaglearca.com/uploads/images/gallery/2026-05/attribute-values.png) L'obbligatorietà della compilazione rispecchia quella definita nella tab **Attributi** della classe oggetto. Il **valore di fallback** viene utilizzato quando la data source **restituisce un valore nullo** nella colonna selezionata. Corrisponde al valore di **default degli attributi** ed è abilitato solo se l'attributo è **obbligatorio**. --- ### Visualizzare la configurazione La scheda di configurazione può essere collassata cliccando al di fuori di essa. Se compilata mostra un riepilogo delle impostazioni principali: data di avvio, coordinate ed elevazione. [](https://wiki.eaglearca.com/uploads/images/gallery/2026-05/automatic-object-creation-section-collapsed.png) --- ### Nuovi attributi Se la **classe oggetto viene modificata** e viene **aggiunto un nuovo attributo** dopo che l'automazione era già configurata, l'attributo da compilare viene segnalato tramite un'**etichetta sulla scheda**. Cliccando sulla scheda questa si apre mettendo **in evidenza** il nuovo attributo, evidenziato con un **bordo blu** per facilitarne l'individuazione. L'evidenziazione rimane visibile fino al salvataggio della classe o al cambio di sezione. [](https://wiki.eaglearca.com/uploads/images/gallery/2026-05/new-attribute.png) --- ### Rimuovere l'automazione Per rimuovere la configurazione clicca sul pulsante **Rimuovi automazione** in alto a destra della scheda. [](https://wiki.eaglearca.com/uploads/images/gallery/2026-05/Qpgremove-automation.png)**Rimuovere** l’automazione da una classe oggetto **non elimina le istanze già create automaticamente**: la classe smetterà semplicemente di **generarne di nuove**. Gli oggetti **già presenti nel progetto** resteranno **invariati**.
--- ### Collegamenti - *[Creare e gestire le Classi Oggetto](https://wiki.eaglearca.com/books/backoffice/page/create-and-manage-object-classes "Create and manage Object Classes")* - *[Configurare Data Source e Grafici](https://wiki.eaglearca.com/books/backoffice/page/configure-data-sources-and-charts "Configure Data Sources and Charts")* --- ***Last update:** 25 May 2026*