Mission Planner
- Initial Setup
- Find and manage your missions
- Create a Mission
- Draw the mission on the map
- Run the pre-check and start a mission
- Schedule a mission
- Edit a mission's configuration
- Missions calendar
- Robot Dog – Tracking a live mission
- Drone – Tracking a live mission
- Review an executed mission
- Control Room
Initial Setup
English version
Before planning a mission, some basic system resources must be configured.
These configurations define the assets used by the Mission Planner within projects.
The initial setup is managed through Global Lists and is a prerequisite for correctly enabling mission planning.
Initial setup through Global Lists
From the app selection page, select the Inventory app. Then, from the side bar on the left, open the Global Lists section.

The main lists used for mission planning are:
- Mission Unit
Represents the robotic units available in the project. - Add-on
Represents sensors, cameras, and accessories, either native or additional, used to support mission objectives. - Equipment
Represents technical configurations composed of one or more Add-on. An Equipment is what you select when you configure a mission.
Register a Mission Unit
To use a Mission Unit in mission planning, it must first be registered in the platform.
The Mission Unit models available for integration are:
- Unitree B2
- Unitree B2 Wheel
- Unitree Go2
- DJI Matrice 4TD
- DJI Dock 3
To add a new Mission Unit, open the Mission Units global list and click the New object button.
Robot dog
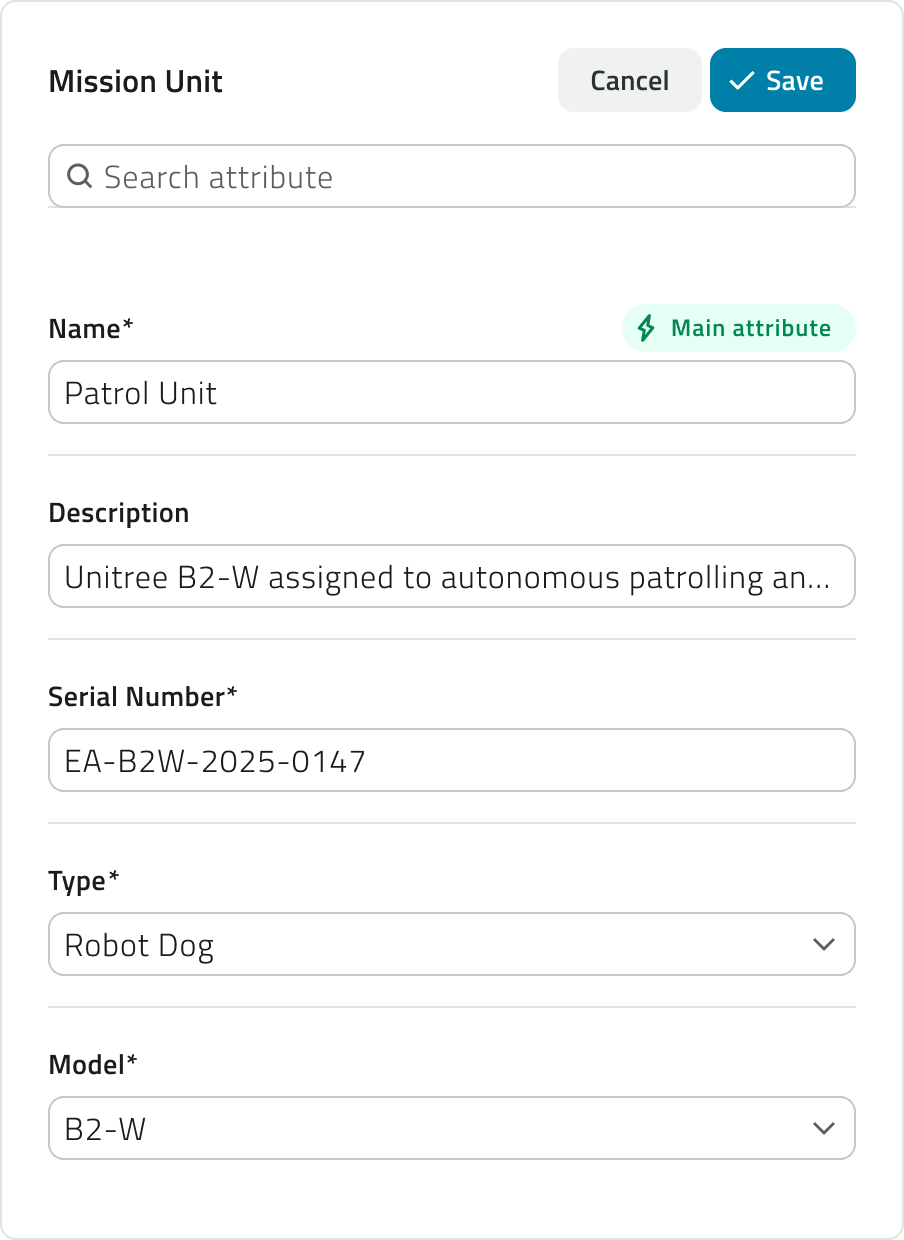
To register a robot dog, complete the following fields:
- Name
- Description
- Serial Number
Unique identification code displayed on the body of the robot dog. Its position may vary depending on the model. - Type
Select Robot dog from the list. - Dog model
Select the specific robot dog model from the list.
Drone
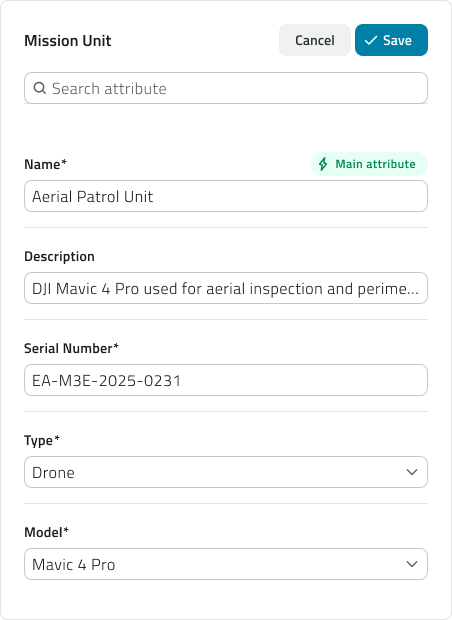
To register a drone, complete the following fields:
- Name
- Description
- Serial Number
Unique identification code displayed on the body of the drone. Its position may vary depending on the model. - Type
Select Drone from the list. - Drone model
Select the specific drone model from the list.
Hangar
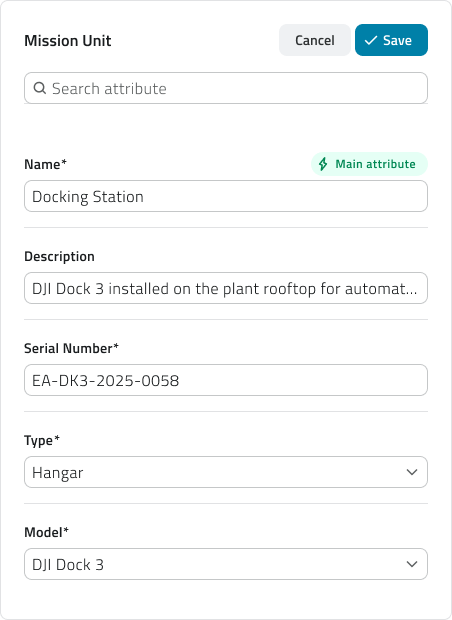
To register a hangar, complete the following fields:
- Name
- Description
- Serial Number
Unique identification code displayed on the body of the hangar. Its position may vary depending on the model. - Type
Select Hangar from the list. - Drone model
Select the specific hangar model from the list.
To complete the Mission Unit registration, click Save.
A drone mission uses two Mission Units: a drone and a hangar. Register both.
Register an Add-on
Registering Add-ons is required only if you use a Mission Unit of type Robot Dog.
To add a new Add-on, open the Add-ons global list and click the New object button.
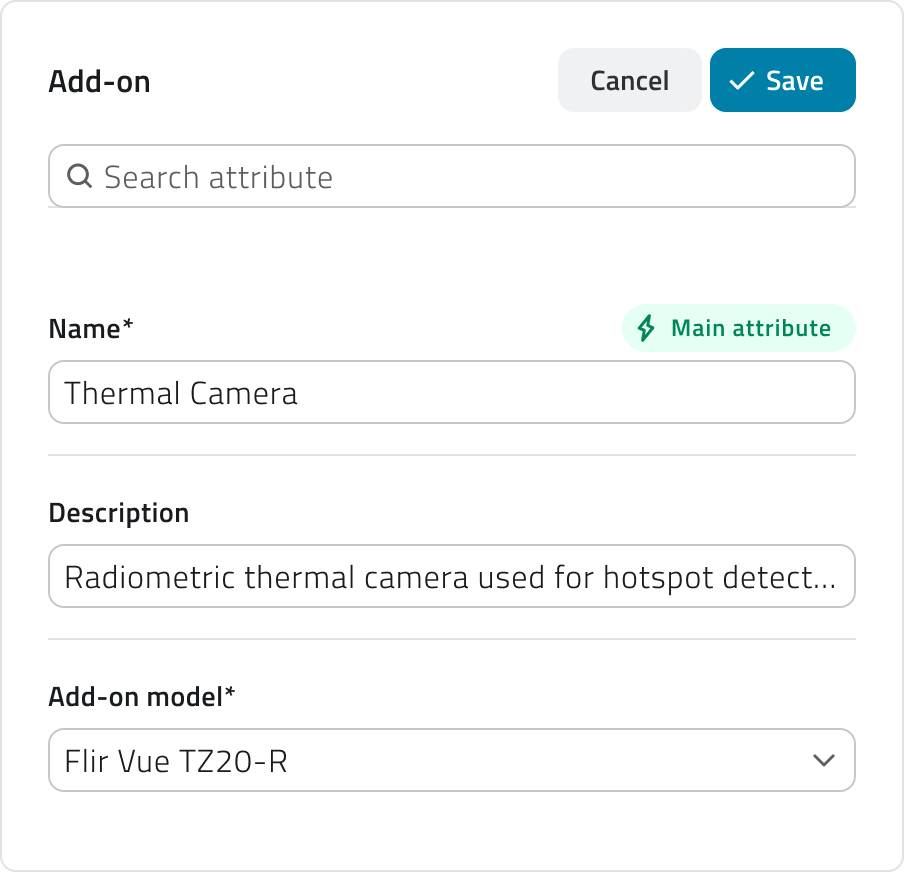
Complete the required fields:
- Name
- Description
- Add-on Model
Select the model of the sensor, camera or accessory to register from the list.
The list shows the models compatible with EagleArca.
To register the Add-on and make it available in the system, click Save.
If no external Add-ons are used, the native Add-ons of the Mission Unit must still be registered.
For native assets, make sure you know the model of the sensor or camera installed on the Mission Unit, so that you can select the correct model. This information is available in the technical documentation of the Mission Unit.
If you cannot identify this information, contact support.
💡Tip: If an Add-on model is not available in the list, it means that it is not compatible with the platform. Make sure you use a supported model or contact support.
Create an Equipment
Equipment can only be associated with Mission Units of type Robot Dog.
To create a new Equipment, open the Equipment global list and click the New object button.
Complete the required fields:
- Name
- Description
- Compliant Dog Models
Select the Robot Dog models compatible with the Equipment. - Add-on
Select one or more previously registered Add-ons.
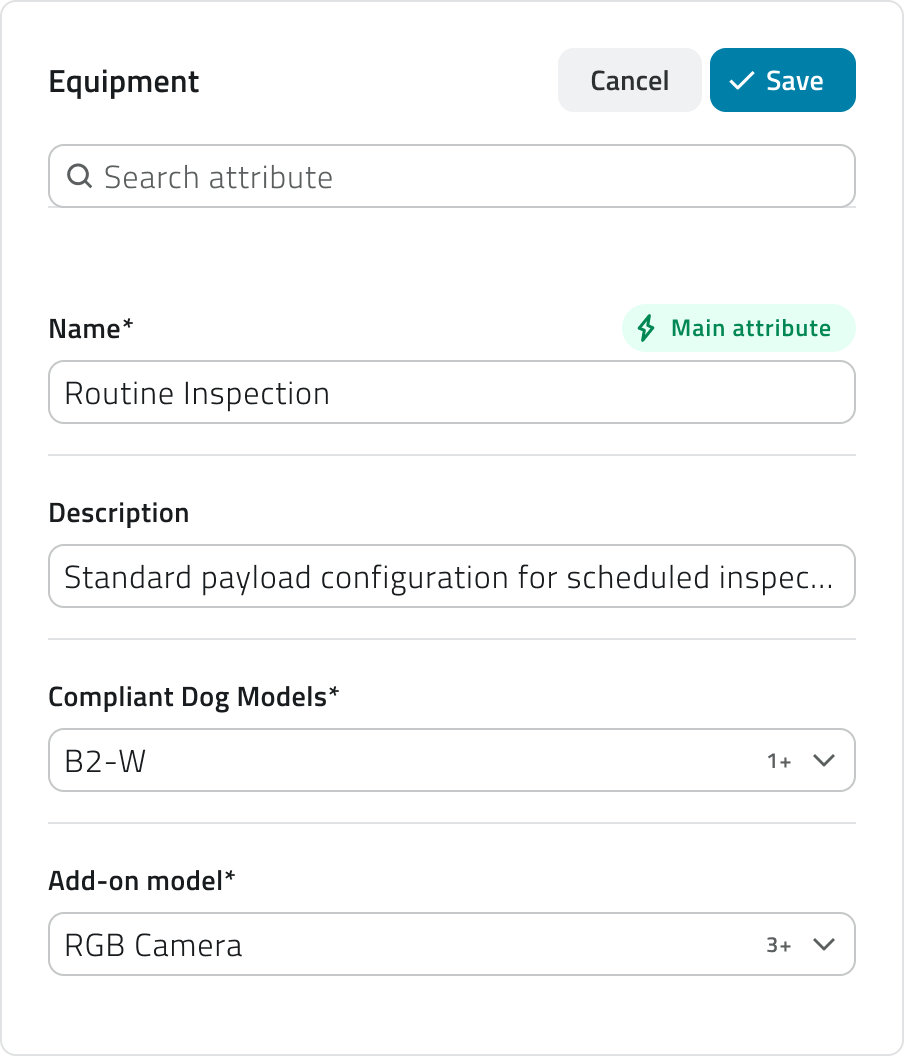
To complete the creation of the Equipment, click Save. When you configure a mission, the list of available Equipment shows only the ones compatible with the Mission Unit you selected.
💡Tip: You can associate an Add-on with multiple Equipment, but make sure it is compatible with the selected Mission Unit models.
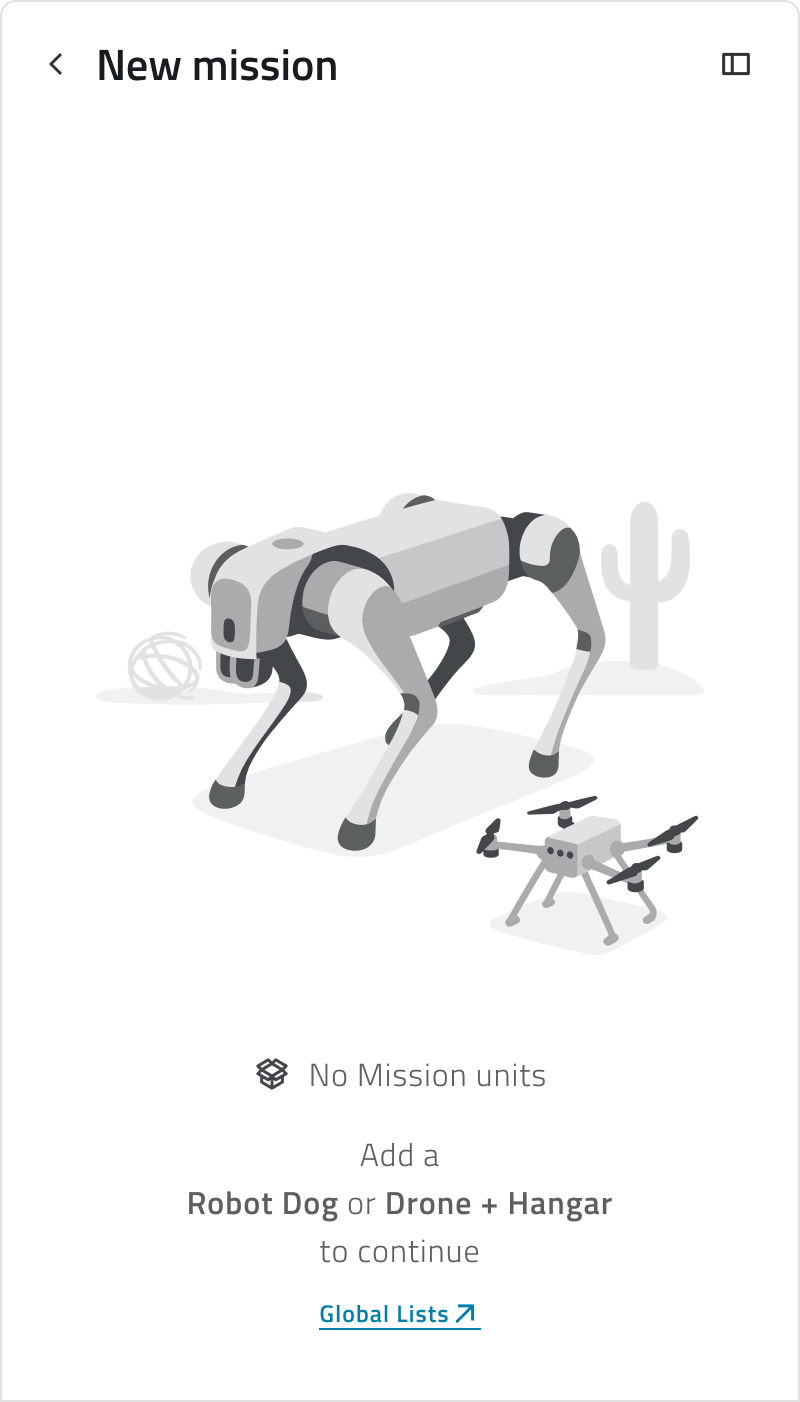
Before you can create a mission
Mission creation starts from the Missions tab, in the side bar on the left, under Live & Planned. Two things need to be registered first:
- at least one Mission Unit, the unit that will carry out the mission;
- at least one Equipment, which defines what that unit takes with it.
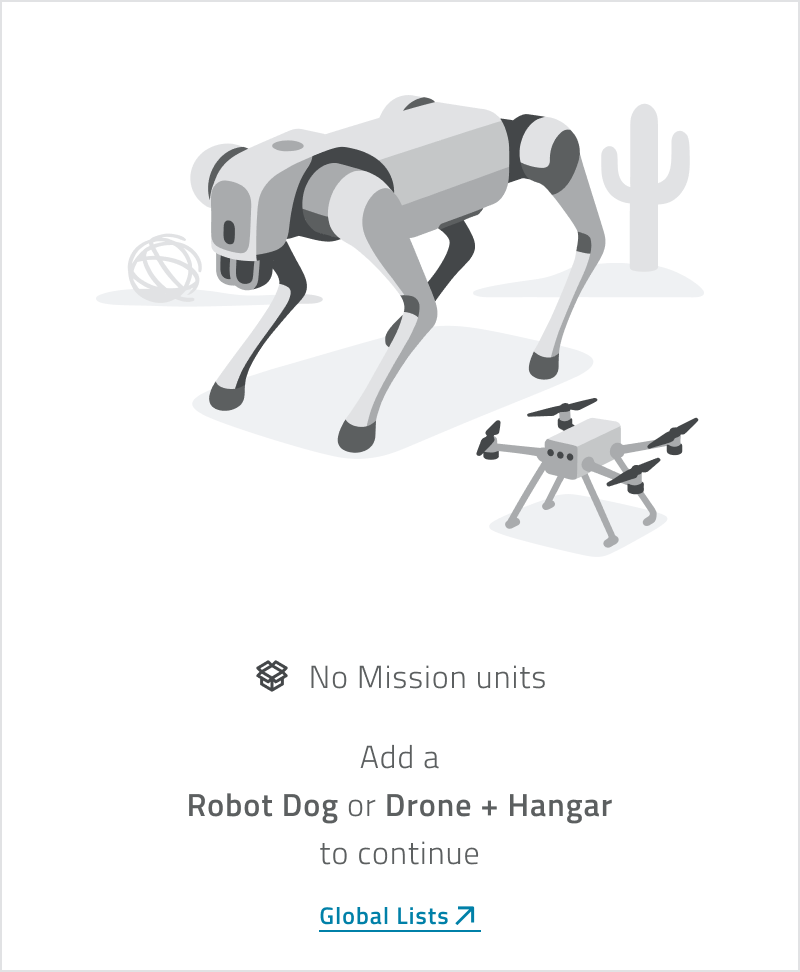
A mission cannot exist without both: there would be no unit to send out, or nothing for it to work with. If either is missing, register it from the Global Lists and then create the mission.
Links
- Create a global object: how the Global Lists work.
- Find and manage your missions: where missions live once the setup is complete.
- Create a mission: configure a new mission step by step.
 Italian version
Prima di pianificare una missione è necessario configurare alcune risorse di base del sistema.
Queste configurazioni definiscono gli asset utilizzati dal Mission Planner all’interno dei progetti.
La configurazione iniziale viene gestita tramite le Liste Globali e rappresenta un prerequisito per abilitare correttamente la pianificazione delle missioni.
Configurazione iniziale tramite le Liste Globali
Le liste principali per la pianificazione delle missioni sono:
- Mission Unit
Rappresentano le unità robotiche disponibili nel progetto. - Add-on
Rappresentano sensori, telecamere e accessori, nativi o aggiuntivi, utilizzati a supporto degli obiettivi di missione. - Equipment
Rappresentano configurazioni tecniche composte da uno o più Add-on. Un Equipment è ciò che selezioni quando configuri una missione.
Censire una Mission Unit
Per utilizzare una Mission Unit nella pianificazione delle missioni, è necessario registrarla in piattaforma.
I modelli di Mission Unit disponibili per l'integrazione sono:
- Unitree B2
- Unitree B2 Wheel
- Unitree Go2
- DJI Matrice 4TD
- DJI Dock 3
Per aggiungere una nuova Mission Unit, apri la Lista Globale delle Mission Units e clicca sul pulsante Nuovo oggetto.
Robot dog
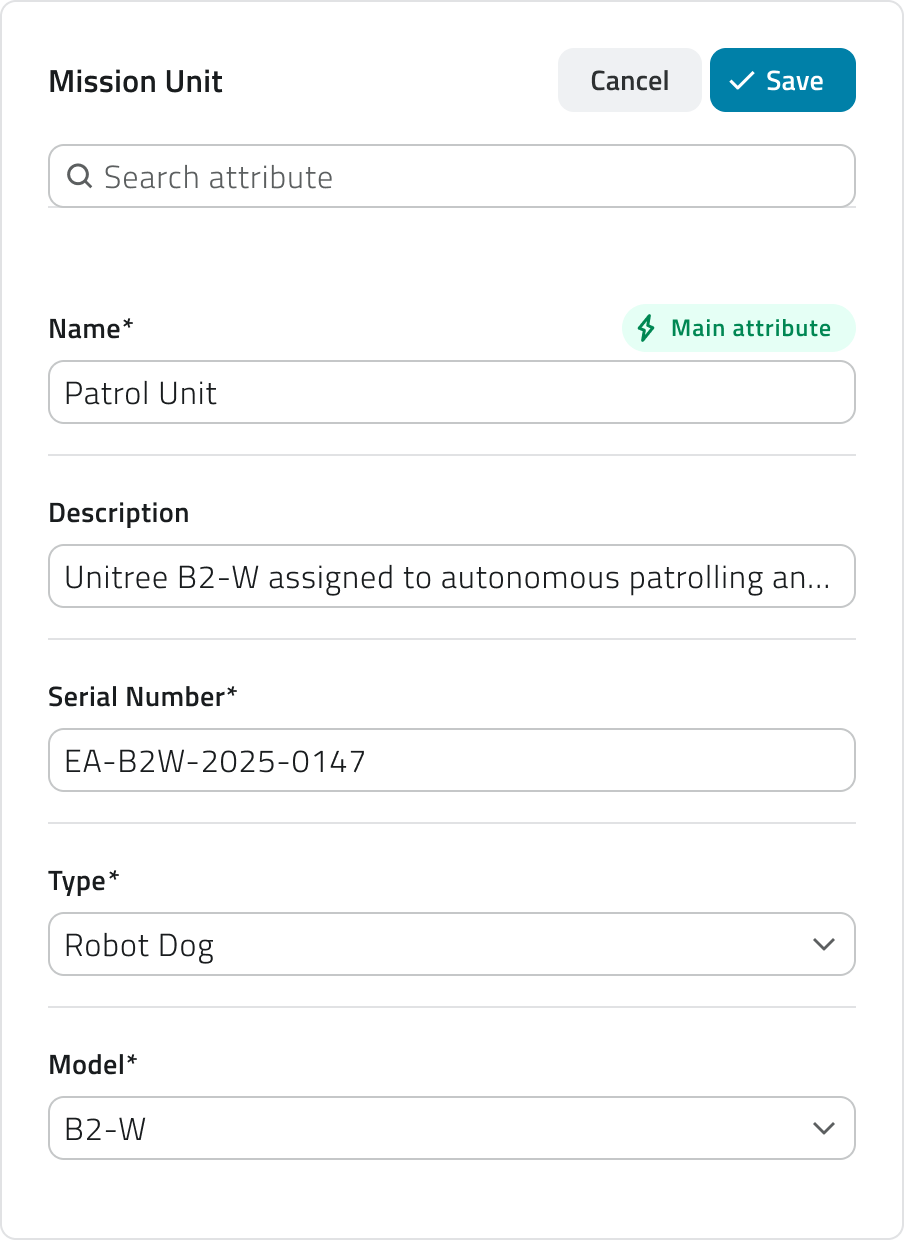
Per registrare un robot dog, compila i seguenti campi:
- Nome
- Descrizione
- Serial Number
Codice identificativo univoco riportato sul corpo del robot dog. La posizione può variare in base al modello. - Tipo
Seleziona Robot dog dall'elenco. - Dog model
Seleziona dall’elenco il modello specifico del robot dog.
Drone
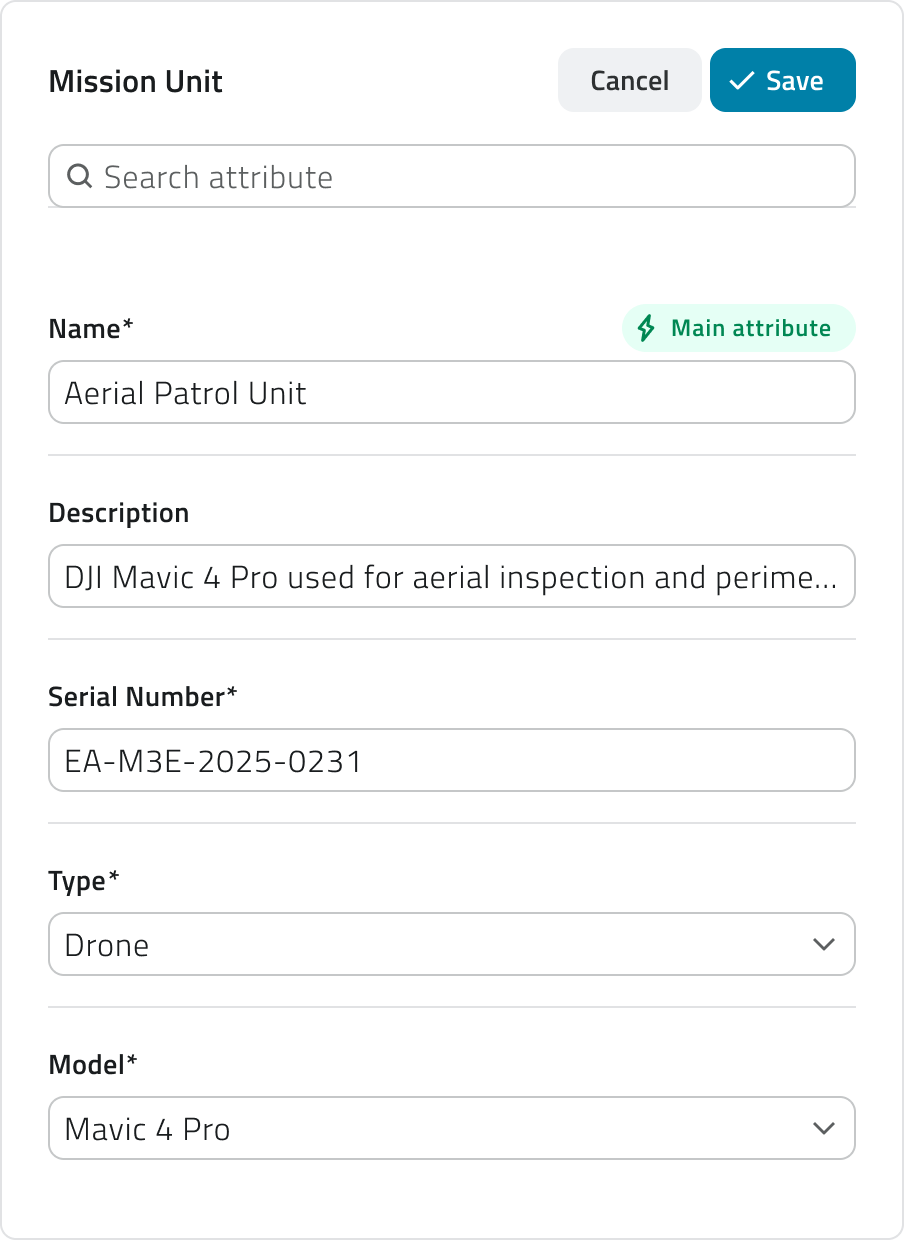
Per registrare un drone, compila i seguenti campi:
- Nome
- Descrizione
- Serial Number
Codice identificativo univoco riportato sul corpo del drone. La posizione può variare in base al modello. - Tipo
Seleziona Drone dall'elenco. - Drone model
Seleziona dall’elenco il modello specifico del drone.
Hangar
Per registrare un hangar, compila i seguenti campi:
- Nome
- Descrizione
- Serial Number
Codice identificativo univoco riportato sul corpo dell’hangar. La posizione può variare in base al modello. - Tipo
Seleziona Hangar dall'elenco. - Drone model
Seleziona dall’elenco il modello specifico dell’hangar.
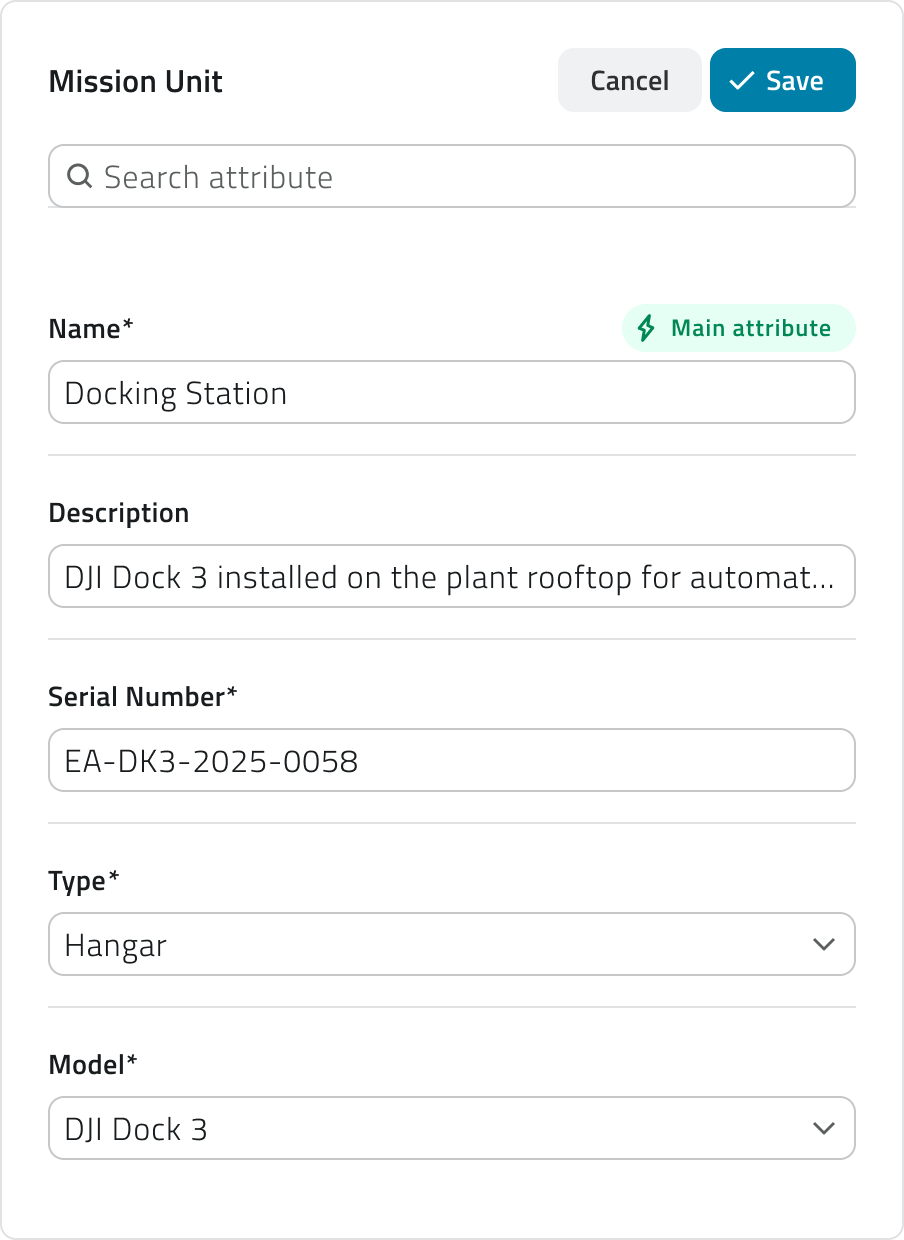
Per completare la registrazione della Mission Unit, clicca su Salva.
Una missione con drone utilizza due Mission Unit: un drone e un hangar. Censiscili entrambi.
Censire un Add-on
Il censimento degli Add-on è necessario solo se utilizzi una Mission Unit di tipo Robot Dog.
Per aggiungere un nuovo Add-on, apri la Lista Globale degli Add-on e clicca sul pulsante Nuovo oggetto.
Compila i campi richiesti:
- Nome
- Descrizione
- Modello Add-on
Seleziona dall’elenco il modello del sensore, della fotocamera o dell’accessorio da registrare.
La lista mostra i modelli compatibili con EagleArca.
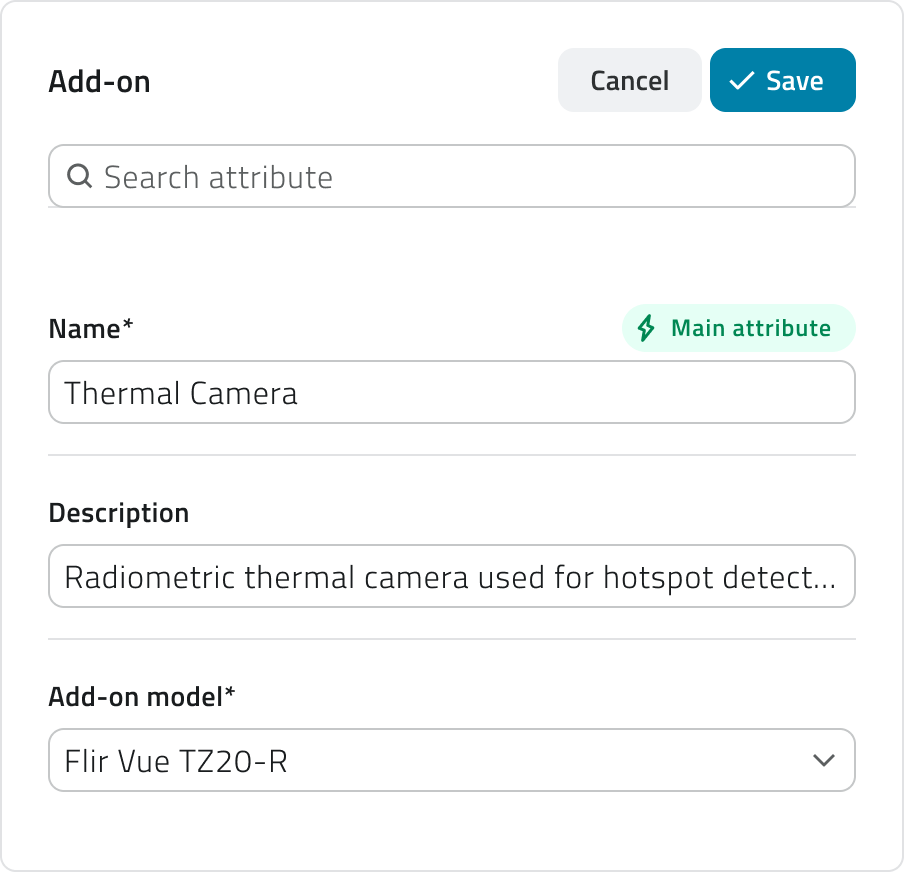
Per registrare l’Add-on e renderlo disponibile nel sistema, clicca su Salva.
In assenza di Add-on esterni, è comunque necessario censire gli Add-on nativi della Mission Unit.
Per gli asset nativi, assicurati di conoscere il modello del sensore o della camera installata sulla Mission Unit, in modo da selezionare il modello corretto. Questa informazione è disponibile nella documentazione tecnica della Mission Unit.
Se non riesci ad individuare questa informazione contatta il supporto.
💡Suggerimento: Se un modello di Add-on non è presente nella lista, significa che non è compatibile con la piattaforma. Assicurati di utilizzare un modello supportato o contatta il supporto.
Creare un Equipment
Gli Equipment possono essere associati solo a Mission Unit di tipo Robot Dog.
Per creare un nuovo Equipment, apri la Lista Globale degli Equipment e clicca sul pulsante Nuovo oggetto.
Compila i campi richiesti:
- Nome
- Descrizione
- Compliant Dog Models
Seleziona i modelli di Robot Dog compatibili con l’Equipment. - Add-on
Seleziona uno o più Add-on precedentemente censiti.
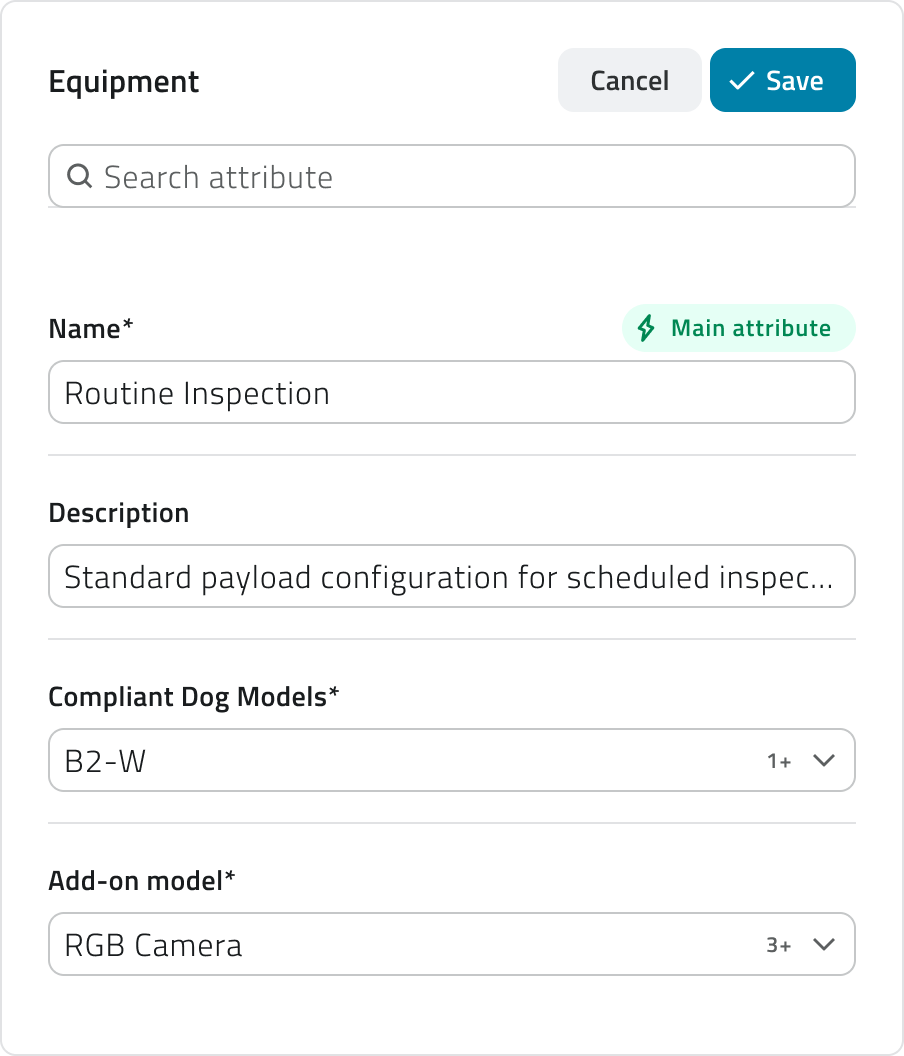
Per completare la creazione dell’Equipment, clicca su Salva. Quando configuri una missione, l’elenco degli Equipment mostra solo quelli compatibili con la Mission Unit selezionata.
💡Suggerimento: Puoi associare un Add-on a più Equipment, ma assicurati che sia compatibile con i modelli di Mission Unit selezionati.
Prima di poter creare una missione
La creazione di una missione parte dalla sezione Missioni, nella barra laterale a sinistra, sotto Live & Planned. Prima però servono due elementi già censiti:
- almeno una Mission Unit, l'unità che eseguirà la missione;
- almeno un Equipment, che definisce la strumentazione a bordo dell'unità.
Senza entrambi la missione non può esistere: mancherebbe l'unità da inviare oppure l'equipaggiamento con cui operare. Se manca uno dei due, censiscilo dalle Liste Globali prima di creare la missione.
Collegamenti
- Creare un oggetto globale: come funzionano le Liste Globali.
- Trovare e gestire le missioni: dove trovi le missioni una volta completata la configurazione.
- Creare una missione: configurare una nuova missione passo per passo.
Last update: 31 July 2026
Find and manage your missions
English version
The Missions tab collects every mission of the project. From here you follow what is running, resume what you have already prepared and start new ones. Open the Missions tab from the side bar on the left.
The Live & Planned tab
The Missions tab has two tabs: Live & Planned, which is where missions are prepared and followed, and Executed, which collects the missions already carried out.
In Live & Planned the missions are grouped by state. Each group shows how many missions it contains and can be collapsed using the arrow next to its name.
| Group | What it contains | What you can do |
| Live Missions | Missions running right now. | Open the mission to follow it and take control of the Mission Unit. |
| Draft | Missions configured and saved, not started yet. A Draft is created as soon as you complete the configuration, and stays available to be reused. | Open the mission to complete or change it, then run the Pre Check and start it. |
| Planned | Missions scheduled to run at a set date and time, once or repeatedly. | Open the mission to change it before it runs. |
Reading the list
Every mission shows its name and the Mission Unit assigned to it. The icon next to the name tells you the type of unit: robot dog, or drone and hangar.
Each group adds the information that matters for that state:
| Group | What is shown |
| Live Missions | For a robot dog, a status chip with what the Mission Unit is doing: On going while the mission is running, RTH while the unit is returning to its Home Position. |
| Draft | Last update, with the date and time of the last change. |
| Planned | The scheduled date, and the time the mission will start. For a repeating mission you also see Next, with the date and time of the following run, and a chip with the number of runs still to come. |
The status chip reports what a robot dog is doing. Missions running with a drone are listed without it.
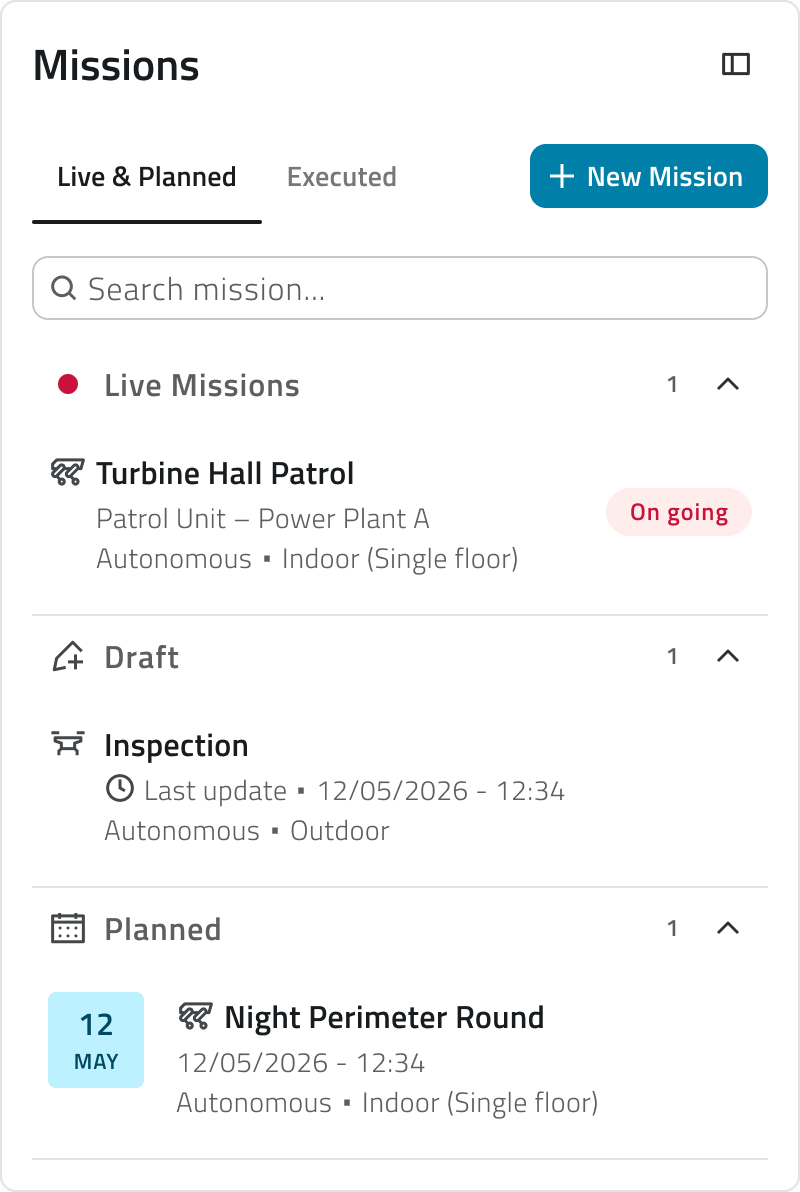
Find a mission
The search bar filters the list by name and keeps the grouping: each group then holds only the missions that match.
When a project holds many missions, collapse the groups you are not working on using the arrow next to the group name, so that the one you need stays in view.
Open a mission
Click a mission to open it. Where you land depends on its state:
- a Draft or a Planned mission opens on the planning screen, where you define Home Position, Waypoints, Danger Zones and Geofencing;
- a Live mission opens on the live view, where you follow it and control the Mission Unit.
Opening a Draft or a Planned mission takes you straight to the planning screen: the configuration you already completed is not asked again. To change it, open the Details tab and select Edit Mission Details.
Save a mission as a draft
On the planning screen, Save as a Draft stores the mission with everything you have defined so far. You can save whenever there is something new to keep; once the mission is saved, there is nothing left to save until you change something again.
If you leave the planning screen with unsaved changes, a confirmation is asked before you go.
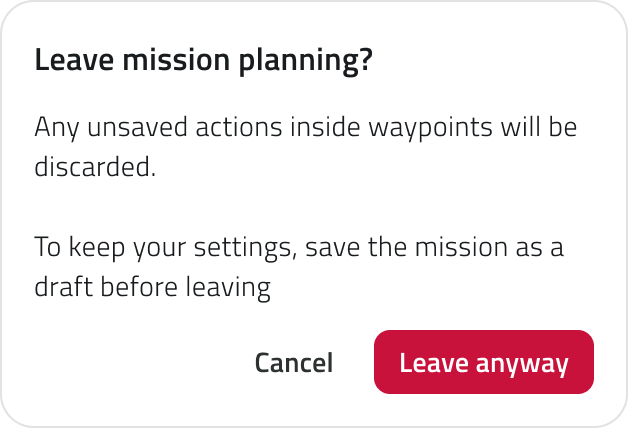
Going ahead discards the actions configured on the Waypoints that have not been saved. Save the mission as a draft first to keep them.
Delete a mission
Deleting a mission removes it from the project together with everything defined on it. The confirmation says how many occurrences are about to be deleted.
To delete more than one mission at a time, hold CTRL and click the ones you need; CTRL and click on a mission that is already selected takes it out of the selection.

Deletion is permanent and cannot be undone.
Start a new mission
The New Mission button, at the top of the Live & Planned tab, opens the configuration of a new mission.
A Mission Unit and an Equipment must be registered before a mission can be created. If either is missing, a message explains what to register.
Links
- Create a mission: configure a new mission step by step.
- Draw the mission on the map: what you can do on the planning screen.
- Initial Setup: register Mission Units, Add-ons and Equipment.
Italian version
La scheda Missioni raccoglie tutte le missioni del progetto. Da qui puoi seguire quelle in corso, riprendere quelle già preparate e avviarne di nuove. Apri la scheda Missioni dalla barra laterale sinistra.
La sezione Live & Planned
Missioni si divide in due sezioni: Live & Planned, dove le missioni si preparano e si seguono, ed Eseguite, che raccoglie quelle già eseguite.
In Live & Planned le missioni sono raggruppate per stato. Ogni gruppo indica quante missioni contiene e si comprime con la freccia accanto al nome.
| Gruppo | Cosa contiene | Cosa puoi fare |
| Live Missions | Le missioni in esecuzione in questo momento. | Aprire la missione per seguirla e intervenire sulla Mission Unit. |
| Bozze | Le missioni configurate e salvate, non ancora avviate. Una Bozza viene creata appena completi la configurazione e resta disponibile per essere ripresa. | Aprire la missione per completarla o modificarla, poi eseguire il Pre Check e avviarla. |
| Pianificate | Le missioni pianificate per una data e un'ora, una sola volta oppure a ripetizione. | Aprire la missione per modificarla prima che venga eseguita. |
Leggere l'elenco
Ogni missione mostra il nome e la Mission Unit assegnata. L'icona accanto al nome indica il tipo di unità: robot dog, oppure drone e hangar.
Ogni gruppo riporta l'informazione più utile per quello stato:
| Gruppo | Cosa viene mostrato |
| Live Missions | Per un robot dog, un chip che indica cosa sta facendo la Mission Unit: In corso mentre la missione è in corso, RTH mentre l'unità sta rientrando alla Home Position. |
| Bozze | Last update, con data e ora dell'ultima modifica. |
| Pianificate | La data pianificata e l'ora di avvio. Se la missione si ripete, compare anche la voce Prossima, con la data e l'ora dell'esecuzione più imminente, e un chip che indica quante esecuzioni restano. |
Il chip di stato riguarda soltanto il robot dog: per una missione in corso con un drone non compare.
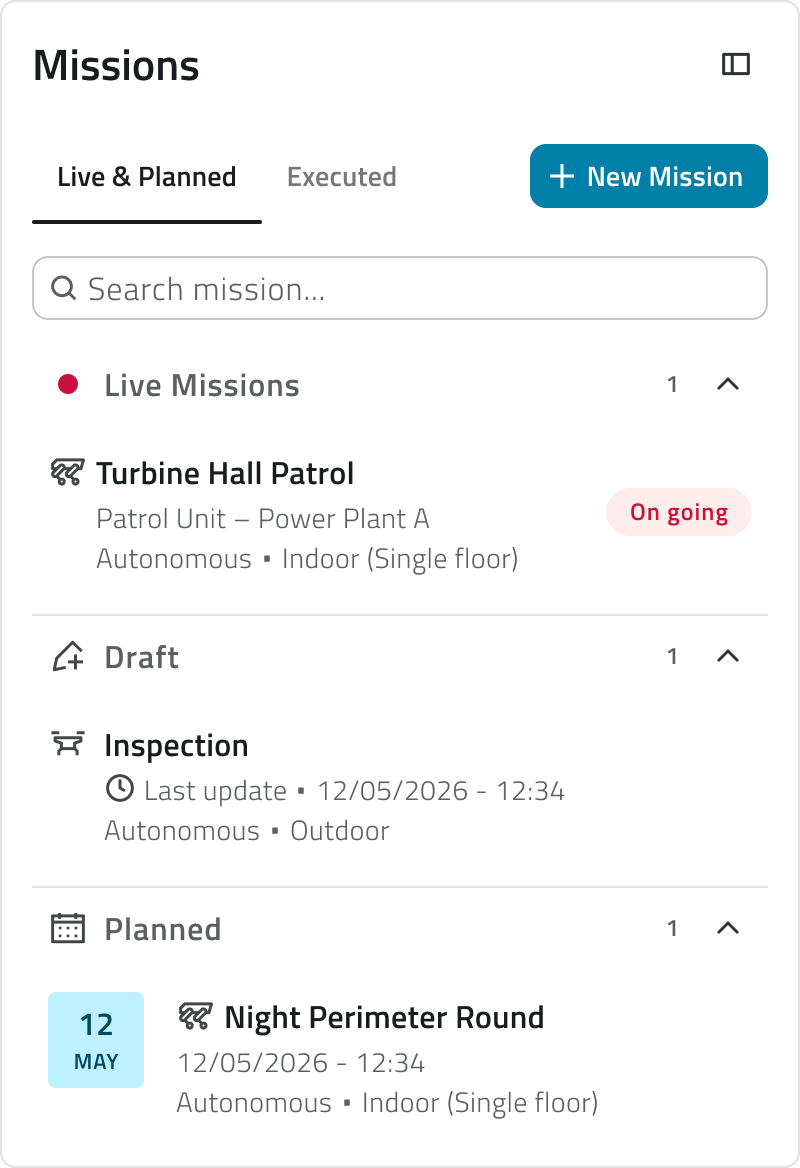
Trovare una missione
La barra di ricerca filtra l'elenco per nome, mantenendo la divisione in gruppi: dentro ciascuno rimangono soltanto le missioni corrispondenti.
Se un progetto contiene molte missioni, comprimi con la freccia i gruppi su cui non stai lavorando, così resta in vista solo quello che ti serve.
Aprire una missione
Clicca una missione per aprirla: la schermata su cui arrivi dipende dal suo stato:
- una missione Bozza o Pianificata si apre sulla schermata di pianificazione, dove definisci Home Position, Waypoints, Zone di pericolo e Geofencing;
- una missione Live si apre sulla vista in diretta, dove la segui e comandi la Mission Unit.
Aprendo una missione Bozza o Pianificata arrivi direttamente alla schermata di pianificazione: la configurazione che hai già completato non viene richiesta di nuovo. Per modificarla, apri la sezione Dettagli e seleziona Modifica i dettagli della missione.
Salvare una missione come bozza
Nella schermata di pianificazione, Salva come bozza salva la missione con tutto ciò che hai definito fino a quel momento. Puoi salvare ogni volta che c'è qualcosa di nuovo; una volta salvata la missione, non resta nulla da salvare finché non la modifichi.
Se esci dalla schermata di pianificazione con modifiche non salvate ti viene chiesta conferma.
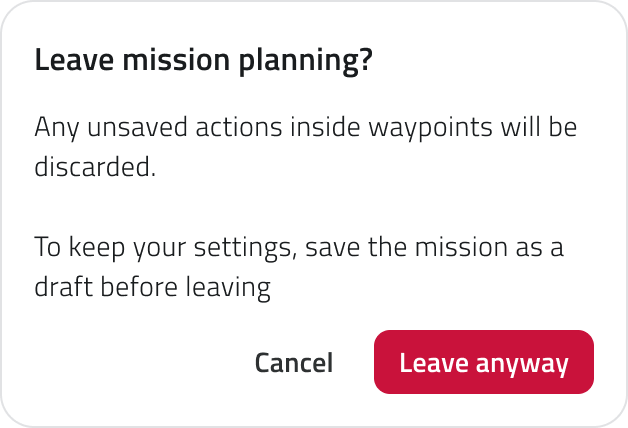
Proseguendo, le azioni configurate sui Waypoints e non salvate vengono perse: salva la missione come bozza per conservarle.
Eliminare una missione
Eliminando una missione, dal progetto vengono rimossi anche tutti gli elementi definiti al suo interno. La conferma indica quante occorrenze verranno eliminate.
Per eliminare più missioni insieme, tieni premuto CTRL e clicca quelle che ti servono; con CTRL + clic su una missione già selezionata la togli dalla selezione.

L'eliminazione è permanente e non può essere annullata.
Avviare una nuova missione
Il pulsante Nuova missione, in alto nella sezione Live & Planned, apre la configurazione di una nuova missione.
Per creare una missione servono almeno una Mission Unit e un Equipment già censiti. Se manca uno dei due, un messaggio indica cosa censire.
Collegamenti
- Creare una missione: configurare una nuova missione passo per passo.
- Disegnare la missione in mappa: cosa puoi fare nella schermata di pianificazione.
- Configurazione iniziale: censire Mission Unit, Add-on ed Equipment.
Last update: 31 July 2026
Create a Mission
English version
Configuring a mission takes five steps. You choose the unit to deploy, what it carries, what kind of mission it is, where it runs and when it starts. At the end the mission is created as a Draft and the planning screen opens, where you place the route on the map.
Start from the Missions tab, Live & Planned, with the New Mission button.
A Mission Unit and an Equipment must be registered before a mission can be created.
Which path you are on
The configuration adapts to what you choose. These are the main combinations, and they differ in the number of steps and in what you define along the way.
| Path | Steps | Map | Home Position | On the map |
| Robot dog, Autonomous | 5 | Chosen from the Maps Library | Marked automatically | Waypoints, Geofencing, Danger Zones |
| Robot dog, Discovery | 4 | Built by the robot dog during the mission | Marked automatically | Nothing to place |
| Drone | 5 | Geographic, fixed | Drawn on the map | Waypoints |
Move between the steps with Next and Back. The numbers at the bottom show where you are and how many steps are left.
Step 1: Mission Unit to deploy
Choose the unit that will carry out the mission. Two tabs separate the types: Robot Dogs and Drones & Hangars.
Each robot dog shows its name, its model, the battery level and a chip with what it is doing:
| Chip | What it means |
| Free | The unit is available and can be assigned to this mission. |
| On going | The unit is already carrying out another mission. |
| RTH | The unit is returning to its Home Position. |
Battery level and status chip are shown for a robot dog. In Drones & Hangars each unit shows its name and model.
A mission with a robot dog uses one unit.
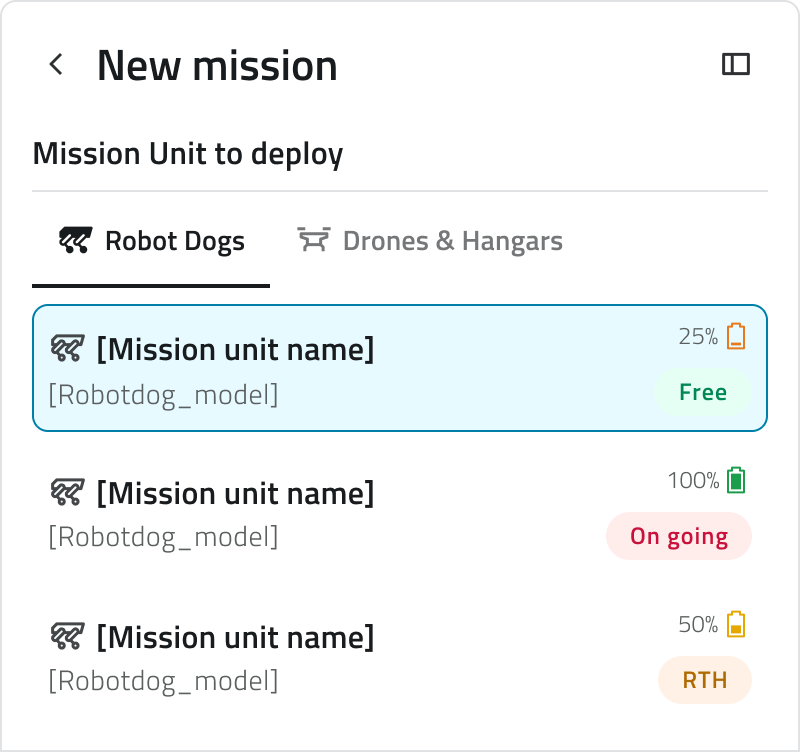
A mission with a drone uses two units: one drone and one hangar, both required, one of each. Select both to continue. Until you do, a message reminds you.
Step 2: Equipment & AI Algorithm
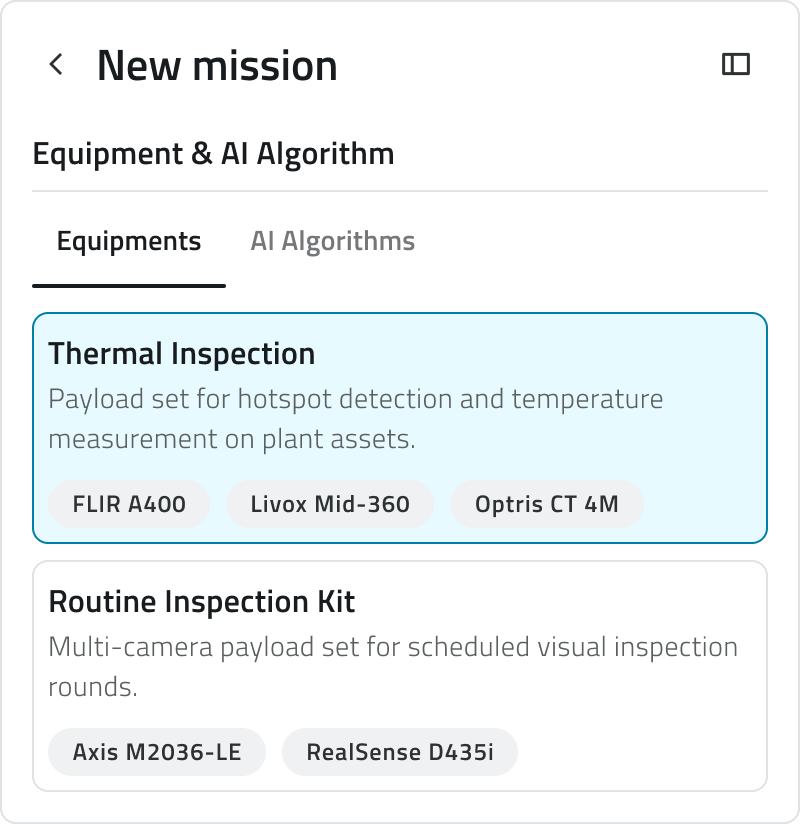
Choose what the unit carries and what it can do during the mission. Three tabs: Equipments, AI Algorithms and Continuous Actions.
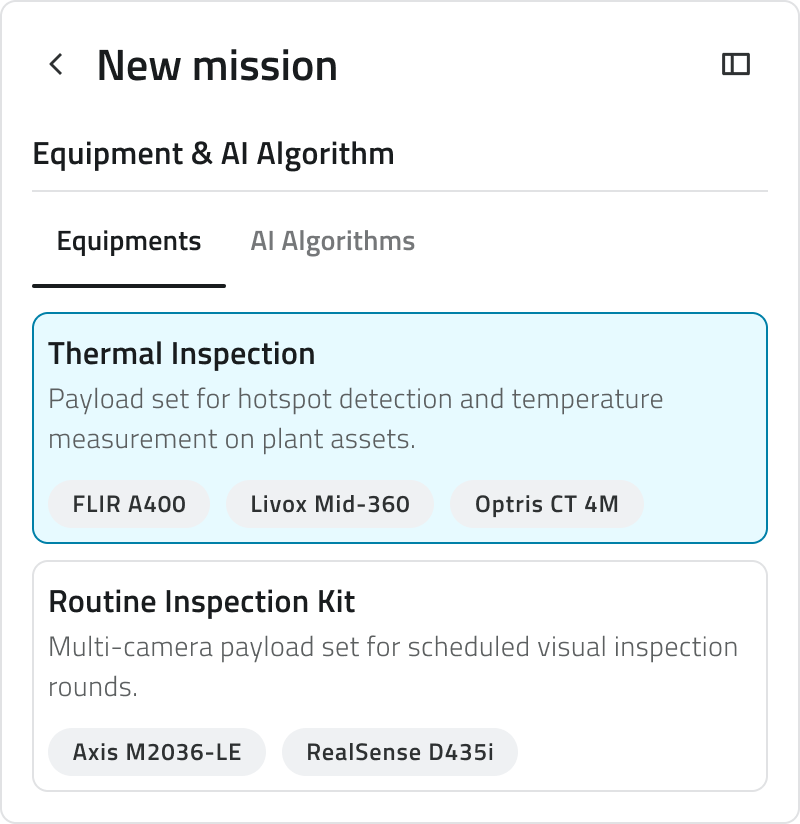
Equipments
Select the Equipment the unit will carry. Each card shows the name, the description and the add-on models it contains.
Only the Equipment compatible with the unit chosen at step 1 is listed. Equipment is defined in advance from the Global Lists: here you pick one, you do not assemble it.
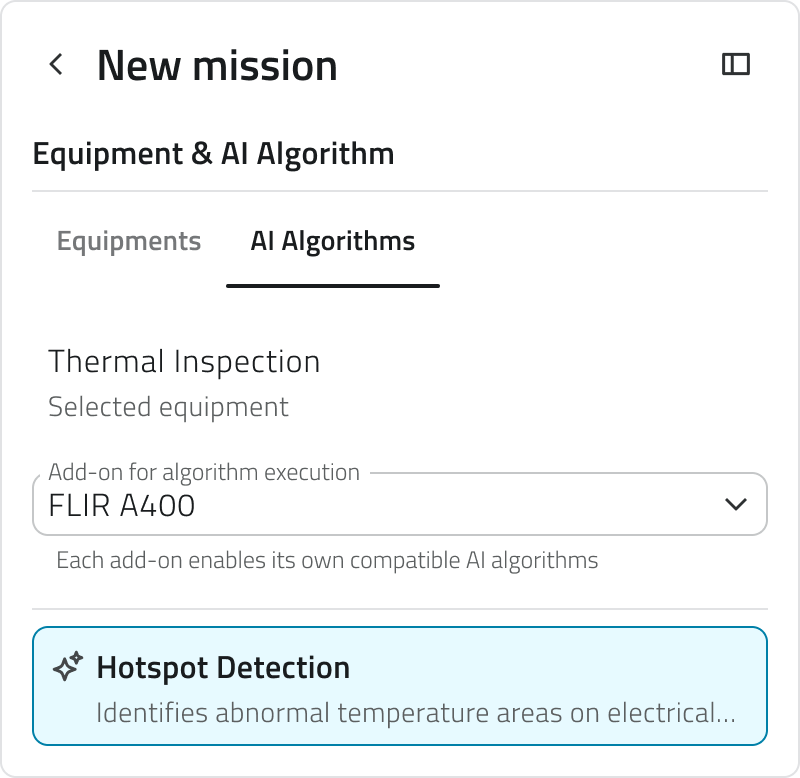
AI Algorithms
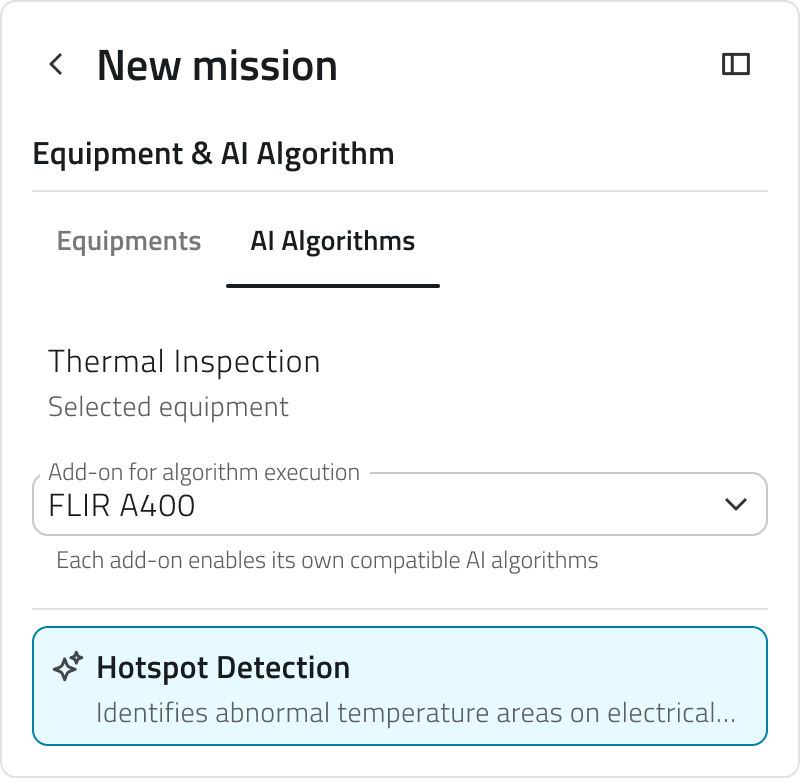
Assign an algorithm that will run on one of the add-ons. Select an Equipment first, then choose the add-on that will carry out the algorithm and the algorithm itself: each add-on works with its own compatible algorithms.
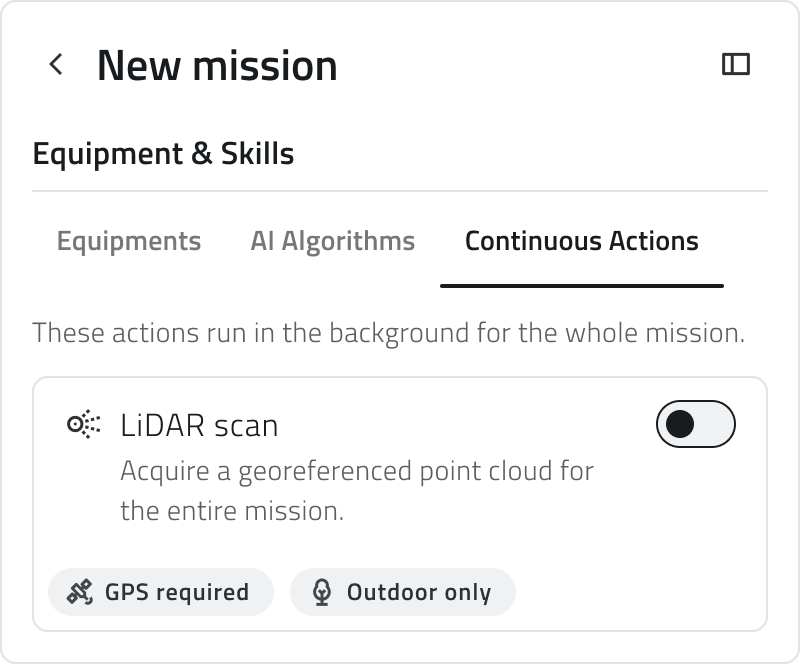
Continuous Actions
Continuous actions run in the background for the whole mission, from the moment it starts. Turn on the ones you need with their switch.
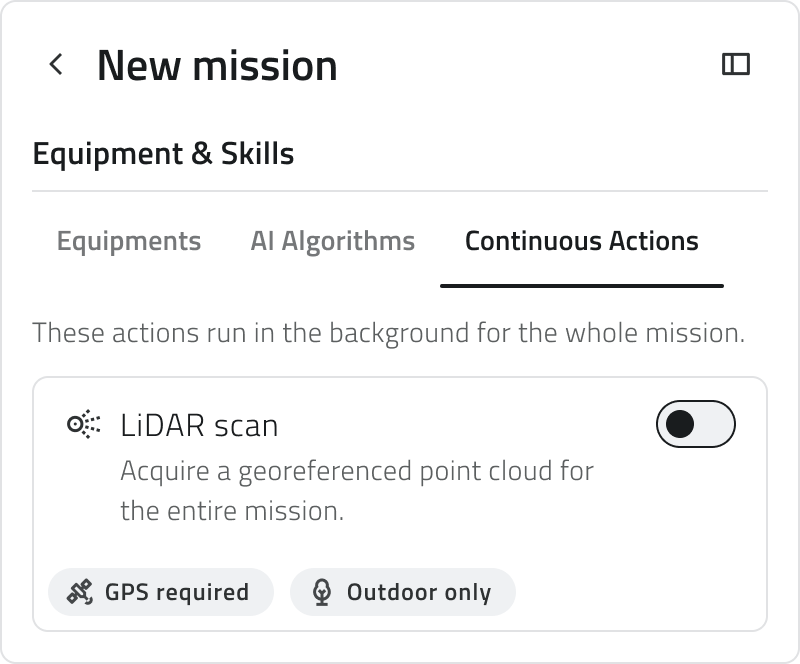
A continuous action can be turned on when the mission satisfies the conditions on its card. For example, LiDAR scan needs an Equipment that includes GPS and an outdoor mission.
Step 3: Mission Name & Typology
Give the mission a name, up to 80 characters, then choose the typology:
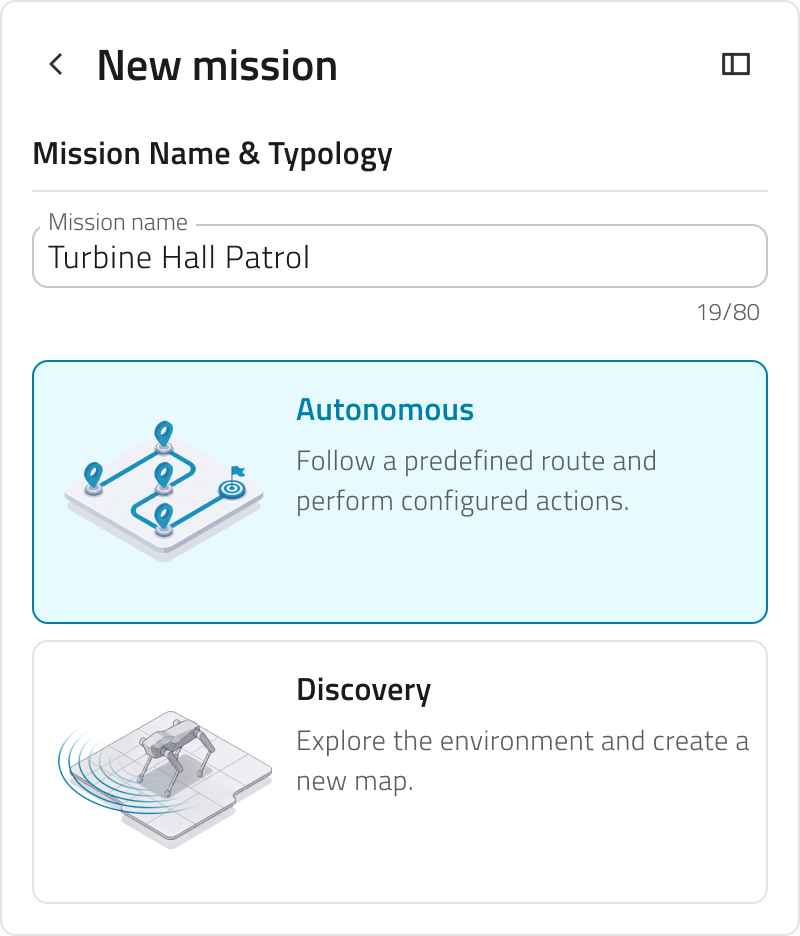
| Typology | What the mission does |
| Autonomous | The unit follows a route you define and performs the actions you configure on each waypoint. |
| Discovery | The robot dog explores the environment and builds a new map of it. |
Selecting Discovery removes the Mission Environment step: the map is produced by the mission itself, so there is nothing to choose. The configuration continues on Launch Mode.
A mission with a drone is always Autonomous, so you find the typology already chosen for you.
Step 4: Mission Environment
Choose where the mission runs, then which map it runs on.
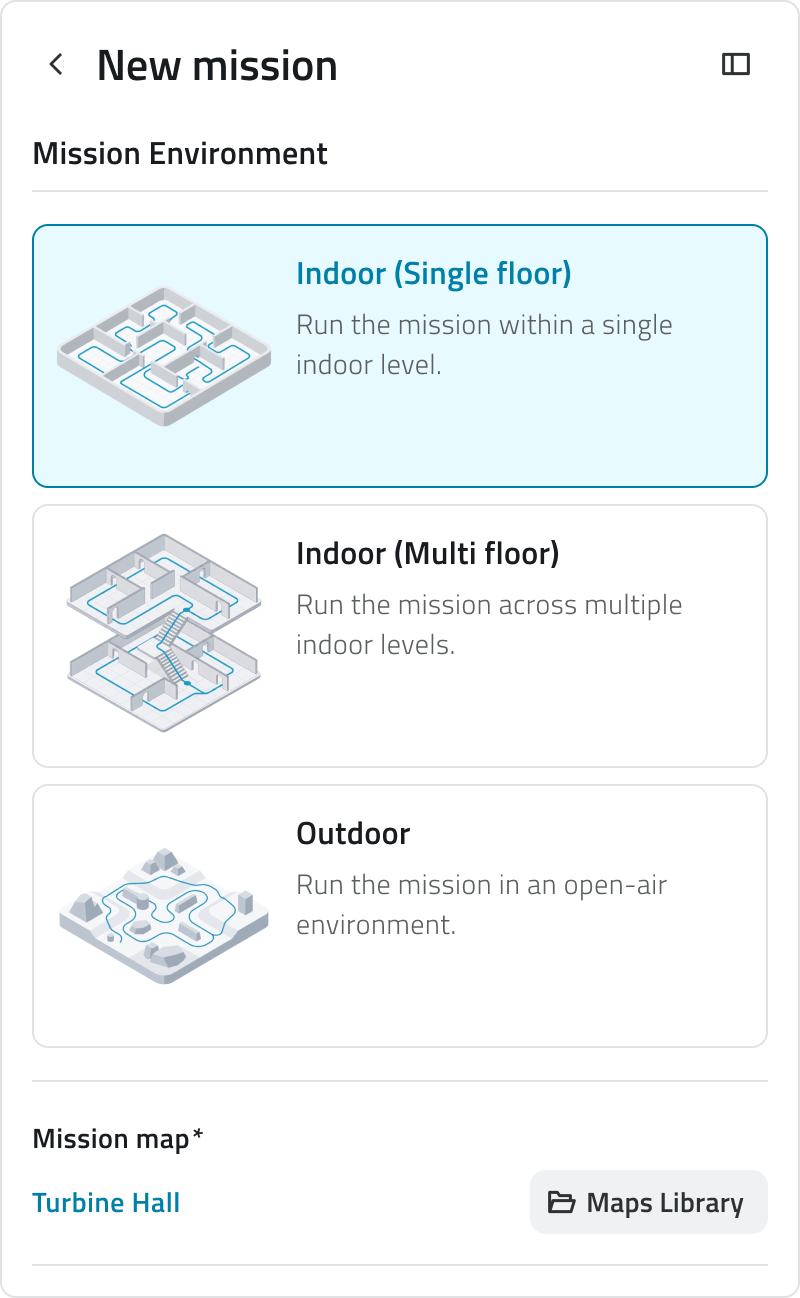
| Environment | Where the mission runs |
| Indoor (Single floor) | Within a single indoor level. |
| Indoor (Multi floor) | Across several indoor levels. |
| Outdoor | In an open-air environment. |
Once the environment is chosen, select the map under Mission map: open Maps Library, pick a map from the list and confirm with Apply. The list shows only the maps that suit the environment you selected, and the preview shows the map with its type and the date of its last change. You need to select a map before you can move on to the next step.
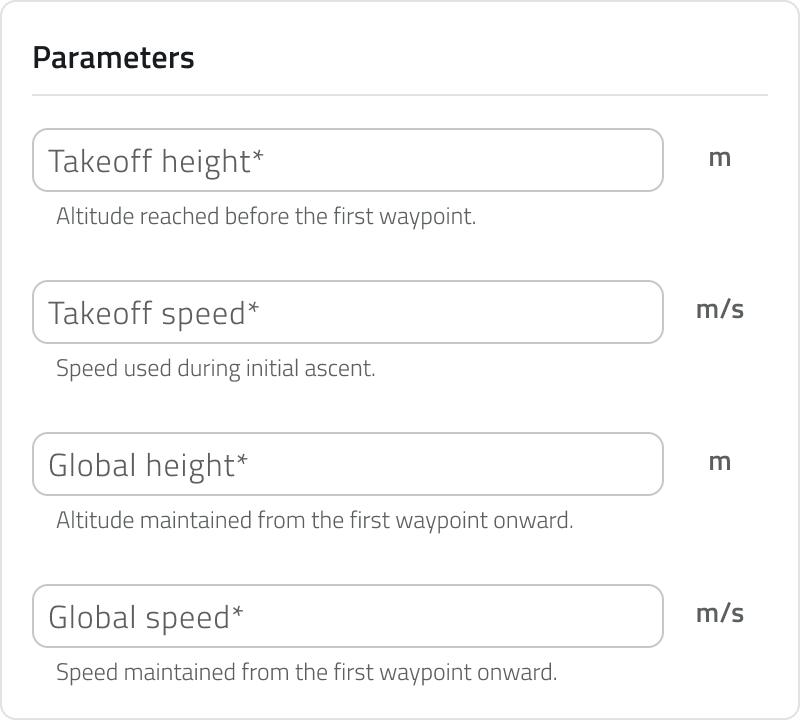
Drone: Outdoor and flight parameters
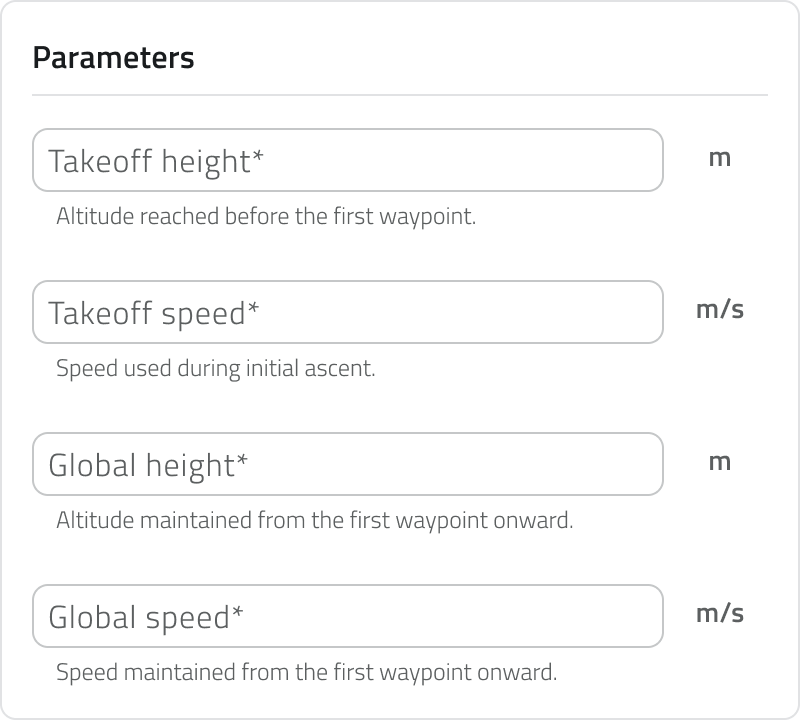
A mission with a drone always runs Outdoor, on a geographic map. This step asks instead for the flight parameters:
| Parameter | What it sets |
| Takeoff height | The altitude reached before the first waypoint. |
| Takeoff speed | The speed used during the initial ascent. |
| Global height | The altitude maintained from the first waypoint onward. |
| Global speed | The speed maintained from the first waypoint onward. |
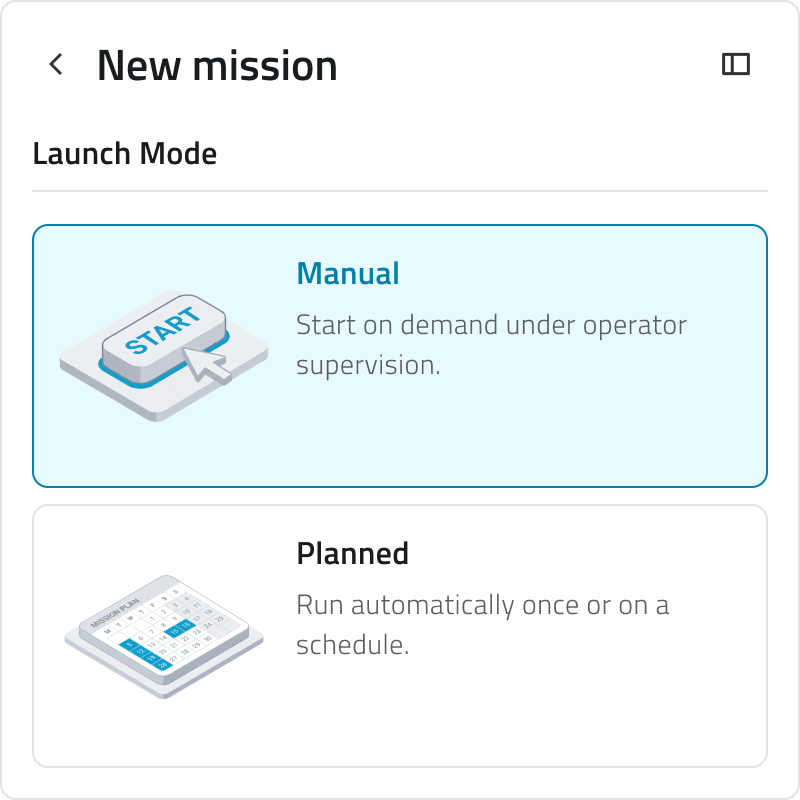
Step 5: Launch Mode
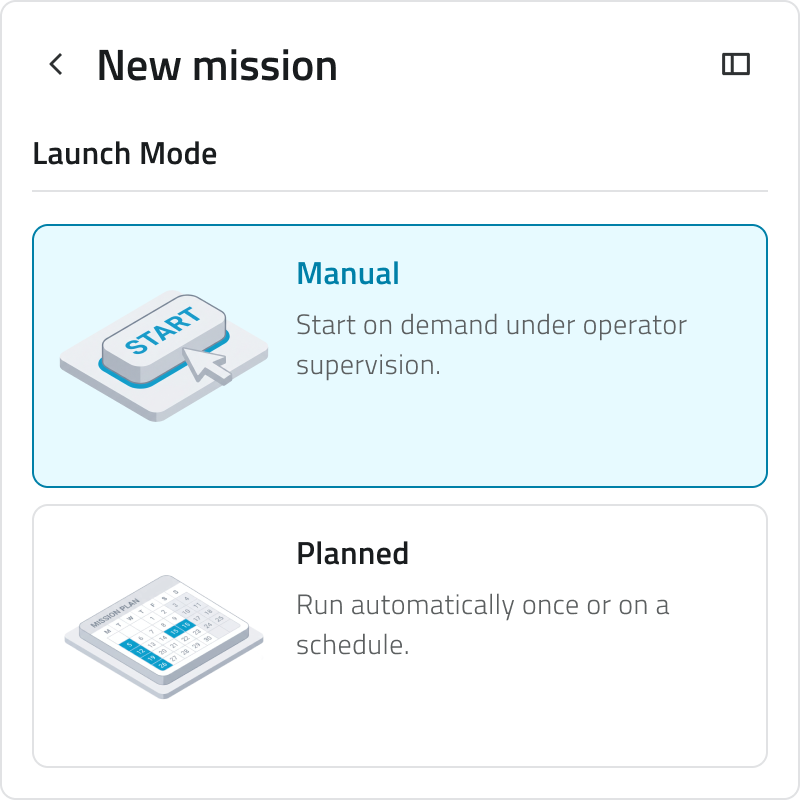
Decide when the mission starts:
| Launch Mode | When the mission starts |
| Manual | On demand, under the supervision of an operator. |
| Planned | Automatically, once or on a schedule. |
Choosing Planned opens the scheduling options, where you set the date and time and, if you want, make the mission repeat.
A mission with a drone always starts in Manual mode, so you find it already chosen for you.
What happens when you select Proceed
Proceed closes the configuration. In sequence, the mission is created as a Draft, the platform connects to the Mission Unit, and the planning screen opens.
For a robot dog the Home Position is marked automatically, at the point where the unit is. For a drone you draw it on the map from the planning screen.
If the Mission Unit cannot be reached, nothing of your work is lost: the mission is created as a Draft and you can retry with Retry Mission Unit Connection. The Home Position and the Pre Check stay out of reach until the connection succeeds, because both depend on what the unit reports.
Leaving the configuration
Leaving the configuration before Proceed asks for a confirmation: Leave mission configuration? Choose Cancel to stay, or Leave to return to the mission list.
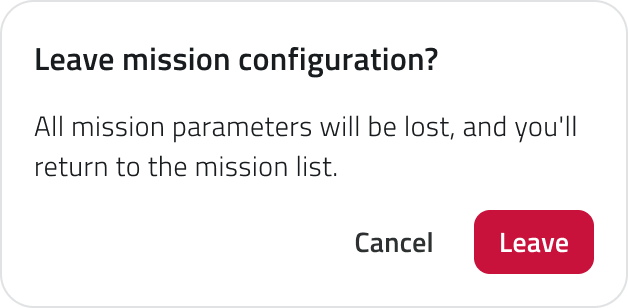
Leaving discards all the mission parameters: nothing is kept, because the mission has not been created yet.
Links
- Draw the mission on the map: where you land after Proceed.
- Schedule a mission: the options behind Planned.
- Edit a mission's configuration: change these choices later.
Italian version
La configurazione di una missione si svolge in cinque step: scegli l'unità da impiegare, la sua strumentazione, il tipo di missione, l'ambiente in cui si svolge e il momento in cui parte. Al termine la missione viene creata come Bozza e si apre la schermata di pianificazione, dove disegni il percorso sulla mappa.
Si parte dalla sezione Missioni, in Live & Planned, con il pulsante Nuova missione.
Per creare una missione servono almeno una Mission Unit e un Equipment già censiti.
Quale percorso stai seguendo
La configurazione si adatta alle tue scelte. Queste sono le combinazioni principali, che cambiano il numero di step e gli elementi da definire.
| Percorso | Step | Mappa | Home Position | In mappa |
| Robot dog, Autonoma | 5 | Scelta dalla Libreria mappe | Marcata in automatico | Waypoints, Geofencing, Zone di pericolo |
| Robot dog, Esplorativa | 4 | Costruita dal robot dog durante la missione | Marcata in automatico | Niente da collocare |
| Drone | 5 | Geografica, fissa | Disegnata in mappa | Waypoints |
Per muoverti tra gli step usa Avanti e Indietro. I numeri in basso indicano a che punto sei e quanti step restano.
Step 1: Mission Unit da schierare
Scegli l'unità che eseguirà la missione: due sezioni separano i tipi, Robot Dog e Droni & Hangar.
Ogni robot dog mostra il nome, il modello, il livello di batteria e un chip che indica cosa sta facendo:
| Chip | Cosa significa |
| Libera | L'unità è disponibile e può essere assegnata a questa missione. |
| In corso | L'unità sta già eseguendo un'altra missione. |
| RTH | L'unità sta rientrando alla propria Home Position. |
Livello di batteria e chip di stato compaiono solo per il robot dog: in Droni & Hangar ogni unità riporta soltanto nome e modello.
Una missione con robot dog usa una sola unità.
Una missione con drone usa due unità: un drone e un hangar, entrambi obbligatori, uno per tipo. Selezionali per proseguire; finché non lo fai, un messaggio te lo ricorda.
Step 2: Equipment & AI Algorithm
Qui decidi come equipaggiare l'unità e cosa sarà in grado di fare durante la missione, attraverso tre sezioni: Equipment, Algoritmi AI e Azioni continuative.
Equipment
Seleziona l'Equipment con cui l'unità eseguirà la missione. Ogni card riporta nome, descrizione e i modelli di Add-on che contiene.
L'elenco mostra solo gli Equipment compatibili con l'unità scelta allo step 1. Gli Equipment vengono definiti in precedenza dalle Liste Globali: qui si sceglie tra quelli esistenti.
Algoritmi AI
Assegna un algoritmo a uno degli add-on. Scegli prima un Equipment, poi l'add-on che eseguirà l'algoritmo e infine l'algoritmo stesso: ogni add-on funziona con i propri algoritmi compatibili.
Azioni continuative
Le azioni continuative restano attive dall'avvio e per tutta la durata della missione. Attiva quelle che ti servono con l'interruttore sulla card.
Puoi attivare un'azione continuativa solo se la missione soddisfa le condizioni riportate sulla sua card. LiDAR scan, per esempio, richiede un Equipment con GPS e una missione all'aperto.
Step 3: Nome Missione & Tipologia
Dai un nome alla missione, fino a 80 caratteri, poi scegli la tipologia:
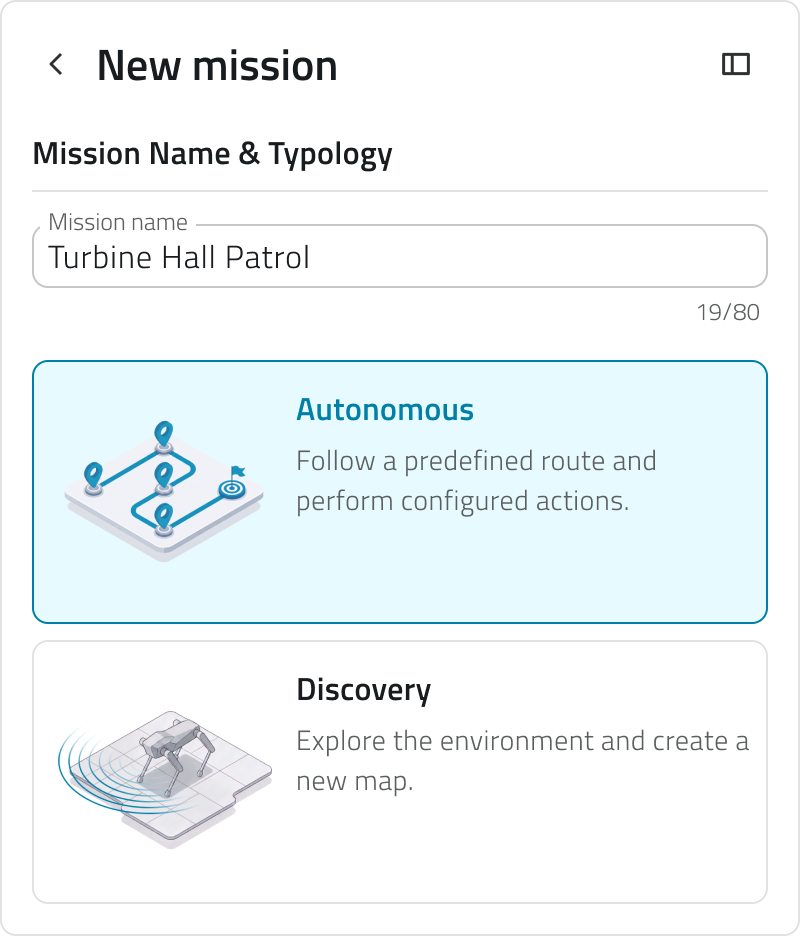
| Tipologia | Cosa fa la missione |
| Autonoma | L'unità segue un percorso che definisci tu ed esegue le azioni configurate su ciascun waypoint. |
| Esplorativa | Il robot dog esplora l'ambiente e ne costruisce una nuova mappa. |
Scegliendo Esplorativa, lo step Ambiente della missione non compare: la mappa viene prodotta dalla missione stessa, quindi non c'è nulla da scegliere. La configurazione prosegue con Modalità di avvio.
Una missione con drone è sempre Autonoma, quindi trovi la tipologia già scelta per te.
Step 4: Ambiente della missione
Scegli dove si svolge la missione, poi su quale mappa.
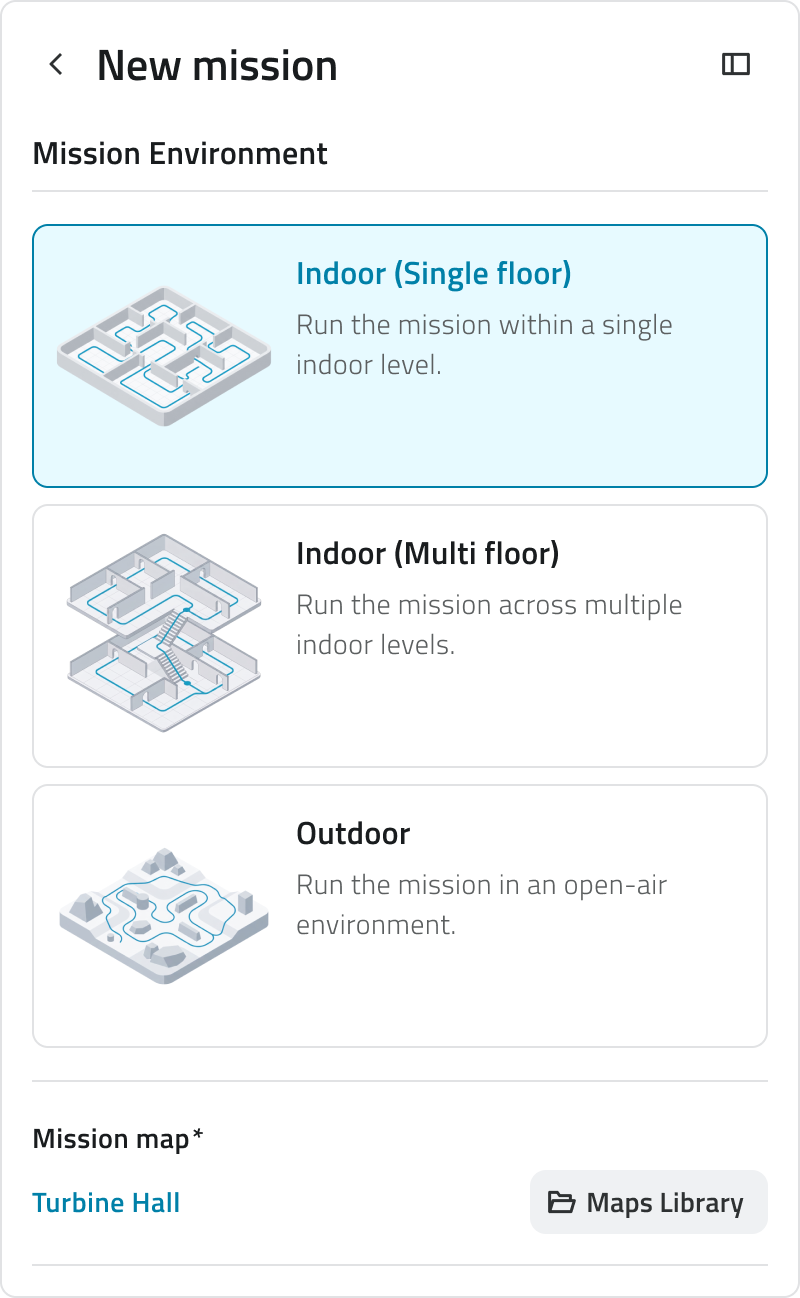
| Ambiente | Dove si svolge la missione |
| Interno (piano unico) | Su un solo livello al chiuso. |
| Interno (multipiano) | Su più livelli al chiuso. |
| All'aperto | In un ambiente all'aperto. |
Per la mappa apri Libreria mappe, seleziona una voce dall'elenco e conferma con Applica. L'elenco mostra solo le mappe adatte all'ambiente scelto, mentre l'anteprima ne riporta il tipo e la data dell'ultima modifica. Per passare allo step successivo devi aver scelto una mappa.
Drone: All'aperto e parametri di volo
Una missione con drone si svolge sempre All'aperto, su mappa geografica: in questo step imposti quindi i parametri di volo.
| Parametro | Cosa imposta |
| Altezza di decollo | La quota raggiunta prima del primo waypoint. |
| Velocità di decollo | La velocità usata durante la salita iniziale. |
| Altezza globale | La quota mantenuta dal primo waypoint in poi. |
| Velocità globale | La velocità mantenuta dal primo waypoint in poi. |
Step 5: Modalità di avvio
Decidi quando parte la missione:
| Modalità di avvio | Quando parte la missione |
| Manuale | Su richiesta, sotto la supervisione di un operatore. |
| Pianificata | In automatico, una volta sola o secondo una pianificazione. |
Scegliendo Pianificata si aprono le opzioni di pianificazione, dove imposti data e ora e, se necessario, la ripetizione della missione.
Una missione con drone parte sempre in modalità Manuale, quindi la trovi già scelta per te.
Cosa succede quando selezioni Procedi
Procedi chiude la configurazione. Nell'ordine: la missione viene creata come Bozza, la piattaforma si collega alla Mission Unit e si apre la schermata di pianificazione.
Per il robot dog la Home Position viene marcata in automatico, nel punto in cui si trova l'unità. Per il drone la disegni in mappa dalla schermata di pianificazione.
Se la Mission Unit non è raggiungibile il lavoro non va perso: la missione viene creata come Bozza e puoi ritentare con Riprova la connessione alla Mission Unit. Home Position e Pre Check restano fuori portata finché il collegamento non riesce, perché dipendono dai dati dell'unità.
Uscire dalla configurazione
Se esci dalla configurazione prima di Procedi ti viene chiesta una conferma: Esci dalla configurazione della missione? Scegli Annulla per restare, oppure Esci per tornare all'elenco delle missioni.
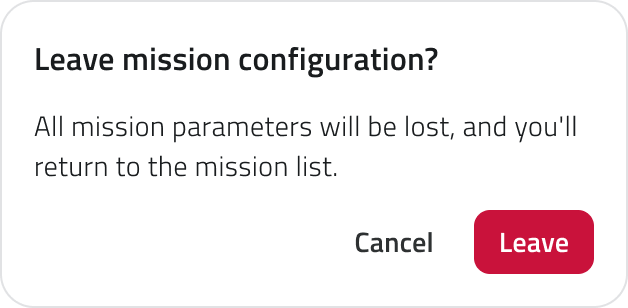
Uscendo perdi tutti i parametri impostati, perché la missione non è ancora stata creata.
Collegamenti
- Disegnare la missione in mappa: dove arrivi dopo il Procedi.
- Pianificare una missione: le opzioni dietro Pianificata.
- Modificare la configurazione di una missione: cambiare queste scelte in un secondo momento.
Last update: 31 July 2026
Draw the mission on the map
English version
On the planning screen you place the mission on the map: the Home Position the unit returns to, the Waypoints it travels through, the actions it performs along the way, and any areas that limit where it may go.
You reach this screen in two ways: at the end of the configuration of a new mission, or by opening a Draft or Planned mission from the mission list.
The panel on the left holds four tabs (Waypoints, Details, In view and Streaming), and the map fills the rest of the screen. At the bottom, Save as a Draft keeps your work and Pre Check moves on to the checks before the start.
The connection to the Mission Unit
The planning screen works with the Mission Unit connected: it is the unit that reports its own position and marks the Home Position.
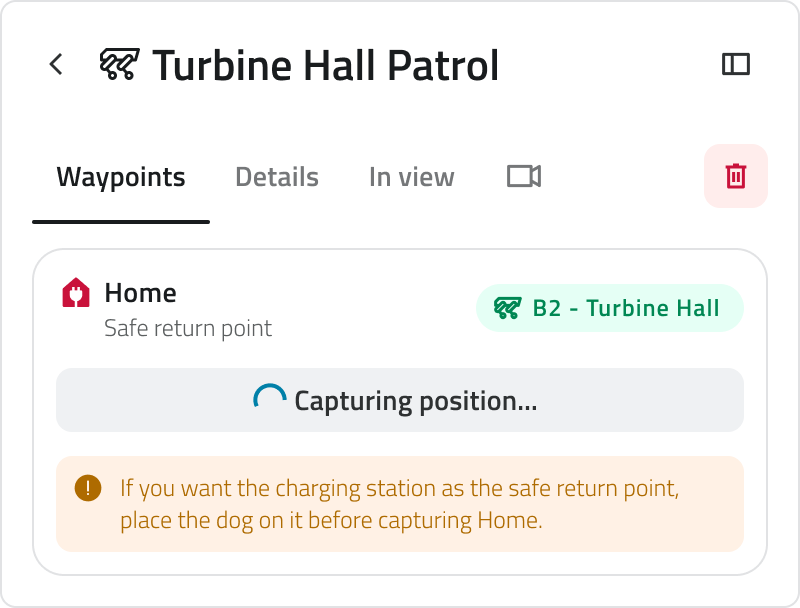
If the unit cannot be reached, check that it is switched on and within range, then retry with Retry Mission Unit Connection.
Both the Home Position and the Pre Check depend on what the unit reports, so neither is possible until the connection succeeds. The mission stays as it is and you can come back to it later.
The Home Position
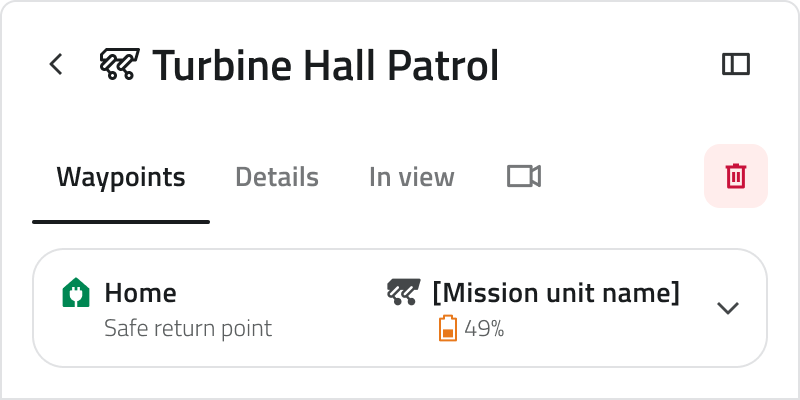
The Home Position is the point the unit starts from and returns to at the end of the mission. It appears at the top of the Waypoints tab, together with the unit assigned to the mission and its battery level.
For a robot dog, the Home Position is set automatically at the point where the unit stands, with no need to place it manually. Once acquired, it can be removed or updated to the current position of the unit by selecting Recapture Home Position.
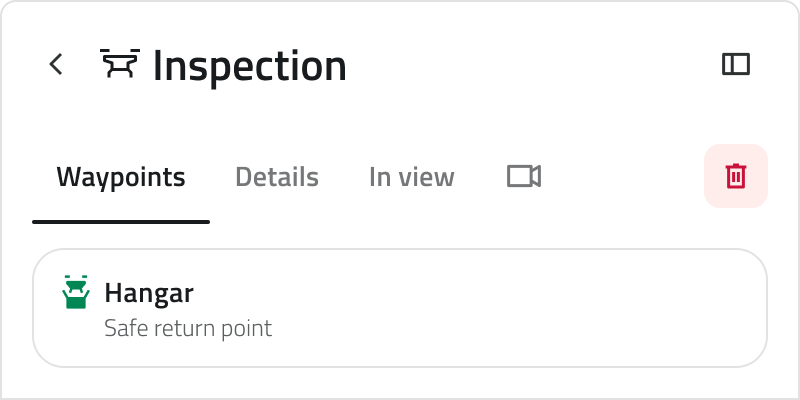
For a drone, the point of return is the Hangar: select that object class and place it on the map, in the same way a waypoint is added.
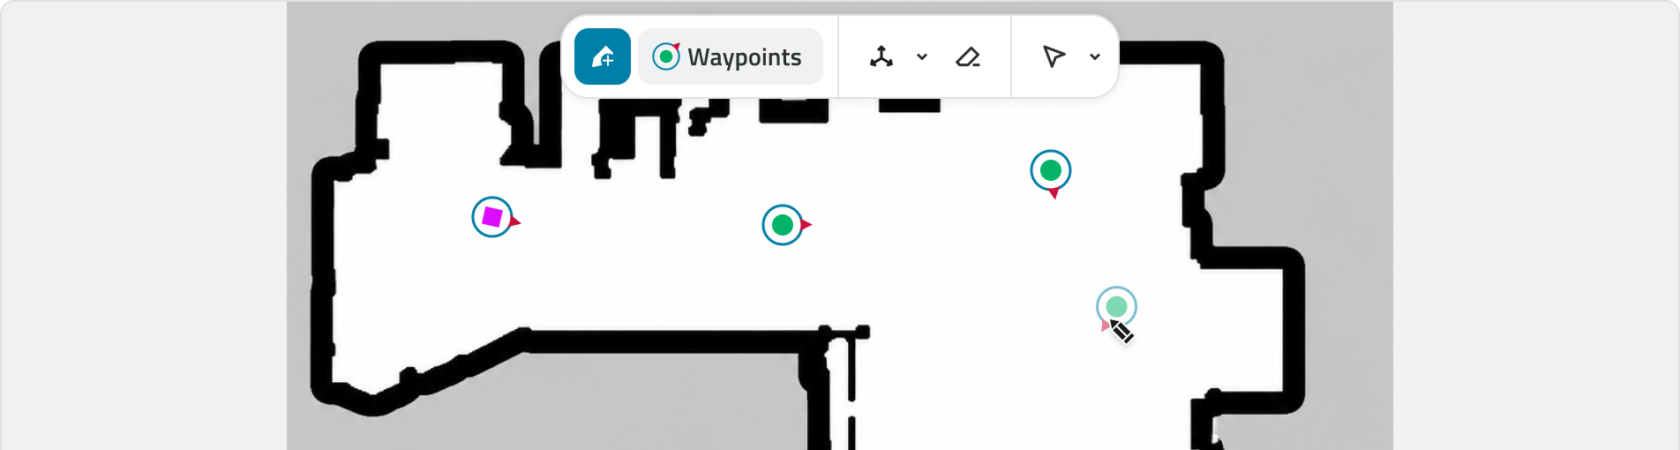
Waypoints
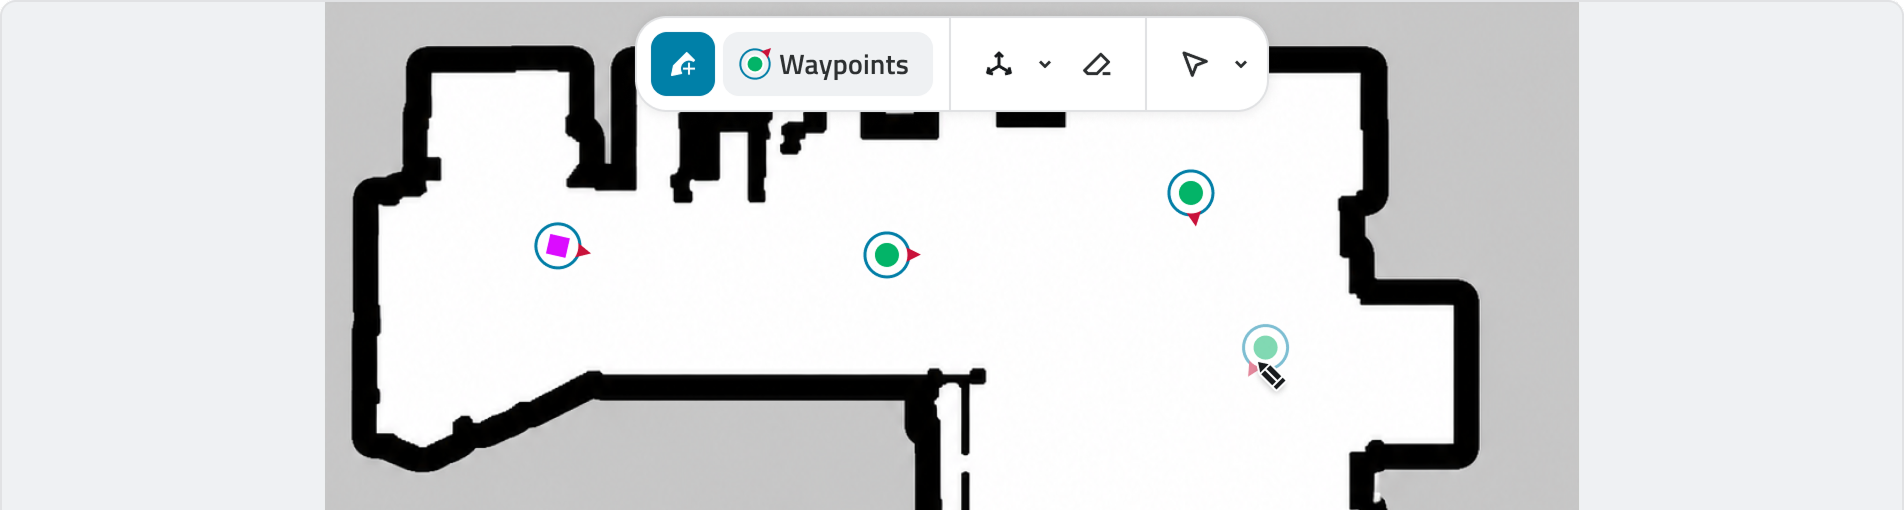
Waypoints are the points the unit travels through, in the order you place them. Draw the first one on the map and the route starts to take shape: each waypoint is numbered and appears both on the map and in the list on the left.
Each waypoint carries an orientation, which is the direction the unit faces when it arrives there.
Actions on a waypoint
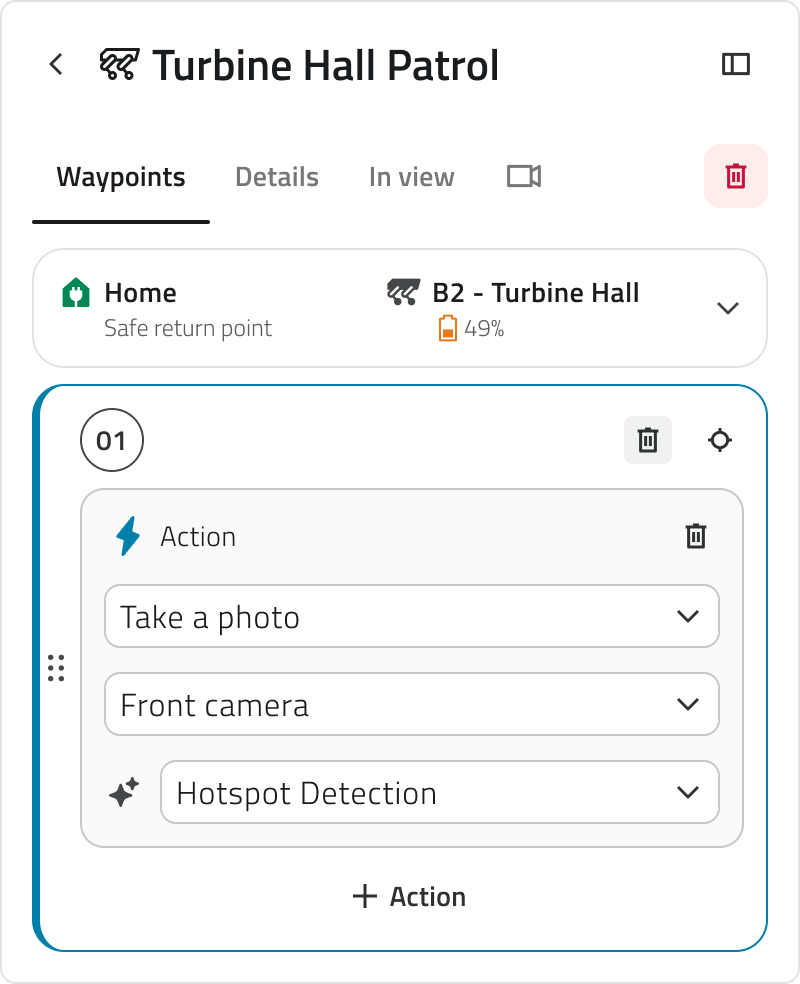
A waypoint can carry one or more actions, performed when the unit reaches it. Open the waypoint and add an action, then choose what it does, which add-on performs it and, where it applies, the algorithm that runs on it.
In the list, each waypoint shows how many actions it carries, so you can read the whole route at a glance.
Danger Zones and Geofencing
Besides the route, you can draw two kinds of area on the map:
| Area | What it does |
| Danger Zones | Marks an area the unit must keep out of. |
| Geofencing | Bounds the area the mission may take place in. |
Both are drawn on the map as areas. They appear among the elements of the In view tab, where you can show or hide them while you work.
Looking up an element on the map
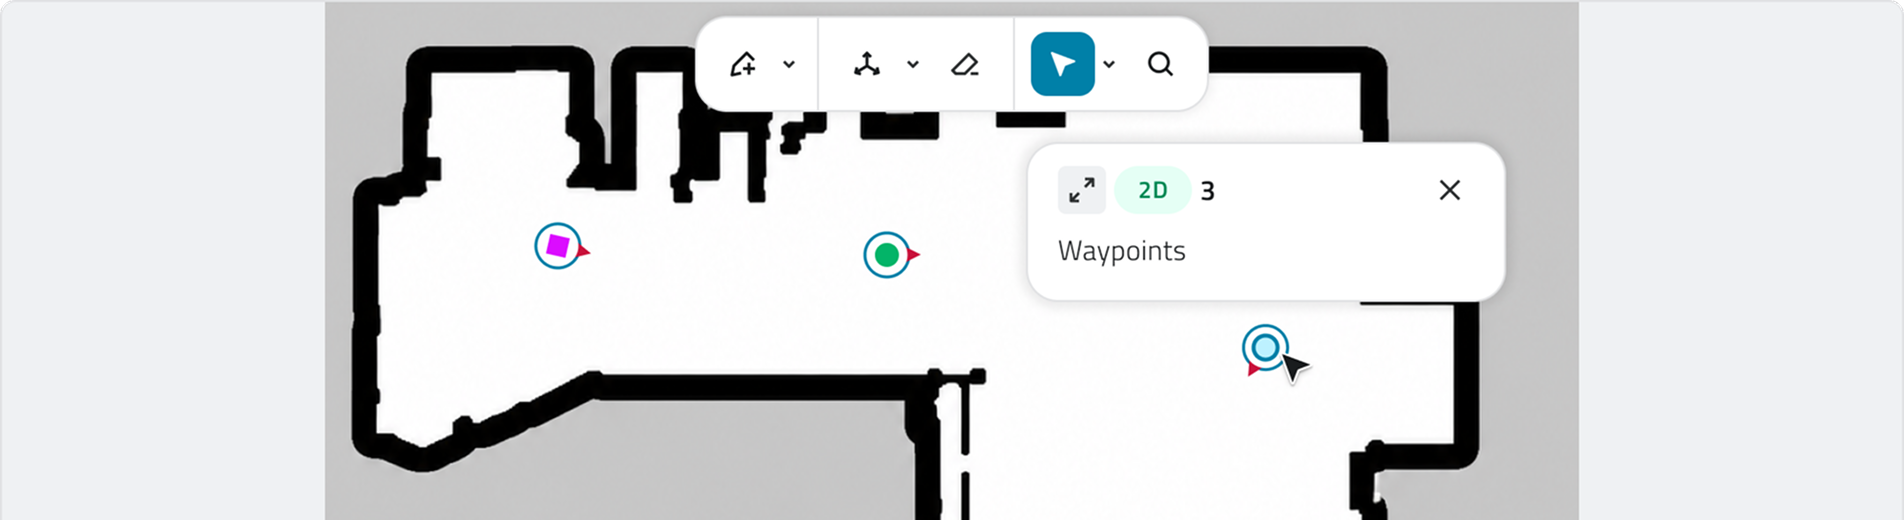
Selecting an element on the map opens a card with its essentials. Expanding the card shows its full attributes: for a waypoint, its identifier, the date of its last change, its orientation and the mission it belongs to.
In view: what you see on the map
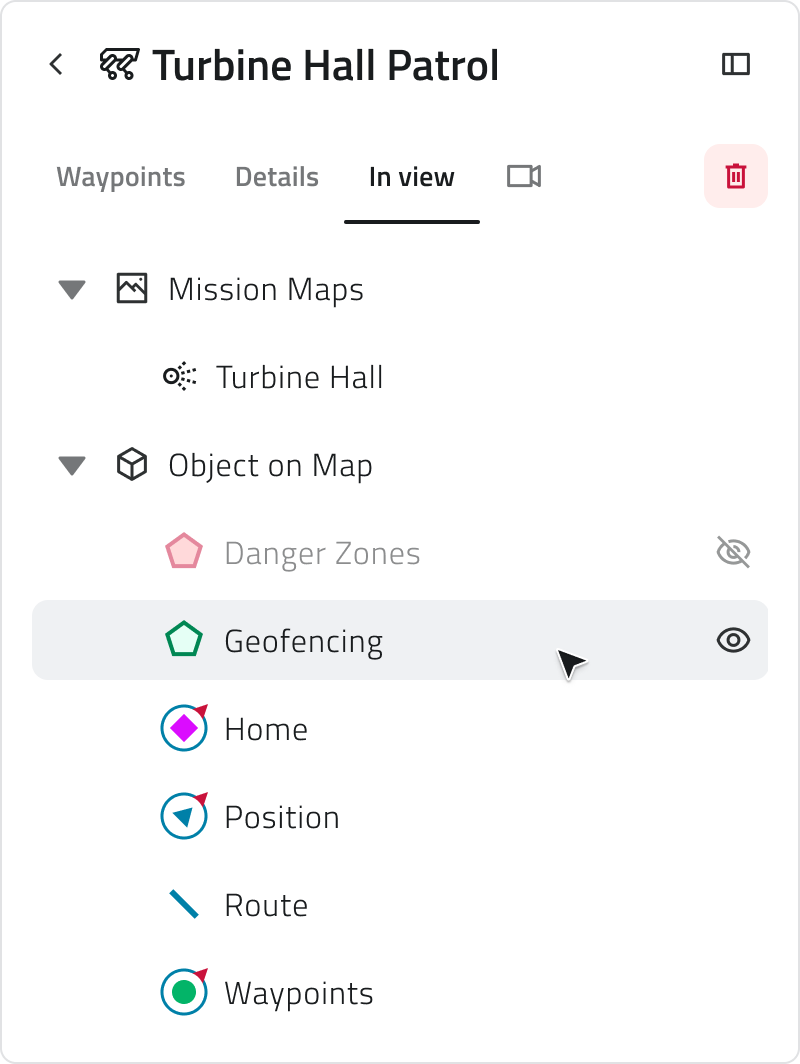
The In view tab governs what the map shows while you work. It holds two groups:
| Group | What it contains |
| Mission Maps | The map the mission runs on. In a multi-floor mission it lists the floors and the stairs between them. |
| Object on Map | The elements of the mission: Danger Zones, Geofencing, Home, Position, Route and Waypoints. |
Show or hide any entry with the eye next to it, and collapse a group with the arrow next to its name when you need more room for the rest.
In a mission with a drone the elements are the Hangar and the Drone Waypoints.
Expanding the map entry reveals Map Opacity: lower it to see what lies beneath the mission map, raise it to bring the map back to the front.
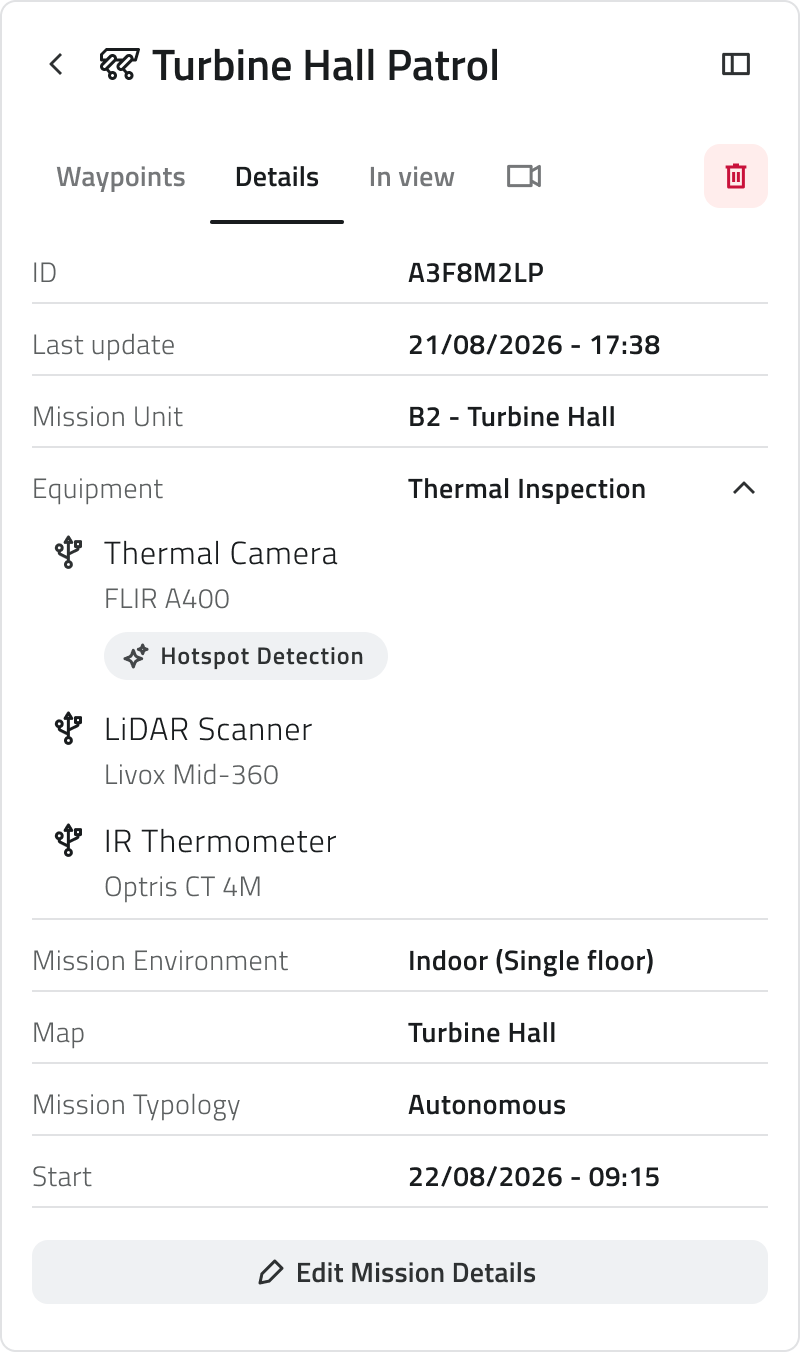
Details of the mission
The Details tab gathers what the mission is made of: its identifier, the date of its last change, the Mission Unit, the Equipment with the add-ons it contains and the algorithm assigned to them, the Mission Environment, the map, the typology and, for a planned mission, when it will start. Any continuous action you turned on is listed here too, under the Equipment.
From this tab, the Edit Mission Details button takes you back to the configuration to change any of these choices.
Saving and deleting
Save as a Draft keeps the mission with everything you have placed so far, and you find it again under Draft in the mission list. You can save whenever there is something new to keep.
Deleting the mission removes it from the project together with the route, the areas and the actions defined on it. A confirmation is asked before it happens.
Deletion is permanent and cannot be undone.
Discovery missions
In a Discovery mission the robot dog explores the environment and builds the map itself, so there is no route to place. The screen shows the Home Position and the map as it is being built, and you move on to the Pre Check from here.
Links
- Run the pre-check and start a mission: the checks before the start.
- Create a mission: the configuration that comes before this screen.
- Find and manage your missions: where drafts and planned missions live.
Italian version
Nella schermata di pianificazione disegni la missione sulla mappa: la Home Position a cui l'unità rientra, i Waypoints che attraversa, le azioni che esegue lungo il percorso ed eventuali aree che ne limitano il movimento.
A questa schermata si arriva in due modi: al termine della configurazione di una nuova missione, oppure aprendo una missione Bozza o Pianificata dall'elenco delle missioni.
Il pannello a sinistra contiene quattro sezioni (Waypoints, Dettagli, In vista e Streaming), e la mappa occupa il resto della schermata. In basso, Salva come bozza conserva il lavoro e Pre Check porta ai controlli che precedono l'avvio.
Il collegamento alla Mission Unit
La schermata di pianificazione richiede la Mission Unit collegata: è l'unità a comunicare la propria posizione e a impostare la Home Position.
Se l'unità non è raggiungibile, verifica che sia accesa e a portata, poi ritenta con Riprova la connessione alla Mission Unit.
Home Position e Pre Check dipendono entrambi dai dati che l'unità comunica, quindi nessuno dei due è possibile prima che il collegamento riesca. La missione resta come l'avevi lasciata e puoi riprenderla più tardi.
La Home Position
La Home Position è il punto da cui l'unità parte e a cui rientra a fine missione. Compare in cima alla sezione Waypoints, insieme all'unità assegnata alla missione e al suo livello di batteria.
Per il robot dog, la Home Position viene impostata automaticamente nel punto in cui si trova l'unità, senza bisogno di posizionarla manualmente. Una volta acquisita, è possibile rimuoverla oppure aggiornarla in base alla posizione corrente dell'unità selezionando Recapture Home Position.
Per il drone, invece, il punto di rientro è l'Hangar: seleziona quella classe di oggetto e posizionala sulla mappa, con la stessa modalità utilizzata per aggiungere un waypoint.
Waypoints
I waypoint sono i punti che l'unità attraversa, nell'ordine in cui li disegni. Il percorso prende forma dal primo waypoint che disegni sulla mappa: ciascuno viene numerato e compare sia sulla mappa sia nell'elenco a sinistra.
Ogni waypoint ha un orientamento, cioè la direzione verso cui l'unità è rivolta quando lo raggiunge.
Azioni su un waypoint
A un waypoint puoi assegnare una o più azioni, che l'unità esegue quando lo raggiunge. Apri il waypoint, aggiungi un'azione e indica in cosa consiste, quale add-on la esegue e, se serve, con quale algoritmo.
Nell'elenco ogni waypoint riporta il numero di azioni che contiene, così vedi subito com'è composto il percorso.
Danger Zones e Geofencing
Oltre al percorso, in mappa puoi disegnare due tipi di area:
| Area | Cosa fa |
| Zone di pericolo | Segnala un'area in cui l'unità non deve entrare. |
| Geofencing | Delimita l'area entro cui la missione può svolgersi. |
Entrambe si disegnano come aree e compaiono tra gli elementi della sezione In vista, dove puoi mostrarle o nasconderle mentre lavori.
Consultare un elemento in mappa
Selezionando un elemento sulla mappa si apre una card con le informazioni essenziali. Espandendola vedi tutti gli attributi: per un waypoint l'identificativo, la data dell'ultima modifica, l'orientamento e la missione a cui appartiene.
In vista: cosa si vede in mappa
Dalla sezione In vista decidi cosa mostrare sulla mappa mentre lavori. Contiene due gruppi:
| Gruppo | Cosa contiene |
| Mappe della missione | La mappa su cui si svolge la missione. In una missione multipiano elenca i piani e le scale che li collegano. |
| Oggetti sulla mappa | Gli elementi della missione: Zone di pericolo, Geofencing, Home, Posizione, Percorso e Waypoints. |
L'occhio accanto a una voce la mostra o la nasconde, mentre la freccia accanto al nome di un gruppo lo comprime quando ti serve più spazio.
In una missione con drone gli elementi sono l'Hangar e i Waypoints del drone.
Espandendo la voce della mappa compare Opacità della mappa: abbassala per vedere cosa c'è sotto la mappa della missione, alzala per riportarla in primo piano.
I dettagli della missione
La sezione Dettagli raccoglie tutte le informazioni della missione: l'identificativo, la data dell'ultima modifica, la Mission Unit, l'Equipment con gli add-on che contiene e l'algoritmo assegnato a ciascuno, l'Ambiente della missione, la mappa, la tipologia e, per una missione pianificata, la data di avvio. Sotto l'Equipment sono elencate anche le azioni continuative attivate.
Da questa sezione, il pulsante Modifica i dettagli della missione riporta alla configurazione, dove puoi modificare ognuna di queste scelte.
Salvare ed eliminare
Salva come bozza conserva la missione con tutto ciò che hai disegnato fino a quel momento, e la ritrovi sotto Bozza nell'elenco delle missioni. Puoi salvare ogni volta che c'è qualcosa di nuovo.
Eliminando la missione, dal progetto vengono rimossi anche il percorso, le aree e le azioni che hai definito. L'operazione richiede una conferma.
L'eliminazione è permanente e non può essere annullata.
Missioni Esplorative
In una missione Esplorativa il robot dog esplora l'ambiente e ne costruisce la mappa, quindi non c'è un percorso da disegnare. La schermata mostra la Home Position e la mappa mentre viene costruita; da qui passi al Pre Check.
Collegamenti
- Eseguire il pre-check e avviare una missione: i controlli che precedono l'avvio.
- Creare una missione: la configurazione che precede questa schermata.
- Trovare e gestire le missioni: dove trovi le bozze e le missioni pianificate.
Last update: 31 July 2026
Run the pre-check and start a mission
English version
The Pre-check is the final step before a mission starts. It verifies that everything required for the mission is in place, tells you what needs to be fixed if something is missing, and allows you to start the mission or confirm its schedule.
Open it with Pre Check, at the bottom of the planning screen.
The pre-check runs with the Mission Unit connected, because part of what it verifies is reported by the unit itself.
What the pre-check verifies
The result is grouped into sections, each with the outcome of its own checks. A mission with a robot dog is checked on Mission Unit, Add-ons, Home and Waypoints; a mission with a drone on Mission Unit, Hangar and Waypoints.
| Section | What it verifies |
| Mission Unit | That the unit assigned to the mission is connected and ready to carry it out. |
| Add-ons | That the add-ons the mission relies on are connected. The outcome tells you whether they all are, or only some. |
| Home | That the Home Position is set, so the unit knows where to return. |
| Hangar | That the position of the hangar has been captured and can be reached, so the drone has a point to return to. |
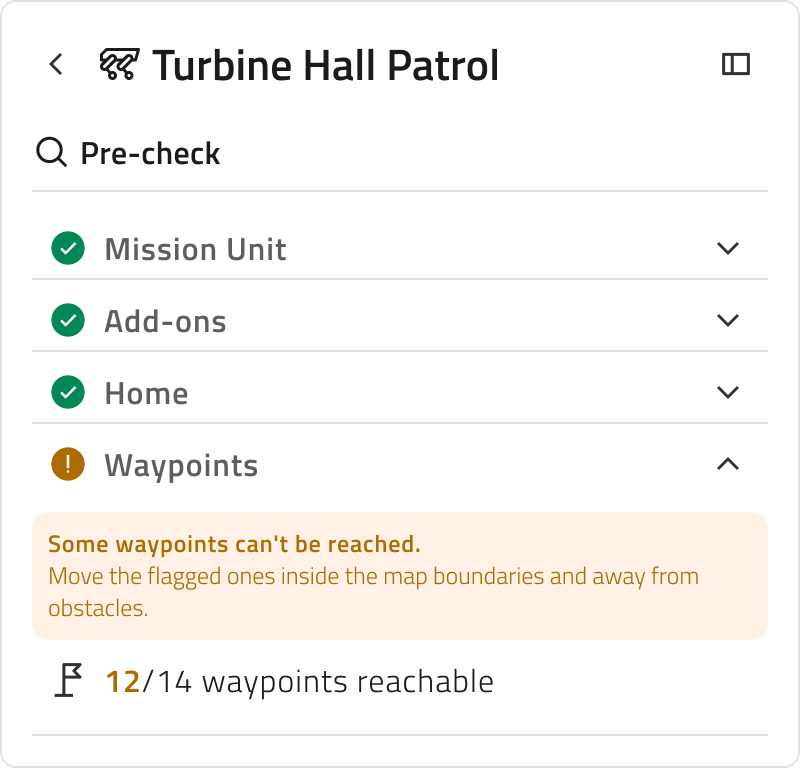
| Waypoints | That the unit can reach the waypoints you placed. The outcome tells you how many are reachable out of the total. |
Each section shows its outcome at a glance and opens to show the detail. Open the ones that need attention to read what is wrong and what to do about it.
What stops the mission and what does not
Not everything the pre-check reports has the same weight:
| Outcome | What it means |
| Passed | The section has nothing to report. |
| Warning | The mission can run, but not as you planned it. A warning on Waypoints, for example, means some of them cannot be reached and will be skipped. Accept the warnings to go ahead, or go back and fix them. |
| Error | The mission cannot run as it is. Go back and resolve what the section reports. |
Before you start
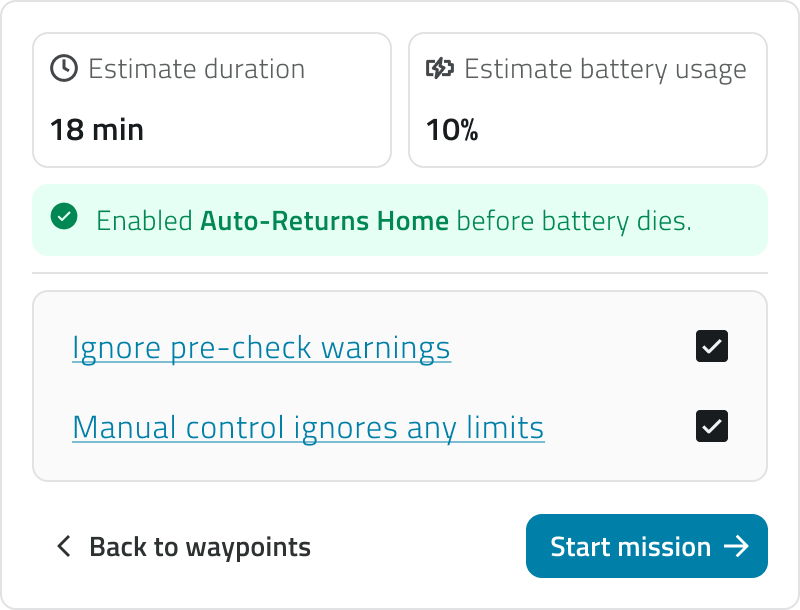
For a mission with a robot dog, when it can go ahead, the pre-check also gives you an Estimate duration and an Estimate battery usage for the run you are about to start, so you can weigh them against the charge the unit has now.
It also confirms that Auto-Returns Home is enabled: the emergency safeguard that brings the unit back, on its own, if the charge is not enough to complete the mission.
Depending on what the pre-check reports and on how the mission is set up, one or more statements to acknowledge appear above Start mission. The button remains disabled until you have read and checked each one.
Starting the mission
What the last step does depends on the Launch Mode chosen during the configuration:
| Launch Mode | What happens |
| Manual | The mission starts straight away and you follow it on the live view. |
| Planned | The schedule is confirmed and the mission moves to Planned, ready to run at the date and time you set. |
To change something before starting, the Back to waypoints button returns to the planning screen with everything as you left it.
Leaving a mission set to Planned without confirming its schedule keeps it as a Draft: it will not run until you come back and confirm it.
Links
- Robot Dog – Tracking a live mission: what you see once the mission is running.
- Draw the mission on the map: where you go back to fix what the pre-check reports.
- Schedule a mission: setting the date and time of a planned mission.
Italian version
Il Pre-check è l'ultimo passaggio prima che una missione parta. Verifica che sia presente tutto ciò che la missione richiede, indica cosa correggere se qualcosa manca, e consente di avviare la missione o di confermarne la pianificazione.
Si apre con Pre Check, in fondo alla schermata di pianificazione.
Il pre-check richiede la Mission Unit collegata, perché parte dei controlli si basa sui dati che l'unità comunica.
Cosa verifica il pre-check
L'esito è diviso in sezioni, ciascuna con il risultato dei propri controlli. Una missione con robot dog viene verificata su Mission Unit, Add-ons, Casa e Waypoints; una missione con drone su Mission Unit, Hangar e Waypoints.
| Sezione | Cosa verifica |
| Mission Unit | Che l'unità assegnata alla missione sia collegata e pronta a eseguirla. |
| Add-ons | Che gli add-on necessari alla missione siano collegati. L'esito indica se lo sono tutti oppure solo alcuni. |
| Home | Che la Home Position sia impostata, così l'unità sa dove rientrare. |
| Hangar | Che la posizione dell'hangar sia stata acquisita e sia raggiungibile, così il drone ha un punto in cui rientrare. |
| Waypoints | Che l'unità possa raggiungere i waypoint che hai disegnato. L'esito indica quanti sono raggiungibili sul totale. |
Ogni sezione mostra il proprio esito e può essere aperta per vederne il dettaglio. Apri quelle che richiedono attenzione per capire cosa non va e come intervenire.
Cosa blocca la missione e cosa no
Non tutto ciò che il pre-check segnala ha lo stesso peso:
| Esito | Cosa significa |
| Superato | La sezione non ha nulla da segnalare. |
| Avviso | La missione può partire, ma non come l'avevi pianificata. Un warning sui Waypoints, per esempio, indica che alcuni non sono raggiungibili e verranno saltati. Accetta i warning per procedere, oppure torna indietro e correggili. |
| Errore | La missione non può partire in queste condizioni: torna indietro e risolvi quanto segnalato dalla sezione. |
Prima di avviare
Per una missione con un robot dog, quando è possibile procedere, il pre-check fornisce anche una Durata stimata e un Consumo stimato della batteria per la missione che si sta per avviare, così da poterle confrontare con il livello di carica attuale dell’unità.
Conferma inoltre che Auto-Returns Home è abilitato: la funzione di sicurezza di emergenza che riporta automaticamente l’unità al punto di partenza se la carica non è sufficiente per completare la missione.
In base all’esito del pre-check e alla configurazione della missione, sopra il pulsante Avvia missione vengono visualizzate una o più dichiarazioni da accettare: il pulsante rimane disabilitato finché non sono state lette e selezionate tutte.
Avviare la missione
L'ultimo passaggio dipende dalla Modalità di avvio scelta durante la configurazione:
| Modalità di avvio | Cosa succede |
| Manuale | La missione parte subito e la segui dalla vista in diretta. |
| Pianificata | La pianificazione viene confermata e la missione passa tra le Pianificate, pronta a partire alla data e all'ora impostate. |
Se vuoi cambiare qualcosa prima di avviare, il pulsante Torna ai waypoint riporta alla schermata di pianificazione, dove ritrovi tutto come l'avevi lasciato.
Se esci da una missione impostata su Pianificata senza confermare la pianificazione, questa resta una Bozza e non verrà eseguita finché non la confermi.
Collegamenti
- Robot Dog – Seguire una missione in diretta: cosa vedi una volta che la missione è partita.
- Disegnare la missione in mappa: dove tornare per correggere quanto il pre-check segnala.
- Pianificare una missione: impostare data e ora di una missione pianificata.
Last update: 31 July 2026
Schedule a mission
English version
A mission set to run Planned starts on its own at the date and time set for it, without anyone launching it. The Scheduling options, which appear as soon as you select Planned in the Launch Mode step of the configuration, are where you decide when that happens, whether it happens more than once, and where you check that it does not overlap the missions already booked for the same Mission Unit.
You reach them both while you configure a new mission and when you change one.
When the mission starts
The Date and time field is filled in automatically with tomorrow's date at the current time, and you can change it to set the moment the mission starts.
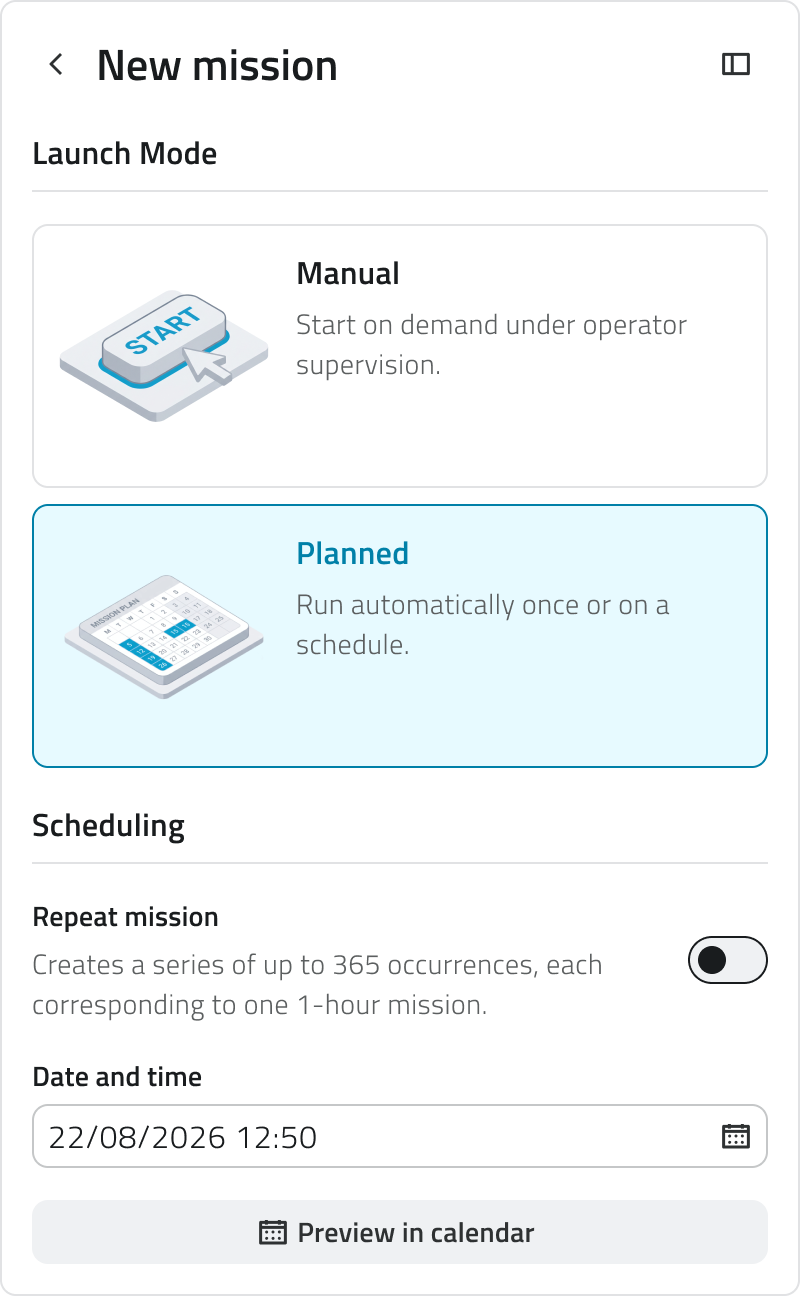
Schedule the mission at least five minutes ahead: the platform needs that margin to prepare the run and reach the Mission Unit.
Repeating the mission
Turn on Repeat mission to run the same mission again over a period of time instead of once. What you build is a series, and every run inside it is an occurrence.
Choose the rhythm of the series:
| Repeats | What you get |
| Daily | One occurrence every day of the period. |
| Custom | One occurrence only on the days of the week you pick. |
Then set the period the series covers with Start date and End date, and the Time every occurrence starts at.
When you create a new series, the two dates come already filled in to cover three weeks. That is only a starting point: move either date to make the series shorter or longer, for as long as you need it to run.
As you change these choices, the platform tells you how many occurrences the series will create, so you know how many there will be before you confirm.
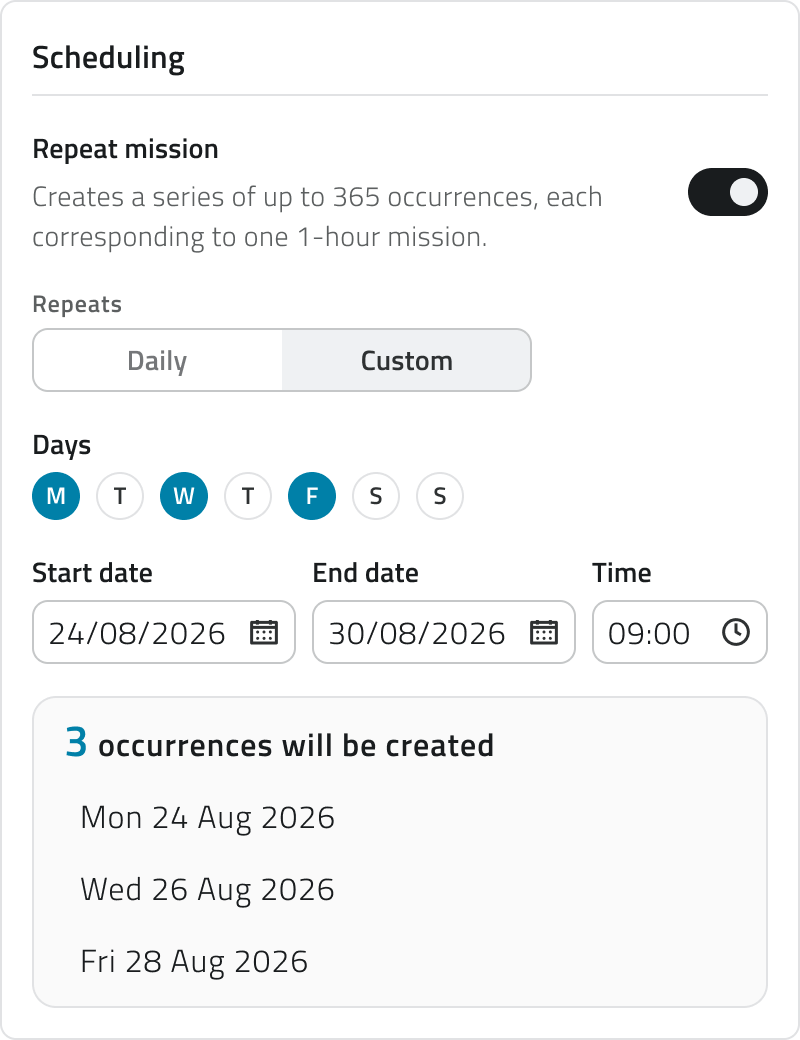
A series holds up to 365 occurrences and cannot stretch beyond a year. Plan a longer campaign as more than one series.
Checking the plan before confirming
The Preview in calendar button opens the Missions calendar beside the scheduling options. It puts the mission you are planning next to what is already booked for the same Mission Unit, so you see the plan in context instead of as a list of dates. Close calendar closes it again.
The calendar tells three things apart: Other Missions, already booked; Schedule preview, the occurrences you are about to create; and Preview in conflict, the ones that clash with something already there. Switch between Day, Week and Month to see how the series falls over the period, and use Today to come back to the current date.
When a mission clashes with another
A conflict means the same Mission Unit is already committed to another mission at that moment, and one unit can only carry out one mission at a time. The preview tells you how many occurrences are in conflict and on which dates.
You can confirm the schedule anyway. The mission is created with its conflicts in plain sight, and you sort them out later by moving one of the two missions or by removing the occurrences you no longer need.
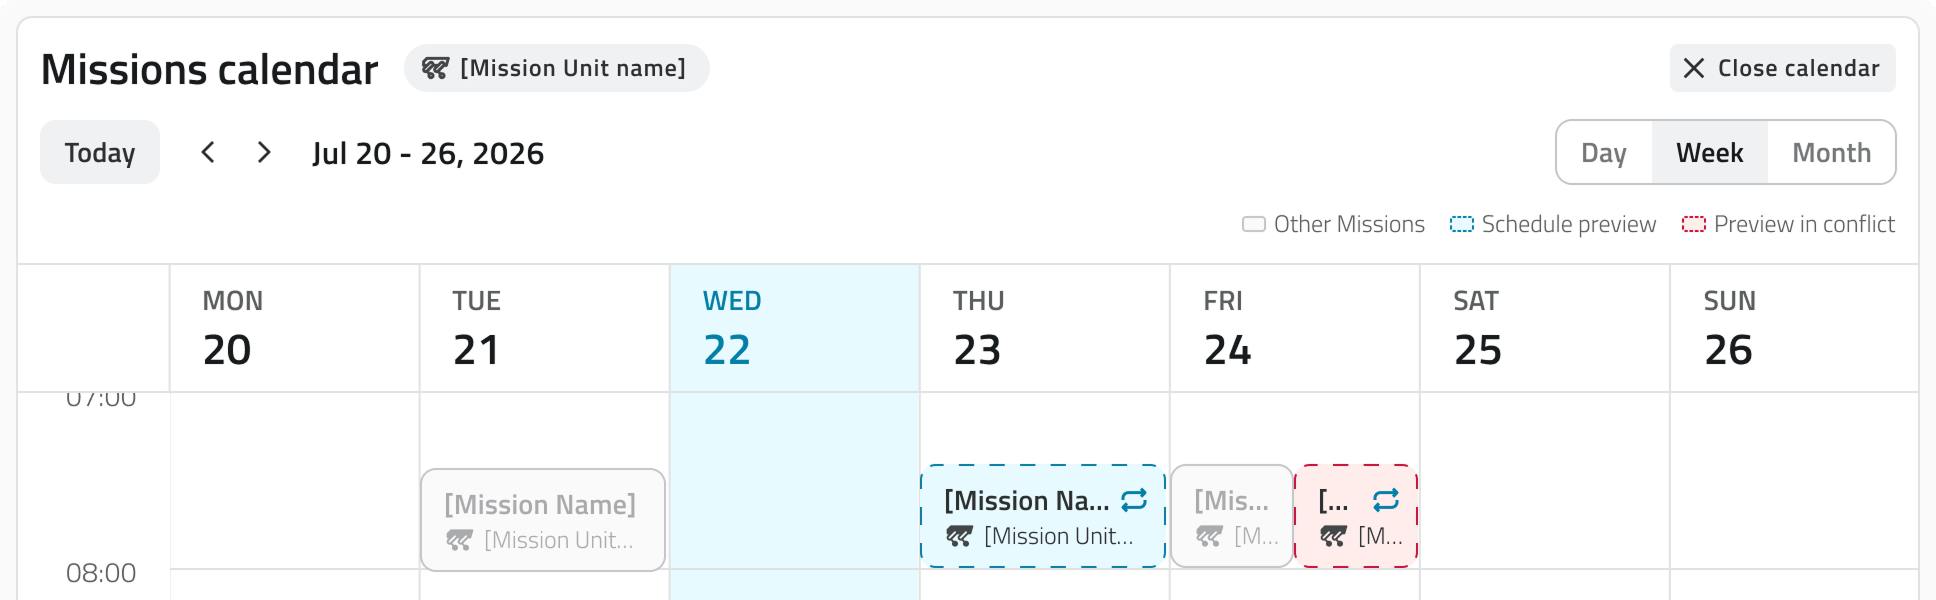
An occurrence left in conflict is not carried out. The mission stays in the calendar, marked as conflicting, until you free the Mission Unit for that moment.
Confirming the schedule
The date you choose is not booked yet. The mission is saved as a Draft, but you still have to draw it on the map and confirm it in the Pre Check: that is the moment the mission takes its place in the calendar.
Once confirmed, the mission moves in among the Planned ones, where you find the date of its next run and how many runs it still has ahead.
Following a series once it is planned
In the mission list, a recurring mission carries Next with the date and time of the occurrence that comes first, and a badge with how many occurrences it still holds.
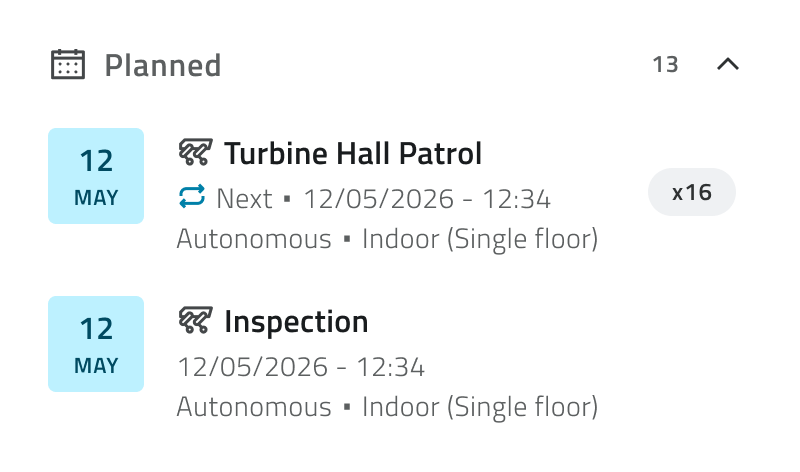
The series shows the mission as it was planned, with a Schedule section that gathers the period the series covers, the time of each run and the days of the week it falls on, followed by the list of the occurrences still to come. That list gets shorter as the series is carried out.
The occurrence, which you also reach by selecting one of the dates in that list, shows the same mission with the schedule reduced to the day and the time of that single run.
Links
- Run the pre-check and start a mission: where the schedule is confirmed.
- Missions calendar: seeing and managing what is planned, conflicts included.
Italian version
Una missione impostata su Pianificata parte da sola alla data e all'ora prestabilite, senza che nessuno la avvii. Le opzioni di Pianificazione compaiono appena selezioni Pianificata nello step Modalità di avvio della configurazione: qui stabilisci quando la missione parte, se deve ripetersi e controlli che non si sovrapponga alle missioni già prenotate per la stessa Mission Unit.
Le trovi sia quando configuri una nuova missione, sia quando ne modifichi una.
Quando parte la missione
Il campo Data e ora è già compilato con la data del giorno successivo e l'ora corrente. Modificalo per fissare il momento in cui la missione partirà.
Pianifica la missione con almeno cinque minuti di anticipo: alla piattaforma serve quel margine per preparare l'esecuzione e raggiungere la Mission Unit.
Ripetere la missione
Attiva Ripeti missione se la stessa missione deve ripetersi in un certo periodo invece di essere eseguita una volta sola. L'insieme delle ripetizioni è una serie, e ogni esecuzione al suo interno è un'occorrenza.
Scegli il ritmo della serie:
| Ripetizione | Cosa ottieni |
| Giornaliera | Un'occorrenza ogni giorno del periodo. |
| Personalizzata | Un'occorrenza solo nei giorni della settimana che scegli. |
Con Data di inizio e Data di fine definisci il periodo coperto dalla serie, con Ora l'orario di avvio di ogni occorrenza.
Alla creazione di una nuova serie le due date sono già impostate su tre settimane: è solo un punto di partenza, spostale per accorciare o allungare la serie quanto ti serve.
A ogni modifica, la piattaforma aggiorna il numero di occorrenze che verranno create dalla serie: sai quante saranno prima di confermare.
Una serie può contenere fino a 365 occorrenze e non può estendersi oltre un anno. Per un periodo più lungo, crea più serie.
Verificare il piano prima di confermare
Il pulsante Anteprima nel calendario apre il Calendario delle missioni accanto alle opzioni di pianificazione. La missione che stai pianificando compare insieme a quelle già prenotate per la stessa Mission Unit, così la vedi nel suo contesto e non come un semplice elenco di date. Per richiuderlo, usa Chiudi calendario.
Il calendario distingue tre cose: le missioni già prenotate (Altre missioni), le occorrenze che stai per creare (Anteprima della pianificazione) e quelle che si sovrappongono a una missione esistente (Anteprima in conflitto). Con Giorno, Settimana e Mese cambi vista per capire come cade la serie nel periodo, mentre Oggi riporta alla data corrente.
Quando una missione si sovrappone a un'altra
Si crea un conflitto quando la Mission Unit è già impegnata in un'altra missione allo stesso orario, perché un'unità può eseguire una sola missione per volta. L'anteprima ti dice quante occorrenze sono in conflitto e in quali date.
Puoi confermare la pianificazione anche così: la missione viene creata con le occorrenze in conflitto evidenziate e le risolvi in un secondo momento, spostando una delle due missioni oppure eliminando le occorrenze che non ti servono.
Un'occorrenza lasciata in conflitto non viene eseguita. La missione resta nel calendario, segnalata come in conflitto, finché non liberi la Mission Unit per quel momento.
Confermare la pianificazione
Scegliere la data non basta a prenotarla: la missione viene salvata come Bozza e prende posto nel calendario solo quando l'hai disegnata sulla mappa e confermata nel Pre Check.
Da quel momento la missione compare tra le Pianificate, con la data della prossima esecuzione e il numero di esecuzioni ancora da svolgere.
Seguire una serie dopo la pianificazione
Nell'elenco delle missioni, una missione ricorrente mostra la voce Prossima, con la data e l'ora dell'occorrenza più imminente, e un badge che indica quante occorrenze restano.
La serie mostra la missione come l'hai pianificata: sotto Pianificazione trovi il periodo coperto, l'orario di ogni esecuzione e i giorni della settimana in cui è prevista, seguiti dall'elenco delle occorrenze ancora da svolgere, che si accorcia man mano che la serie procede.
Selezionando una data dell'elenco apri la singola occorrenza: è la stessa missione, ma con la pianificazione limitata al giorno e all'ora di quell'esecuzione.
Collegamenti
- Eseguire il pre-check e avviare una missione: dove la pianificazione viene confermata.
- Calendario delle missioni: vedere e gestire ciò che è pianificato, conflitti compresi.
Last update: 6 August 2026
Edit a mission's configuration
English version
Everything you decided while configuring a mission can be decided again: the Mission Unit that carries it out, the Equipment it uses, the name and the typology, the environment with its map, and the way the mission starts.
The steps depend on one another, so a change can take away a choice you had already made or part of what you had drawn. The table further down says what each one affects.
Reopening the configuration
Open the Details tab of the planning screen and select Edit Mission Details. The configuration opens again at the first step.
Reach the step you want with Next and Back, or select its number in the row at the bottom of the panel.
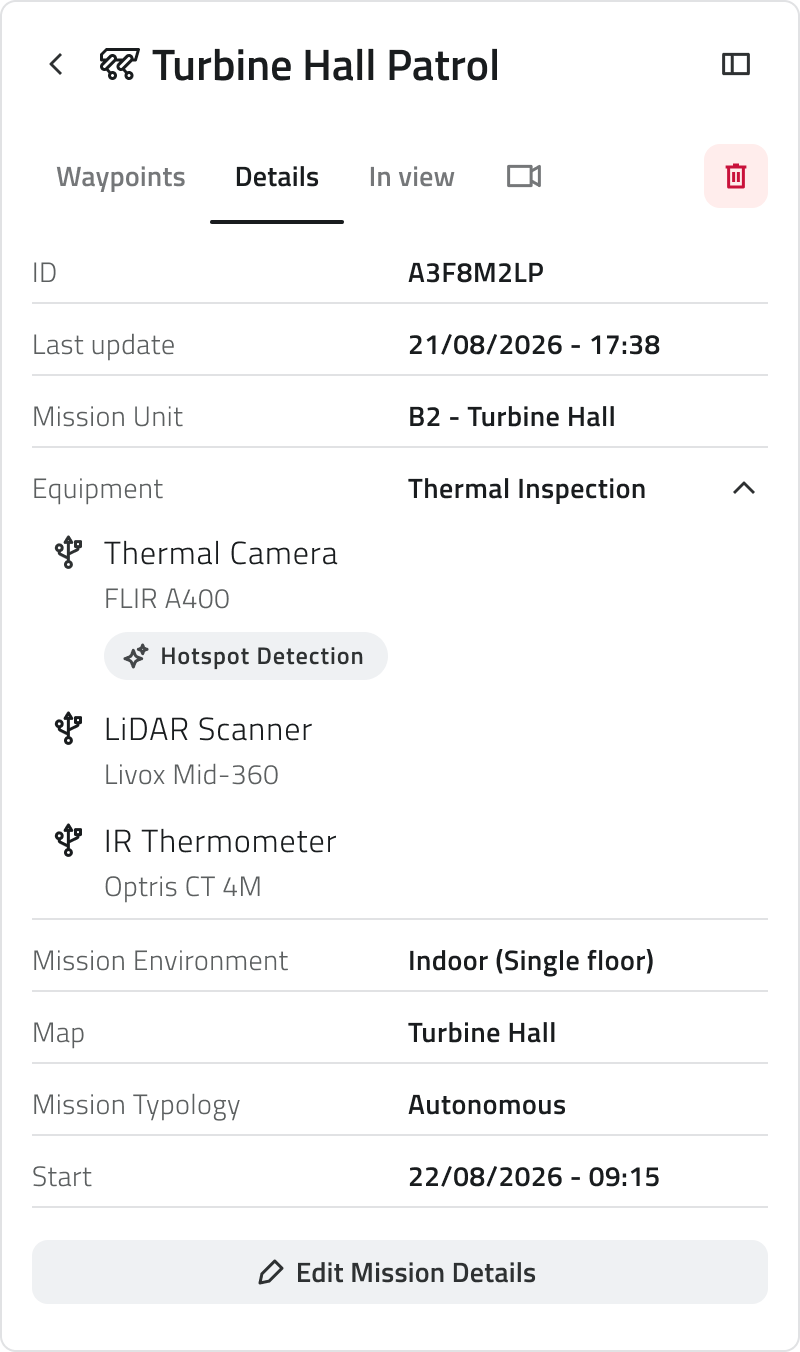
After a change, the steps that come after it have to be confirmed one by one with Next, even when the change leaves them exactly as they were.
What each change affects
| What you change | What it affects |
| The Mission Unit | If the new unit does not support the Equipment you had chosen, you will need to select another one among those it supports. If you select a unit of a different type, the configuration adapts to what that type can do. |
| The Equipment | The waypoint actions performed by an add-on the new Equipment does not carry. |
| The typology | Switching to Discovery leaves behind the map and everything you had drawn on it. Switching to Autonomous means choosing a map and drawing the mission. |
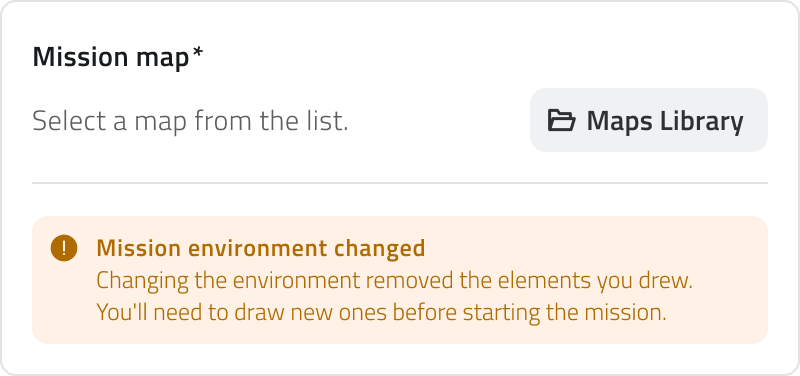
| The Mission Environment | The map is emptied, and with it all the elements you had drawn. |
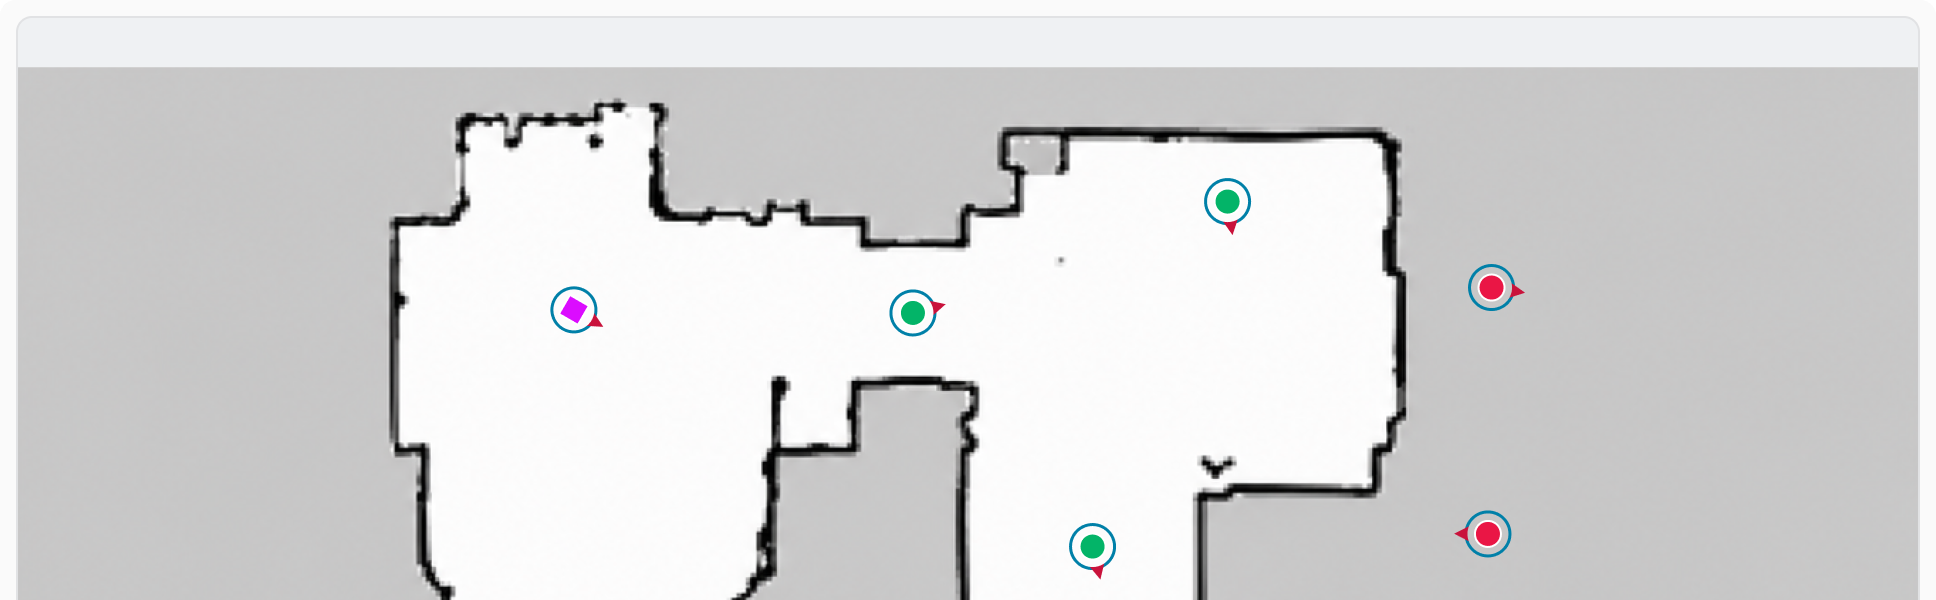
| The map | Nothing is removed, but the positions of what you drew need checking on the new map. |
Waypoint actions that need attention
Every action assigned to a waypoint is performed by one of the add-ons of the Equipment. If you have changed the Equipment and the new one does not carry the add-on an action needs, that action is emptied and marked in red, and needs to be filled in again.
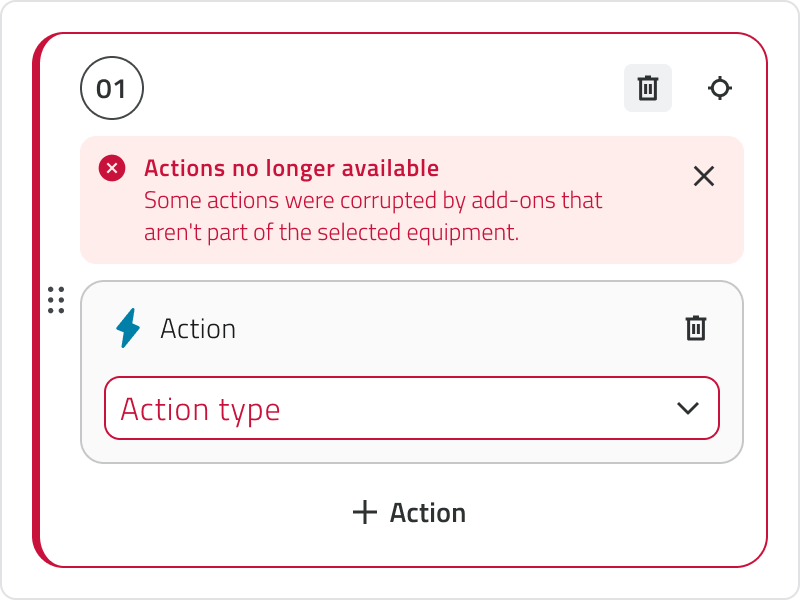
Open the waypoints that are marked and either assign an action the new Equipment can perform, or delete the empty one. The waypoints whose actions the new Equipment still covers keep them as they were.
Switching to Discovery
A Discovery mission builds its own map as it goes, so it needs no map to be selected and nothing to be drawn beforehand. Choosing it in place of Autonomous therefore leaves behind the map and everything on it: Home Position, waypoints, Danger Zones and Geofencing.
What you had drawn is not kept anywhere. Going back to Autonomous means selecting a map and drawing the mission again.
Changing the environment or the map
The environment decides which maps a mission can run on, so changing it empties the map and removes what you had drawn on the previous one. Select a new map from the Maps Library, as you did when you first configured the mission, then draw the mission again.
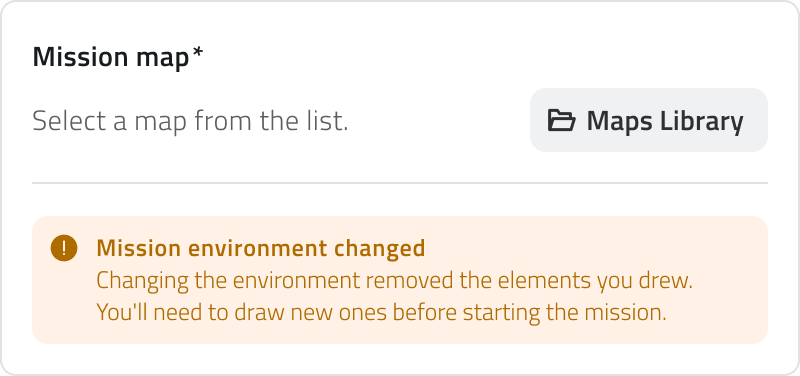
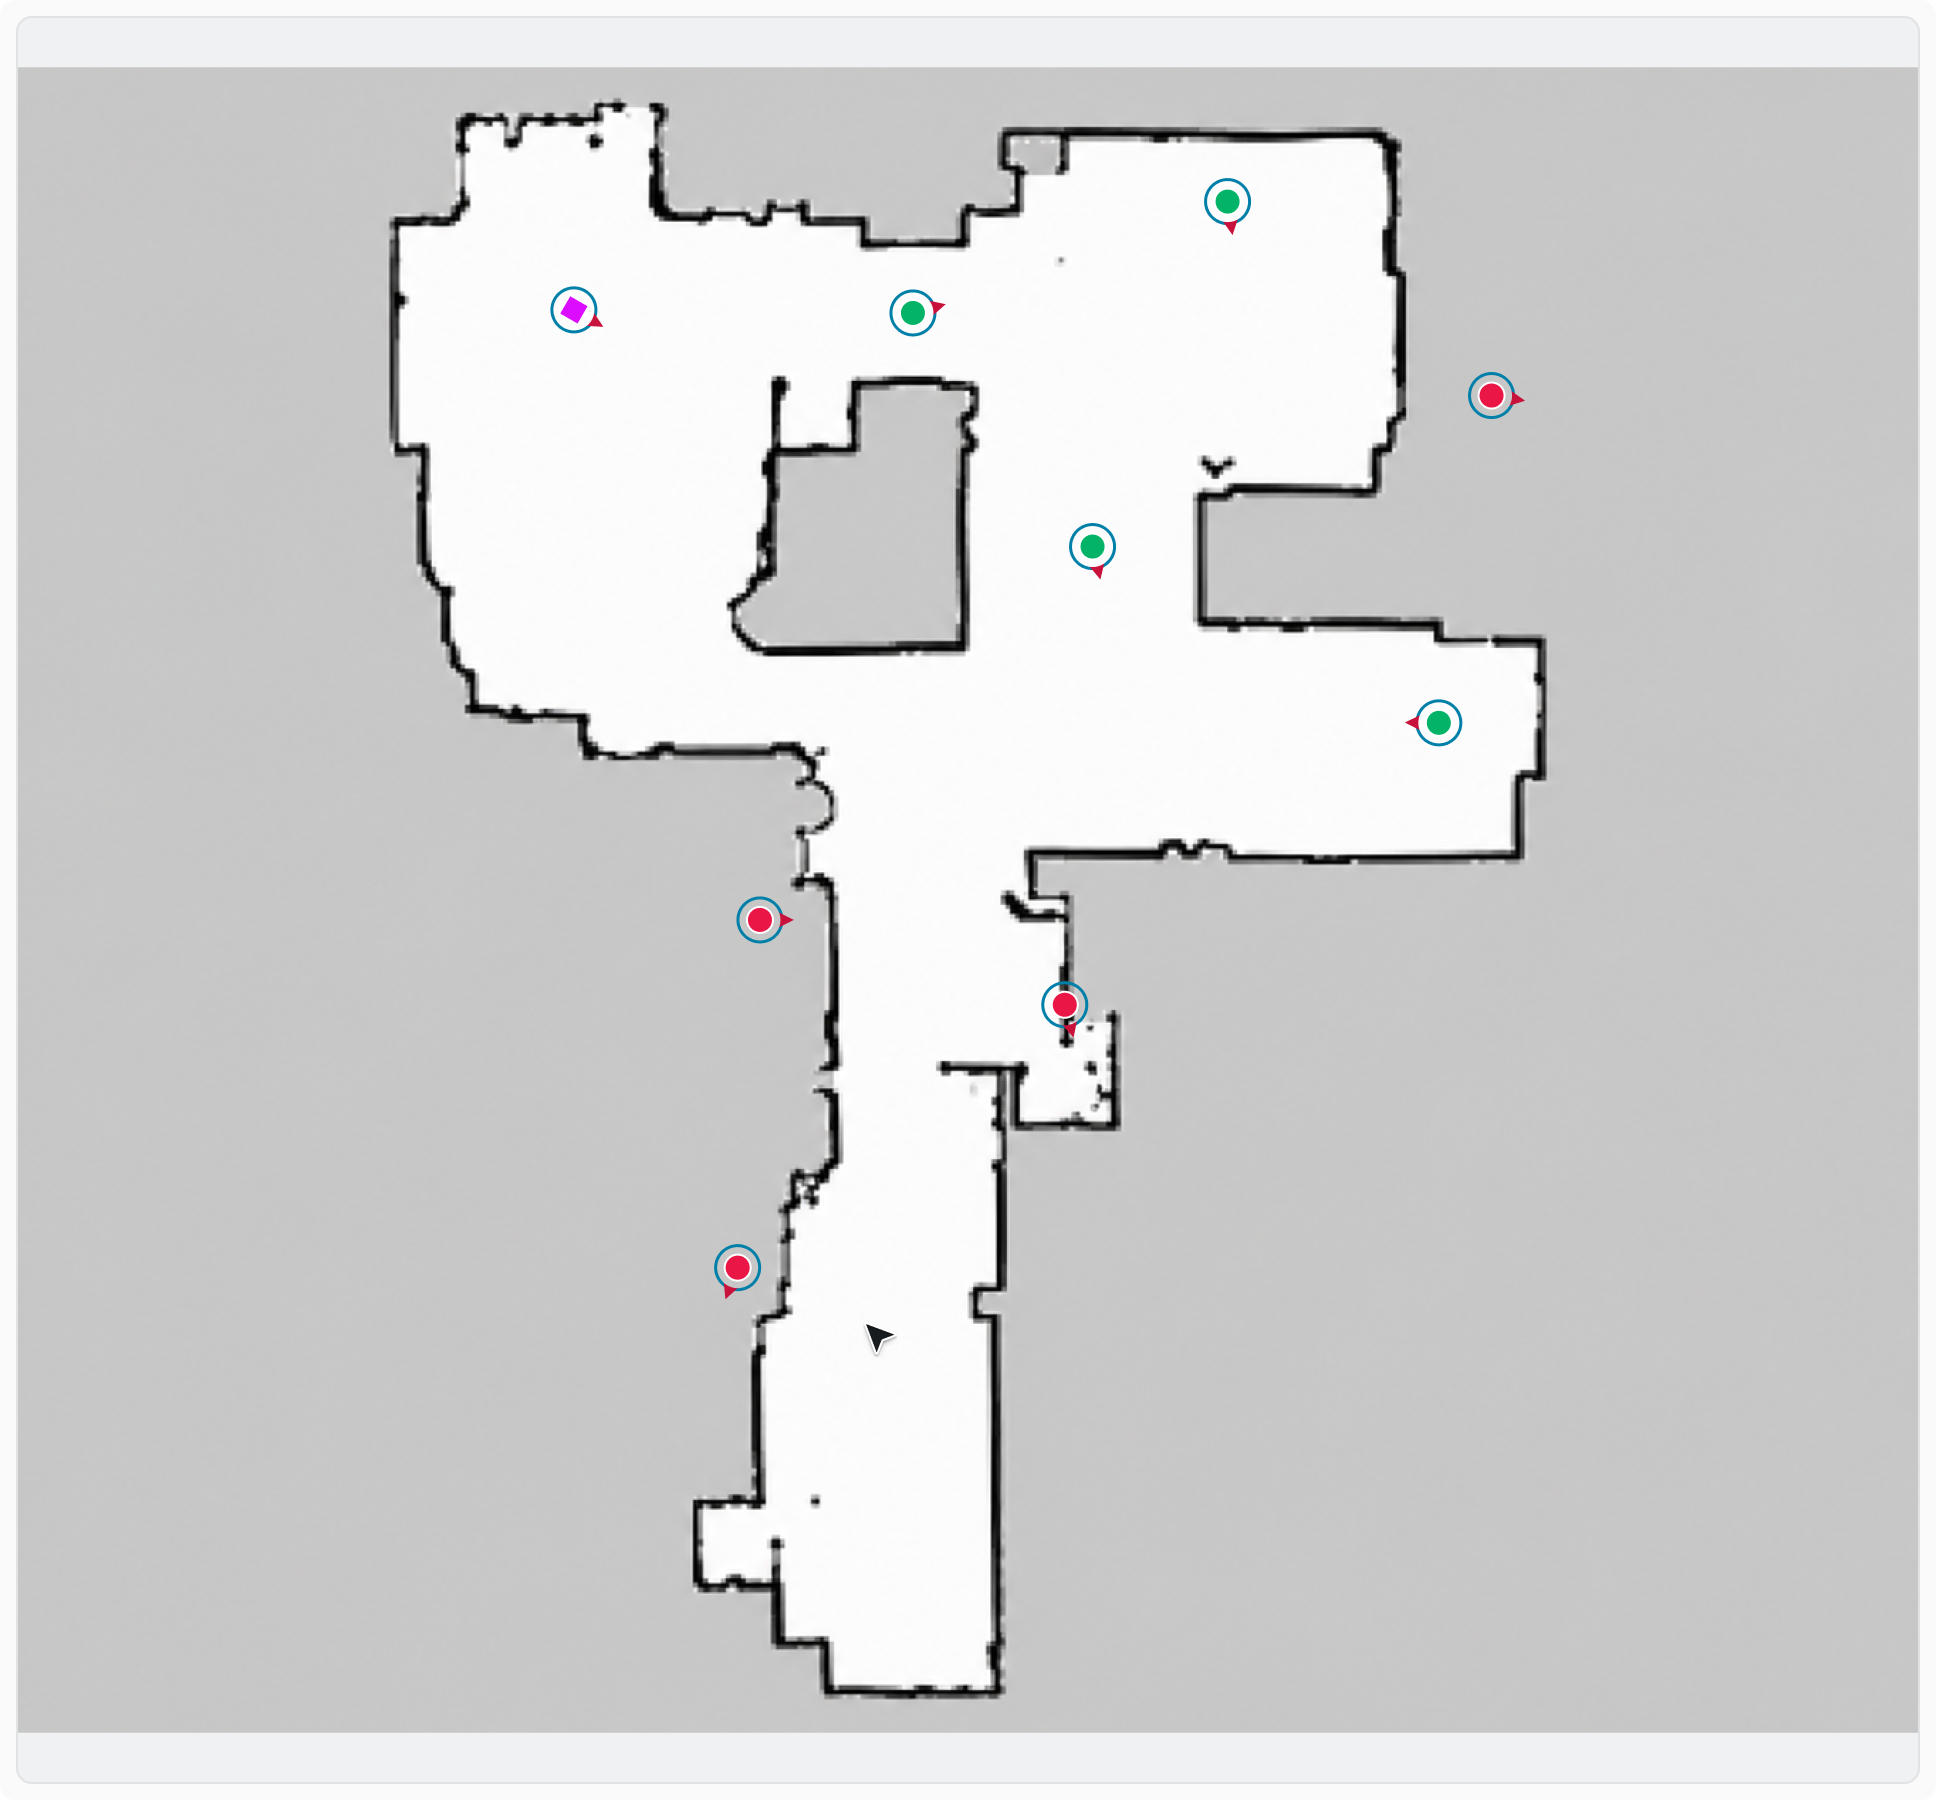
Changing only the map costs you less: Home Position, waypoints, Danger Zones and Geofencing are all kept, at the coordinates they had. Since the new map has its own layout, go through them on the map and check that each one still falls where you want it before you start the mission.
Links
- Draw the mission on the map: where you reopen the configuration from, and where you come back to.
- Create a mission: each step and each choice described in full.
- Run the pre-check and start a mission: the checks that follow what you have changed.
Italian version
Ogni scelta fatta in fase di configurazione può essere rivista: la Mission Unit che esegue la missione, l'Equipment che utilizza, il nome e la tipologia, l'ambiente con la sua mappa e il modo in cui la missione parte.
Gli step sono legati tra loro: una modifica può far decadere una scelta già fatta o una parte del disegno. Nella tabella più sotto trovi su cosa incide ciascuna.
Riaprire la configurazione
Apri la sezione Dettagli della schermata di pianificazione e seleziona Modifica i dettagli della missione: la configurazione si riapre dal primo step.
Per spostarti tra gli step usa Avanti e Indietro, oppure vai diretto a quello che ti serve selezionandone il numero nella riga in basso nel pannello.
Dopo una modifica, gli step successivi vanno riconfermati uno per uno con Avanti, anche quando restano esattamente come erano.
Su cosa incide ogni modifica
| Cosa modifichi | Su cosa incide |
| La Mission Unit | Se la nuova unità non supporta l'Equipment scelto in precedenza, dovrai selezionarne un altro tra quelli supportati. Se scegli un'unità di tipo diverso, la configurazione si adatta alle possibilità di quel tipo. |
| L'Equipment | Le azioni dei waypoint che richiedono un add-on non presente nel nuovo Equipment. |
| La tipologia | Passando a Esplorativa si perdono la mappa e tutti gli elementi disegnati. Passando ad Autonoma dovrai scegliere una mappa e disegnare la missione. |
| L'Ambiente della missione | La mappa si svuota, insieme a tutti gli elementi disegnati. |
| La mappa | Nulla viene rimosso, ma le posizioni degli elementi vanno verificate sulla nuova mappa. |
Azioni dei waypoint che richiedono attenzione
Ogni azione assegnata a un waypoint viene eseguita da uno degli add-on dell'Equipment. Se hai modificato l'Equipment e quello nuovo non dispone dell'add-on richiesto da un'azione, l'azione si svuota, viene segnalata in rosso e va compilata di nuovo.
Apri i waypoint segnalati e assegna un'azione che il nuovo Equipment è in grado di eseguire, oppure elimina quella rimasta vuota. Gli altri waypoint mantengono le azioni che avevano.
Passare a Esplorativa
Una missione Esplorativa costruisce la propria mappa mentre procede: non richiede quindi né una mappa da selezionare né un disegno preparato in anticipo. Scegliendola al posto di Autonoma si perdono la mappa e tutti gli elementi che conteneva, cioè Home Position, waypoint, Zone di pericolo e Geofencing.
Il disegno non viene conservato in alcun modo. Per tornare ad Autonoma dovrai quindi selezionare una mappa e disegnare di nuovo la missione.
Cambiare l'ambiente o la mappa
L'ambiente determina su quali mappe la missione può svolgersi: cambiandolo, la mappa si svuota e con essa si perde tutto quello che avevi disegnato. Scegli una nuova mappa dalla Libreria mappe, come alla prima configurazione, e disegna di nuovo la missione.
Se invece cambi soltanto la mappa non perdi nulla: Home Position, waypoint, Zone di pericolo e Geofencing restano alle coordinate che avevano. La nuova mappa ha però una conformazione diversa, quindi controllali prima di avviare la missione, per assicurarti che cadano ancora dove ti servono.
Collegamenti
- Disegnare la missione in mappa: da dove riapri la configurazione, e dove torni.
- Creare una missione: ogni step e ogni scelta descritti per esteso.
- Eseguire il pre-check e avviare una missione: i controlli che seguono ciò che hai modificato.
Last update: 6 August 2026
Missions calendar
English version
Missions calendar puts what is planned on a timeline, so you can see when a Mission Unit is busy, which missions are about to run and which ones are waiting for a conflict to be resolved.
The same calendar appears in two places, and what changes is how much of the organisation it covers:
| Where you open it | What it covers |
| Inside a project, from the calendar icon in the side bar | The missions of that project. This is where you delete a mission or one of its occurrences. |
| In the Backoffice, from the calendar icon in the side bar | The missions of the organisation and of the selected group, across all of its projects. |
The five views
Each view answers a different question, and they all show the same missions:
| View | What it shows |
| Series | The recurring missions listed one by one, instead of a grid of days. |
| Day | One day on an hourly grid, with each mission at its own time and a line marking the current moment. |
| Week | Seven days side by side, to see how a week is loaded. |
| Month | The whole month, with the missions of each day. When a day is too full to show them all, +N missions tells you how many others there are. |
| Agenda | The next 14 days as a list grouped by day, without empty days. |
Reading a mission at a glance
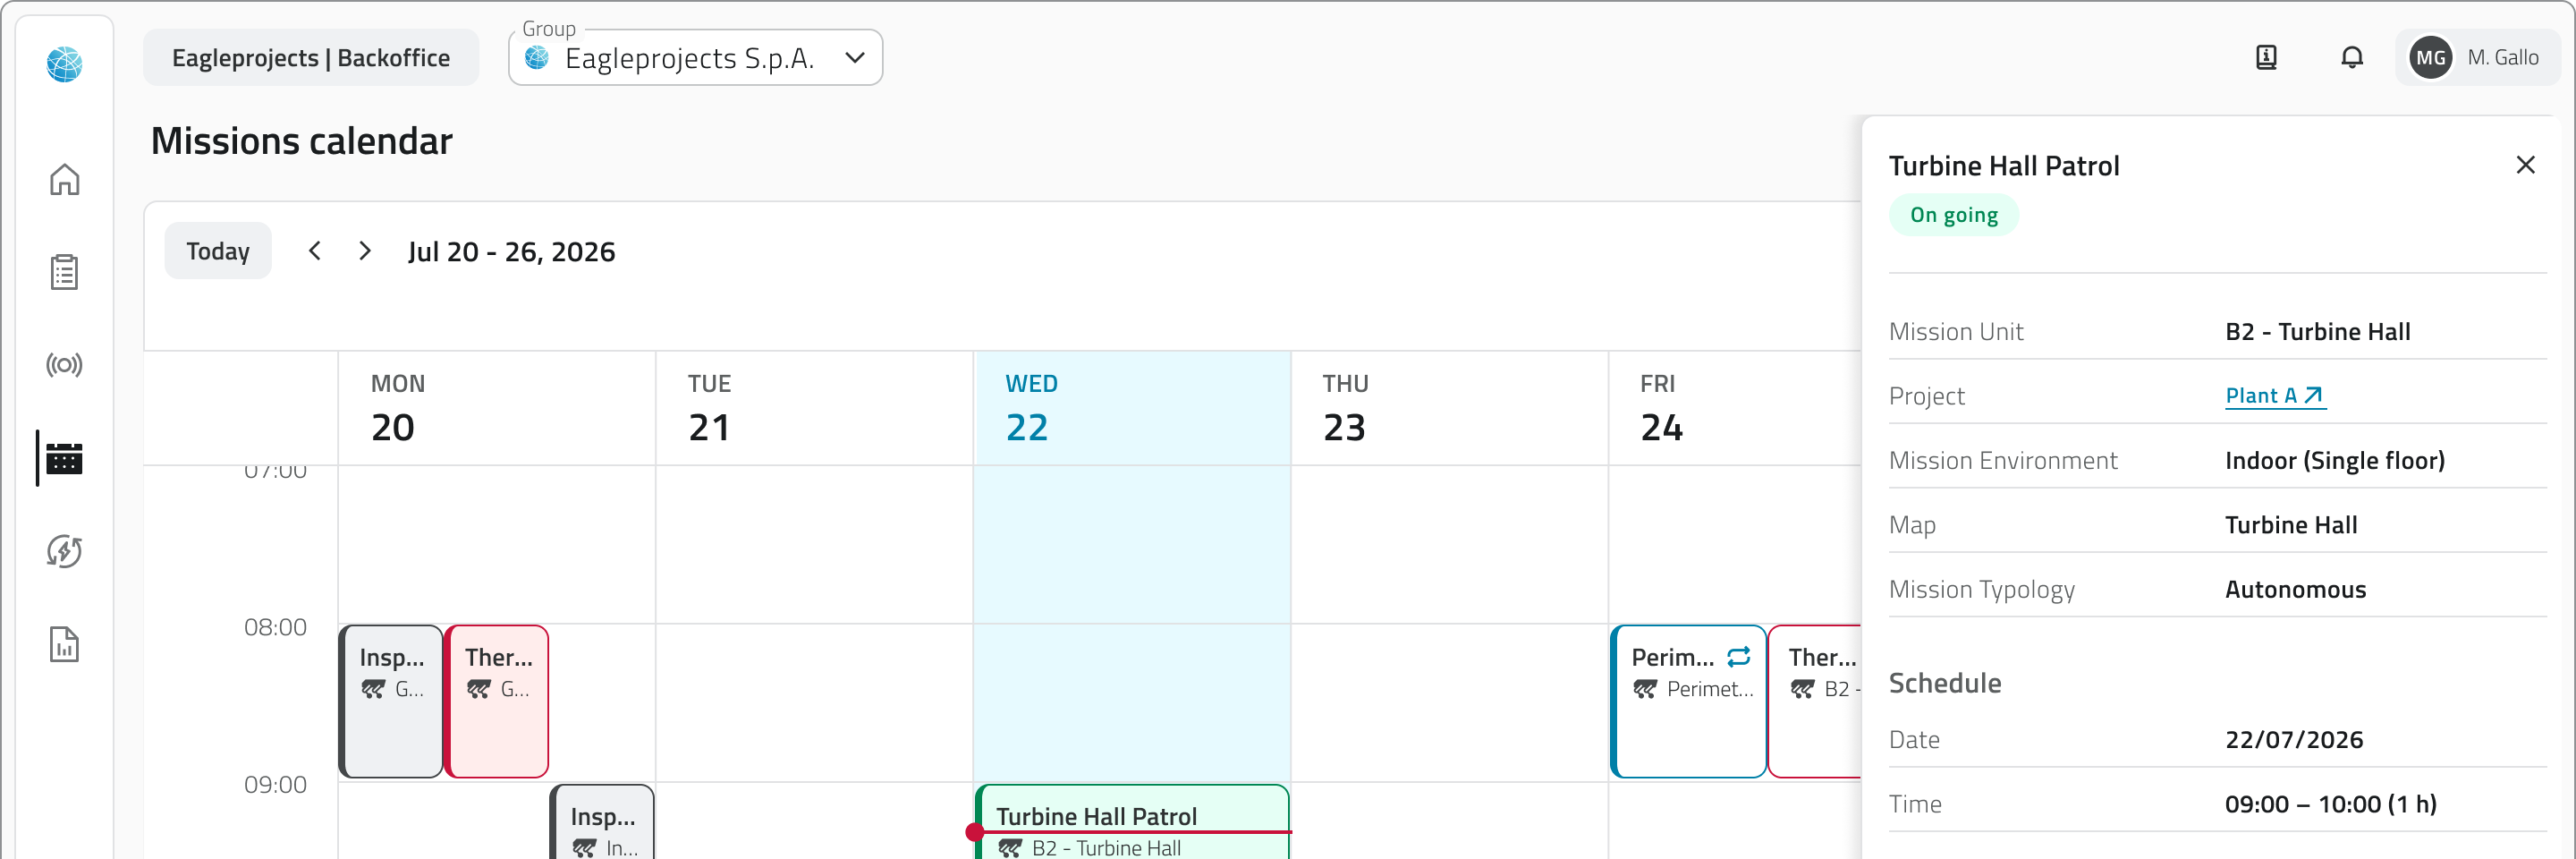
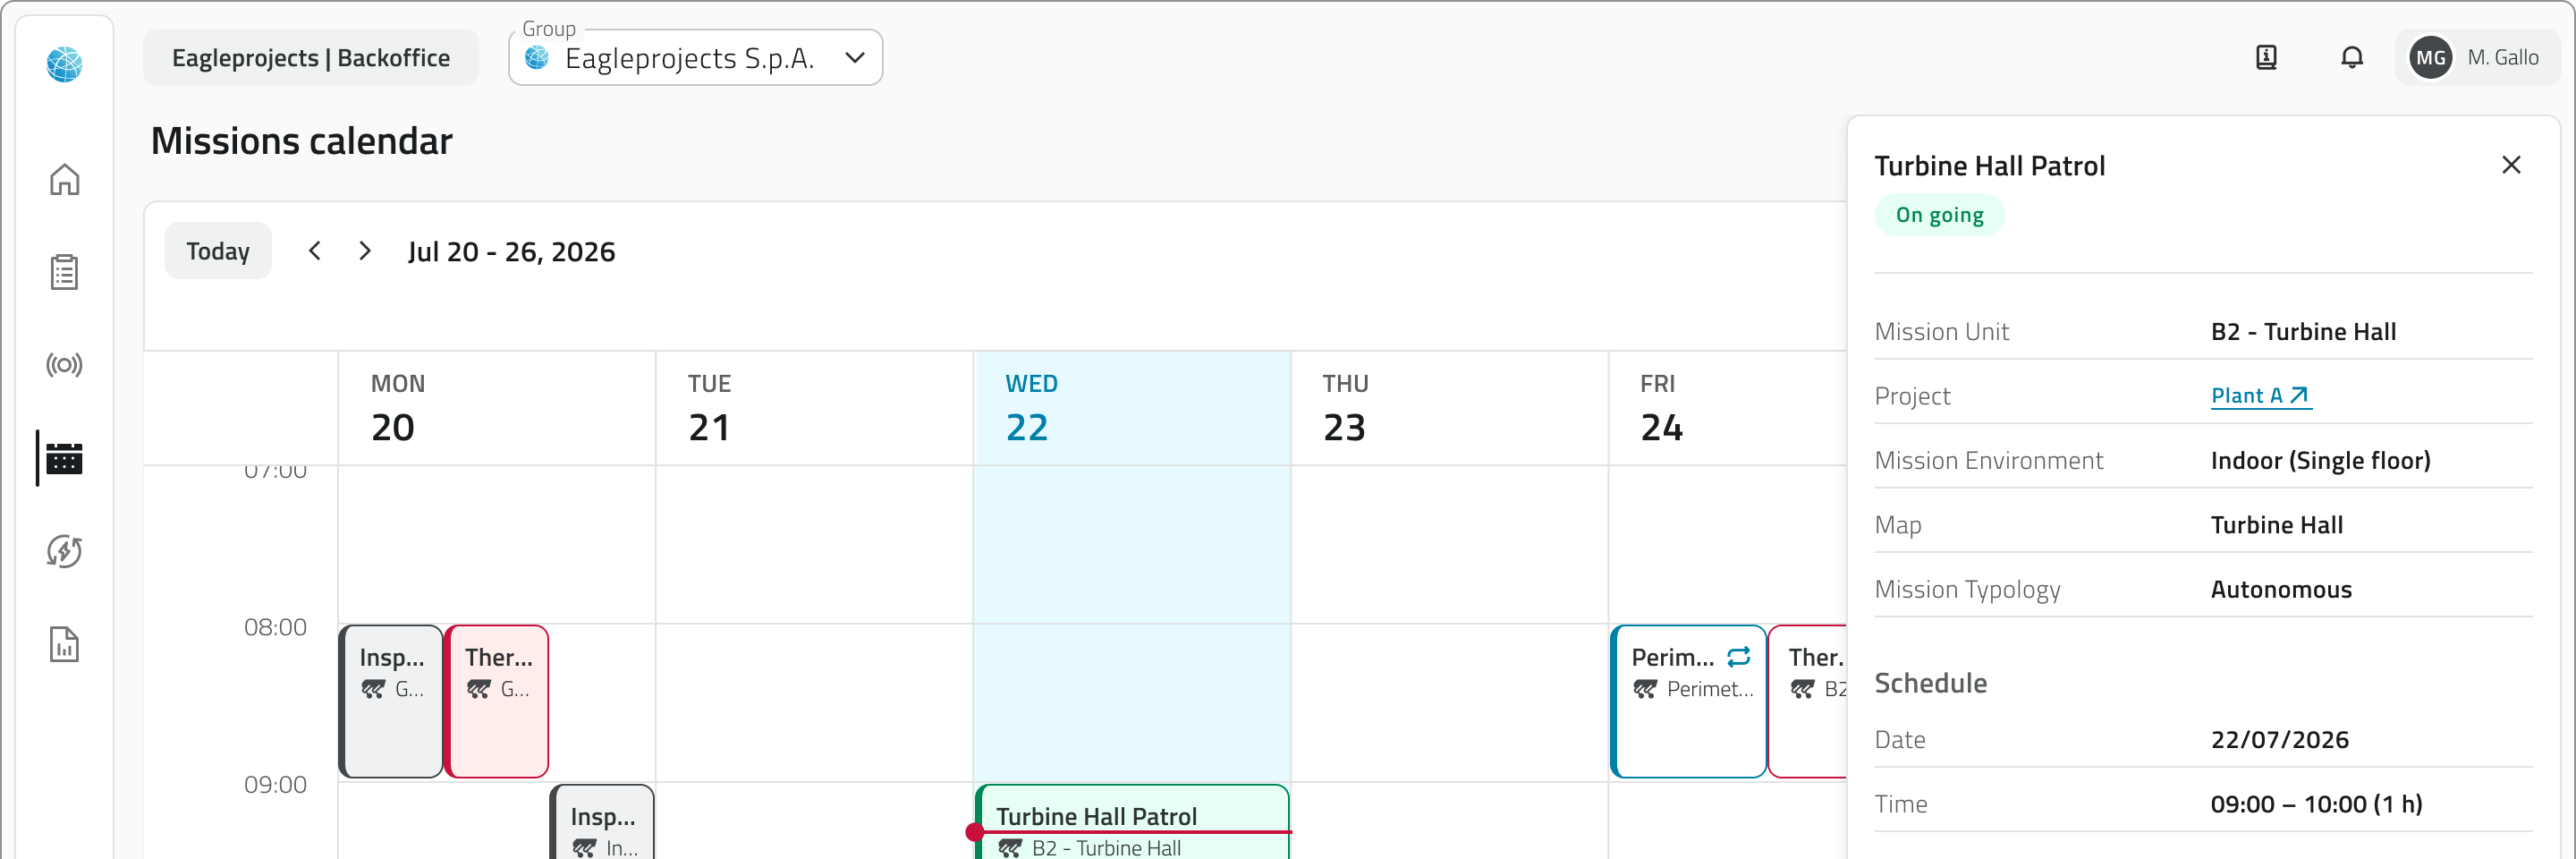
Every mission on the calendar carries its start time, its name and the Mission Unit that runs it. A mission that belongs to a series also carries the recurrence icon, so you can tell it apart from a mission planned once.
The colour of each mission represents its state, and the legend above the calendar shows what each colour means:
| State | What it means |
| Planned | The mission will start at the date and time set for it. |
| On going | The mission is running now. |
| Executed | The mission has run and is over. |
| Failed | The mission started but did not get to the end. |
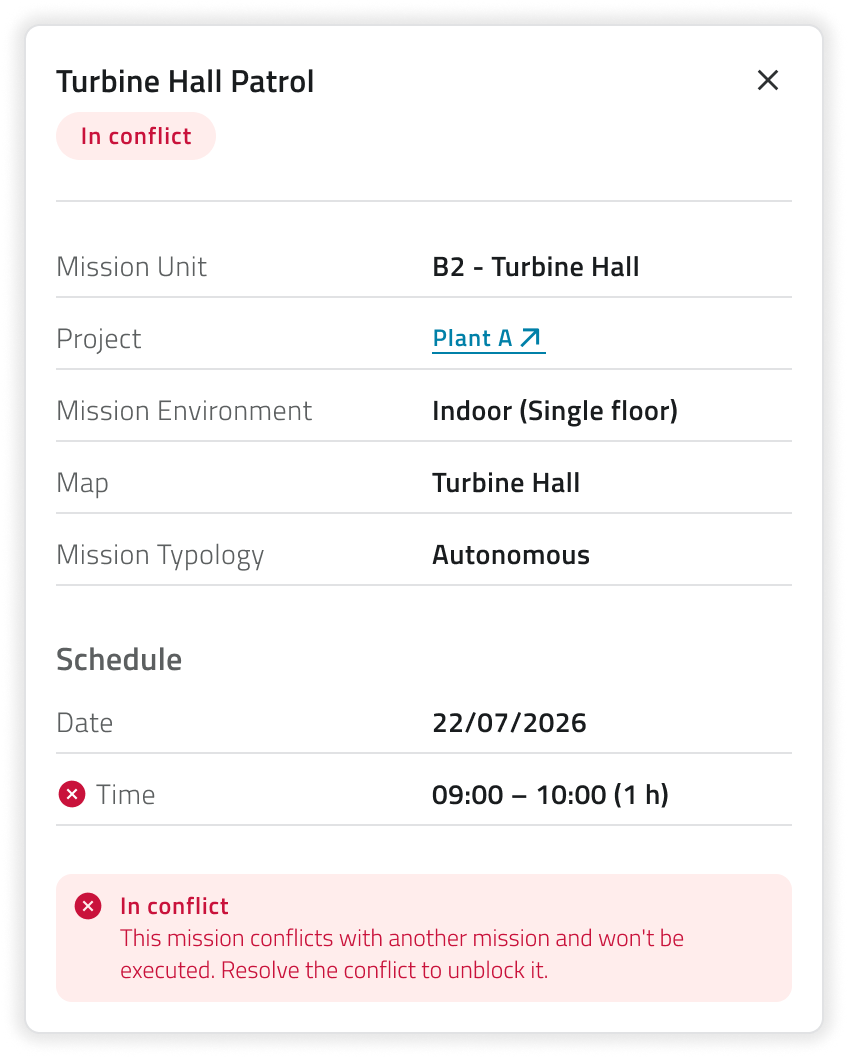
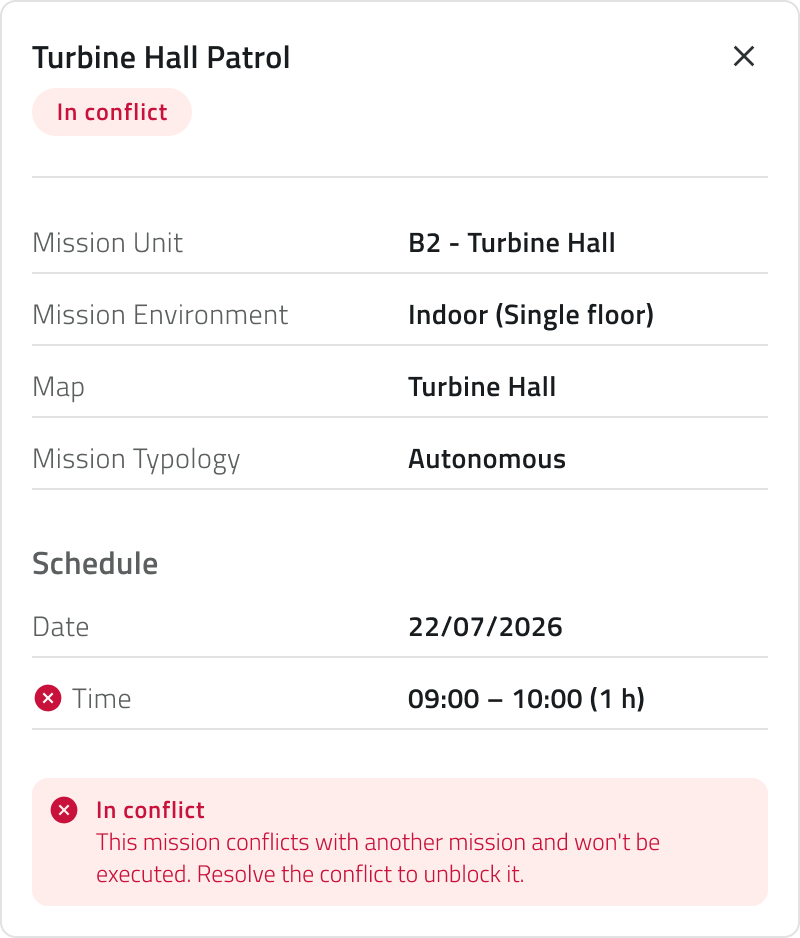
| In conflict | The Mission Unit is already committed at that moment, so this mission will not run until you free it. |
Opening a mission from the calendar
Select a mission and a panel opens on the right, showing its state and its configuration: the Mission Unit, the Mission Environment, the map and the typology, followed by a Schedule section with the date, the time and how long the run lasts.
When the mission is in conflict, the panel says so, and the mission will not be carried out until the conflict is resolved.
Following the recurring missions
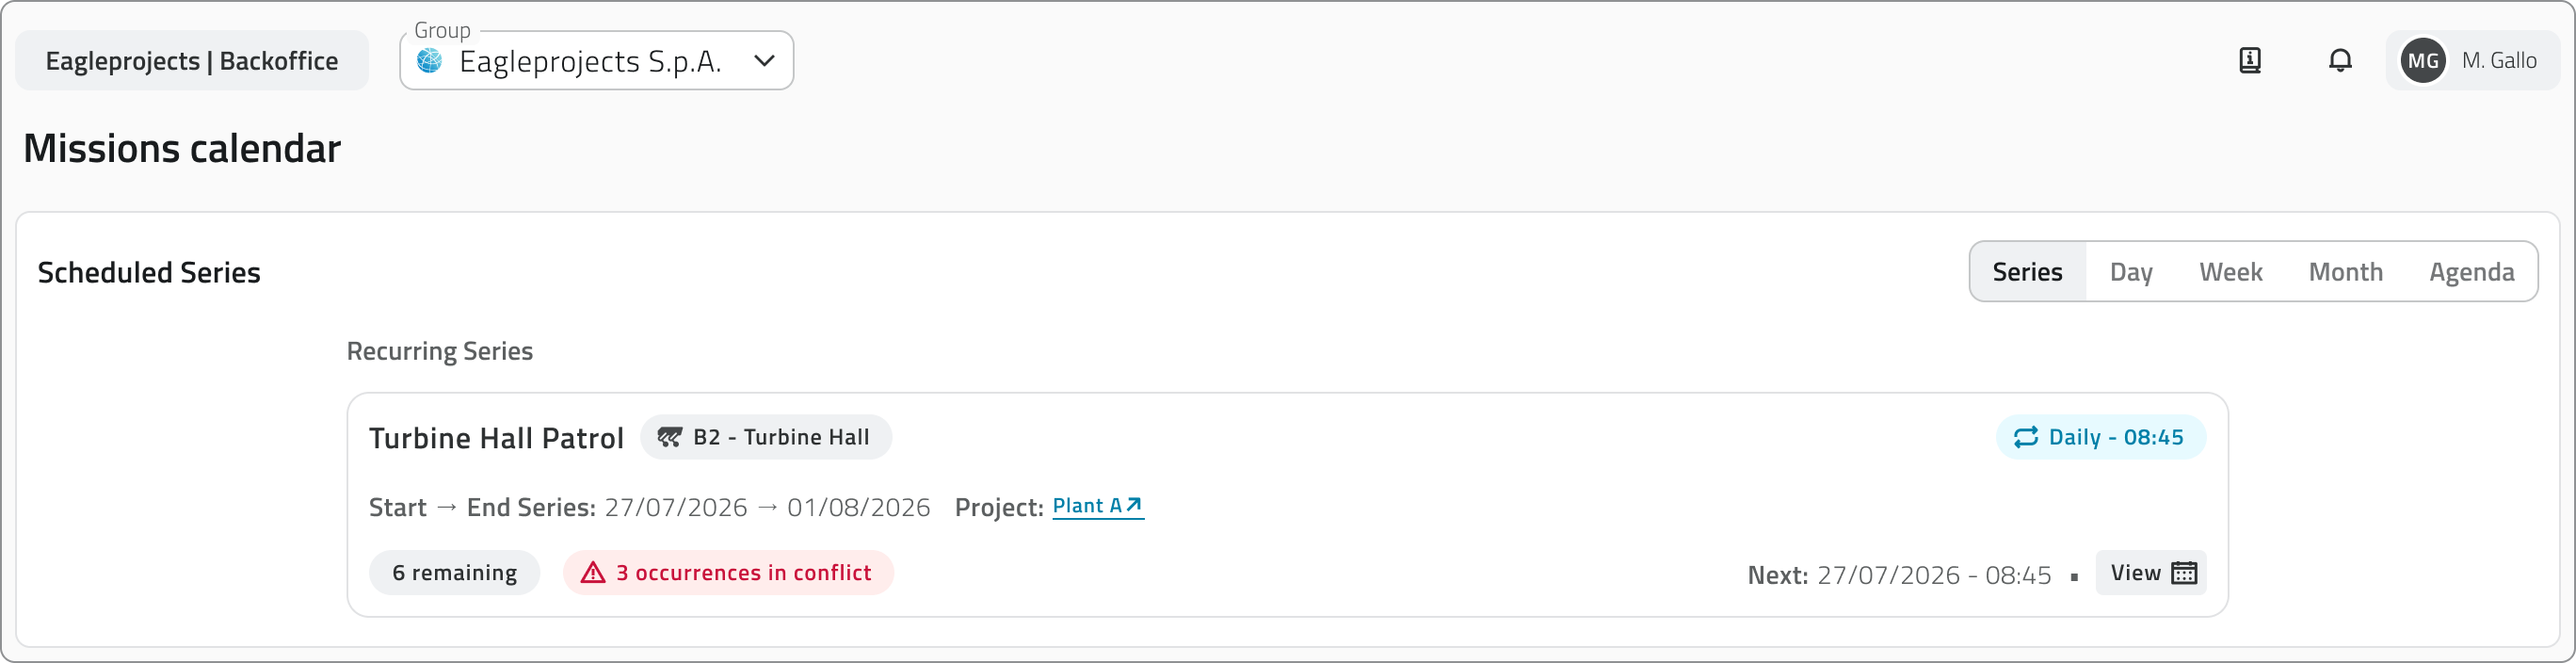
The Series view lists the recurring missions one by one. Each of them shows the rhythm and the time it runs at, the first and the last date of the series, how many occurrences are still to come and how many of them are in conflict, and the date of the next one. View opens the series on the calendar.
Deleting a planned mission
The Delete button, at the bottom of the panel, removes the mission from the project. For a mission planned once, a confirmation is all it takes.
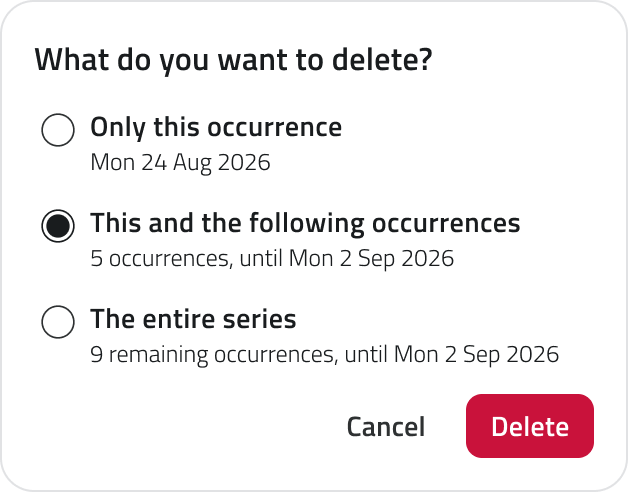
For a mission that belongs to a series, you first choose what to delete: only that occurrence, that one and all the following ones, or the entire series. Next to each choice you see how many occurrences it involves and the date it reaches.
Deleting is permanent and cannot be undone. To keep a planned mission but move it, change its schedule instead of deleting it.
The calendar of a whole group
In the Backoffice the calendar covers every project of one group, chosen in Group at the top of the page. Views, states and panel are the same, so the way you read it does not change.
Since the missions here come from different projects, the project a mission belongs to is always within reach: the panel adds a Project row, and in the Series view each recurring mission carries it as well. In both cases it is a link that takes you into the project.
Links
- Schedule a mission: how a mission ends up on the calendar.
- Edit a mission's configuration: changing a mission instead of deleting it.
Italian version
Calendario delle missioni distribuisce su un calendario tutto ciò che è pianificato, così vedi quando una Mission Unit è impegnata, quali missioni stanno per partire e quali restano in attesa che un conflitto venga risolto.
Lo stesso calendario compare in due punti, e cambia solo l'ampiezza di ciò che raccoglie:
| Dove lo apri | Cosa raccoglie |
| Dentro un progetto, dall'icona del calendario nella barra laterale | Le missioni di quel progetto. È da qui che elimini una missione o una delle sue occorrenze. |
| Nel Backoffice, dall'icona del calendario nella barra laterale | Le missioni dell'organizzazione e del gruppo selezionato, su tutti i suoi progetti. |
Le cinque viste
Le viste mostrano le stesse missioni, ma ciascuna risponde a una domanda diversa:
| Vista | Cosa mostra |
| Serie | Le missioni ricorrenti elencate una per una, al posto della griglia dei giorni. |
| Giorno | Una giornata su griglia oraria, con ogni missione al proprio orario e una linea che segna il momento attuale. |
| Settimana | Sette giorni affiancati, per capire quanto è carica una settimana. |
| Mese | Il mese intero, con le missioni di ogni giorno. Quando un giorno è troppo pieno per mostrarle tutte, +N missioni indica quante altre ce ne sono. |
| Agenda | I prossimi 14 giorni in elenco, raggruppati per giorno e senza i giorni vuoti. |
Leggere una missione a colpo d'occhio
Ogni missione sul calendario riporta l'orario di avvio, il nome e la Mission Unit che la esegue. Le missioni che fanno parte di una serie portano anche l'icona della ricorrenza, che le distingue da quelle pianificate una volta sola.
Il colore di ogni missione rappresenta il suo stato, e la legenda sopra il calendario ricorda a cosa corrisponde ciascun colore:
| Stato | Cosa significa |
| Pianificata | La missione partirà alla data e all'ora impostate. |
| In corso | La missione è in esecuzione adesso. |
| Eseguita | La missione è stata eseguita e si è conclusa. |
| Fallita | La missione è partita ma non è arrivata alla fine. |
| In conflitto | La Mission Unit è già impegnata in quel momento, quindi la missione non verrà eseguita finché non la liberi. |
Aprire una missione dal calendario
Selezionando una missione si apre un pannello a destra che riporta il suo stato e la sua configurazione: la Mission Unit, l'Ambiente della missione, la mappa e la tipologia, seguiti da una sezione Pianificazione con la data, l'ora e la durata dell'esecuzione.
Se la missione è in conflitto il pannello lo segnala, e la missione non verrà eseguita finché il conflitto non viene risolto.
Seguire le missioni ricorrenti
La vista Serie raccoglie le missioni ricorrenti, una riga per ciascuna. Per ognuna vedi con quale ritmo e a che ora viene eseguita, il primo e l'ultimo giorno della serie, quante occorrenze restano da svolgere e quante di queste sono in conflitto, insieme alla data della prossima. Con il pulsante Visualizza apri la serie direttamente sul calendario.
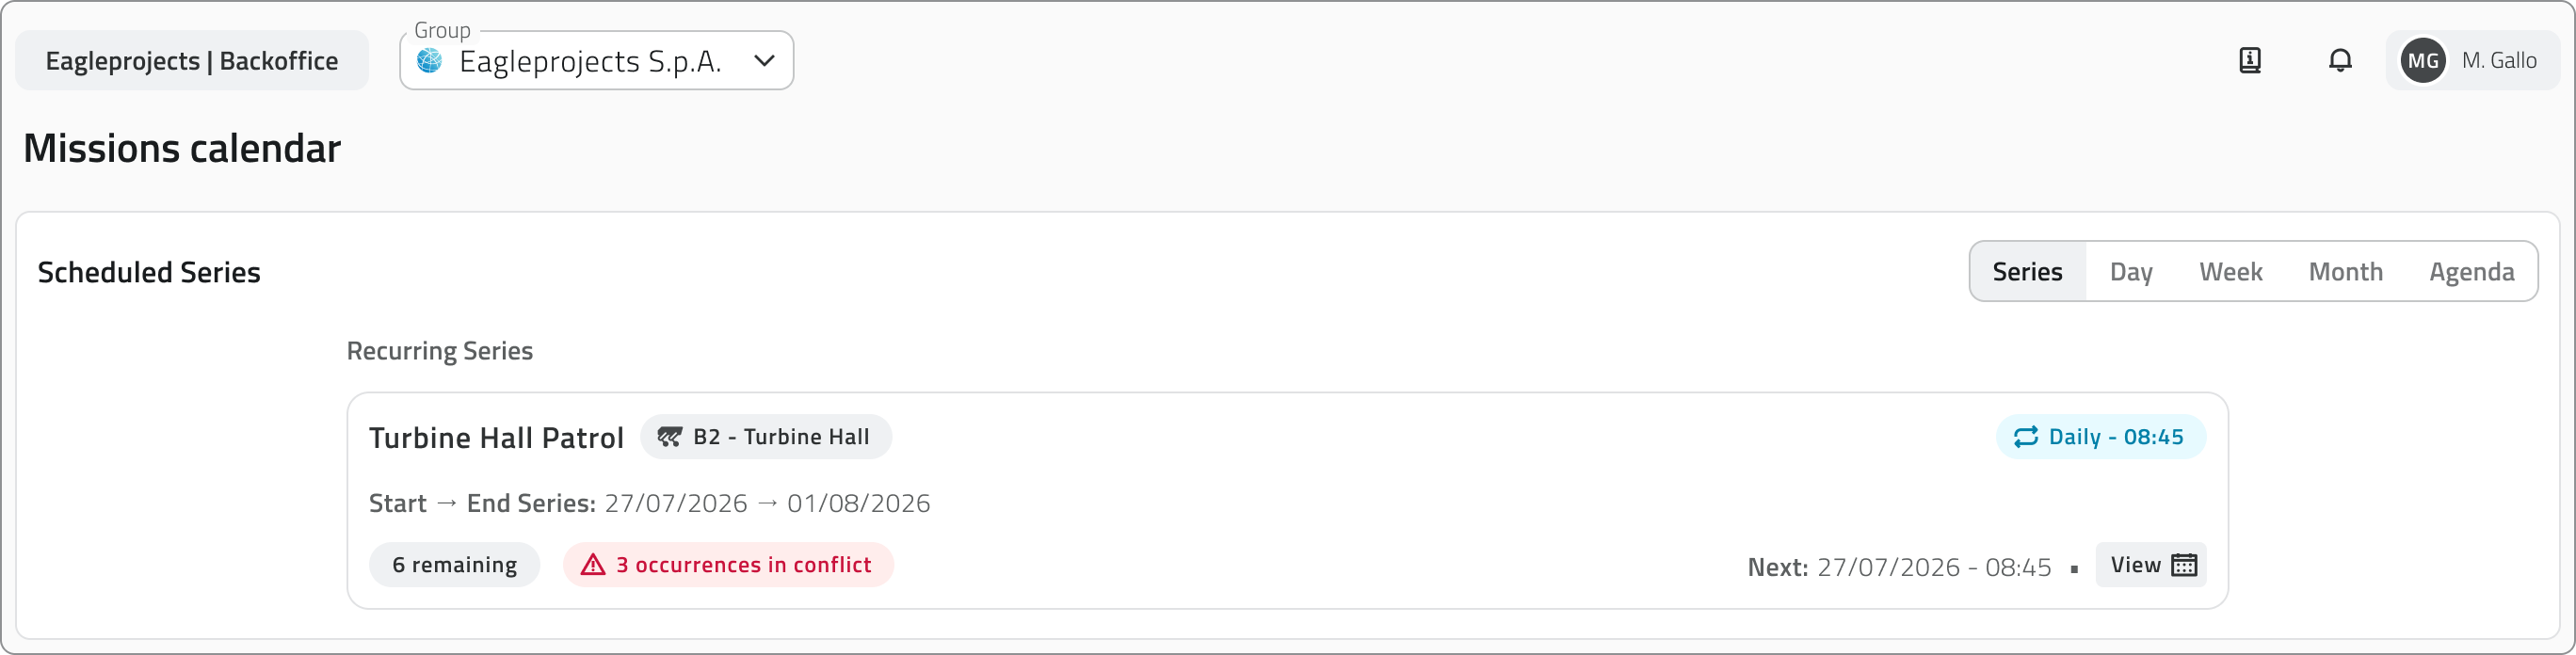
Eliminare una missione pianificata
In fondo al pannello della missione, il pulsante Elimina la rimuove dal progetto. Se la missione è pianificata una volta sola, basta confermare.
Se invece la missione fa parte di una serie, devi prima indicare cosa eliminare: solo quell'occorrenza, quella e tutte le successive, oppure l'intera serie. Accanto a ogni scelta trovi quante occorrenze comprende e fino a quale data arriva.
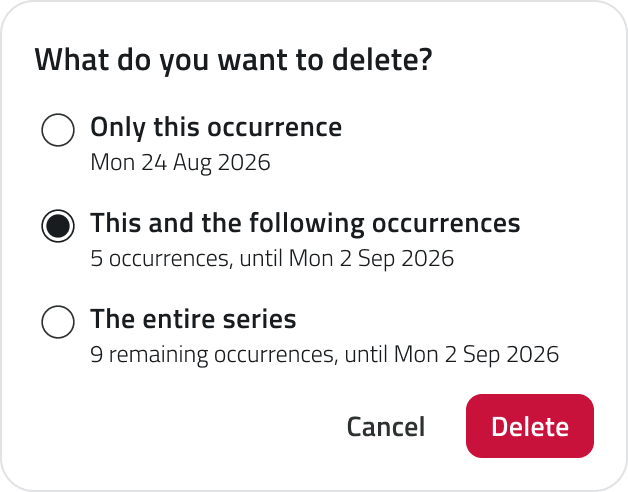
L'eliminazione è permanente e non può essere annullata. Se vuoi conservare una missione pianificata spostandola, modificane la pianificazione invece di eliminarla.
Il calendario di un intero gruppo
Nel Backoffice il calendario copre tutti i progetti di un gruppo, che scegli dal selettore Gruppo in cima alla pagina. Viste, stati e pannello restano gli stessi, quindi si legge esattamente come il calendario di un progetto.
Dato che qui le missioni arrivano da progetti diversi, ognuna indica sempre da quale: il pannello aggiunge la riga Progetto e nella vista Serie il progetto compare accanto a ogni missione ricorrente. In entrambi i casi è un link che apre il progetto.
Collegamenti
- Pianificare una missione: come una missione finisce sul calendario.
- Modificare la configurazione di una missione: modificare una missione invece di eliminarla.
Last update: 6 August 2026
Robot Dog – Tracking a live mission
English version
During a live mission you follow the robot dog as it moves and you see what its add-ons see, and you can step in at any moment: take the controls yourself, stop the unit where it is, bring it home or end the mission.
You arrive here in two ways: by starting a mission from the Pre Check, or by opening a mission from Live Missions in the mission list.
The live screen
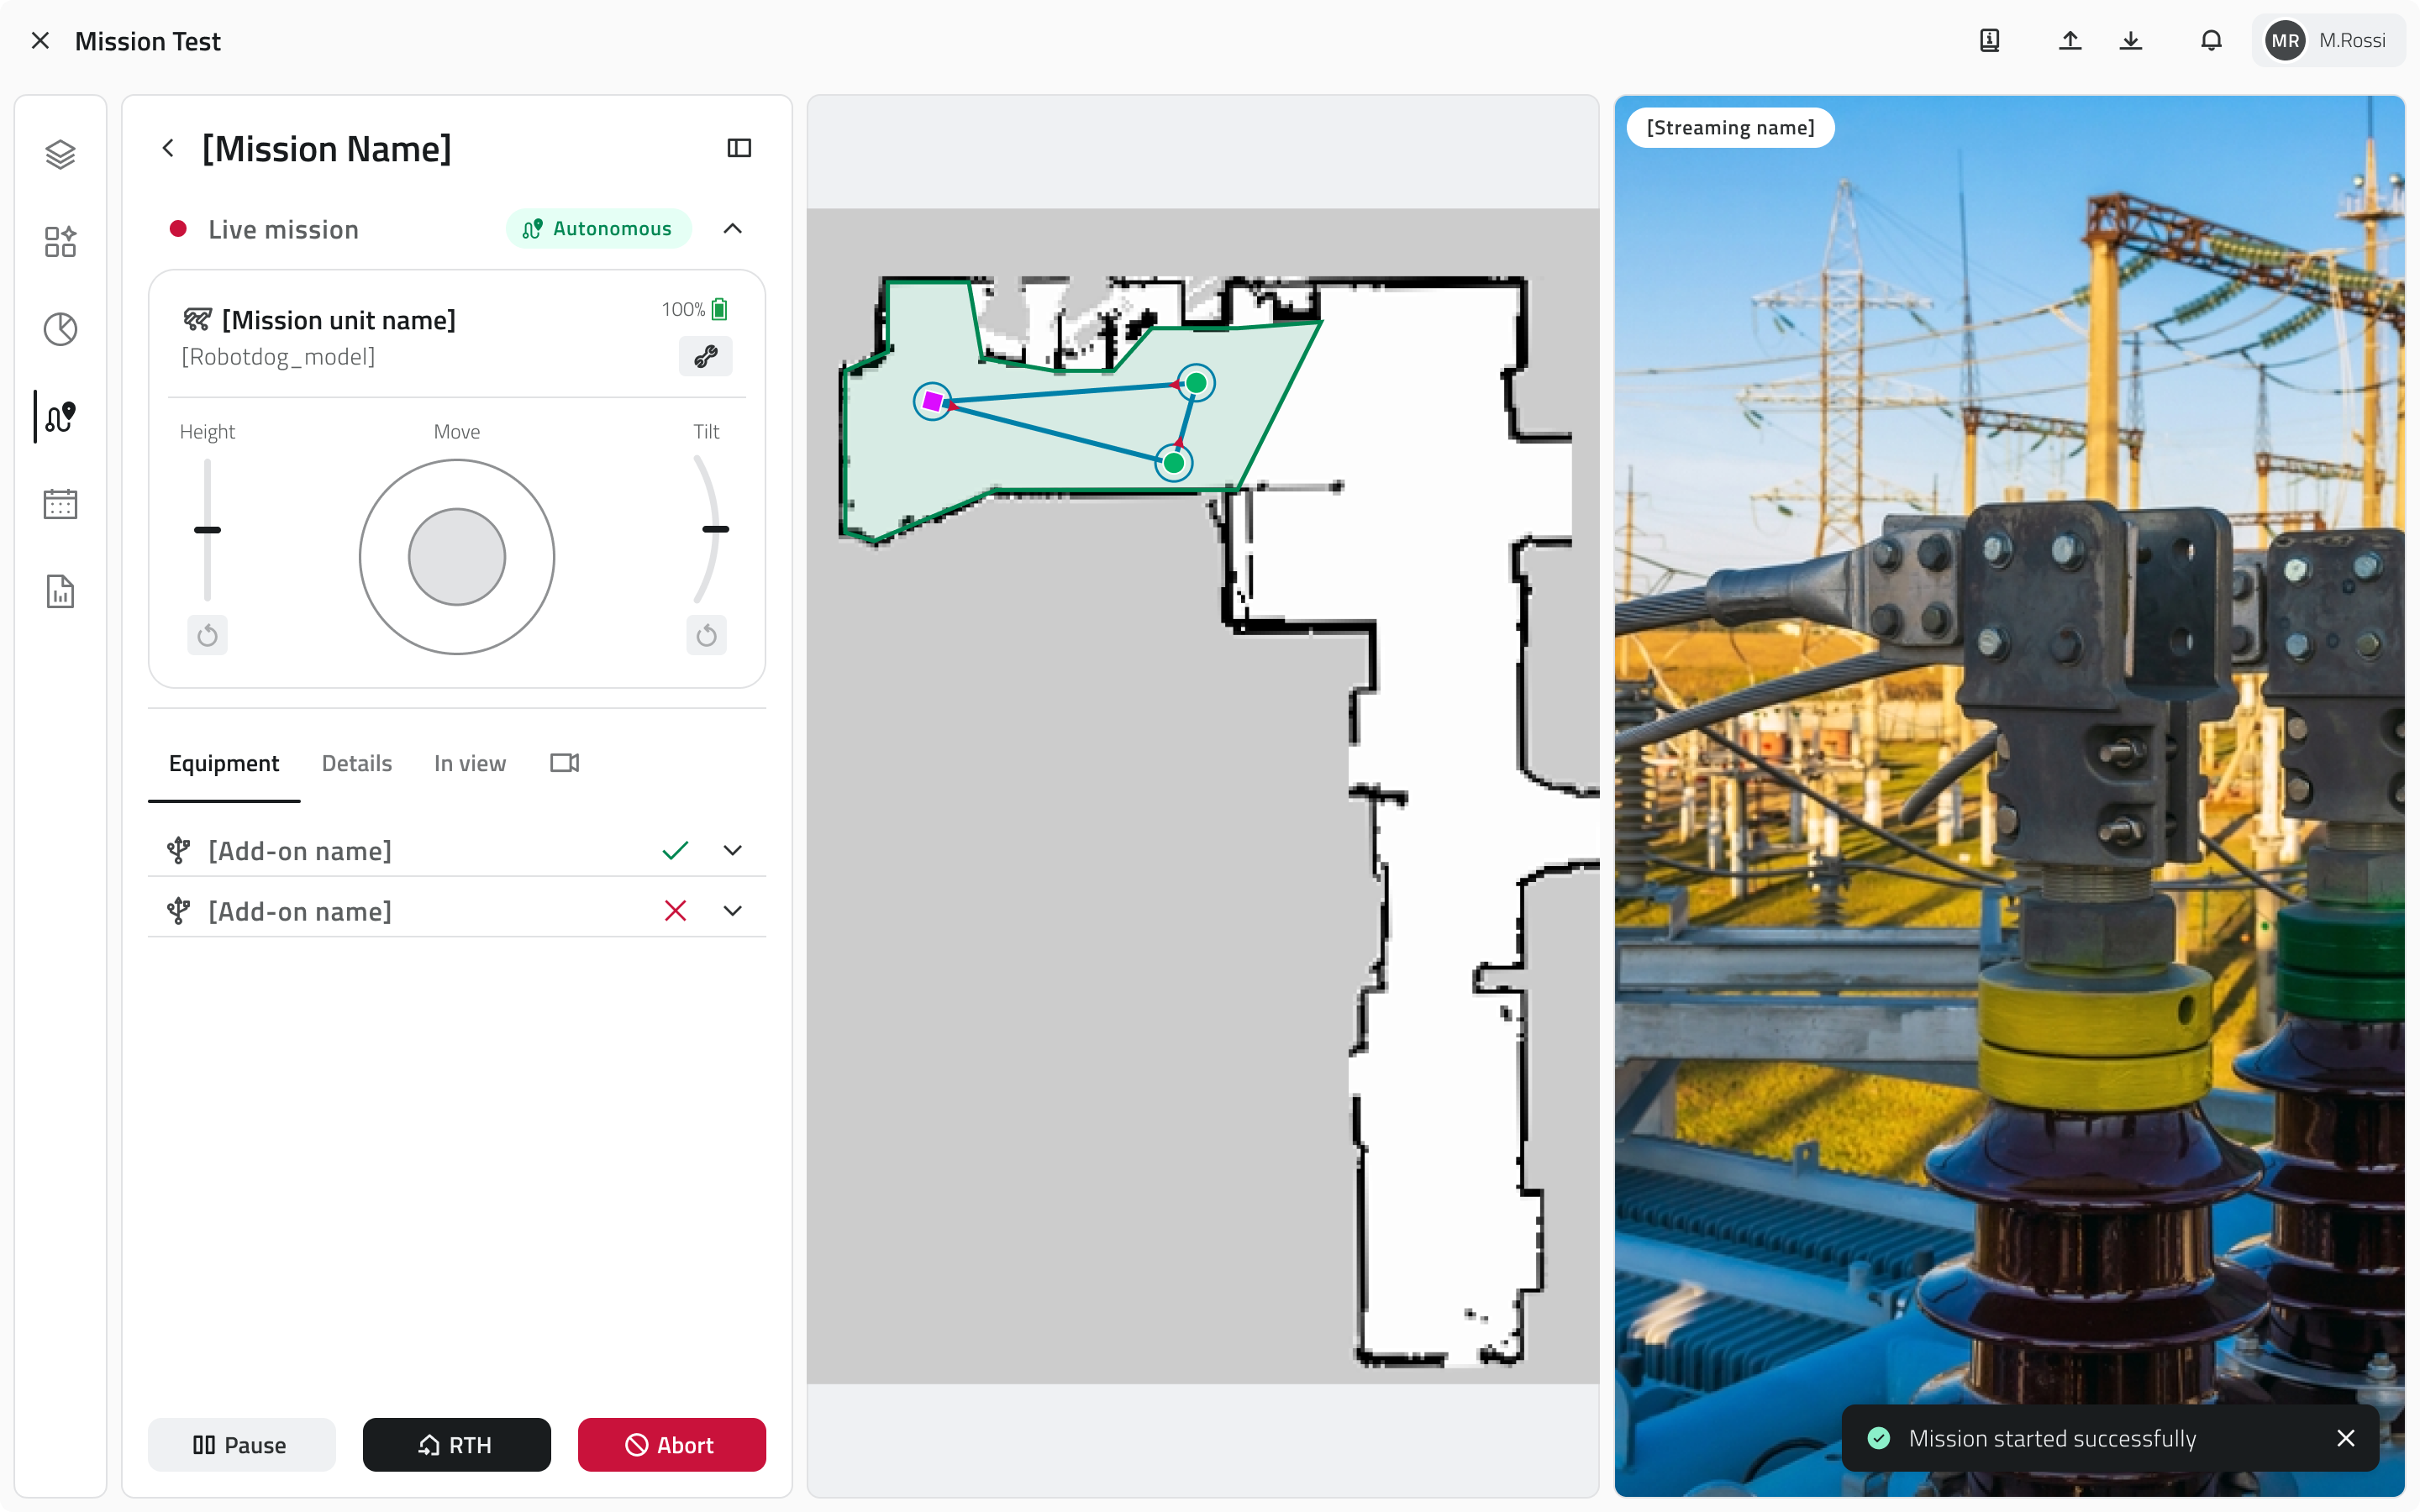
The panel on the left holds the state of the mission and the commands to act on it, and it can be closed when you need more room. You follow the run on the map, always among the views, with the route and the unit moving along it, while the rest of the space is shared out by the streams you have turned on.
At the top of the panel, a chip reports the state of the mission. Below it the unit is named with its model and its battery level, and then come the controls that let you drive it.
Four tabs follow: Equipment lists the add-ons the unit carries, Details gathers the configuration the mission was created with, In view decides what the map shows, and Streaming is where you manage the streams, turning each add-on's transmission on or off.
Mission control modes
The chip at the top of the panel names one of three states, and each one changes what the unit is doing and what you can do with it.
Autonomous mode
The robot dog travels the route on its own, waypoint after waypoint, and performs the actions configured on each one.
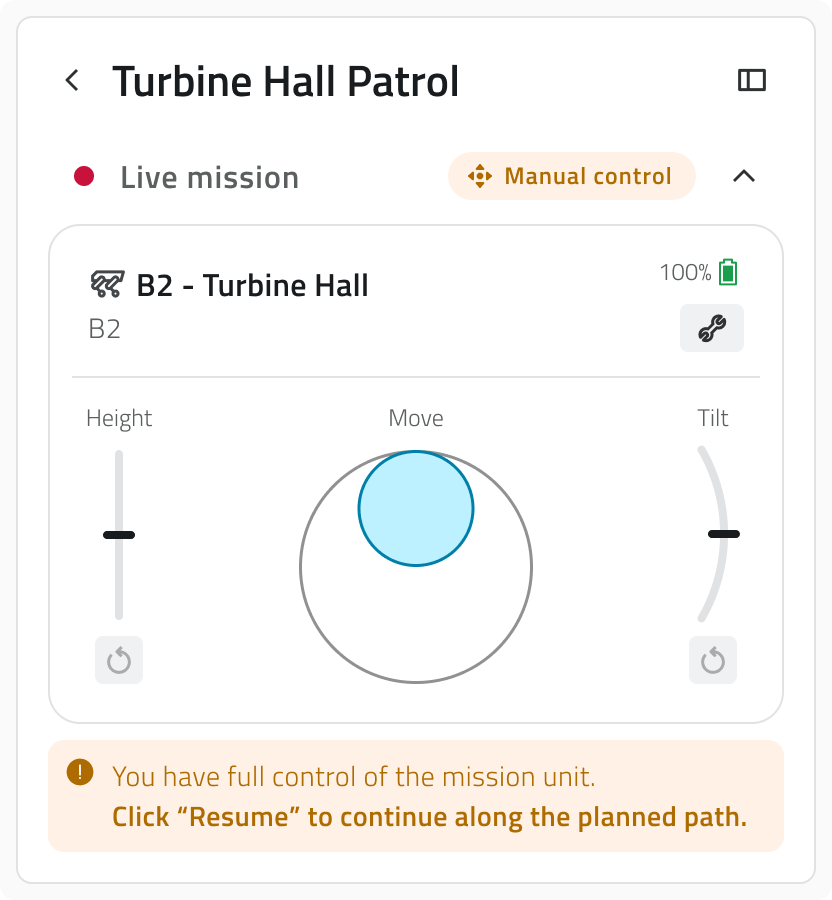
Manual control mode
Use the joypad and the mission passes into your hands: the autonomous run is suspended, the unit answers only to your commands and a message on the panel reminds you that you have the controls. There are three of them:
| Control | What it does |
| Move (joypad) | Drives the robot dog in the direction you push. |
| Height | Raises and lowers the body of the robot dog. Height does not stop it: the unit can walk however high or low the body is. |
| Tilt | Leans the body forward or backward, to point the add-ons up or down. While the body is leaning the unit stays where it is. |
Height and Tilt each have a reset below them, which brings the value back to its default.
The Resume button puts the mission back in autonomous mode.
Pause
Pause stops the robot dog where it is. The unit waits there with no time limit, until you decide what to do next. Resume sends it back along the route.
Ending the mission early
Two commands end a mission before its last waypoint, and they leave the unit in very different places. Both ask for a confirmation, and neither can be undone.
| Command | Where the unit ends up |
| RTH | The unit works out a way back and returns to its Home Position, at the charging station. |
| Abort | The unit leaves the route and stays where it is, idle, until you take manual control or start another mission. |
Both treat what has been recorded in the same way: everything already saved is kept, while anything still being recorded when you confirm is lost. Stop a recording before confirming if you want to keep it.
While the unit is returning home you can still stop it with the Pause button, and the Resume button puts it back on the way home.
Using the add-ons during the mission
The Equipment tab lists the add-ons the unit carries, each one showing whether it is answering. Open one and you can aim it, adjust the zoom and ask it for a photo or a recording, without touching the mission that is running.
| Control | What it does |
| Aiming | The arrows point the add-on up, down, left and right, and the reset below them brings it back to the position it started from. |
| Zoom | Brings the image closer or takes it further away, with the current value between the two buttons. |
| Photo | Takes one image, there and then. |
| Start REC | Begins a recording, and stops it when you ask again. |
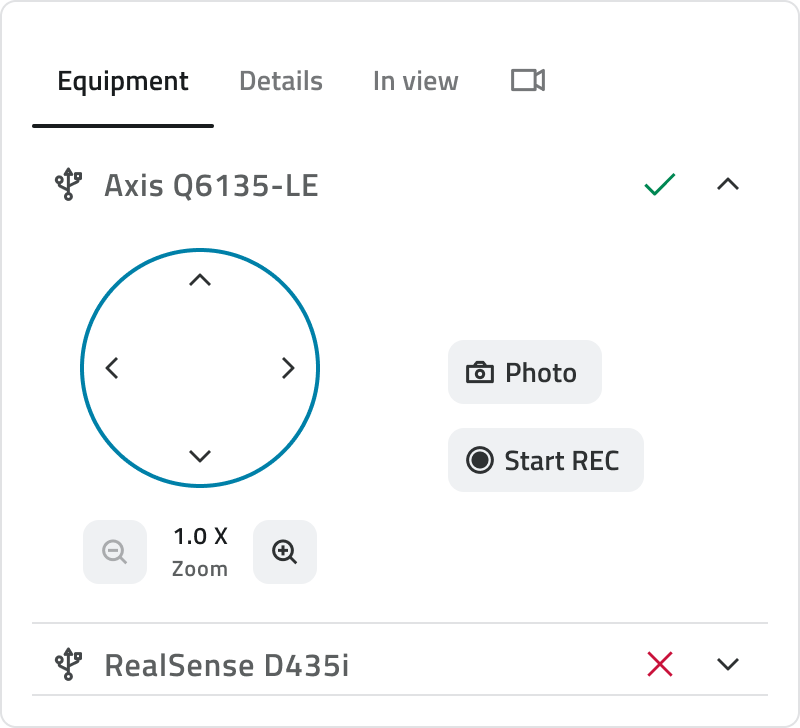
Not every add-on offers all of these: in each one you find only the controls it supports.
What you do here is yours alone: it neither changes the mission nor touches the actions configured on the waypoints, which the unit goes on performing. The controls work in autonomous mode as well as when you have taken over.
Watching the streams
Every video source you turn on opens a view of its own, with the name of the add-on it comes from at the top. The views share the available space with the map, which stays visible throughout, so you can keep an eye on where the unit is and on what it is transmitting.
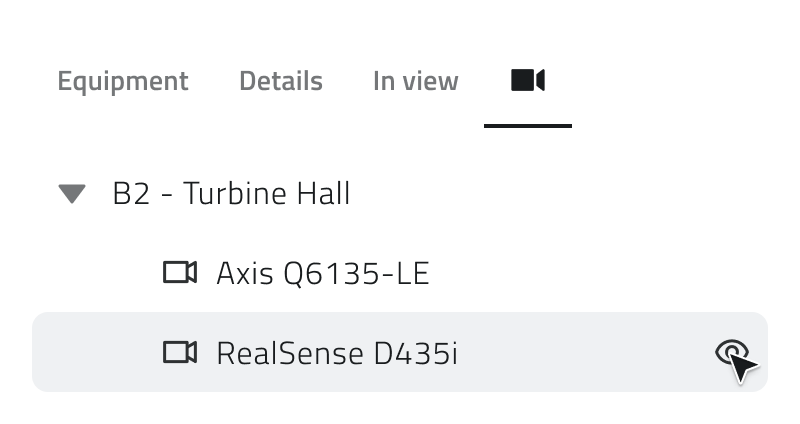
The more video sources you turn on, the smaller each view becomes to make room.
Leaving the mission without stopping it
Going back to the mission list leaves the mission running: the robot dog carries on, and the mission stays under Live Missions. Open it again from there and you are back where you were, with the map, the streams and the controls.
Links
- Run the pre-check and start a mission: the checks that come before the start.
- Review an executed mission: what you find once a mission is over.
- Control room: following every unit of the organisation at once.
Italian version
Durante una missione live segui il robot dog mentre avanza da un waypoint all'altro e vedi in diretta le immagini dei suoi add-on. Puoi intervenire in qualsiasi momento: prendere i comandi dell'unità, fermarla dov'è, farla rientrare alla Home Position oppure chiudere la missione prima della fine.
Ci si arriva in due modi: avviando una missione dal Pre Check, oppure aprendo una missione da Live Missions nell'elenco delle missioni.
La schermata della missione in corso
A sinistra, il pannello raccoglie lo stato della missione e i comandi con cui intervenire; quando ti serve più spazio puoi chiuderlo. L'esecuzione può essere seguita sulla mappa, sempre presente, che mostra il percorso e l'unità mentre lo percorre. Lo spazio restante si divide tra gli streaming che hai attivato.
In cima al pannello, un chip riporta lo stato della missione. Sotto trovi l'unità con il modello e il livello di batteria, e poi i comandi con cui guidarla.
Seguono quattro sezioni: Equipment elenca gli add-on che l'unità porta con sé, Dettagli raccoglie la configurazione con cui la missione è stata creata, In vista decide cosa mostra la mappa e da Streaming gestisci le trasmissioni, accendendo o spegnendo quella di ciascun add-on.
Modalità di controllo della missione
Il chip in cima al pannello indica in quale dei tre stati si trova la missione. Da questo dipendono sia il comportamento dell'unità sia i comandi che hai a disposizione.
Modalità autonoma
Il robot dog percorre da sé il tracciato, un waypoint dopo l'altro, eseguendo su ciascuno le azioni che sono state configurate.
Modalità controllo manuale
Basta usare il joypad perché la missione passi sotto il tuo controllo: l'esecuzione autonoma si sospende, l'unità risponde soltanto ai tuoi comandi e un messaggio nel pannello lo segnala. Hai a disposizione tre comandi:
| Comando | Cosa fa |
| Movimento (joypad) | Guida il robot dog nella direzione in cui lo spingi. |
| Altezza | Alza e abbassa il corpo del robot dog. L'altezza non gli impedisce di muoversi: l'unità può camminare sia alzata sia abbassata. |
| Inclinazione | Inclina il corpo in avanti o all'indietro, così da puntare gli add-on verso il basso o verso l'alto. A differenza dell'altezza, l'inclinazione blocca il movimento: finché il corpo è inclinato l'unità resta ferma. |
Sia Altezza sia Inclinazione hanno un reset che riporta il valore a quello predefinito.
Con il pulsante Riprendi la missione torna in modalità autonoma.
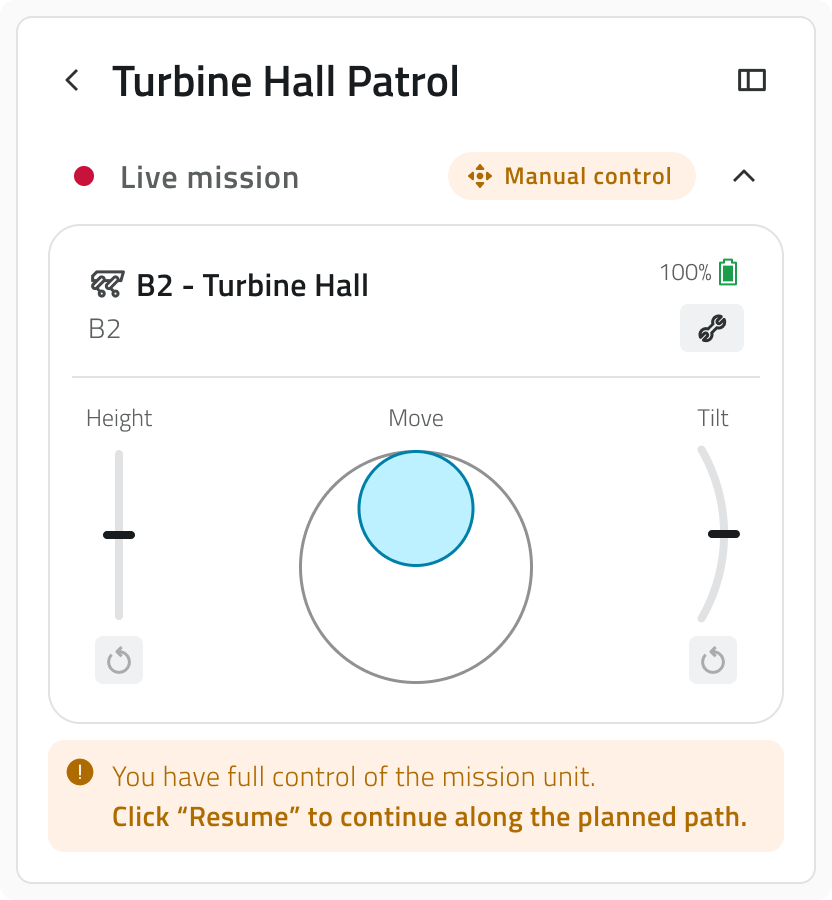
Pausa
Pausa arresta il robot dog dov'è: l'unità resta in attesa a tempo indeterminato, finché non decidi come proseguire. Con Riprendi torna a percorrere il tracciato.
Chiudere la missione prima della fine
Due comandi chiudono la missione prima dell'ultimo waypoint, con esiti molto diversi per l'unità. Entrambi chiedono una conferma e nessuno dei due può essere annullato.
| Comando | Dove finisce l'unità |
| RTH | L'unità calcola il percorso di rientro e torna alla propria Home Position, sulla stazione di ricarica. |
| Abort | L'unità abbandona il percorso e resta ferma dov'è, in attesa che tu prenda il controllo manuale o avvii un'altra missione. |
In entrambi i casi i media già salvati vengono conservati, mentre una registrazione ancora in corso al momento della conferma va perduta. Se vuoi conservarla, fermala prima di confermare.
Durante il rientro puoi comunque fermarla con il pulsante Pausa; con il pulsante Riprendi torna a dirigersi verso casa.
Usare gli add-on durante la missione
La sezione Equipment elenca gli add-on montati sull'unità e segnala, per ciascuno, se sta rispondendo. Aprendone uno ne prendi i comandi senza interrompere la missione: puoi orientarlo, regolare lo zoom e chiedergli una foto o una registrazione.
| Comando | Cosa fa |
| Orientamento | Le frecce orientano l'add-on verso l'alto, il basso, destra e sinistra; il reset sottostante lo riporta nella posizione iniziale. |
| Zoom | Avvicina o allontana l'immagine. Il valore corrente è indicato tra i due pulsanti. |
| Foto | Scatta subito un'immagine. |
| Avvia REC | Avvia la registrazione e, premuto di nuovo, la interrompe. |
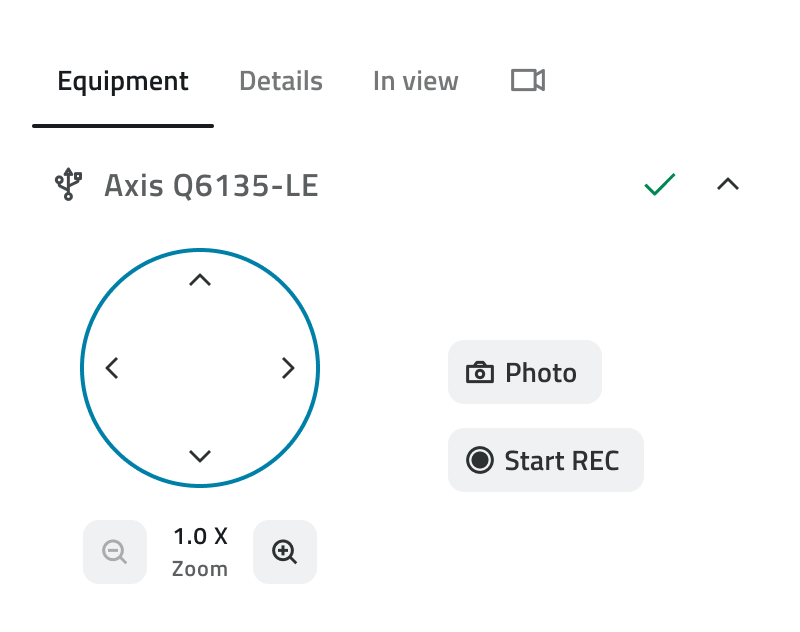
Non tutti gli add-on offrono tutti questi comandi: per ciascuno trovi soltanto quelli che supporta.
Quello che fai da qui non modifica la missione e lascia intatte le azioni configurate sui waypoint, che l'unità continua a eseguire. I comandi restano utilizzabili sia in modalità autonoma sia dopo che hai preso il controllo.
Guardare gli streaming
Ogni sorgente video che attivi apre una vista dedicata, con in alto il nome dell'add-on a cui fa riferimento. Le viste si distribuiscono automaticamente nello spazio disponibile insieme alla mappa, che resta sempre visibile: puoi così tenere d'occhio la posizione dell'unità e le immagini che trasmette.
Più sorgenti video attivi, più ogni vista si riduce di dimensione per trovare posto.
Uscire dalla missione senza fermarla
Se torni all'elenco delle missioni la missione non si ferma: il robot dog continua il percorso stabilito e la trovi ancora sotto Live Missions. Basta riaprirla per ritrovare tutto come l'avevi lasciato, dalla mappa agli streaming ai comandi.
Collegamenti
- Eseguire il pre-check e avviare una missione: i controlli che precedono l'avvio.
- Consultare una missione eseguita: cosa trovi a missione conclusa.
- Control room: seguire insieme tutte le unità dell'organizzazione.
Last update: 6 August 2026
Drone – Tracking a live mission
English version
During a live mission with a drone you can follow the mission from the panel and watch the images the cameras send back, while the flight runs on its own.
You arrive here in two ways: by starting a mission from the Pre Check, or by opening it from the Live Missions section.
The live screen
The panel on the left holds the state of the mission and the configuration it was built with, and it can be closed when you need more room. The map is always there, with the waypoints and the hangar of the mission, and the space left over is shared out by the streams you have turned on.
At the top of the panel a chip reports the state of the mission, below it the unit with the model of the drone, and then the three panels: Details, In view and Streaming, marked with a camera.
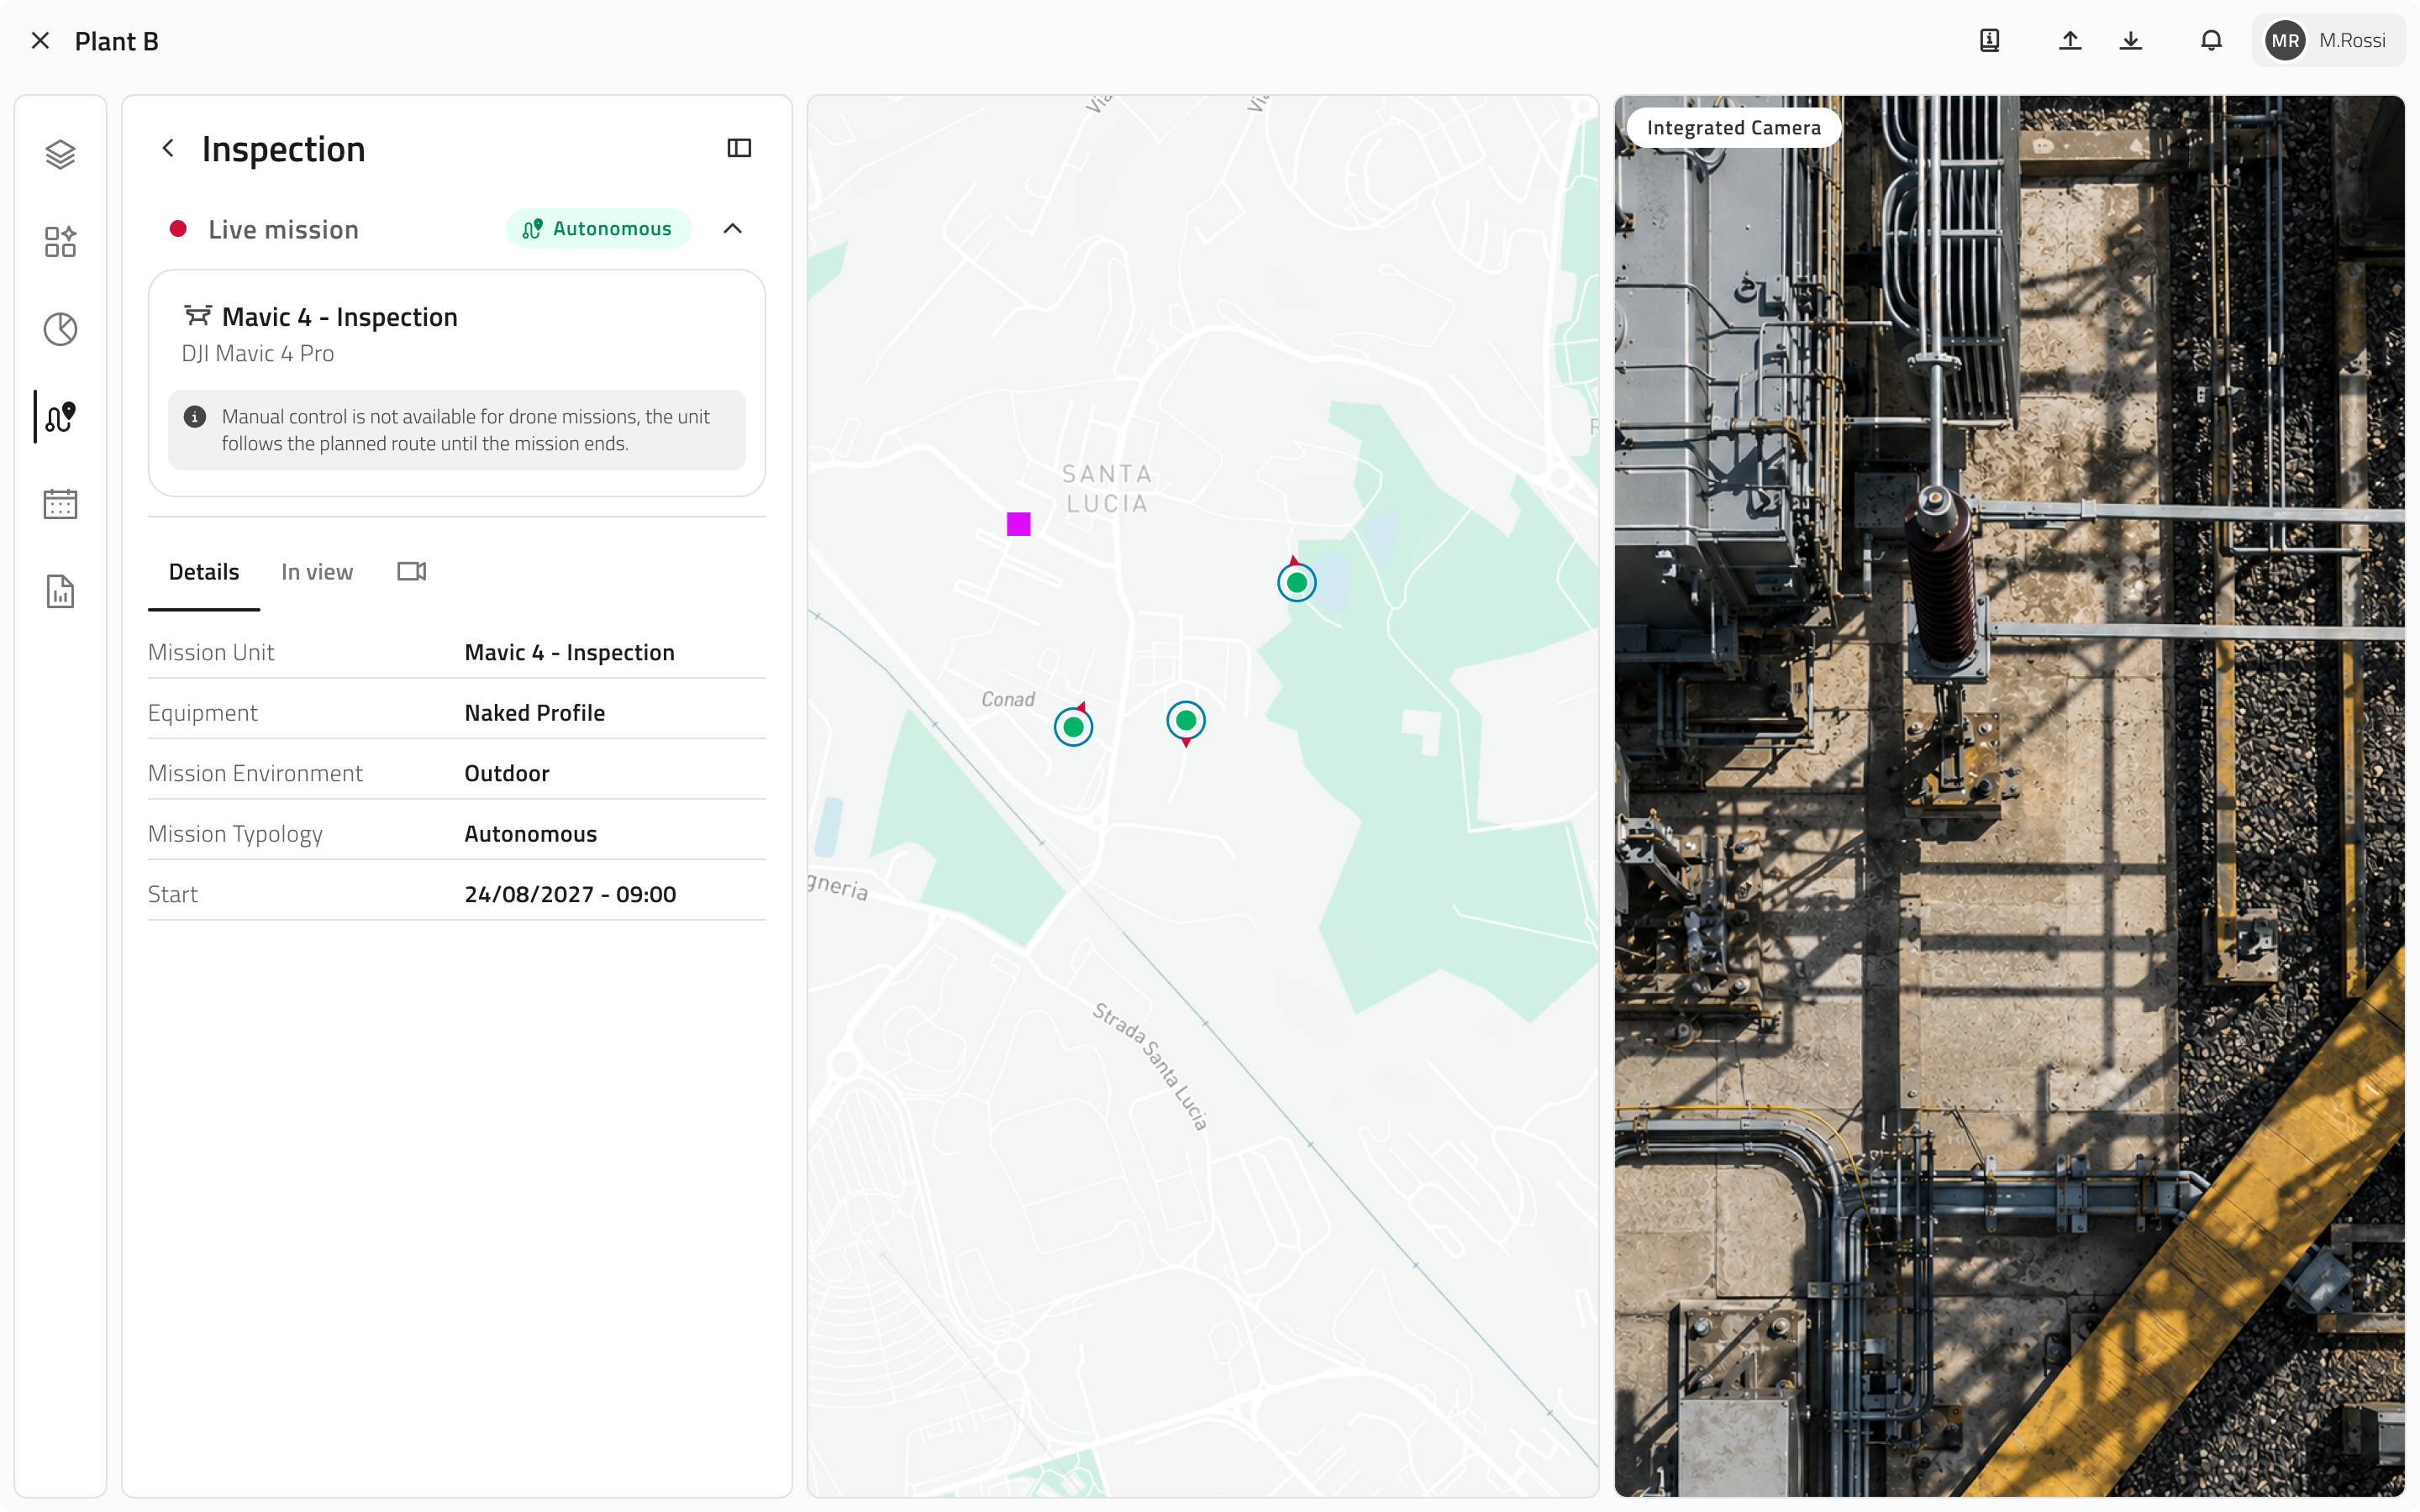
The details of the mission
The Details panel repeats the configuration the mission was created with: the Mission Unit that flies it, the Equipment it uses, the environment, the typology and the moment the mission started.
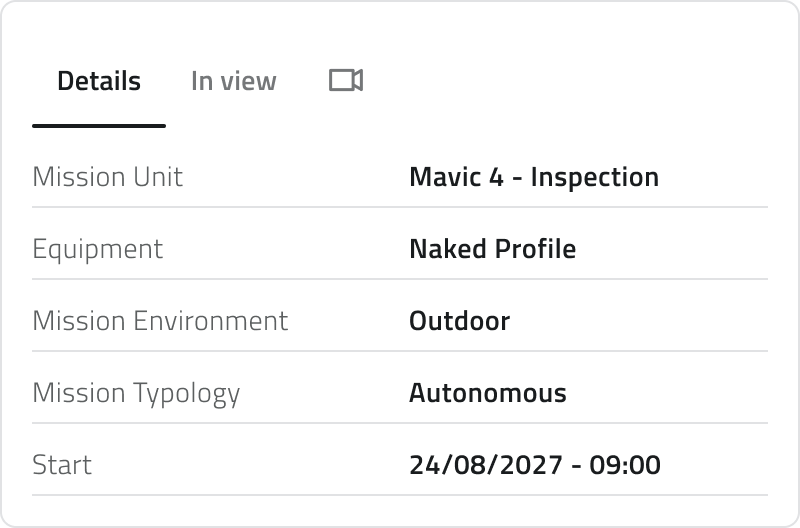
What the map shows
The In view panel lists the elements drawn on the map, the Drone Waypoints and the Hangar, and the eye beside each one shows or hides it while the mission goes on.
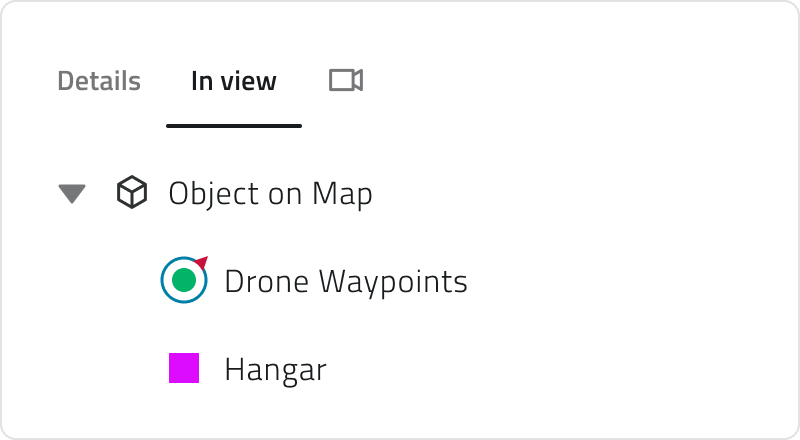
Watching the streams
The Streaming panel lists the video sources grouped by unit, the drone with its own camera and the hangar with its own. Turning one on opens a view for it, with the name of the source at the top, and the eye beside a group hides the view again.
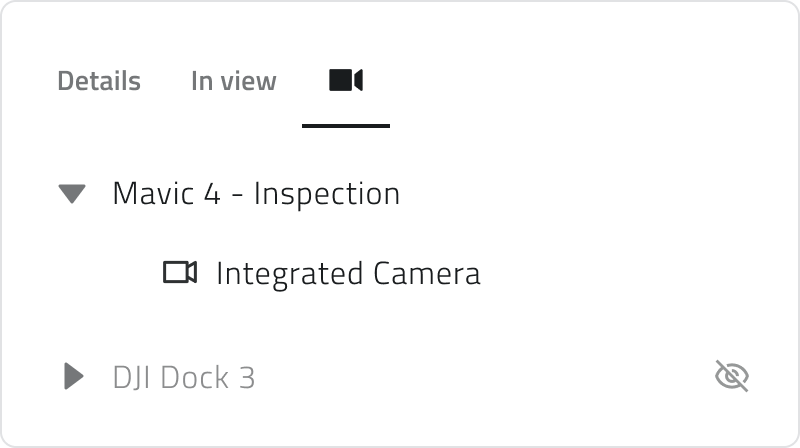
The space adjusts itself as you show and hide the views: the map is always there, and what is left goes to the views you have open.
Leaving the mission without stopping it
Going back to the mission list, or moving to another section of the platform, leaves the mission running: the drone carries on along its route and you can go back to it from the list, in the Live Missions section. Open it again and you find everything as you left it, the map and the streams included.
Links
- Run the pre-check and start a mission: the checks that come before the start.
- Find and manage your missions: where you open a mission that is already running.
- Review an executed mission: what you find once a mission is over.
Italian version
Durante una missione live con drone puoi seguire la missione dal pannello e guardare le immagini che le telecamere trasmettono, mentre il volo procede da sé.
Ci si arriva in due modi: avviando una missione dal Pre Check, oppure aprendola dalla sezione Live Missions.
La schermata della missione in corso
Il pannello a sinistra mostra lo stato della missione e la configurazione con cui è stata creata e può essere chiuso quando serve più spazio. La mappa rimane sempre visibile, con i waypoint e l’hangar della missione, mentre lo spazio restante viene suddiviso tra gli stream che sono stati attivati.
Nella parte superiore del pannello, un indicatore mostra lo stato della missione; sotto sono riportati l’unità e il modello del drone, seguiti dai tre pannelli: Details, In view e Streaming, quest’ultimo contrassegnato dall’icona di una fotocamera.
I dettagli della missione
Il pannello Details riporta la configurazione con cui è stata creata la missione: la Mission Unit che la esegue, l’Equipment utilizzato, l’ambiente, la tipologia e l’ora di inizio della missione.
Cosa si vede in mappa
Il pannello In view elenca gli elementi visualizzati sulla mappa, i Drone Waypoints e l’Hangar. L’icona a forma di occhio accanto a ciascun elemento consente di mostrarlo o nasconderlo durante la missione.
Guardare gli streaming
Il pannello Streaming elenca le sorgenti video raggruppate per unità: il drone con la propria telecamera e l’hangar con la propria. Attivando una sorgente, si apre la relativa vista, con il nome della sorgente nella parte superiore; l’icona a forma di occhio accanto a un gruppo consente di nascondere nuovamente la vista.
Lo spazio si adatta automaticamente man mano che le viste vengono mostrate o nascoste: la mappa rimane sempre visibile, mentre lo spazio restante viene distribuito tra le viste aperte.
Uscire dalla missione senza fermarla
Tornare all’elenco delle missioni o spostarsi in un’altra sezione della piattaforma non interrompe la missione: il drone prosegue lungo il proprio percorso ed è possibile tornare alla missione dall’elenco, nella sezione Live Missions. Riaprendola, si ritrova tutto nello stato in cui era stato lasciato, inclusi la mappa e gli stream.
Collegamenti
- Eseguire il pre-check e avviare una missione: i controlli che precedono l'avvio.
- Trovare e gestire le missioni: da dove apri una missione già in corso.
- Rivedere una missione eseguita: cosa trovi quando la missione è conclusa.
Last update: 21 August 2026
Review an executed mission
English version
A mission that has come to an end stays available under Executed, in the Missions panel. Open it and you find how the run went, the media it collected, and the possibility to restore the mission without configuring it from scratch.
The panel on the left has three tabs, Summary, Details and In view, while beside it the map opens on which the mission ran, with the waypoints and the areas drawn when it was created.
The report of the mission
At the top of the Summary tab is the list of Manual Captures: the photos and videos taken at your request while the mission was running, kept apart from those produced at the waypoints. They are split in two groups, photos and videos, each with its own count and with the name and the time of every file.
The waypoints follow, in the order they were reached, each with the number of actions carried out and media collected. Open one and you find the individual actions, with the add-on that performed them, and the files that go with them.
Waypoints the Mission Unit did not reach are marked in red, both in the list and on the map, so you can see at a glance which part of the route was left uncovered.
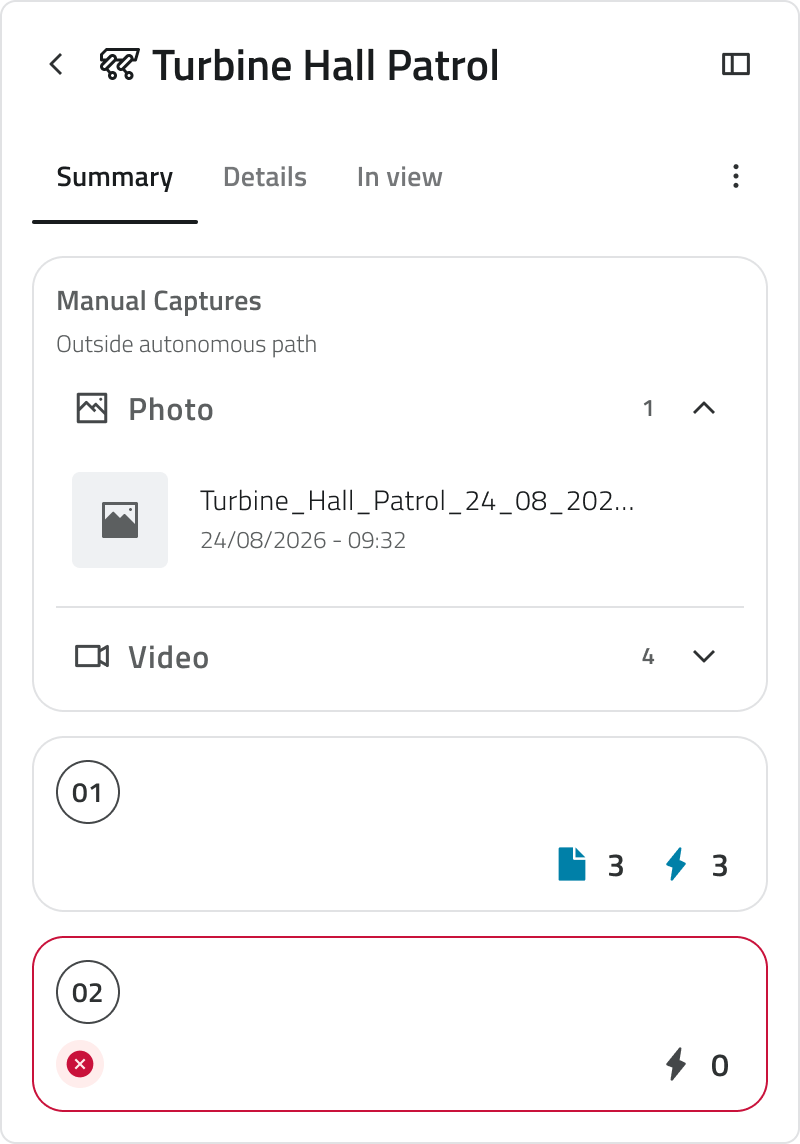
The map of a mission that is over
The map of a mission that is over is read only: it shows the mission as it ran and can no longer be changed. You can still select the elements and use the measuring tools, to take distances and areas over the route that was covered.
Opening a photo or a video
Select a file to open it full screen. Below it you find where it comes from, a waypoint or a manual capture, and when it was taken; the arrows on either side move to the other files of the same group. From here you can enlarge the image and download the file.
How it was configured
The Details tab reports the configuration the mission ran with: the Mission Unit, the Equipment with its add-ons, the Mission Environment, the map, the typology and the moment it started.
The In view tab works as it does while planning: it lists the map and the elements drawn on it, hides and shows them, adjusts the opacity of the map and, in a multi floor mission, lists the floors.
Running the same mission again
When a mission has to be repeated there is no need to configure it again: Restore Mission, in the menu at the top right of the panel, makes a copy of it as a Draft, with waypoints, actions, Danger Zones and Geofencing already in place. The copy can still be changed before it starts.
From the copy you take the usual path of a Draft: the platform connects to the Mission Unit, you capture the Home Position again and you move on to the Pre Check. The Home is taken again because it concerns where the unit is now, not where it was then.
Discovery missions
A Discovery mission follows no route: it explores the environment and produces a map of it. Its report therefore holds no waypoints and no actions, only a message confirming that the mission is complete, and the map beside it is the one generated during the run.
Missions of this kind cannot be restored: to explore again, configure a new Discovery mission.
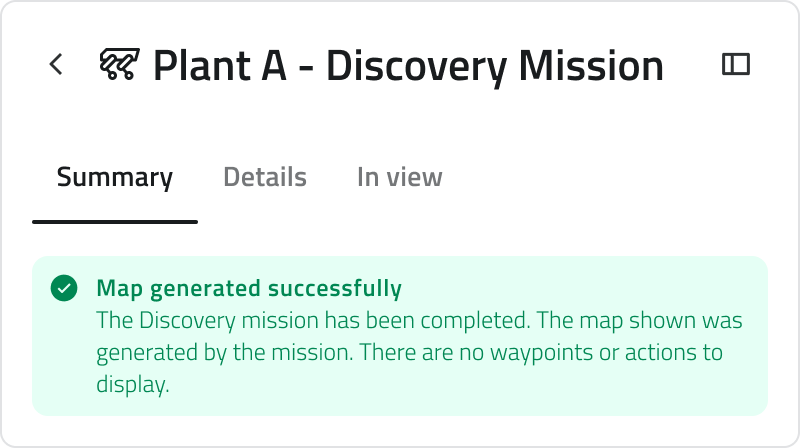
Links
- Find and manage your missions: where you open an executed mission.
- Missions calendar: where an executed mission also appears.
Italian version
Una missione che si è conclusa resta a disposizione nella sezione Eseguite del pannello Missioni. Aprendola ritrovi come si è svolta, i media che ha raccolto e la possibilità di ripristinare la missione senza configurarla da capo.
Il pannello a sinistra è diviso in tre sezioni, Riepilogo, Dettagli e In vista. Accanto si apre la mappa su cui la missione si è svolta, con i waypoint e le aree definiti in fase di creazione.
Il resoconto della missione
In cima alla sezione Riepilogo è riportato l'elenco delle Acquisizioni manuali: le foto e i video acquisiti su tua richiesta durante lo svolgimento della missione, tenuti distinti da quelli prodotti sui waypoint. Sono divisi in due gruppi, foto e video, ognuno con il proprio conteggio e con il nome e l'ora di acquisizione di ciascun file.
Seguono i waypoint, nell'ordine in cui sono stati raggiunti, ciascuno con il numero di azioni svolte e di media raccolti. Aprendone uno trovi le singole azioni, con l'add-on che le ha eseguite, e i file corrispondenti.
I waypoint che la Mission Unit non ha raggiunto sono evidenziati in rosso, nell'elenco e sulla mappa: individui così a colpo d'occhio quale parte del percorso è rimasta scoperta.
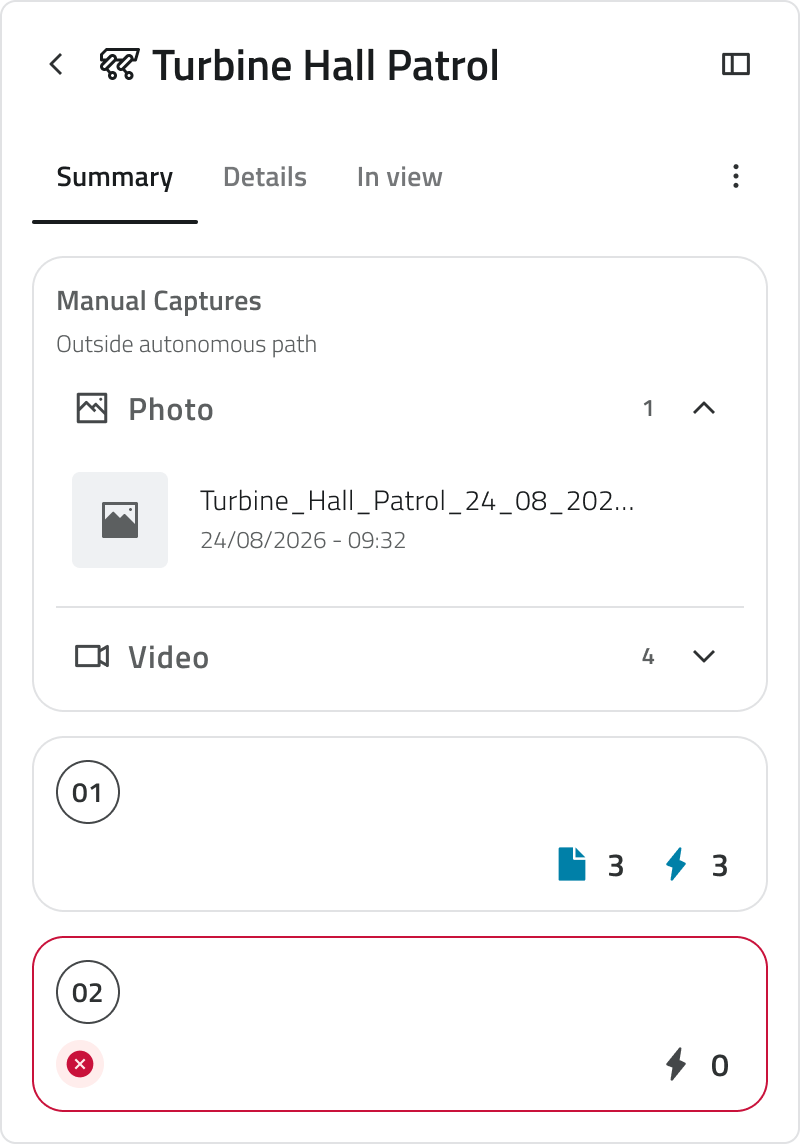
La mappa di una missione conclusa
La mappa di una missione conclusa è in sola lettura: mostra la missione com'è stata eseguita e non può più essere modificata. Puoi comunque selezionare gli elementi e usare gli strumenti di misura, per rilevare distanze e aree sul percorso svolto.
Aprire una foto o un video
Selezionando un file lo apri a schermo intero. Sotto compaiono la sua origine, il waypoint oppure un'acquisizione manuale, e la data in cui è stato acquisito; le frecce ai lati portano agli altri file dello stesso gruppo. Da qui puoi ingrandire l'immagine e scaricare il file.
Com'è stata configurata
La sezione Dettagli riporta la configurazione con cui la missione è stata eseguita: la Mission Unit, l'Equipment con i suoi add-on, l'Ambiente della missione, la mappa, la tipologia e il momento di avvio.
La sezione In vista si comporta come in fase di pianificazione: elenca la mappa e gli elementi disegnati, permette di nasconderli e di mostrarli, regola l'opacità della mappa e, in una missione multipiano, riporta i singoli piani.
Eseguire di nuovo la stessa missione
Per ripetere una missione non serve riconfigurarla: Ripristina missione, nel menu in alto a destra del pannello, ne crea una copia come Bozza, con waypoint, azioni, Zone di pericolo e Geofencing già al loro posto. La copia resta modificabile prima dell'avvio.
Da lì la copia segue il percorso di una qualsiasi Bozza: la piattaforma si collega alla Mission Unit, tu riacquisisci la Home Position e passi al Pre Check. La Home Position va riacquisita perché dipende da dove si trova l'unità ora, non da dov'era allora.
Missioni Esplorative
Una missione Esplorativa non segue un percorso: esplora l'ambiente e ne produce una mappa. Per questo il resoconto non contiene waypoint né azioni, ma un messaggio che conferma la conclusione della missione, e la mappa che vedi accanto è quella generata durante l'esecuzione.
Le missioni di questo tipo non possono essere ripristinate: per esplorare di nuovo occorre configurare una nuova missione Esplorativa.
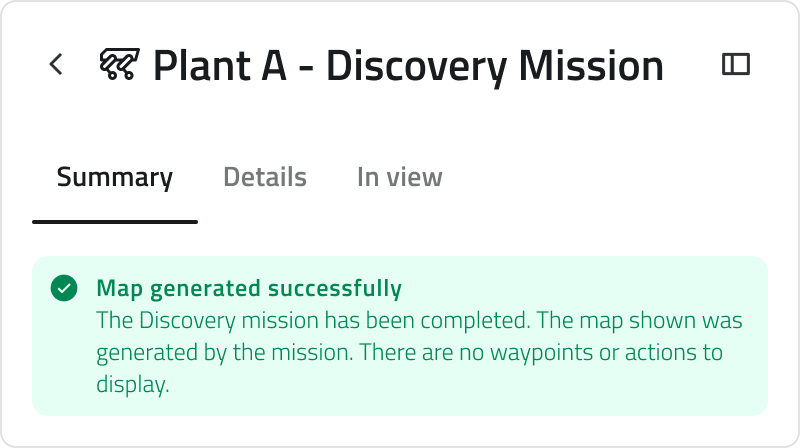
Collegamenti
- Trovare e gestire le missioni: da dove apri una missione eseguita.
- Calendario delle missioni: dove una missione eseguita compare anche.
Last update: 6 August 2026
Control Room
English version
The Control Room gathers every Mission Unit of the organisation, whatever project they are working on.
In a single screen you find:
- the state of each unit: busy, free or offline;
- the charge it has left;
- its position on the map;
- the stream of any unit that is on and reachable.
You open it from its own button in the side bar.
The two layouts
The same units can be laid out in two ways, chosen at the top right:
| Layout | What it shows |
| Cards | The units side by side and grouped by state, with the count next to each group. This layout gives the quickest overall picture. |
| Map | The list stays in a column on the left and the map takes the rest of the room, with every located unit marked by its name. |
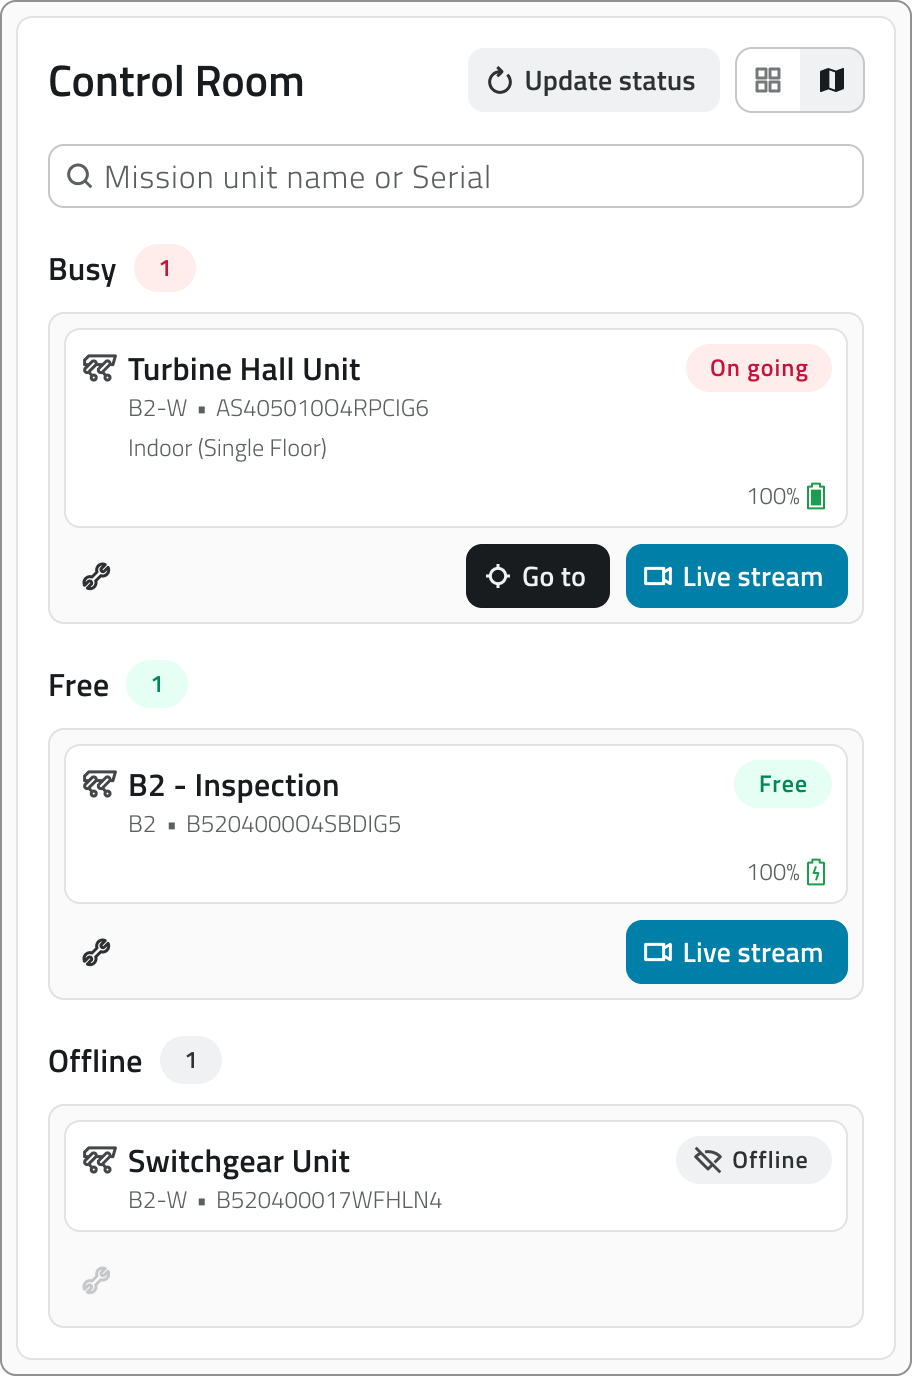
When a Mission Unit has no location available, it appears in the list but not on the map.
What each unit tells you
Every Mission Unit carries its name, its model and its serial number, along with the state it is in: On going while it is running a mission, Free when it is available, Offline when it is not answering. Units that are busy also show the environment of the mission under way, indoor or outdoor.
The charge left is given as a percentage, and its colour tells you how to read it at a glance:
| Colour | Charge |
| Green | Above 49%. |
| Orange | Between 20% and 49%. |
| Red | Up to 19%. Below 5% an exclamation mark is added, because the charge is critical. |
Spotting the units on the map
In the map layout, the Go to button brings the frame onto the unit you choose. The button covers the units that are free and those busy with Outdoor missions.

The Fit all assets button does the opposite: it widens the frame until every unit fits in it at once, which helps to see how they are spread over the area.

Watching the streams
Live stream opens a panel on the right of the screen for the unit you selected. The panel holds one view for every add-on of its Equipment that transmits images, and each view carries the name of the add-on it comes from. While the unit is running a mission, the project and the mission it is joined to appear at the top of the panel.
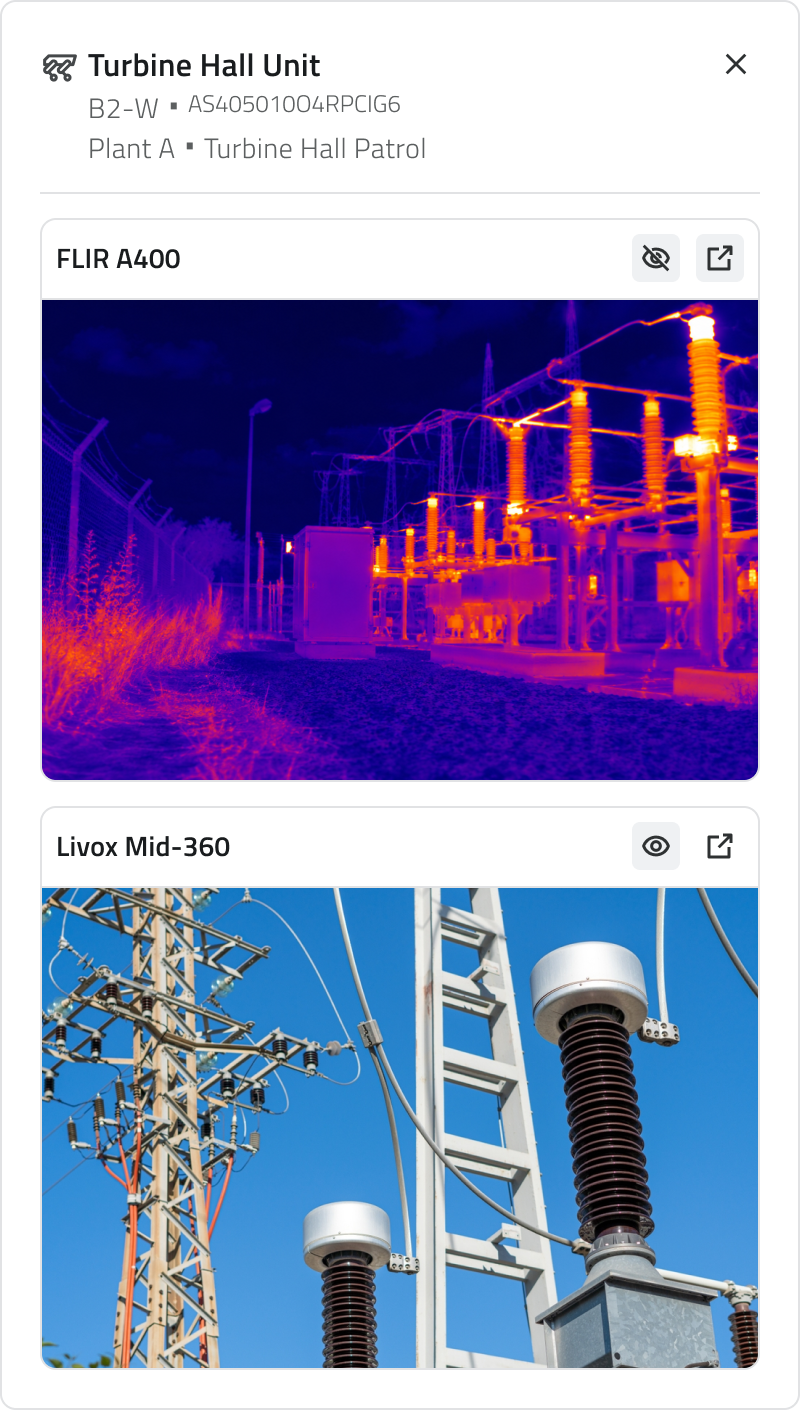
Dragging its border expands the panel. Each view can be hidden, to leave only the ones you are following, or opened in a separate window, which helps when you want a stream on a second screen.
Updating the state
The Update status button asks the units for their current information and brings it back into the list: use it when you have been on the page a while and want to be sure that what you are reading is up to date.
Links
- Robot Dog – Tracking a live mission: following and commanding a single mission.
- Find and manage your missions: the missions of a single project.
- Missions calendar: what is planned for the organisation.
Italian version
La Control Room raccoglie tutte le Mission Unit dell'organizzazione, a prescindere dal progetto su cui lavorano.
In un'unica schermata trovi:
- lo stato di ogni unità: impegnata, libera oppure offline;
- la carica residua;
- la posizione sulla mappa;
- lo streaming di ogni unità accesa e raggiungibile.
Si apre dal pulsante dedicato nella barra laterale.
I due layout
Le stesse unità possono essere disposte in due layout diversi, che selezioni in alto a destra:
| Layout | Cosa mostra |
| A schede | Le unità affiancate e raggruppate per stato, con il conteggio accanto a ogni gruppo. È il layout che restituisce il quadro d'insieme più immediato. |
| A mappa | Le unità restano elencate in una colonna a sinistra, mentre la mappa occupa il resto dello spazio e mostra dove si trova ogni unità, con il suo nome accanto. |
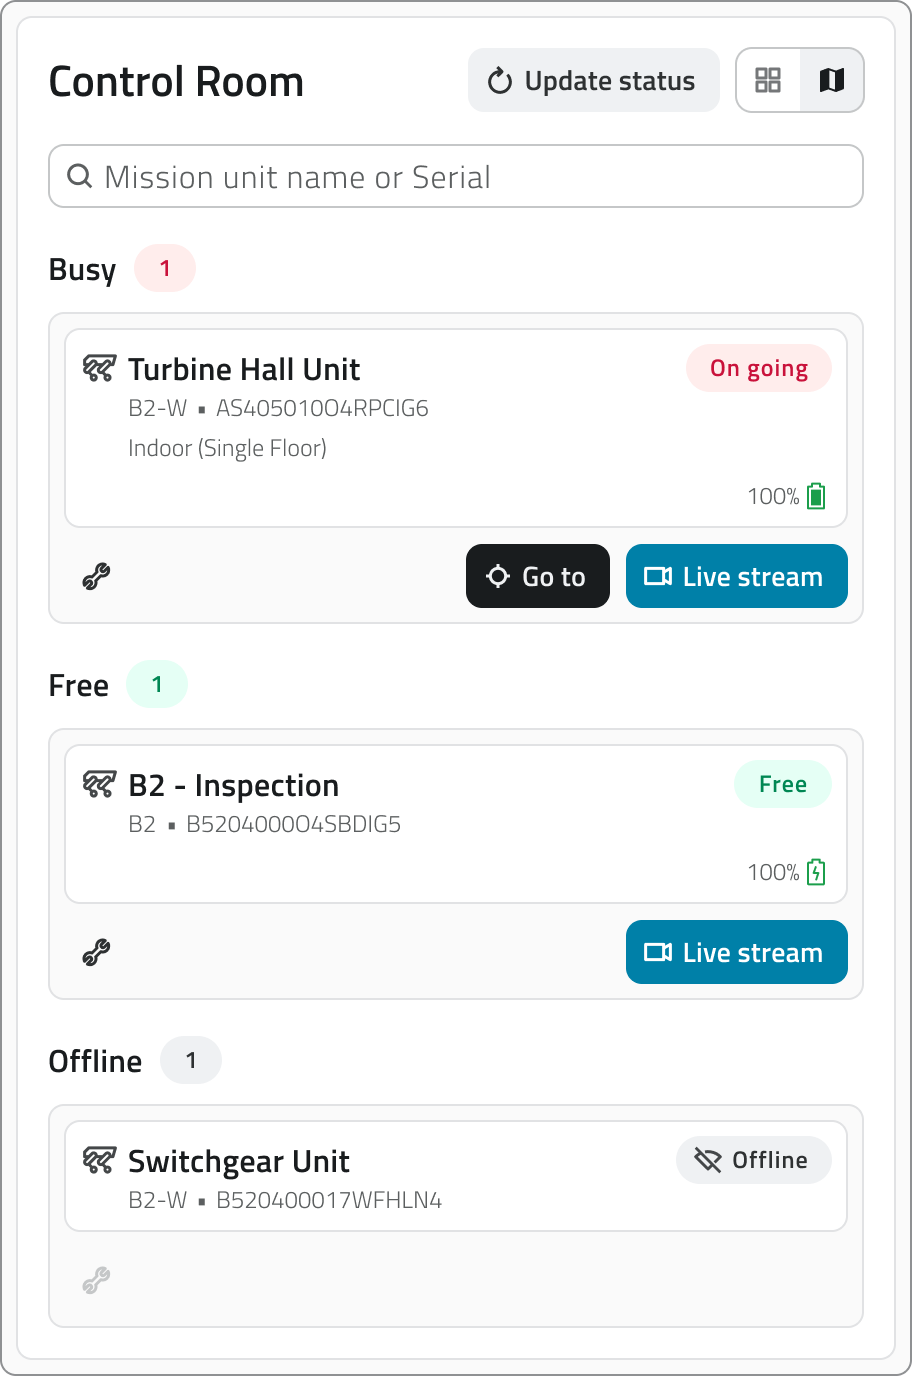
Se per una Mission Unit non è disponibile la localizzazione, l'unità compare nell'elenco ma non sulla mappa.
Cosa riporta ogni unità
Di ogni Mission Unit sono riportati il nome, il modello e il numero di serie, insieme allo stato in cui si trova: In corso mentre esegue una missione, Libera quando è disponibile, Offline quando non risponde. Per le unità impegnate compare anche l'ambiente della missione in corso, interno o all'aperto.
La carica residua è espressa in percentuale, e il colore ne segnala subito la criticità:
| Colore | Carica |
| Verde | Oltre il 49%. |
| Arancione | Tra il 20% e il 49%. |
| Rosso | Fino al 19%. Sotto il 5% compare anche un punto esclamativo, perché la carica è ormai critica. |
Individuare le unità sulla mappa
Nel layout a mappa, il pulsante Vai a centra l'inquadratura sull'unità selezionata. Il pulsante è previsto per le unità libere e per quelle impegnate in missioni All'aperto.
Il pulsante Adatta tutti gli asset fa il contrario: allarga l'inquadratura fino a comprendere tutte le unità, così vedi come sono distribuite sul territorio.

Guardare gli streaming
Il pulsante Live stream apre a destra un pannello dedicato all'unità selezionata, con una vista per ogni add-on del suo Equipment che sta trasmettendo: ciascuna porta in alto il nome dell'add-on da cui proviene. Se l'unità sta eseguendo una missione, in cima al pannello trovi anche il progetto e la missione che sta eseguendo.
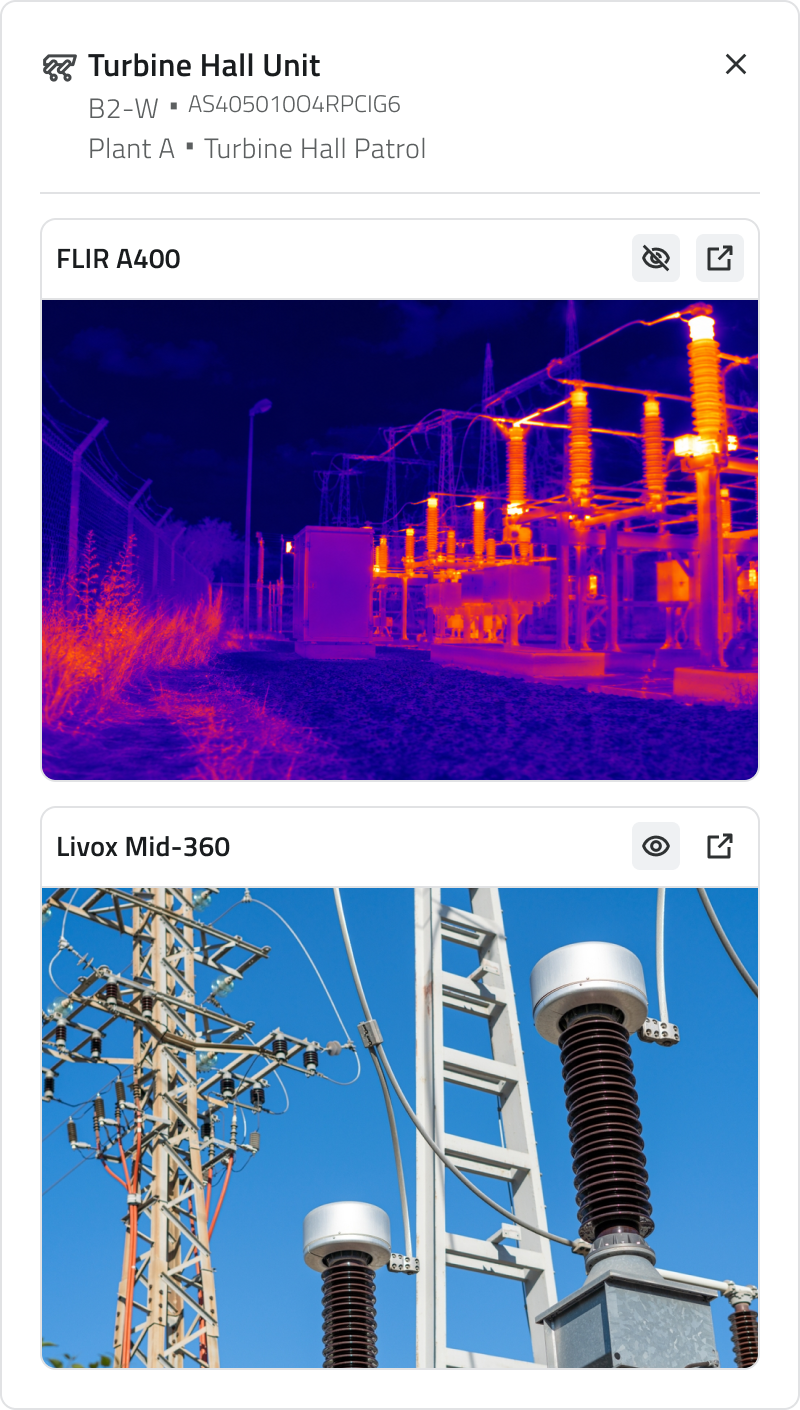
Trascinando il bordo puoi espandere il pannello. Puoi nascondere le viste che non ti servono, in modo da lasciare soltanto quelle che stai seguendo, oppure aprirne una in una finestra separata, comoda per tenere uno streaming su un secondo schermo.
Aggiornare lo stato
Il pulsante Aggiorna stato interroga le unità e riporta nell'elenco le informazioni aggiornate: usalo quando resti a lungo sulla pagina e vuoi essere sicuro di leggere la situazione attuale.
Collegamenti
- Robot Dog – Seguire una missione in diretta: seguire e comandare una singola missione.
- Trovare e gestire le missioni: le missioni di un singolo progetto.
- Calendario delle missioni: cosa è pianificato per l'organizzazione.
Last update: 7 August 2026