
Initial Setup
 English
  Italiano
 English version
Before planning a mission, some basic system resources must be configured.
These configurations define the assets used by the Mission Planner within projects.
The initial setup is managed through Global Lists and is a prerequisite for correctly enabling mission planning.
Initial setup through Global Lists
From the app selection page, select the app you want to work on. Then, from the left sidebar, open the Global Lists section.

The main lists used for mission planning are:
- Mission Unit
Represents the robotic units available in the project. - Add-on
Represents sensors, cameras, and accessories, either native or additional, used to support mission objectives. - Equipment
Represents technical configurations composed of one or more Add-on. An Equipment is what you select when you configure a mission.
Register a Mission Unit
To use a Mission Unit in mission planning, it must first be registered in the platform.
The Mission Unit models available for integration are:
- Unitree B2
- Unitree B2 Wheel
- Unitree Go2
- DJI Matrice 4TD
- DJI Dock 3
To add a new Mission Unit, open the Mission Units global list and click the New object button.
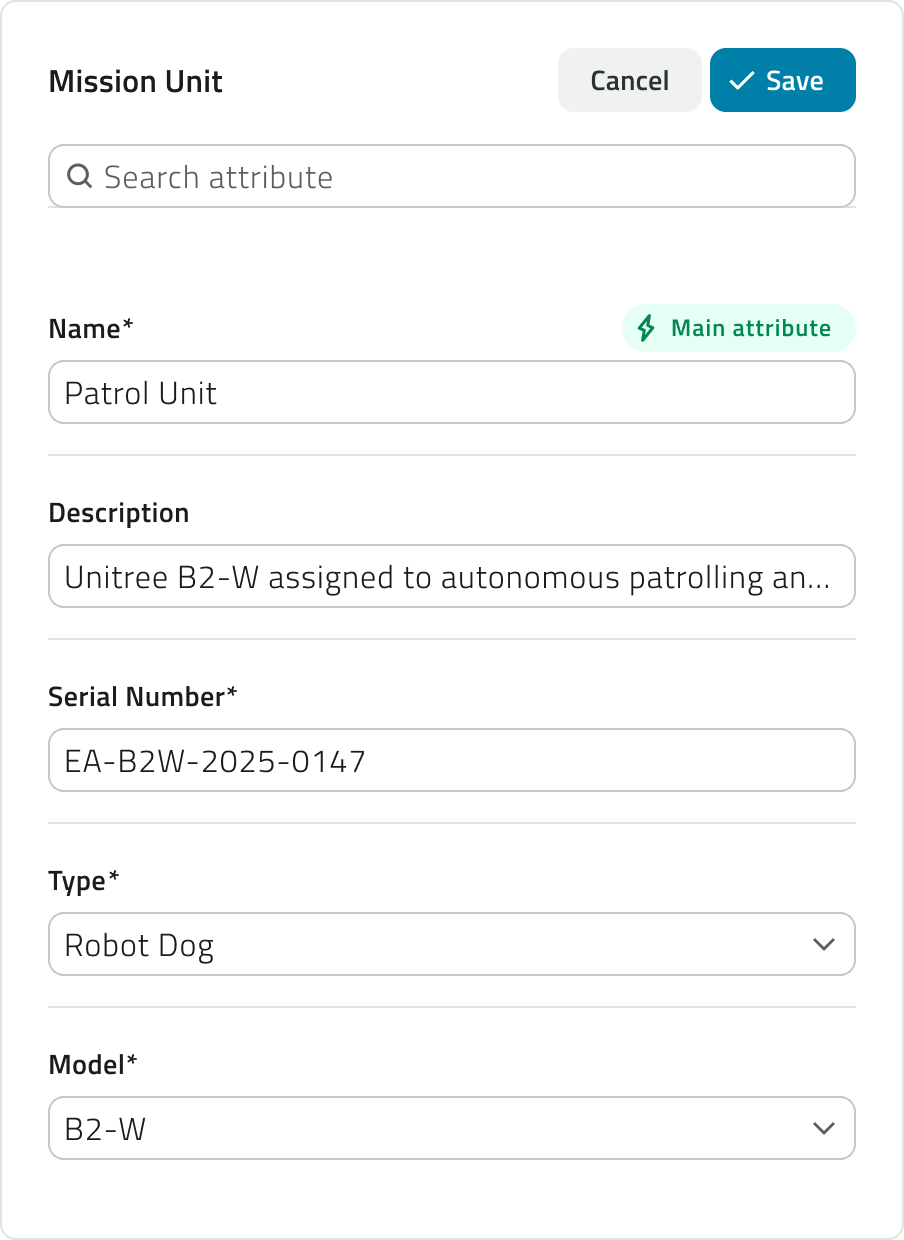
Robot dog
To register a robot dog, complete the following fields:
- Name
- Description
- Serial Number
Unique identification code displayed on the body of the robot dog.
Its position may vary depending on the model.
- Type
Select Robot dog from the list. - Dog model
Select the specific robot dog model from the list.
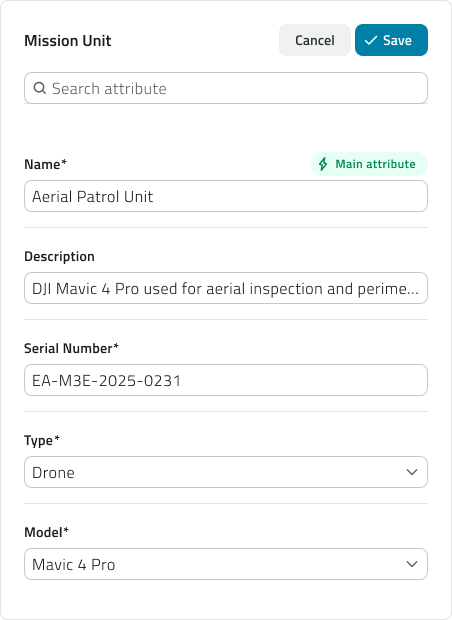
Drone
To register a drone, complete the following fields:
- Name
- Description
- Serial Number
Unique identification code displayed on the body of the drone.
Its position may vary depending on the model.
- Type
Select Drone from the list. - Drone model
Select the specific drone model from the list.
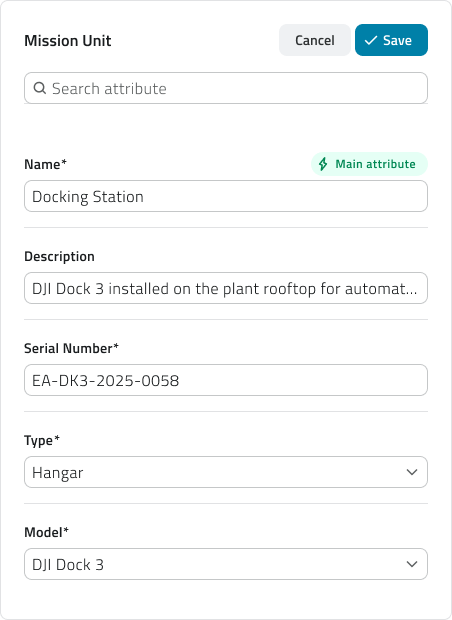
Hangar
To register a hangar, complete the following fields:
- Name
- Description
- Serial Number
Unique identification code displayed on the body of the hangar.
Its position may vary depending on the model.
- Type
Select Hangar from the list. - Drone model
Select the specific hangar model from the list.
To complete the Mission Unit registration, click Save.
A drone mission uses two Mission Units: a drone and a hangar. Register both.
Register an Add-on
Registering Add-ons is required only if you use a Mission Unit of type Robot Dog.
To add a new Add-on, open the Add-ons global list and click the New object button.
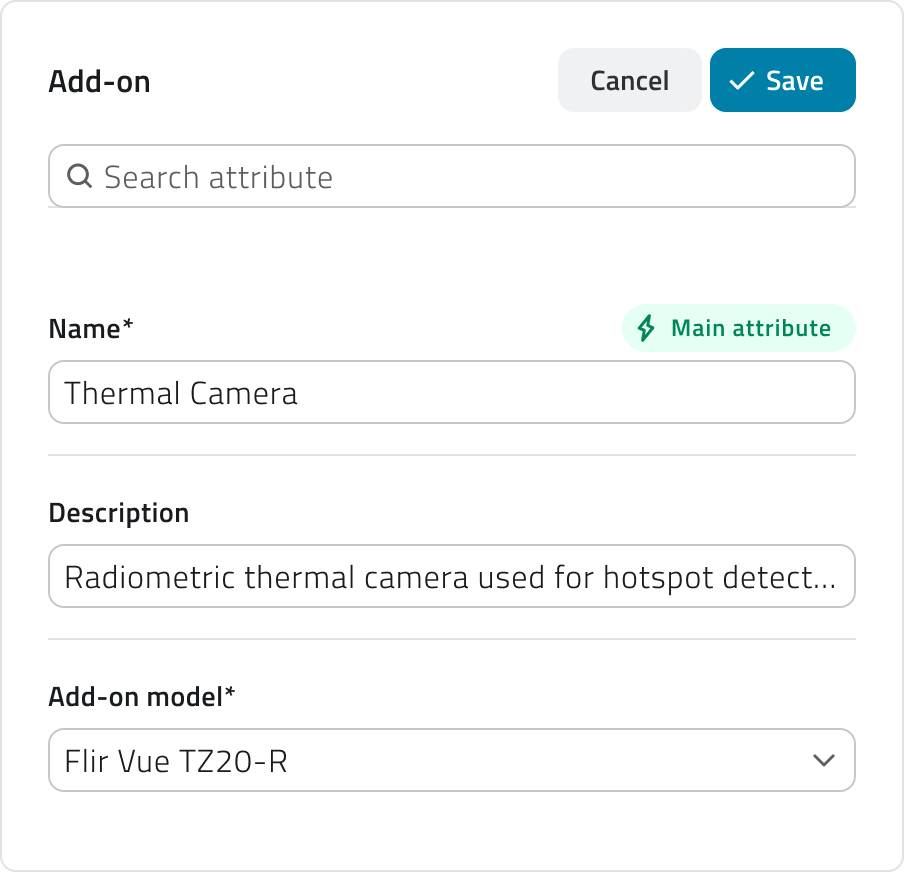
Complete the required fields:
- Name
- Description
- Add-on Model
Select the model of the sensor, camera or accessory to register from the list.
The list shows the models compatible with EagleArca.
To register the Add-on and make it available in the system, click Save.
If no external Add-ons are used, the native Add-ons of the Mission Unit must still be registered.
For native assets, make sure you know the model of the sensor or camera installed on the Mission Unit, so that you can select the correct model. This information is available in the technical documentation of the Mission Unit.
If you cannot identify this information, contact support.
💡Tip: If an Add-on model is not available in the list, it means that it is not compatible with the platform. Make sure you use a supported model or contact support.
Create an Equipment
Equipment can only be associated with Mission Units of type Robot Dog.
To create a new Equipment, open the Equipment global list and click the New object button.
Complete the required fields:
- Name
- Description
- Compliant Dog Models
Select the Robot Dog models compatible with the Equipment. - Add-on
Select one or more previously registered Add-ons.
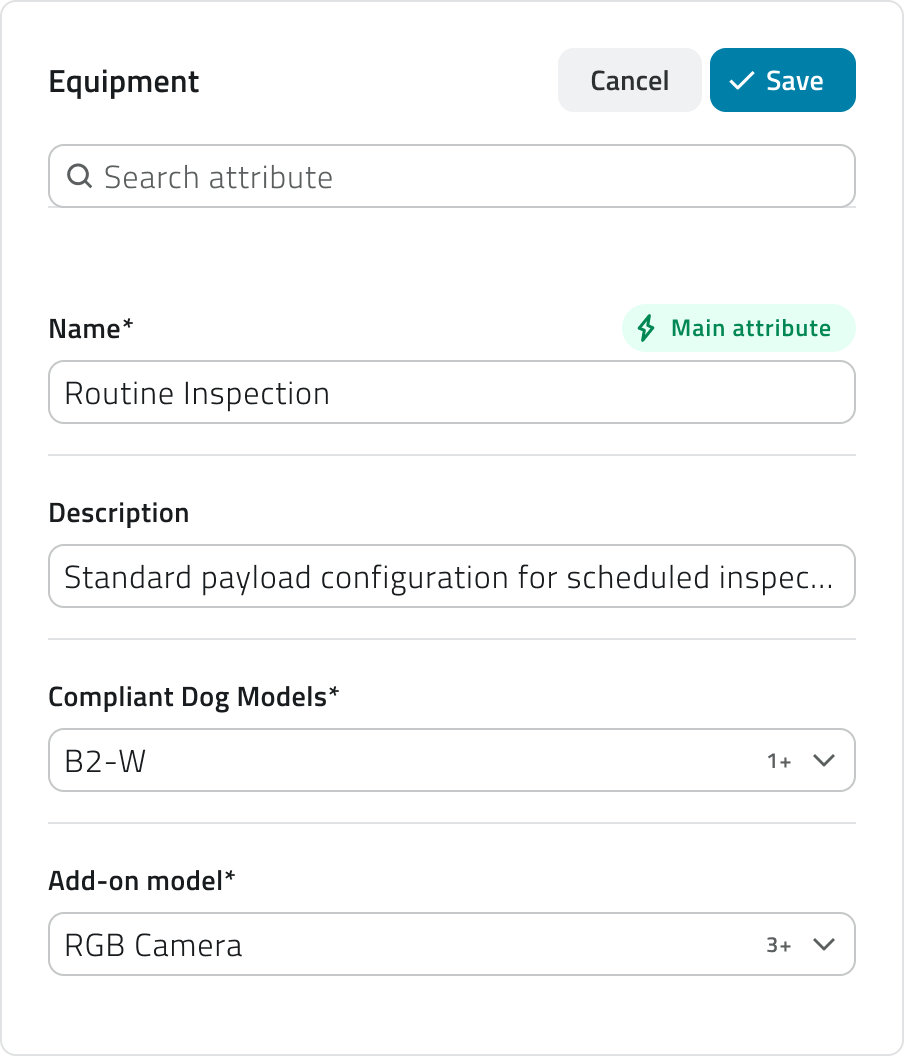
To complete the creation of the Equipment, click Save. When you configure a mission, the list of available Equipment shows only the ones compatible with the Mission Unit you selected.
💡Tip: You can associate an Add-on with multiple Equipment, but make sure it is compatible with the selected Mission Unit models.
Before you can create a mission
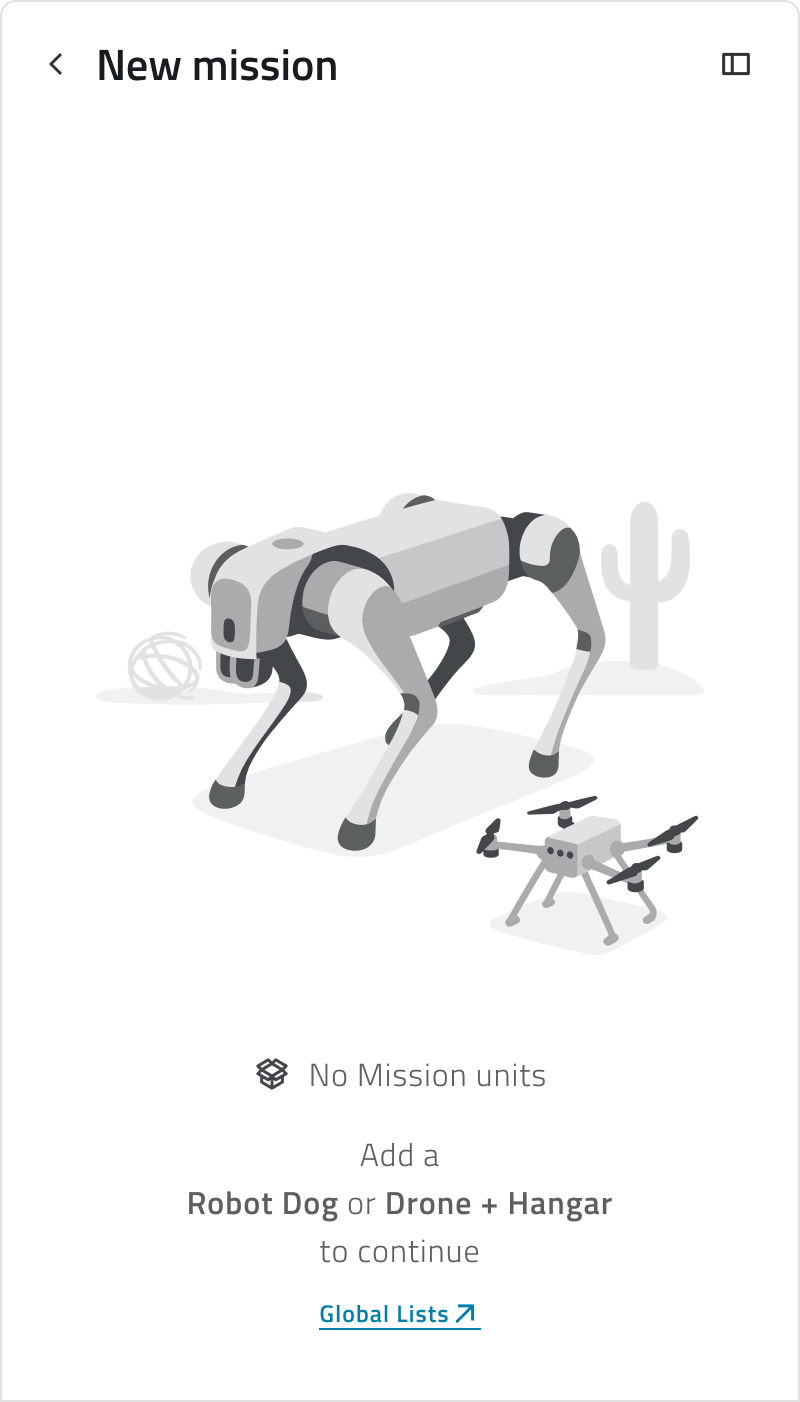
Mission creation starts from the Missions tab, in the side bar on the left, under Live & Planned. Two things need to be registered first:
- at least one Mission Unit, the unit that will carry out the mission;
- at least one Equipment, which defines what that unit takes with it.
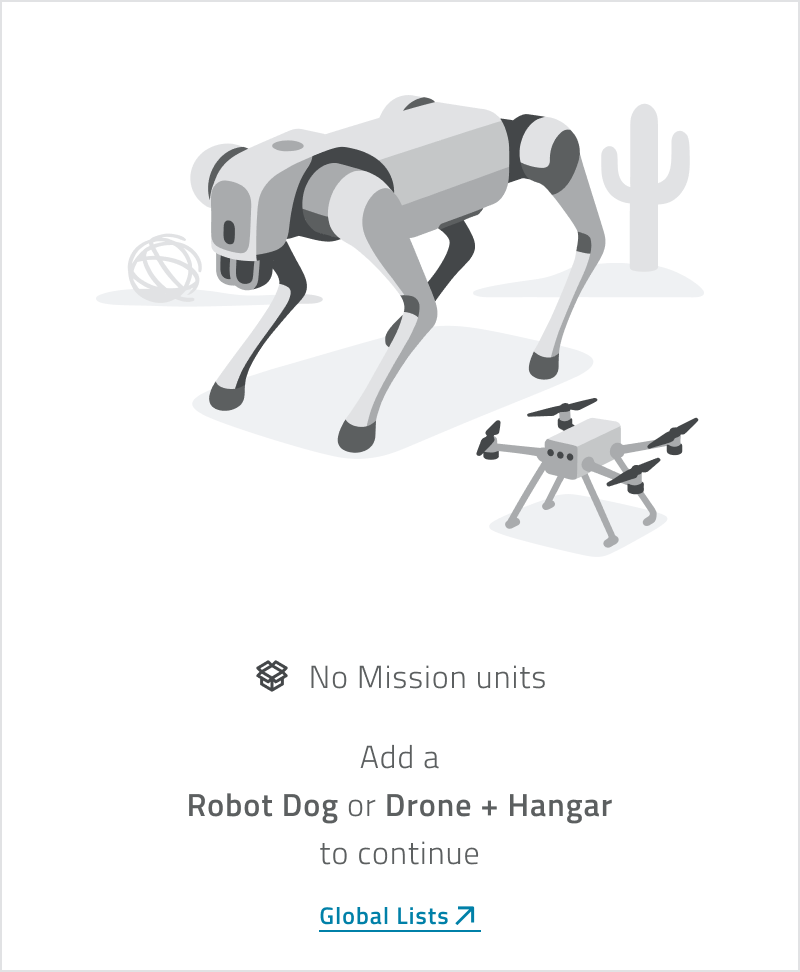
A mission cannot exist without both: there would be no unit to send out, or nothing for it to work with. If either is missing, register it from the Global Lists and then create the mission.
Links
- Create a global object: how the Global Lists work.
- Find and manage your missions: where missions live once the setup is complete.
- Create a mission: configure a new mission step by step.
Prima di pianificare una missione è necessario configurare alcune risorse di base del sistema. La configurazione iniziale viene gestita tramite le Liste Globali e rappresenta un prerequisito per abilitare correttamente la pianificazione delle missioni. Le liste principali per la pianificazione delle missioni sono: Per utilizzare una Mission Unit nella pianificazione delle missioni, è necessario registrarla in piattaforma. I modelli di Mission Unit disponibili per l'integrazione sono: Per aggiungere una nuova Mission Unit, apri la Lista Globale delle Mission Units e clicca sul pulsante Nuovo oggetto. Per registrare un robot dog, compila i seguenti campi: La posizione può variare in base al modello. Per registrare un drone, compila i seguenti campi: La posizione può variare in base al modello. Per registrare un hangar, compila i seguenti campi: La posizione può variare in base al modello. Per completare la registrazione della Mission Unit, clicca su Salva. Una missione con drone utilizza due Mission Unit: un drone e un hangar. Censiscili entrambi. Il censimento degli Add-on è necessario solo se utilizzi una Mission Unit di tipo Robot Dog. Per aggiungere un nuovo Add-on, apri la Lista Globale degli Add-on e clicca sul pulsante Nuovo oggetto. Compila i campi richiesti: Per registrare l’Add-on e renderlo disponibile nel sistema, clicca su Salva. In assenza di Add-on esterni, è comunque necessario censire gli Add-on nativi della Mission Unit. Per gli asset nativi, assicurati di conoscere il modello del sensore o della camera installata sulla Mission Unit, in modo da selezionare il modello corretto. Questa informazione è disponibile nella documentazione tecnica della Mission Unit. 💡Suggerimento: Se un modello di Add-on non è presente nella lista, significa che non è compatibile con la piattaforma. Assicurati di utilizzare un modello supportato o contatta il supporto. Gli Equipment possono essere associati solo a Mission Unit di tipo Robot Dog. Per creare un nuovo Equipment, apri la Lista Globale degli Equipment e clicca sul pulsante Nuovo oggetto. Compila i campi richiesti: Per completare la creazione dell’Equipment, clicca su Salva. Quando configuri una missione, l’elenco degli Equipment mostra solo quelli compatibili con la Mission Unit selezionata. 💡Suggerimento: Puoi associare un Add-on a più Equipment, ma assicurati che sia compatibile con i modelli di Mission Unit selezionati. La creazione di una missione parte dalla sezione Missioni, nella barra laterale a sinistra, sotto Live & Planned. Prima però servono due elementi già censiti: Senza entrambi la missione non può esistere: mancherebbe l'unità da inviare oppure l'equipaggiamento con cui operare. Se manca uno dei due, censiscilo dalle Liste Globali prima di creare la missione. Last update: 31 July 2026
Italian
Configurazione iniziale
Queste configurazioni definiscono gli asset utilizzati dal Mission Planner all’interno dei progetti.
Configurazione iniziale tramite le Liste Globali

Rappresentano le unità robotiche disponibili nel progetto.
Rappresentano sensori, telecamere e accessori, nativi o aggiuntivi, utilizzati a supporto degli obiettivi di missione.
Rappresentano configurazioni tecniche composte da uno o più Add-on. Un Equipment è ciò che selezioni quando configuri una missione.
Censire una Mission Unit
Robot dog
Codice identificativo univoco riportato sul corpo del robot dog.
Seleziona Robot dog dall'elenco.
Seleziona dall’elenco il modello specifico del robot dog.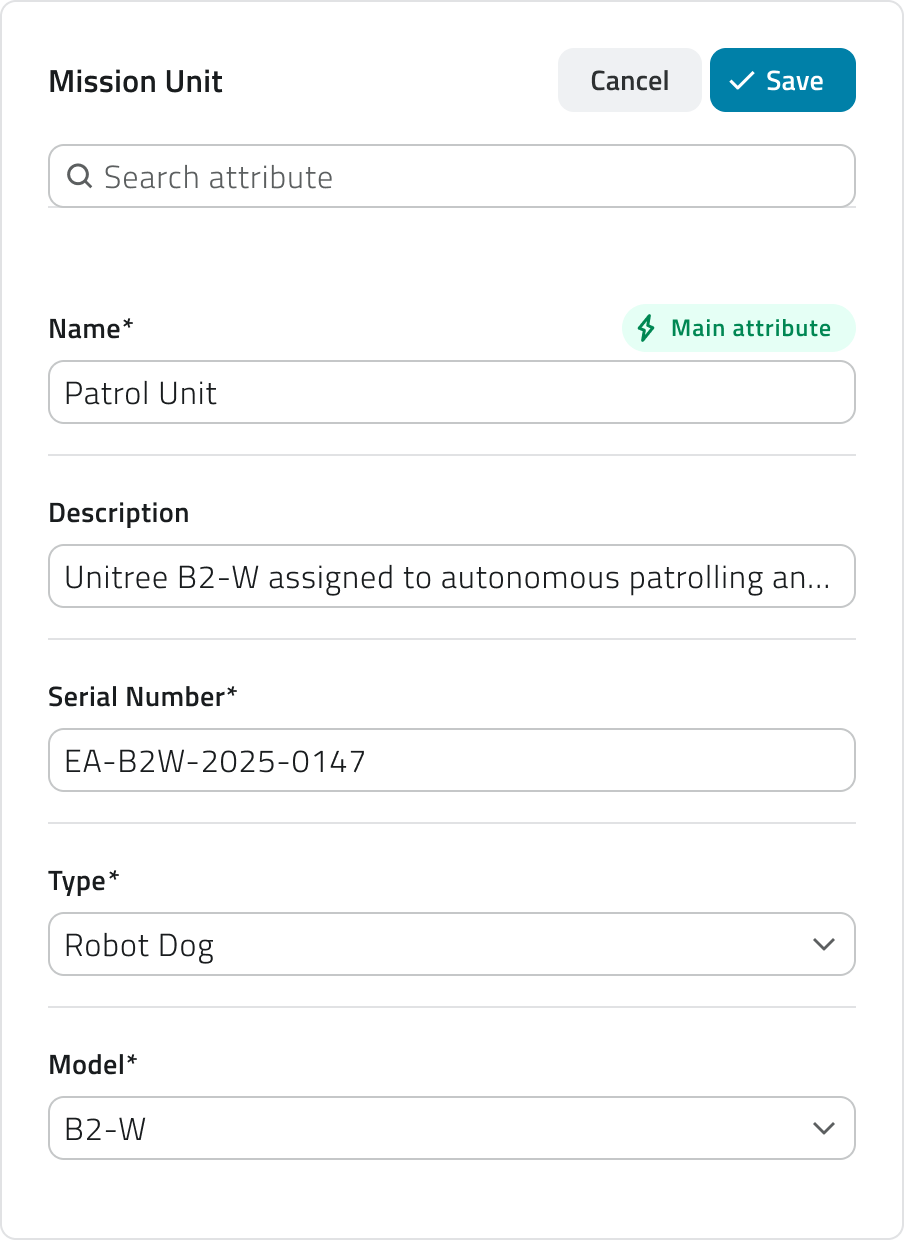
Drone
Codice identificativo univoco riportato sul corpo del drone.
Seleziona Drone dall'elenco.
Seleziona dall’elenco il modello specifico del drone.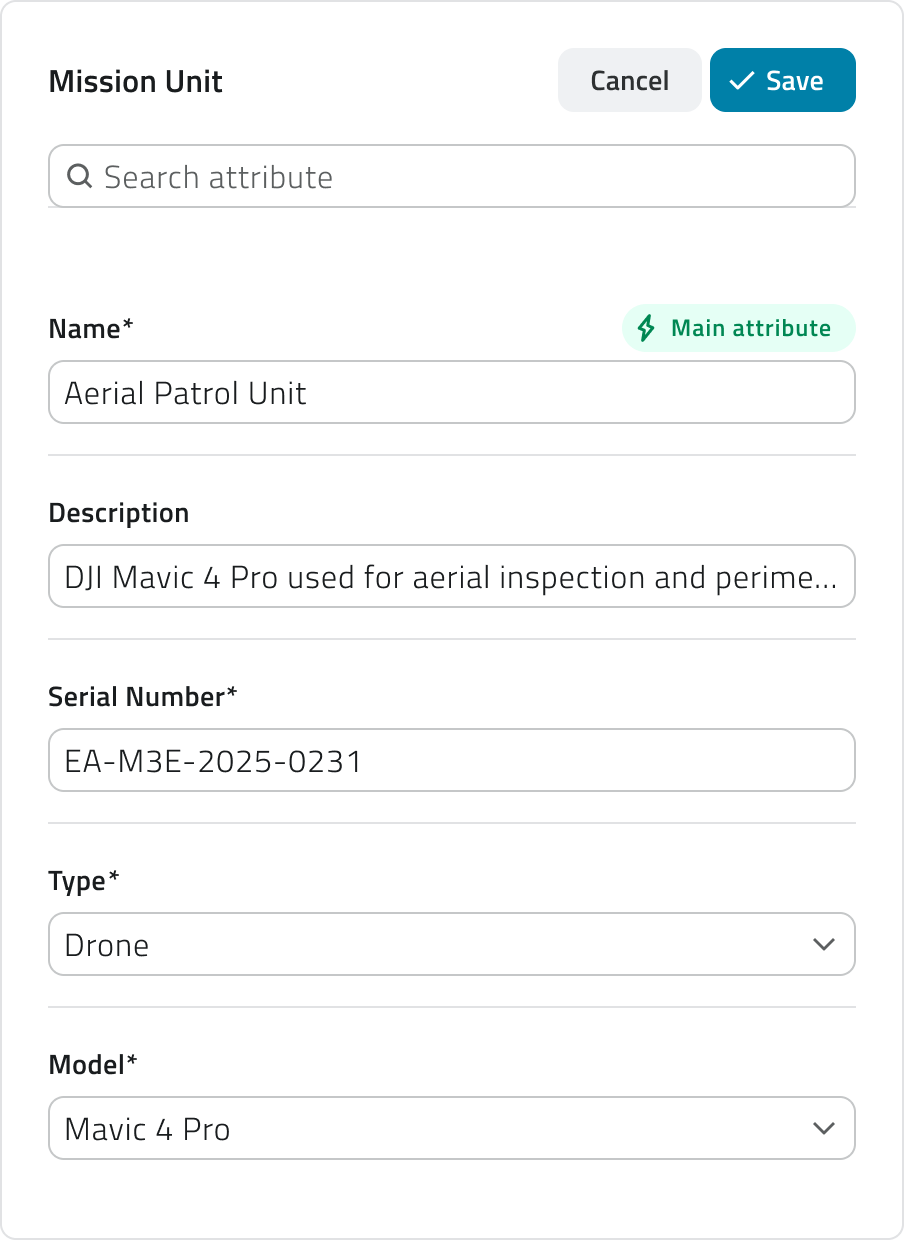
Hangar
Codice identificativo univoco riportato sul corpo dell’hangar.
Seleziona Hangar dall'elenco.
Seleziona dall’elenco il modello specifico dell’hangar.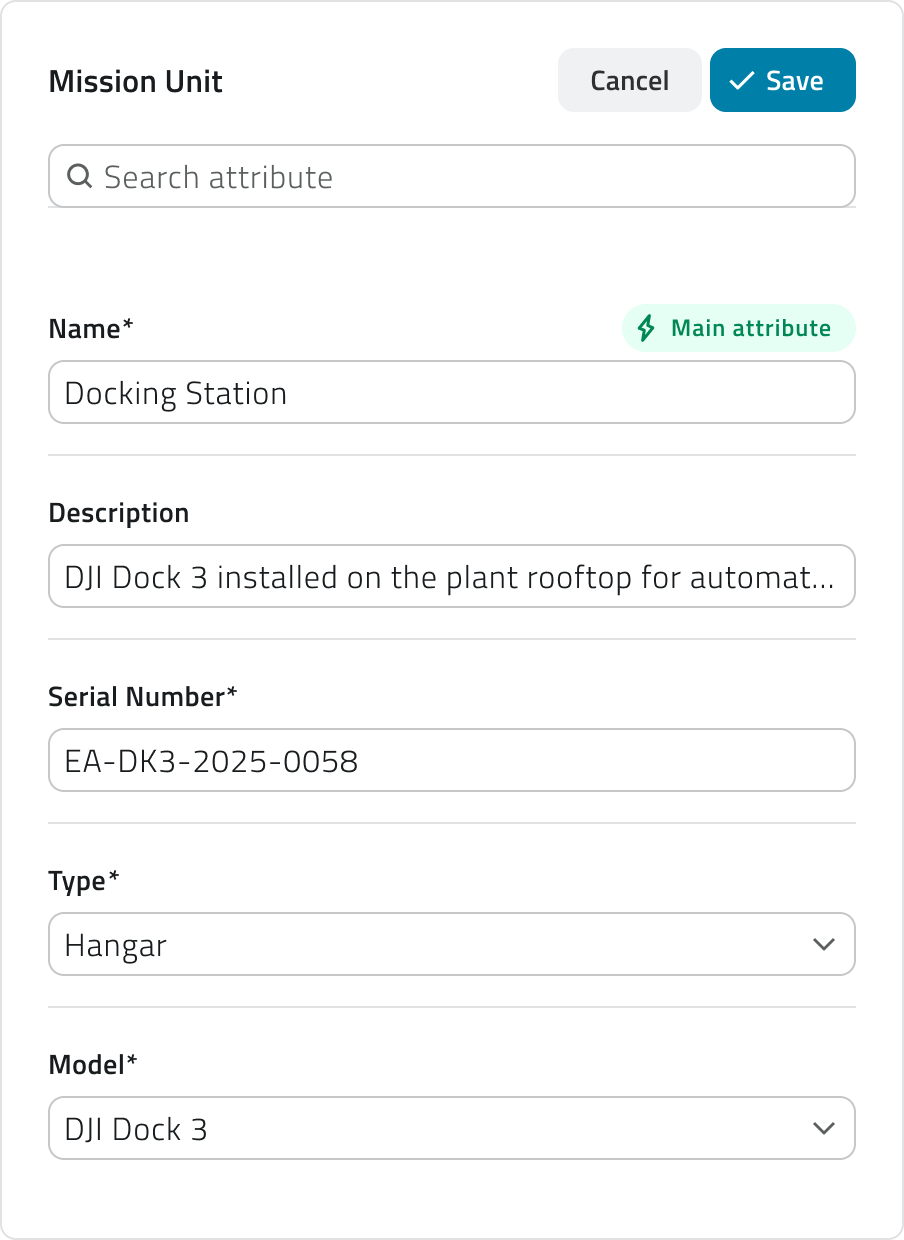
Censire un Add-on
Seleziona dall’elenco il modello del sensore, della fotocamera o dell’accessorio da registrare.
La lista mostra i modelli compatibili con EagleArca.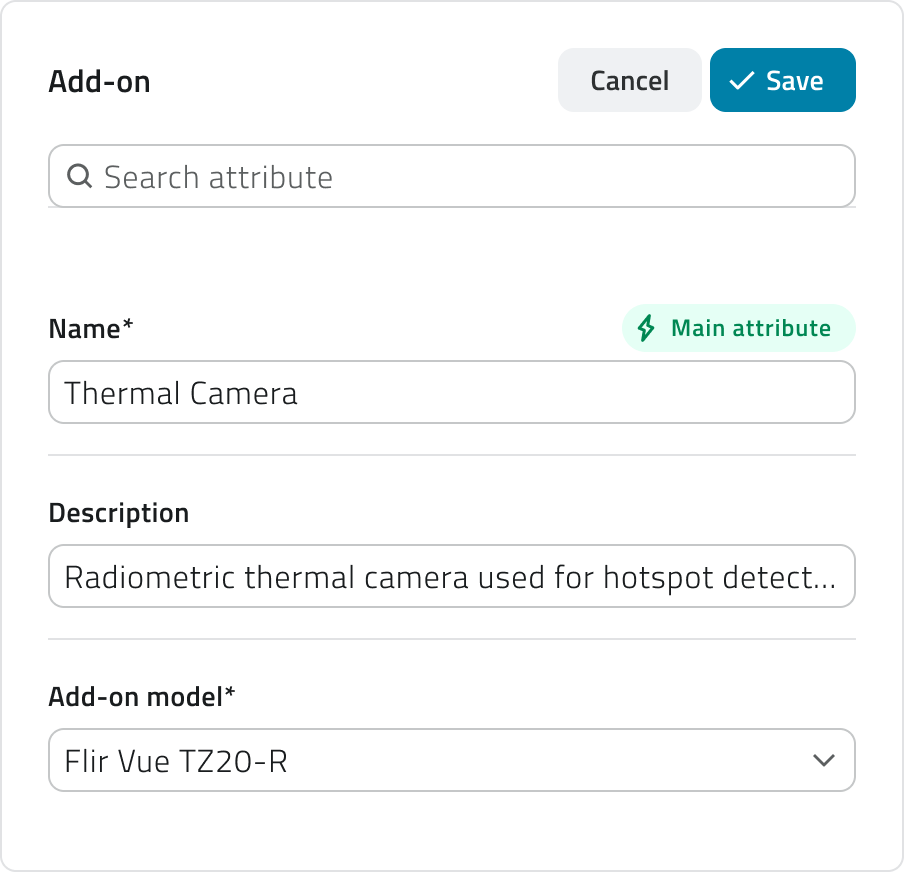
Se non riesci ad individuare questa informazione contatta il supporto.
Creare un Equipment
Seleziona i modelli di Robot Dog compatibili con l’Equipment.
Seleziona uno o più Add-on precedentemente censiti.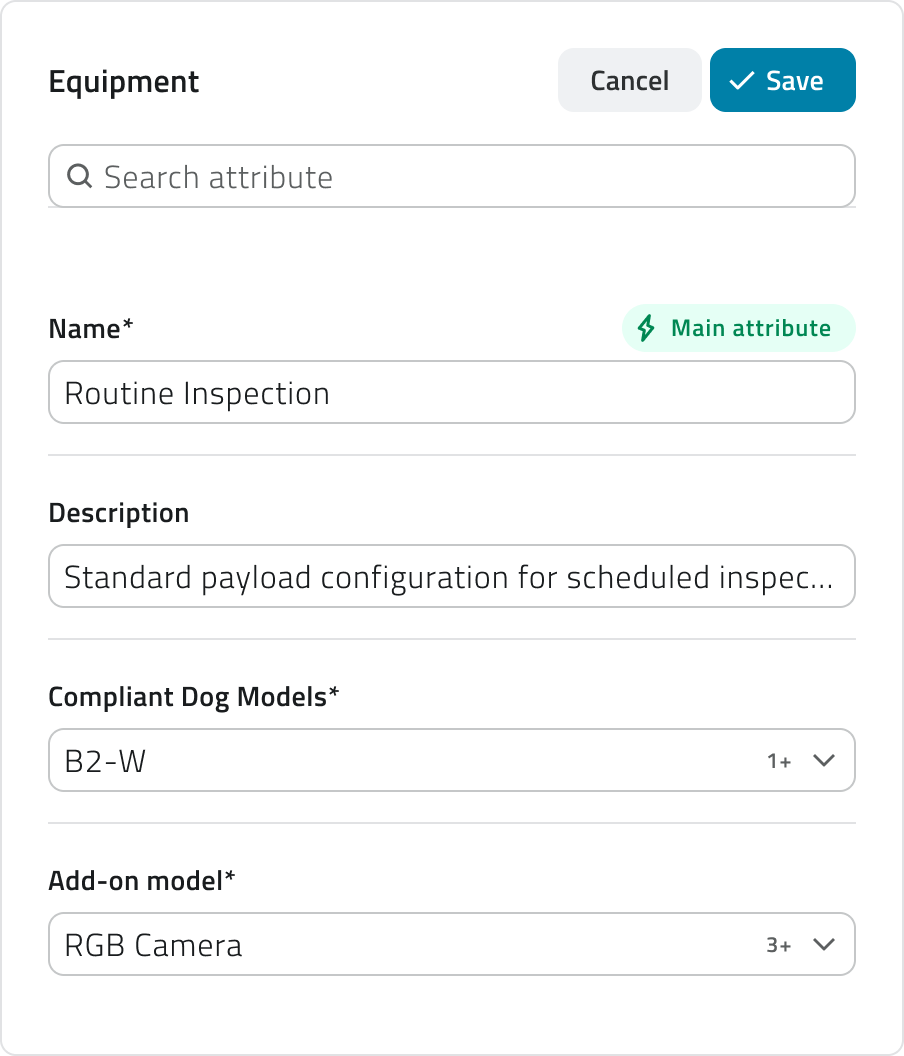
Prima di poter creare una missione
Collegamenti