
Compare orthophotos
![]() English version
English version
The Orthophoto Compare tool lets you compare two georeferenced orthophotos of the same area directly on the map. It is designed to highlight differences over time or between acquisitions — for example surveys taken on different dates, work in progress versus completed work, or variants of the same survey such as RGB and thermal.
The two orthophotos are displayed over the project basemap and can be compared using three modes: swipe, fade, or side by side.
The tool is available from the Tools section of the project. To run a comparison, two orthophotos covering the same area must be available.
Opening the tool and selecting orthophotos
1. Open the Tools section of the project.
![]()
2. Click the Orthophoto Compare card. The tool opens in place of the current view and the workspace splits into two halves, Left and Right.
3. Click Select left orthophoto (or Select right orthophoto) to choose the orthophoto for each side. A resource viewer opens, where you can search the available orthophotos by name, preview the selected item, and check its type and last edit date.
![]()
4. Confirm with Apply. The chosen side fills with a preview of the selected orthophoto. Repeat the selection for the other side: once both orthophotos are selected, the comparison becomes active and its controls can be used.
Choosing a comparison mode
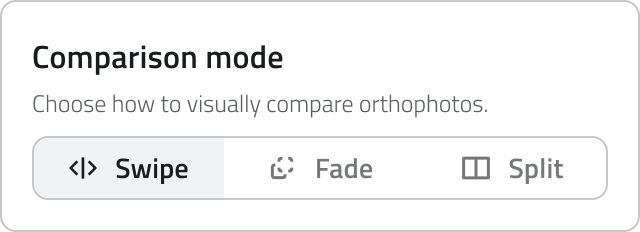
From the Comparison mode control in the side panel you can choose how the two orthophotos are compared:
- Swipe: A draggable vertical divider reveals the left orthophoto on one side and the right one on the other, over the same area. Drag the handle to move the divider.
- Fade: The two orthophotos are overlaid and a slider controls the opacity of one over the other, blending gradually between the two.
- Split: The two orthophotos are shown side by side in two synchronized panes, each labelled with its acquisition.
Showing objects on the map
The Show geometries on map switch shows or hides the inventory geometries over the imagery. When it is turned off, all geometries are hidden, regardless of their object class, so you can read the orthophoto cleanly.

Aligning the orthophotos
If the two orthophotos are not perfectly registered, you can fine-tune the right one over the left from the Alignment section, using the Shift X, Shift Y and Scale sliders. Reset alignment restores the original values.
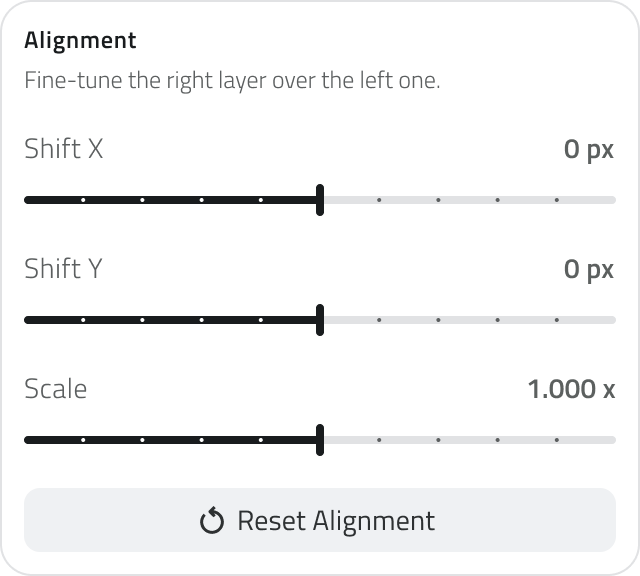
Alignment only affects the right orthophoto; the left one is used as the reference. Where the right orthophoto is reduced or shifted, the underlying basemap becomes visible.
Exiting the tool
To close the comparison, click Close compare mode on the map, or use the back button in the tool panel.
Using Collapse panel to expand the map view, or opening another section from the navigation rail, does not close the comparison: it stays active and a blue badge appears on the Tools icon. Click the icon to bring the comparison back.
Links
![]() Italian version
Italian version
I Report Globali sono report indipendenti dai progetti, disponibili a livello di organizzazione. I dati raccolti per ogni report fanno riferimento a tutti i progetti presenti in piattaforma, oppure a dati che prescindono dai progetti, come ad esempio gli accessi degli utenti.
Vengono generati a partire da template predefiniti e possono essere scaricati nei formati disponibili.
Per generare e visualizzare i report sono necessari i permessi di accesso all'App e i permessi di visualizzazione o modifica per quel template.
Generare un report globale
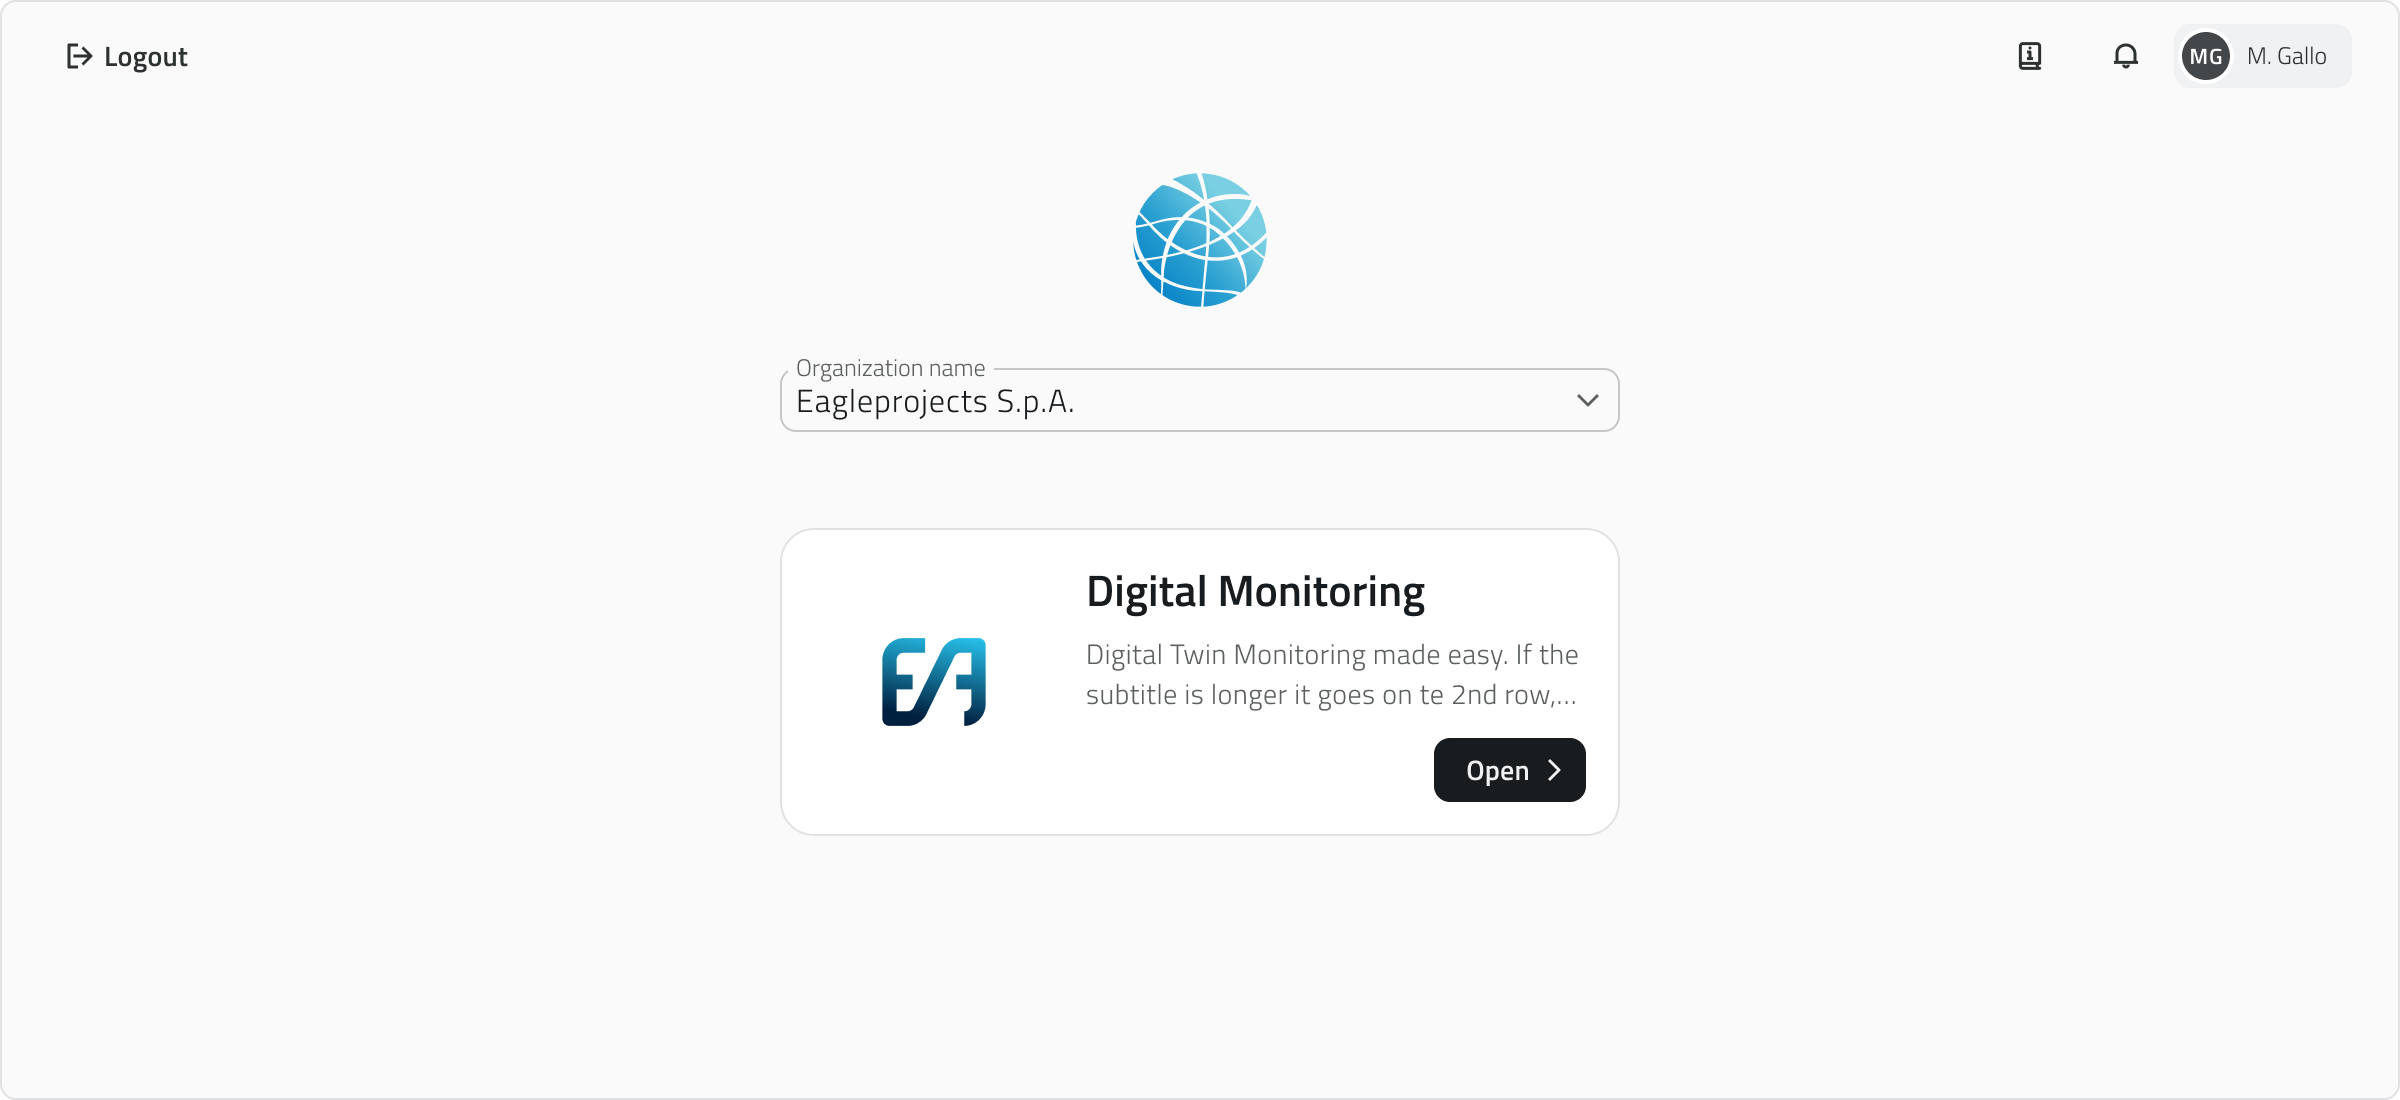
1. Dalla schermata iniziale, seleziona l'app della tua organizzazione per accedere all'ambiente di lavoro.
![]()
![]()
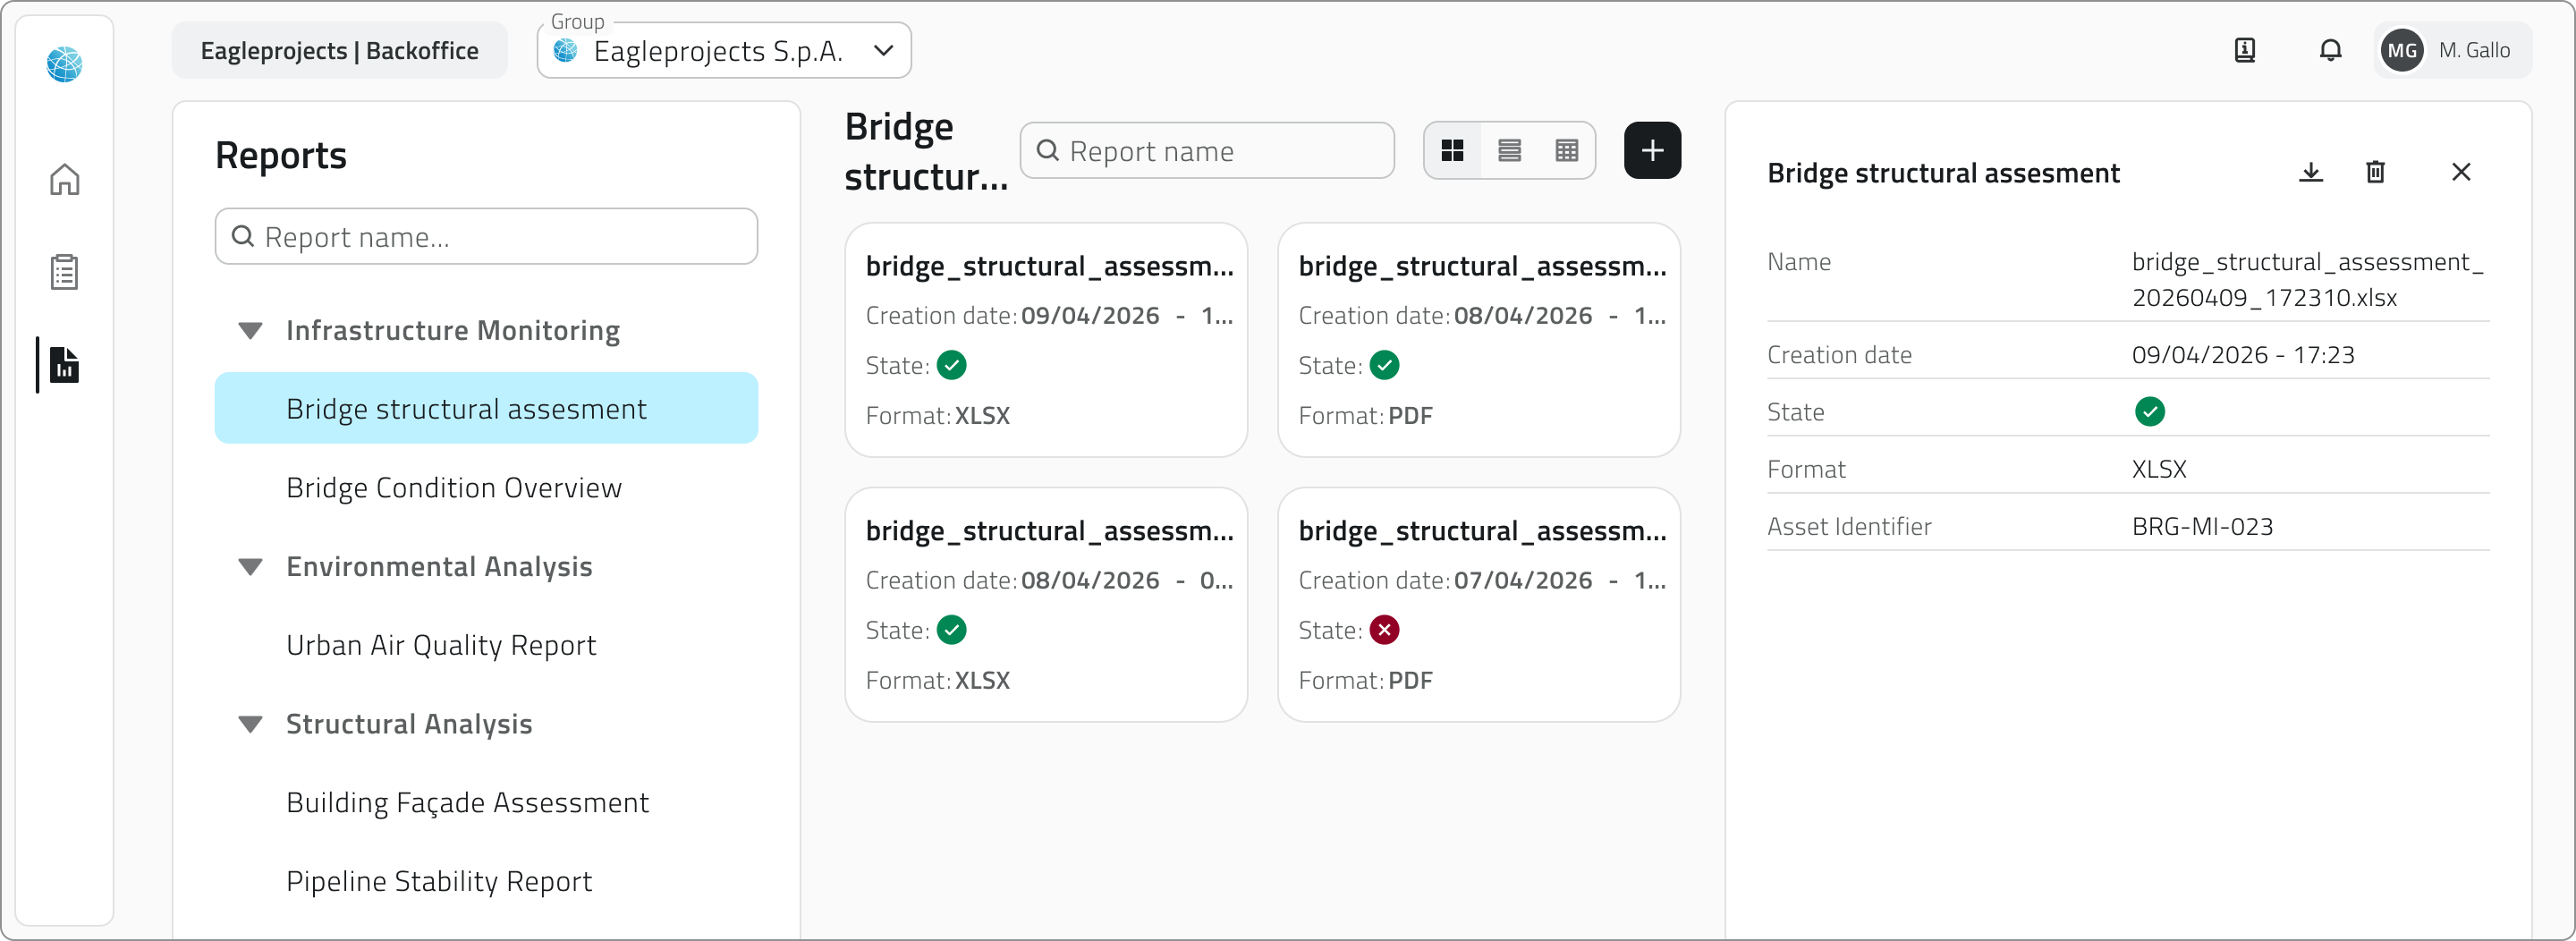
3. Seleziona il template desiderato dalla lista per aprire la pagina Report. Puoi filtrare i report usando la barra di ricerca in alto. Gli elementi possono essere visualizzati in modalità griglia, lista o tabella.
4. Clicca sul pulsante Genera report in alto a destra.

5. Si apre un pannello di configurazione sul lato destro della pagina, che richiede:
- la scelta di un formato tra quelli disponibili, configurati nel Backoffice;
- la compilazione degli eventuali filtri, che variano in base al template selezionato e affinano il contenuto del report. Alcuni filtri possono essere obbligatori.

6. Clicca Conferma per avviare la generazione, oppure Annulla per chiudere la finestra senza procedere.
Il pulsante Conferma è disabilitato finché tutti i filtri obbligatori non sono stati compilati.
La generazione del report richiede alcuni istanti. Non lasciare la pagina durante il processo. Lo stato di avanzamento è visibile direttamente nella riga del report, dove il pulsante di download mostra uno spinner fino al completamento.
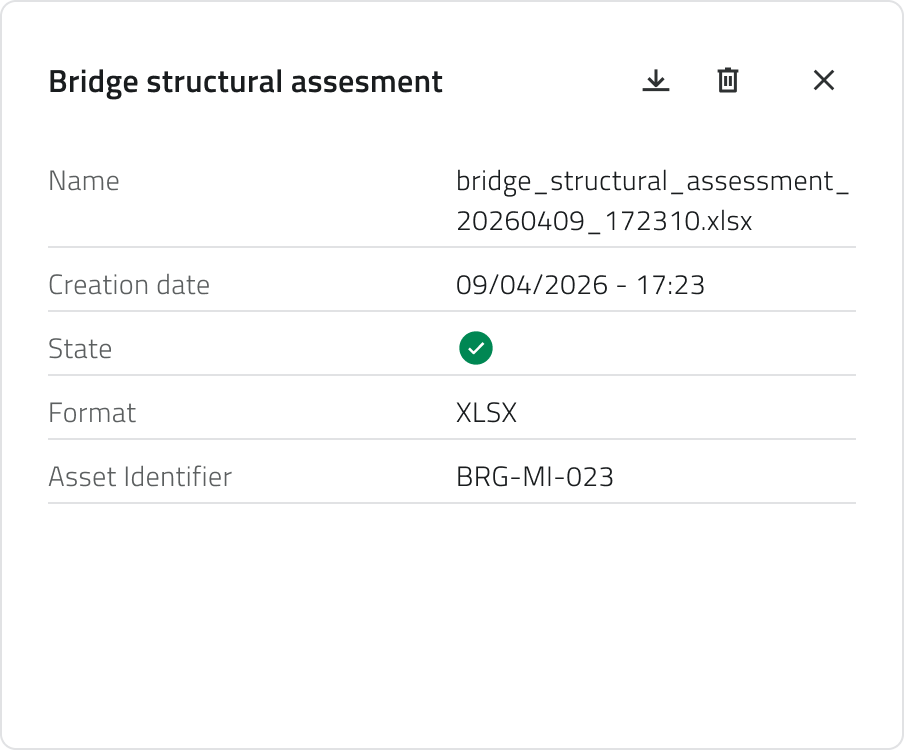
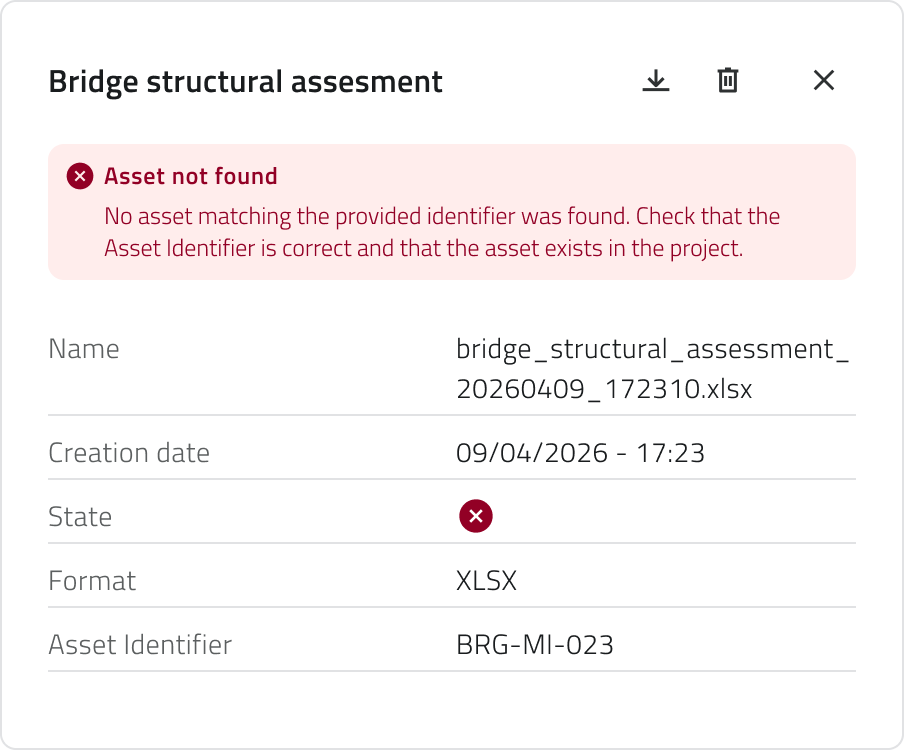
Informazioni del report
Una volta avviata la generazione, nella pagina vengono mostrate le seguenti informazioni per ogni elemento:
- Nome del report
- Data di creazione (vuota fino al completamento della generazione)
- Stato (successo o errore; vuoto se la generazione non è ancora conclusa)
- Formato selezionato
- Filtri inseriti in fase di configurazione
Scaricare e consultare un report
Al termine della generazione il report può essere scaricato tramite il pulsante di download presente sulla riga dell'elemento. In alternativa, cliccando sul pulsante blu Apri che compare al passaggio del mouse sull'elemento si apre il dettaglio report, che mostra tutte le informazioni associate.
Se la generazione non è andata a buon fine, il messaggio di errore è visibile in cima al dettaglio del report.
I report non possono essere modificati dopo la generazione.
Eliminare un report
Per eliminare un report apri il dettaglio report e clicca il pulsante Elimina, quindi conferma l'operazione. In alternativa, seleziona uno o più report dalla lista: comparirà il pulsante Elimina in alto a destra della pagina.
La generazione e l'eliminazione dei report globali sono disponibili solo se si dispone dei permessi di modifica per quel template di report.
Collegamenti
Last update: 11 June 2026