
Create and manage Events
 English version
An Event allows the platform to receive and interpret information (typically JSON) from external providers, linking it to a platform entity such as organizations, projects, objects, sensors, and devices.
To use events for sending notifications, you can configure the outputs from the Automations section.
Available only to users with backoffice permission. To create an event, the entities it must be linked to must already exist in the system: project, object, sensor, or device.
Create a new Event
1. Log in to the Backoffice and open the Events section from the left-side menu.
The list shows the name, the linked entity, the direct lists present, the creation date, and a button to copy the event URL.

2. Click New event in the top-right corner.
3. Enter the Event name and select the Linked to entity, both fields are required.
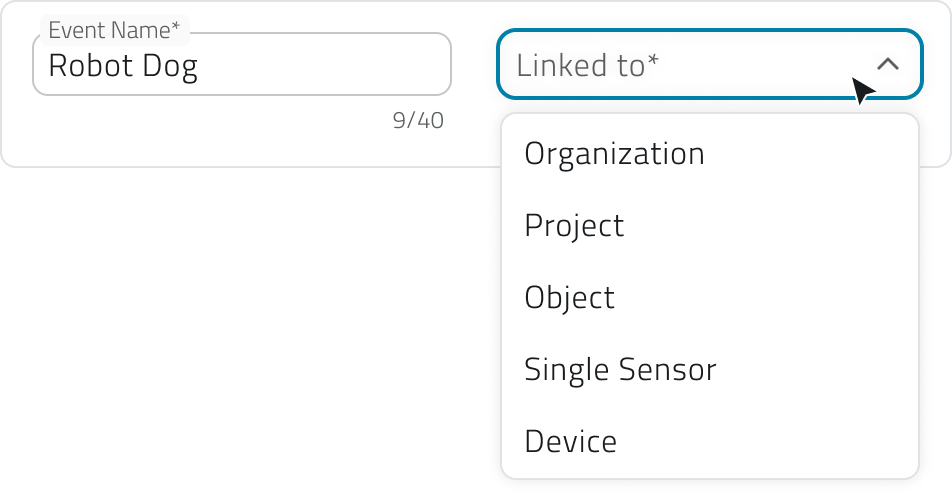
The available options are:
For general events.
Project
For events specific to a single project.
Object
For events linked to a class and a single instance.
Single sensor
For events coming from a single sensor.
Device
For events generated by a set of sensors.
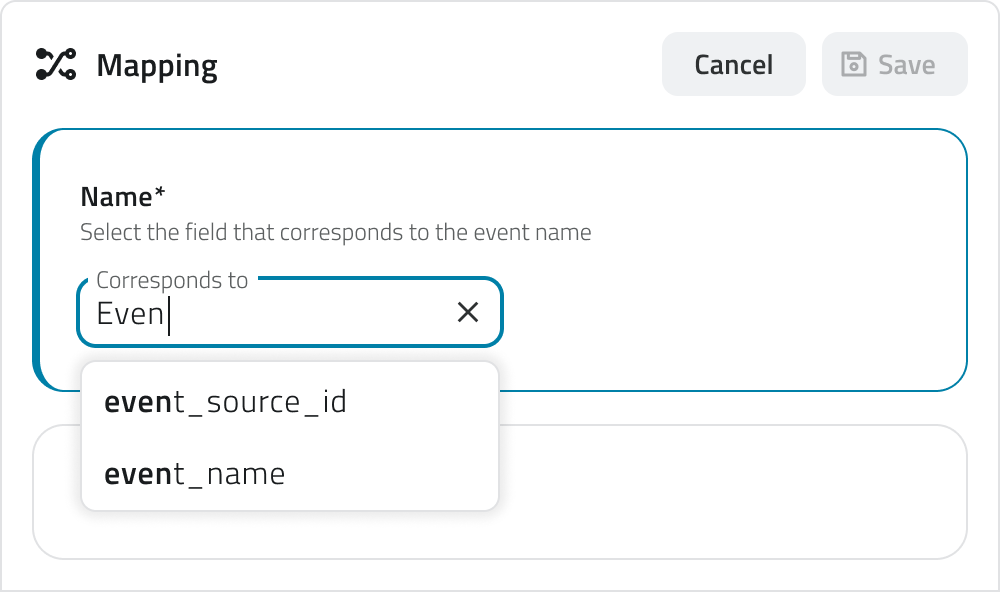
4. In the Mapping section, define how the incoming data should be interpreted.
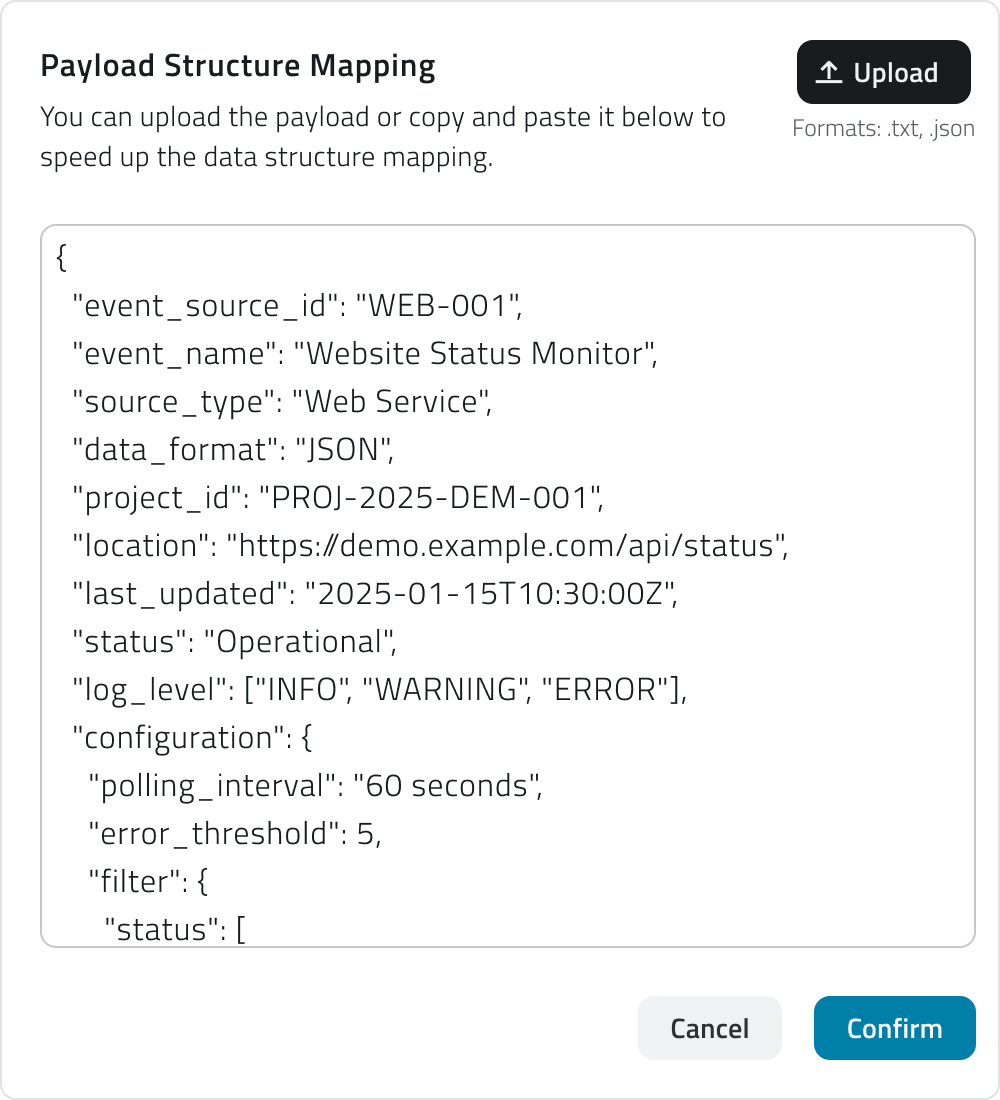
If needed, load the sample payload: paste or upload a JSON file in the text box and click Confirm to generate the mapping keys.
Loading the JSON is not required, you can also fill in the fields manually.
Then map the keys, associating the provider's keys with the fields required by the platform:
The name of the event. Example:
event_name or notification_name.Event ID (required)
Uniquely identifies the type of event. Example:
event_id or type_code.Time (required)
Indicates when the event occurs. Example:
timestamp or event_time.Levels (required)
Defines the type or severity of the event (
info, warning, success, error). Each level can have a Displayed name, shown when hovering over the level icon. Example: a key like severity or status mapped to "warning".Description (required)
Briefly explains the content or purpose of the event. Example:
message or details.Additional info (optional)
Adds supplementary data, each with an optional Displayed name. Example:
temperature, battery_status, signal_strength.
Depending on the linked entity selected earlier, additional required fields may appear:
Links the event to a project. Example:
project_id.Object ID
Links the event to an object; the object class must be selected first. Example:
object_id or entity_ref.Single Sensor ID
Identifies the sensor the event comes from. Example:
sensor_id or sensor_name.Device ID
Identifies the device grouping one or more sensors. Example:
device_id or controller_name.
5. Click Save in the top-right corner. The button remains disabled until the name, the linked entity, and all required keys have been filled in.
Once saved, a URL link appears in the list. This link must be provided to the external provider to enable data transmission.
Edit and manage events
To edit an event, click the blue button with the arrow icon that appears when hovering over the item.
To duplicate an event, select a single item from the list, then click the Duplicate button in the top-right corner.
To delete an event, select one or more items from the list — the Delete button will appear in the top-right corner.
To copy the URL of an event, use the dedicated button directly from the list.
💡 Tips:
Links
 Italian version
Un Evento consente alla piattaforma di ricevere e interpretare informazioni (tipicamente JSON) da provider esterni, collegandole a un'entità della piattaforma, come organizzazioni, progetti, oggetti, sensori e dispositivi.
Per usare gli eventi per l'invio di notifiche, puoi configurare gli output dalla sezione Automazioni.
Disponibile solo per utenti con permesso backoffice. Per creare un evento è necessario che nel sistema siano già presenti le entità a cui l’evento deve essere collegato: progetto, oggetto, sensore o dispositivo.
Creare un nuovo evento
1. Accedi al Backoffice e apri la sezione Eventi dal menu laterale sinistro.
La lista mostra il nome, l'entità collegata, le direct list presenti, la data di creazione e un bottone per copiare l'URL dell'evento.
2. Clicca su Nuovo evento in alto a destra.
3. Inserisci il Nome evento e seleziona l'Entità collegata, entrambi i campi sono obbligatori.
Le opzioni disponibili sono:
- Organizzazione
Per eventi generali. - Progetto
Per eventi specifici di un singolo progetto. - Oggetto
Per eventi legati a una classe e a una singola istanza. - Sensore singolo
Per eventi provenienti da un singolo sensore. - Dispositivo
Per eventi generati da un insieme di sensori.
4. Nella sezione Mapping definisci come i dati in arrivo devono essere interpretati.
Se lo ritieni necessario, carica il payload di esempio: incolla o carica un file JSON nella casella di testo e clicca Conferma per generare le chiavi di mappatura.
Inserire il JSON non è obbligatorio, puoi inserire i campi anche manualmente.
Poi mappa le chiavi, associando le chiavi del provider ai campi richiesti dalla piattaforma:
- Nome (obbligatorio)
Il nome dell'evento. Esempio:event_nameonotification_name. - Event ID (obbligatorio)
Identifica in modo univoco il tipo di evento. Esempio:event_idotype_code. - Tempo (obbligatorio)
Indica il momento in cui l'evento si verifica. Esempio:timestampoevent_time. - Livelli (obbligatorio)
Definisce la tipologia o gravità dell'evento (info,warning,success,error).
Ogni livello può avere un Nome visualizzato, visibile passando il cursore sull'icona del livello. Esempio: una chiave comeseverityostatusmappata su "warning". - Descrizione (obbligatoria)
Spiega brevemente il contenuto o lo scopo dell'evento. Esempio:messageodetails. - Informazioni aggiuntive (facoltativo)
Aggiunge dati supplementari, ciascuno con un Nome visualizzato opzionale. Esempio:temperature,battery_status,signal_strength.
In base all'entità colegata selezionata precedentemente, potrebbero aggiungersi ulteriori campi obbligatori:
-
Project ID
Collega l'evento a un progetto. Esempio:project_id. -
Object ID
Collega l'evento a un oggetto; è necessario selezionare prima la classe oggetto. Esempio:object_idoentity_ref. -
Single Sensor ID
Identifica il sensore da cui proviene l'evento. Esempio:sensor_idosensor_name. -
Device ID
Identifica il dispositivo che raggruppa uno o più sensori. Esempio:device_idocontroller_name.
5. Per salvare, clicca Salva in alto a destra. Il bottone rimane disabilitato finché non sono compilati il nome, l'entità collegata e tutte le chiavi obbligatorie.
Una volta salvato, nella lista compare un link URL che deve essere fornito al provider esterno per abilitare l'invio dei dati.
Modificare e gestire gli eventi
Per modificare un evento, clicca sul bottone blu con l'icona freccia che compare passando il mouse sull'elemento.
Se vuoi duplicare un evento, seleziona un singolo elemento dalla lista, poi clicca il bottone Duplica in alto a destra.
Per eliminare un evento, seleziona uno o più elementi dalla lista: comparirà il bottone Elimina in alto a destra.
Per copiare l'URL di un evento, usa il bottone apposito direttamente dalla lista.
💡 Suggerimenti:
- Quando duplichi un evento, aggiorna le chiavi di mappatura se il provider di destinazione ha una struttura JSON diversa.
- Usa nomi descrittivi per gli eventi per facilitarne il riconoscimento nella lista.
Collegamenti
Last update: 26 May 2026