Create and manage Groups
![]() English version
English version
A group brings together users with the same role and permissions, allowing them to work on the same projects using a consistent set of operations.
Creating a group allows you to group users and assign them a role, simplifying permission management in a scalable way.
Available only to users with backoffice permissions. To create a group, the role to which the group will be linked must already exist in the system.
Steps
1. Access the Backoffice and click Groups in the left-side menu.
The list shows the name, creation date, associated projects, added users and linked role.
![]()
2. Click the New Group button in the top-right corner.
![]()
3. Fill in the required fields (name and role):
- Enter a unique name in the Group Name field.
- Select the Role to associate from the drop-down menu.

Name and Role are required to save.
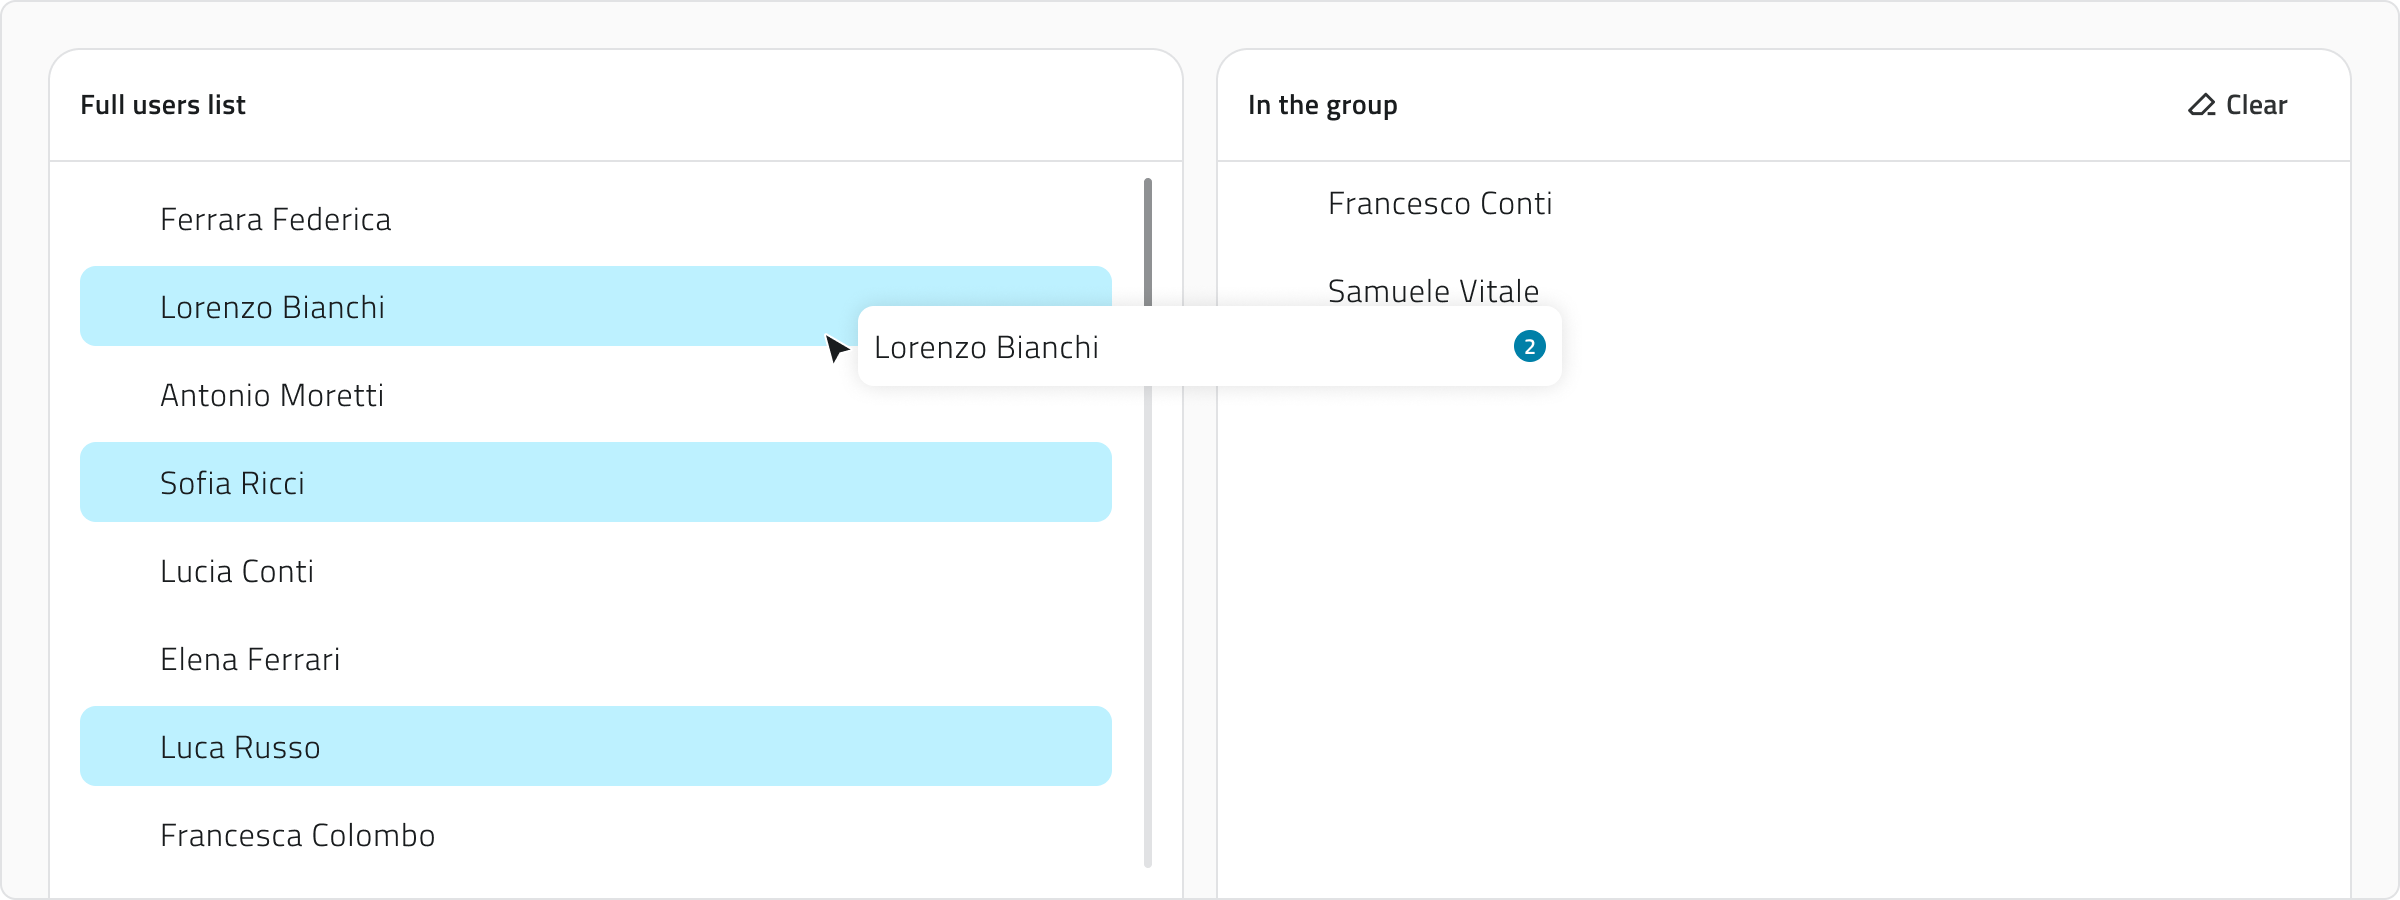
4. Add or remove users.
The group configuration shows two lists: on the left are all users in the organization, while on the right are the users already added to the group.
To add users to the group, select one or more names from the list on the left using Control or Shift for multiple selection, then drag them to the area on the right.
To remove users from the group, select the names from the list on the right and drag them to the list on the left. To remove all added users, click Clear.
5. Save the new group by clicking Save in the top-right corner (after assigning at least one user).
💡Tip: Use the search bar to filter users in both lists.
💡Tip: Make sure to assign only those users who need the same level of access to the projects.
Viewing and Editing Groups
To edit a group, click the blue button with the arrow icon that appears when you hover over the item.
To duplicate a group, select an item from the list. Once selected, the Duplicate button will appear.
Links
![]() Italian version
Italian version
Un gruppo raccoglie utenti con lo stesso ruolo e permessi, consentendo loro di lavorare sugli stessi progetti con un set di operazioni coerenti.
Creare un gruppo serve a associare utenti e assegnare loro un ruolo, semplificando la gestione dei permessi in modo scalabile.
Disponibile solo per utenti con permesso backoffice. Per creare un gruppo è necessario che nel sistema sia già presente il ruolo a cui il gruppo deve essere collegato.
Passaggi
1. Accedi al Backoffice e clicca su Gruppi nel menu sul lato sinistro.
La lista mostra nome, data di creazione, progetti associati, utenti aggiunti e il ruolo collegato.
![]()
2. Clicca sul pulsante Nuovo gruppo in alto a destra.
![]()
3. Compila i campi obbligatori (nome e ruolo):
- Inserisci un nome univoco nel campo Nome gruppo.
- Seleziona il Ruolo da associare tramite il menu a tendina.
Nome e Ruolo sono obbligatori per il salvataggio.
4. Aggiungi o rimuovi gli utenti.
La configurazione del gruppo mostra due liste: a sinistra sono disponibili tutti gli utenti dell’organizzazione, mentre a destra sono presenti gli utenti già aggiunti al gruppo.
Per aggiungere utenti al gruppo, seleziona uno o più nominativi dalla lista a sinistra usando Control o Shift per le selezioni multiple, quindi trascinali nell’area a destra.
Per rimuovere utenti dal gruppo, seleziona i nominativi dalla lista a destra e trascinali nella lista a sinistra. Per rimuovere tutti gli utenti aggiunti, clicca Cancella.
5. Salva il nuovo gruppo cliccando Salva in alto a destra (dopo aver assegnato almeno un utente).
💡Suggerimento: Usa la barra di ricerca per filtrare gli utenti in entrambe le liste.
💡Suggerimento: Assicurati di assegnare solo gli utenti che devono avere lo stesso livello di accesso ai progetti.
Visualizzazione e Modifica dei Gruppi
Per modificare un gruppo, clicca sul pulsante blu con l’icona di una freccia, che appare al passaggio del mouse sull’elemento.
Per duplicare un gruppo, seleziona un elemento dalla lista. Dopo la selezione, compare il pulsante Duplica.
Collegamenti
Last update: 07 May 2026