
Drone – Create and start a mission
![]() English version
English version
This section describes the steps to create, configure and start a mission with a drone, from mission creation to preliminary checks and launch.
Available only if at least one Drone Mission Unit is configured and access permissions to the App are granted.
Create a new mission
1. From the main page, open the project where you want to create the mission.
2. From the left-side menu, go to the Inventory section.
![]()
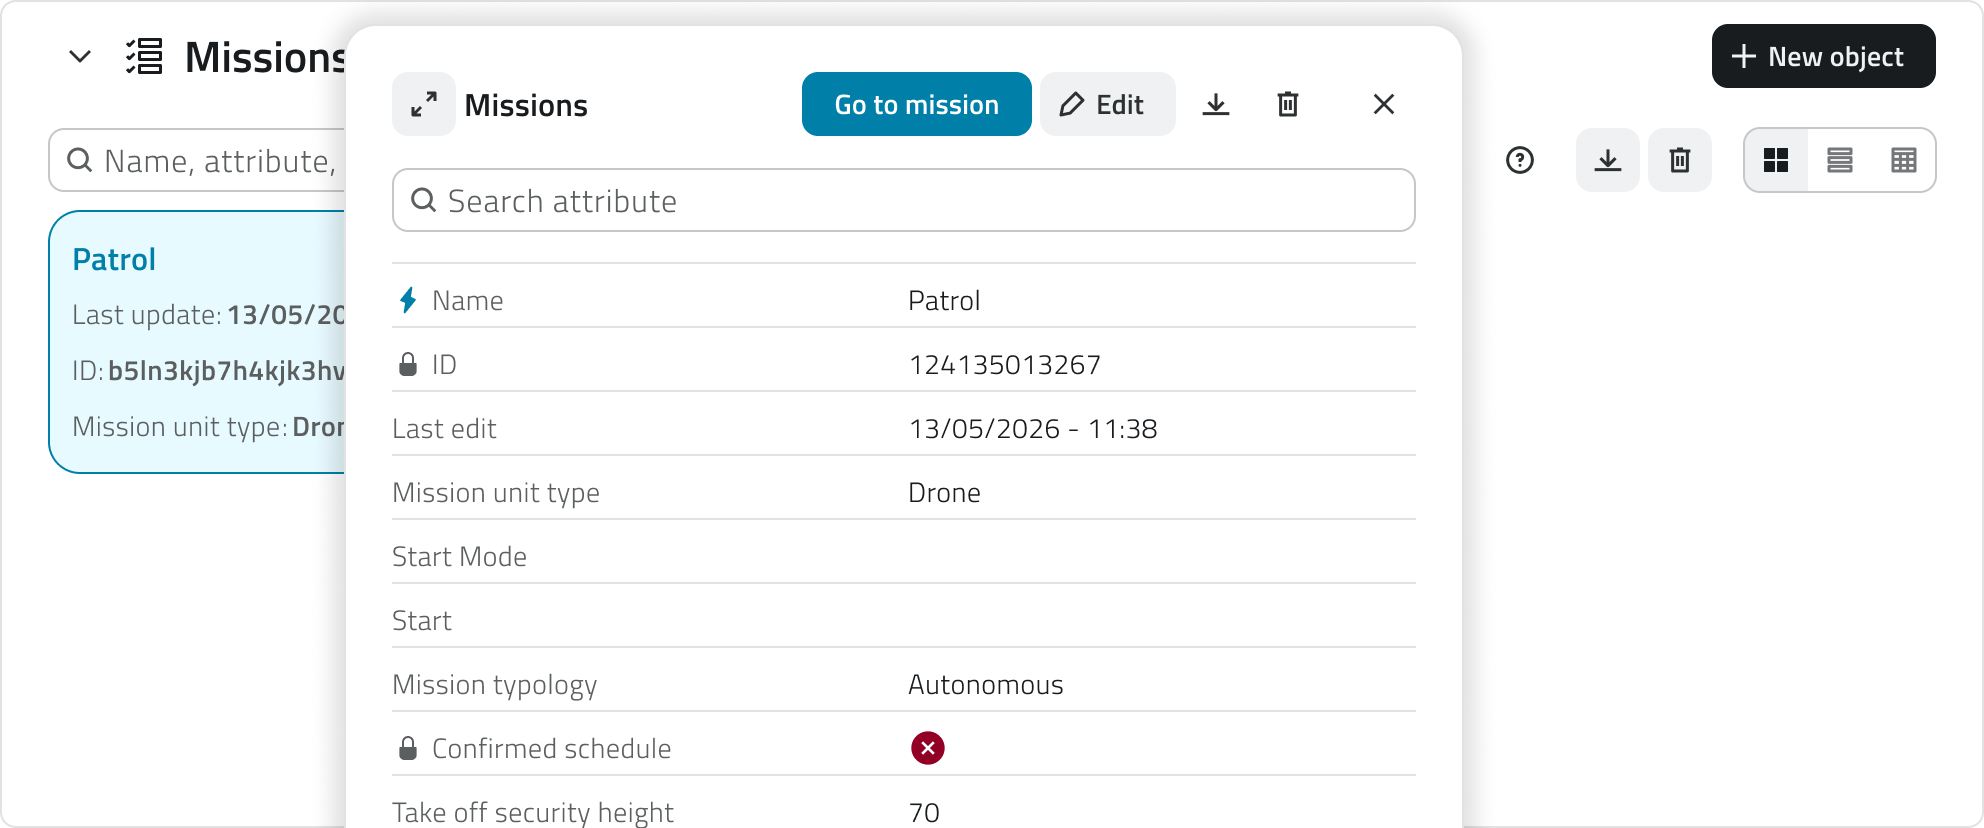
3. Click on the Missions Object Class to view the list of missions.
4. Click on New object.
![]()
5. A mission creation modal will open, asking you to input the following details:
- Name
The identifying name of the mission. - Mission unit type
Select Drone from the list. - Take off security height
The safety altitude the drone will reach at takeoff before proceeding to the first Waypoint. - Take off speed
The vertical climb speed during takeoff. - Global height
The default cruising altitude the drone will maintain during the mission. - Global speed
The default travel speed between Waypoints. - Mission Units
Select the drone that will execute this mission and the hangar. - Profiles
Select a profile for the mission. This field will become active only after selecting the Mission Unit.
6. To create the mission, click Save.
Editing missions
You can edit and delete missions in the inventory, in the mission list.
Edit
To edit a mission that hasn't been completed yet, open the details by clicking the blue button that appears when you hover over the item.
To update the mission details, click Edit.
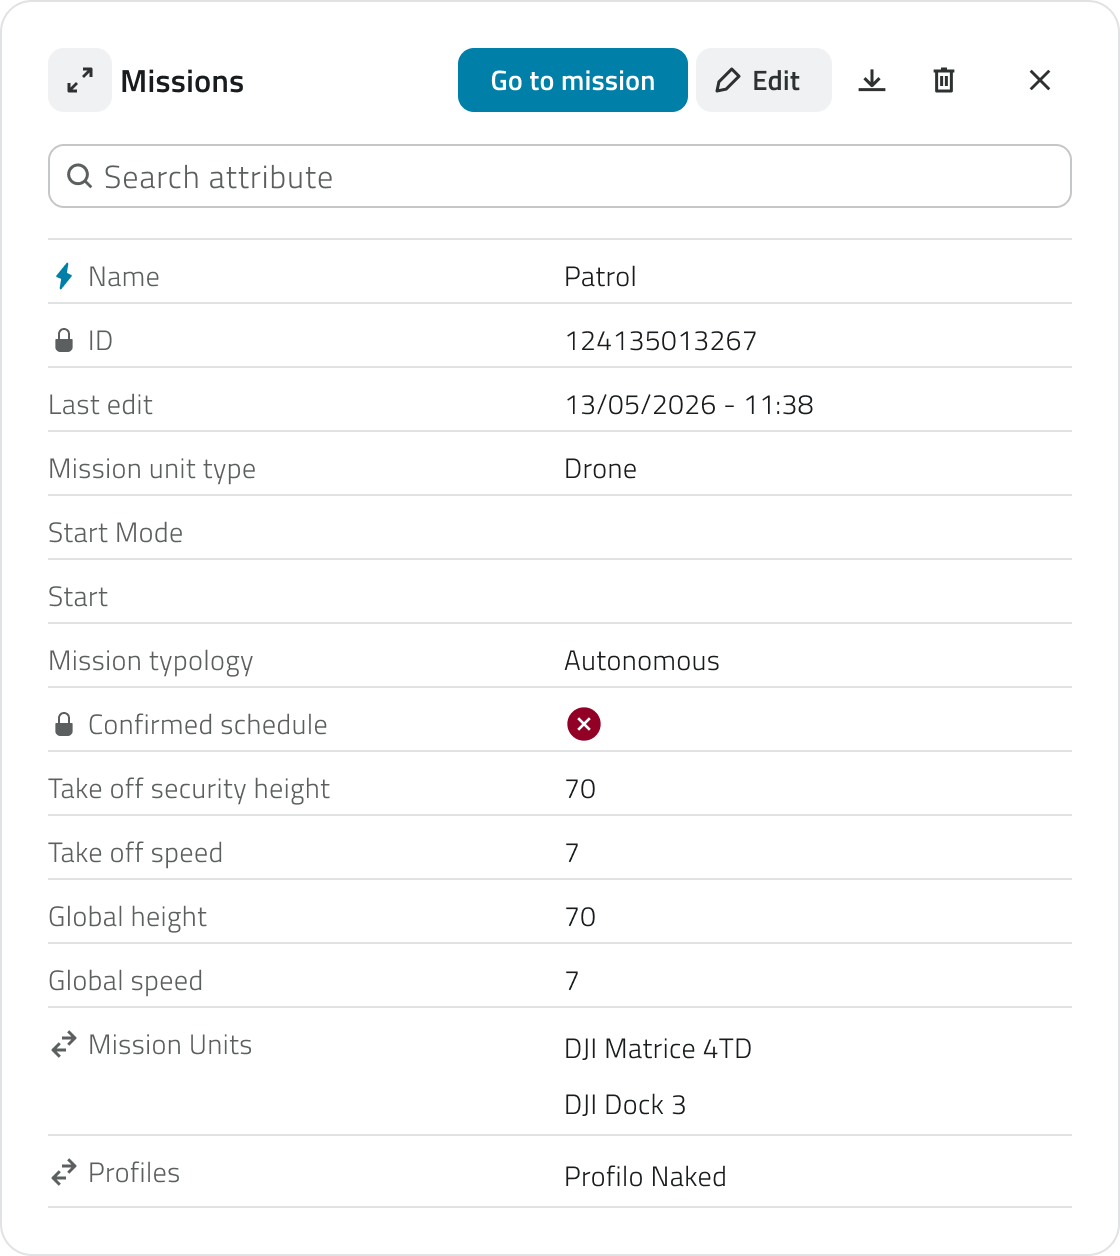
Some attributes can be edited, depending on the mission's status and whether there are any waypoints.
Delete
To delete a mission:
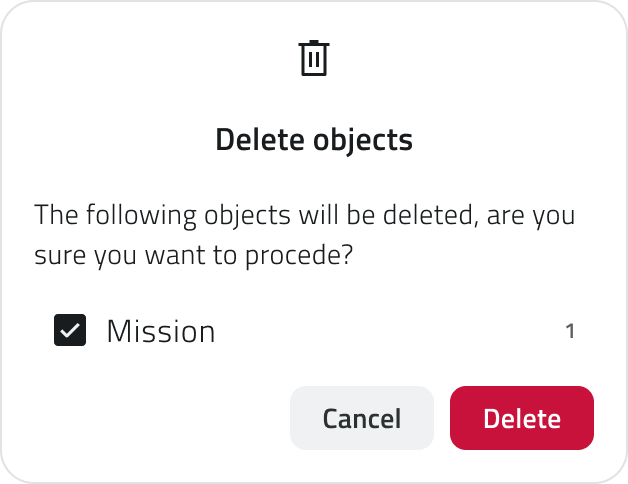
- Open the mission details and click the Delete button in the top-right corner of the window.
- Select one or more missions from the list and click the Delete button in the top-right corner of the view.
In both cases, a confirmation window will appear for the operation.
Deletion is only allowed for missions that have not been started.
Archived missions cannot be deleted, but can only be viewed or duplicated.
Adding elements to the map
To make a mission operational, you must define the Hangar and at least two Drone Waypoints.
To add them, click Go to Mission from the mission details panel.
Set the Hangar
The Hangar represents the drone's takeoff and landing point. It is placed manually on the map as an unoriented point, positioned as close as possible to the actual physical location of the hangar.
For each mission, the Hangar must be re-added.
To add the Hangar, select the Draw tool from the toolbar and choose the corresponding Object Class.
To place the point, left-click on the map.
After placing it, fill in the required attributes:
- Mission Select the current mission you want to associate the Hangar with.
- Mission Unit Select the specific hangar that will be used.
Click Save to confirm.
To change the Hangar, delete the existing one and add it again.
Add Drone Waypoints to the Map
Drone Waypoints define the operational path and altitude the drone will follow during the mission.
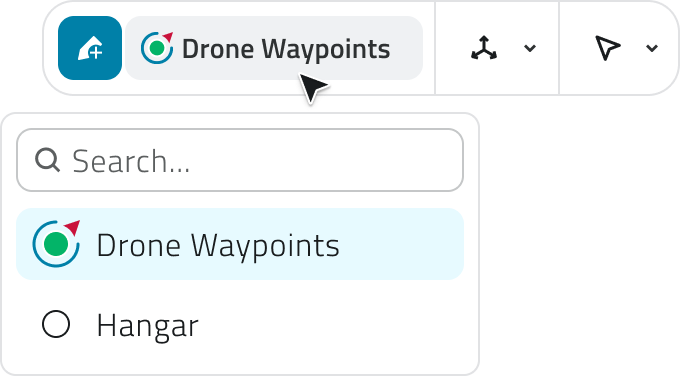
1. To add a Drone Waypoint, select the Draw tool from the toolbar and choose the corresponding Object Class.
2. Place the waypoint by left-clicking on the map.
3. To set the waypoint’s orientation, move the mouse.
4. Confirm the entry by right-clicking.
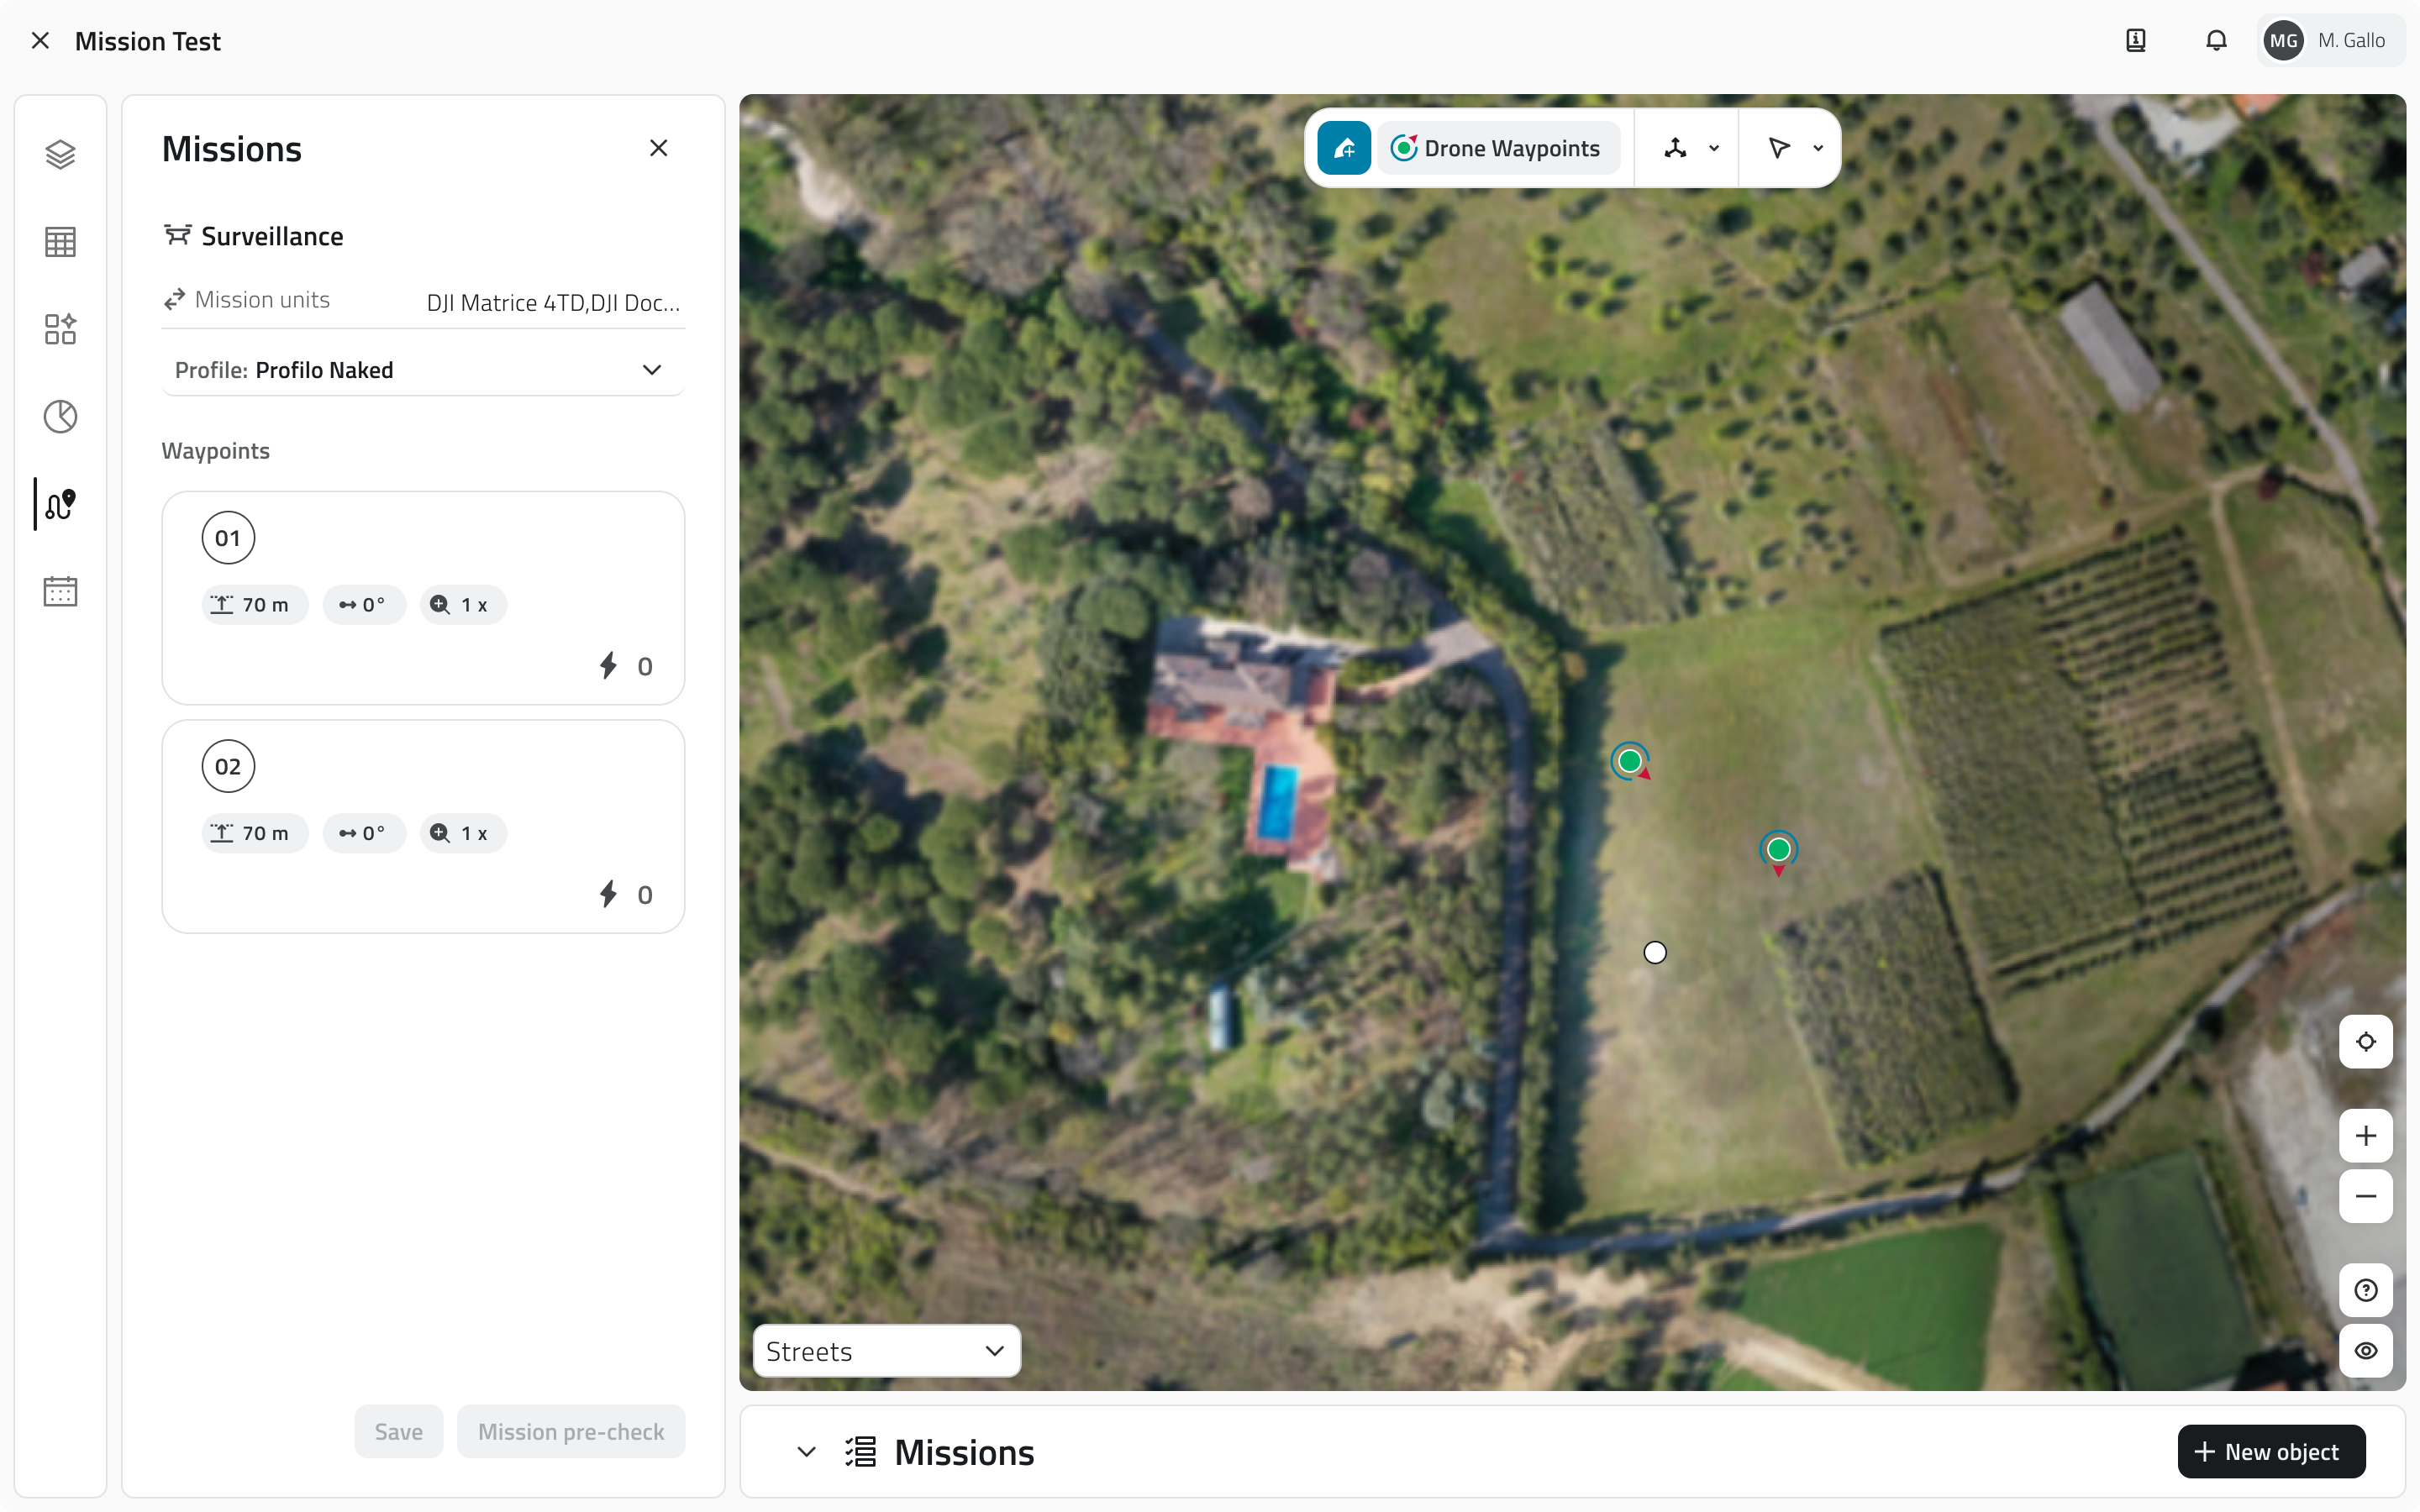
Drone Waypoints are visible both on the map and in the list in the side panel. Each Waypoint is automatically numbered based on the order in which it was created. The order of the Waypoints also determines the order in which the drone will reach them.
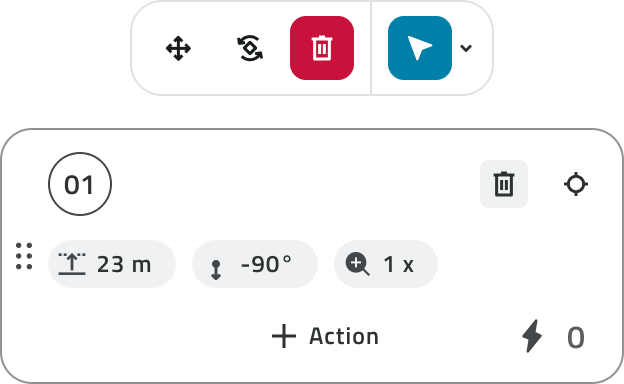
In each Waypoint card in the side panel, the main settings are displayed, including the global flight altitude, the gimbal and the camera zoom.
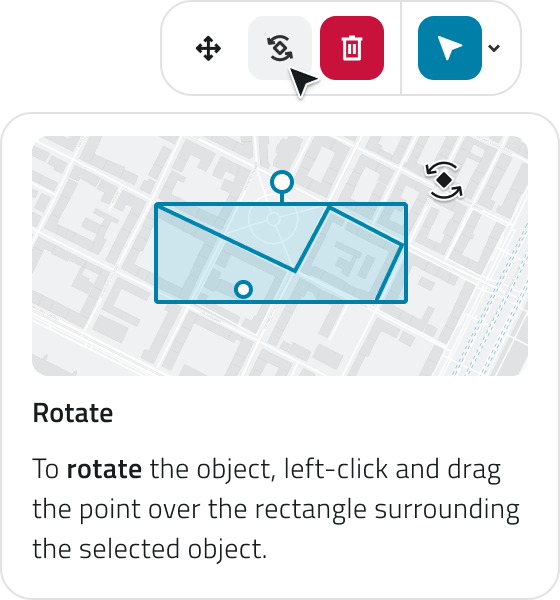
To change the orientation, select a Waypoint on the map and click Rotate from the toolbar.
To delete waypoints, select them on the map and click Delete on the toolbar, or click Delete when you hover over the item in the list.
To change the order of the Waypoints, drag them in the sidebar list.
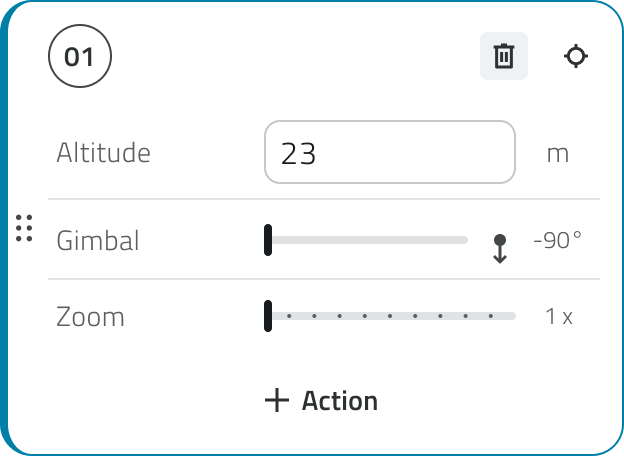
To edit the settings of a Waypoint, click on its card in the side panel to open it. From there you can:
- update the altitude for that specific Waypoint, overriding the mission's Global Height
- adjust the gimbal, i.e. the camera tilt angle
- adjust the camera zoom
- add or modify the actions associated with the Waypoint
If you change the order or settings of the waypoints after saving them, a warning about unsaved changes will be displayed. Remember to click Save at the bottom of the panel.
Set actions on Waypoints
For each Waypoint, it is possible to configure one or more actions that the drone will perform after reaching the point.
To add an action to a Waypoint, hover over one of the action cards on the left-hand panel and click the +Action button.
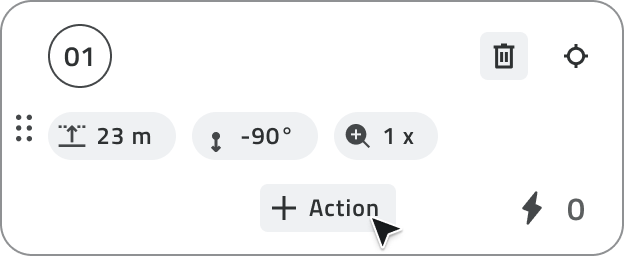
The available actions on the platform are:
- Take photo Captures an image using the drone's camera.
For each waypoint it is possible to add multiple actions, but it is also possible to save without setting any actions. The actions are executed in sequence, in the order in which they were created and are visible in the list.
To save the waypoint configuration and actions, click the Save button at the bottom.
Mission pre-check
Before starting the mission, a pre-check must be performed.
Clicking on Mission pre-check, the system will verify the connection status of the drone and the hangar and the correctness of the Drone Waypoint sequence.
The system may detect the following types of errors:
Blocking errors
Related to the connection with the drone or the hangar.
In this case, the mission cannot be started until the issue is resolved.
Non-blocking errors
Related to individual Waypoints.
In this case, the mission can still be started, but the system requires you to sign a waiver before proceeding.
Every time you reopen the mission, the connection status will be automatically checked. In addition, the Mission pre-check must be performed again.
Mission start
If the check did not present any blocking errors, you can start the mission by clicking the Start mission button.
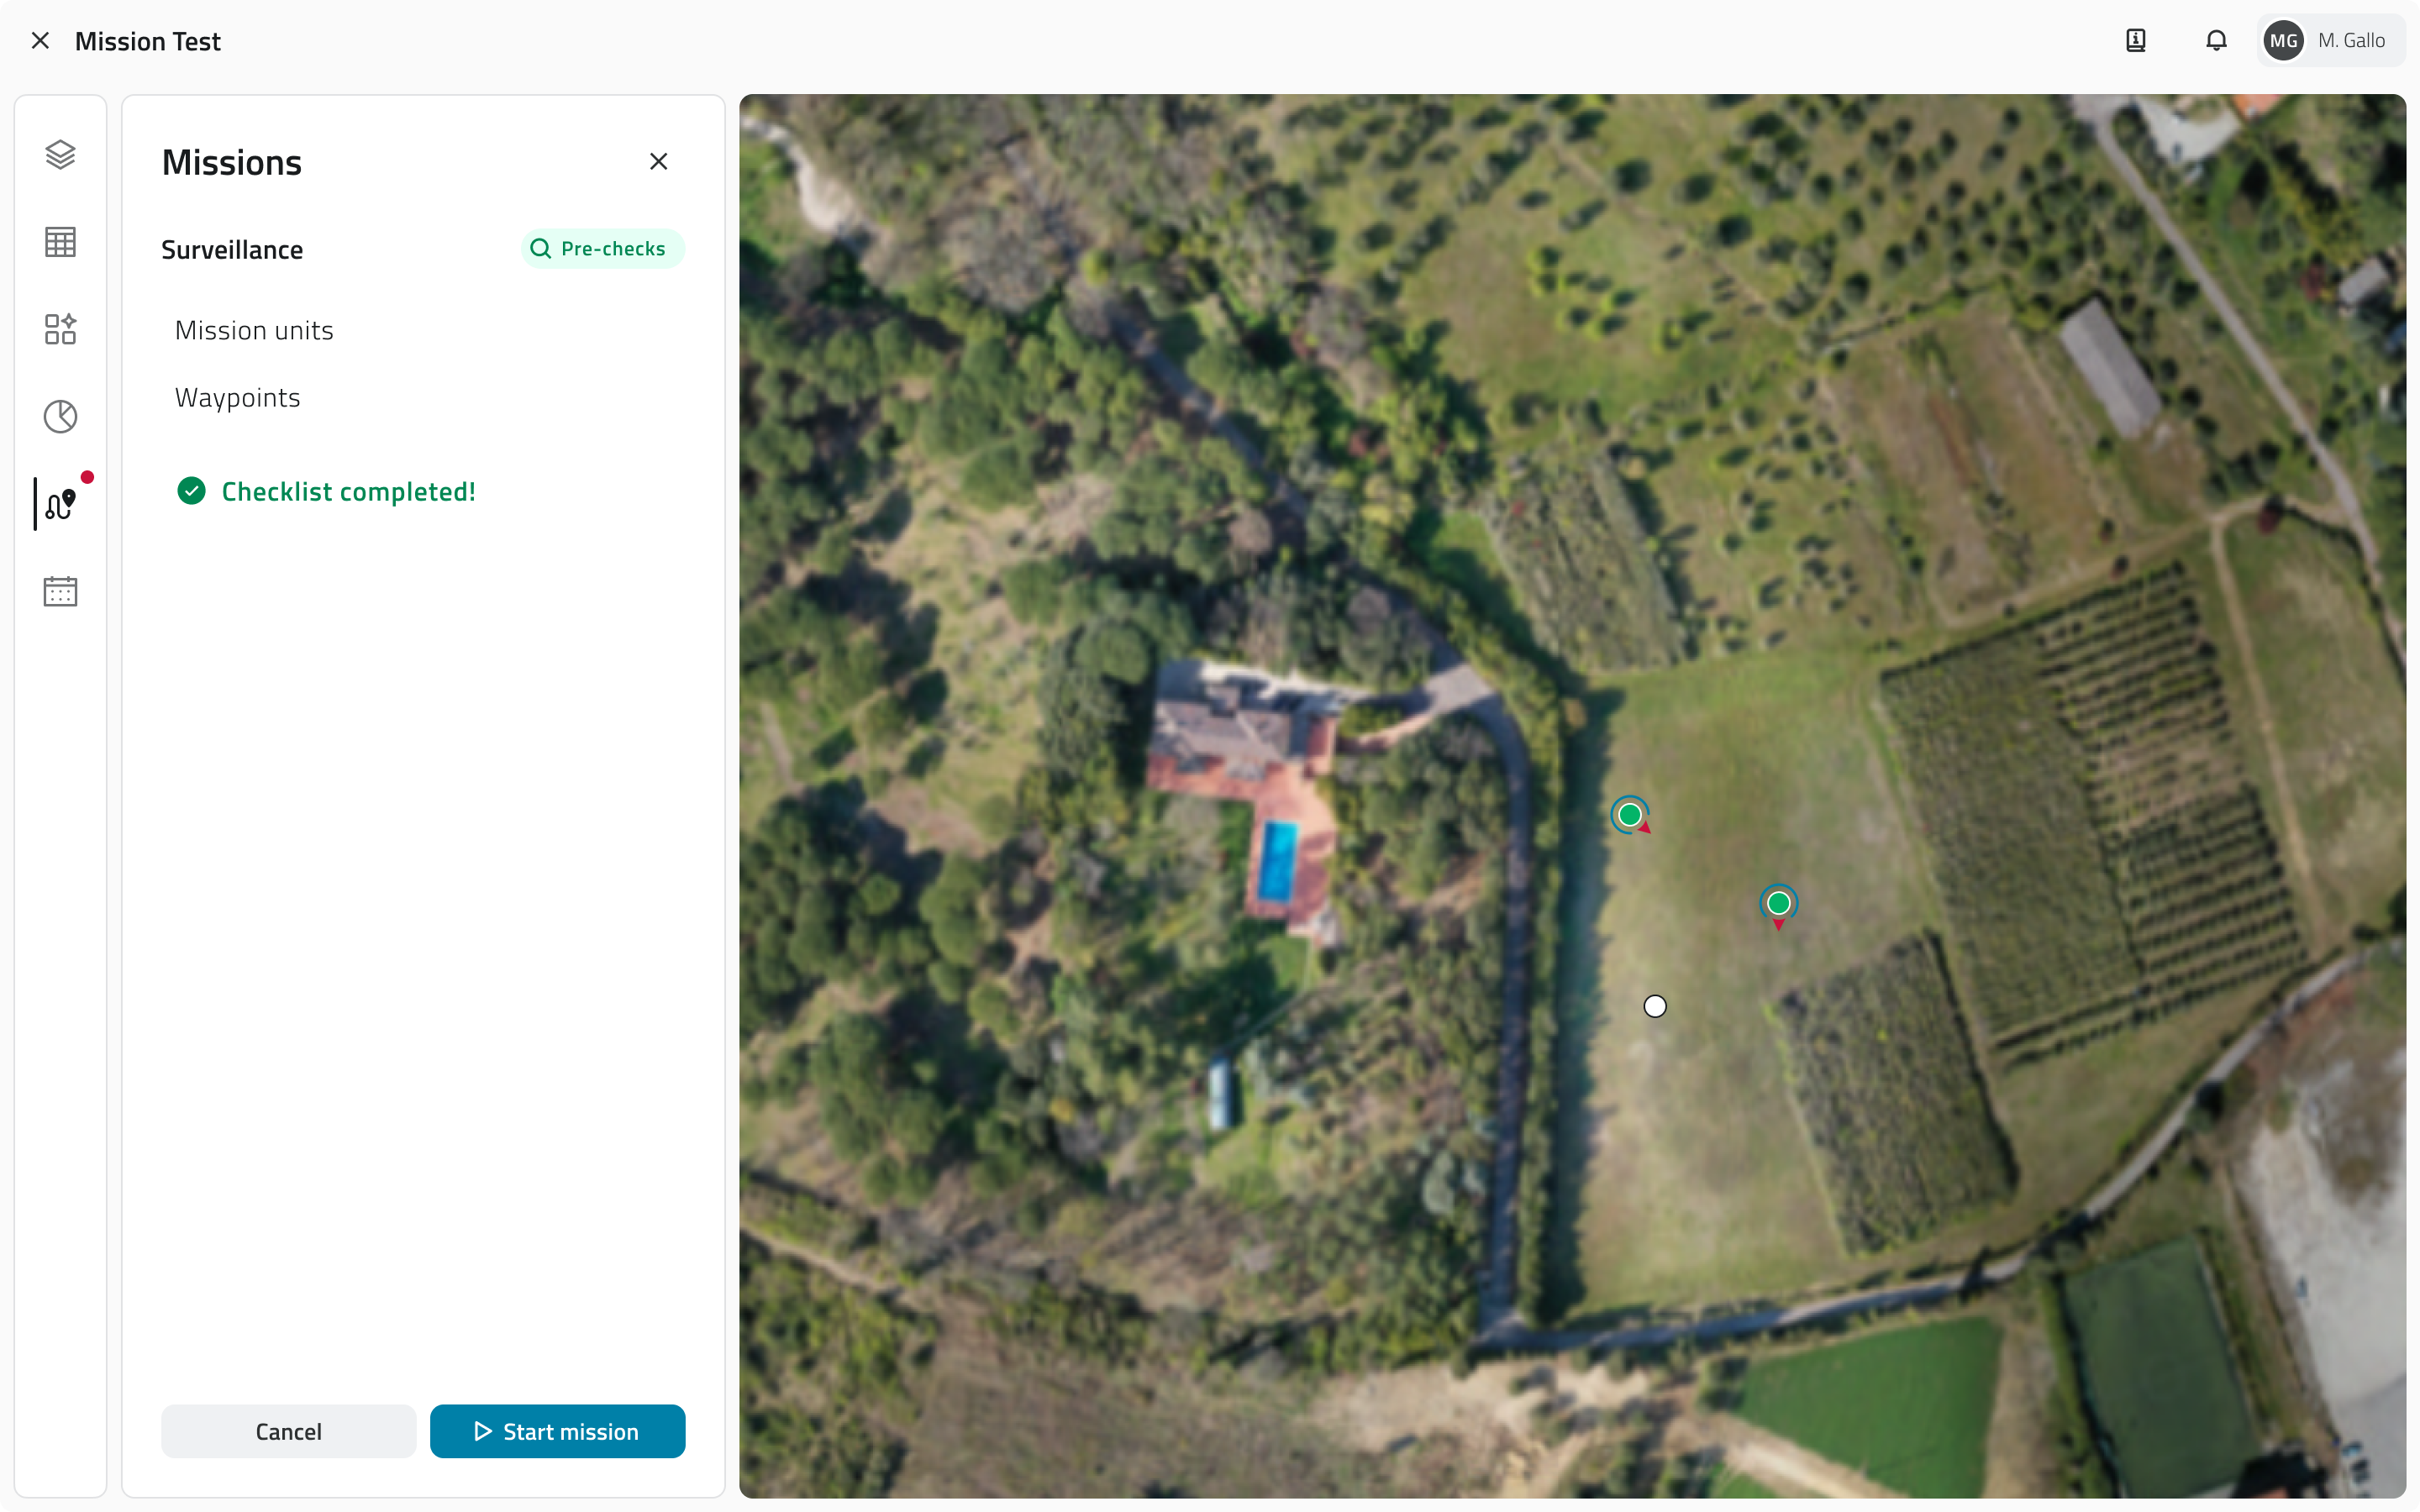
Upon start, the drone takes off and begins to execute the path and actions configured for the mission.
From this moment, it is possible to monitor the mission in real-time.
Links
![]() Italian version
Italian version
Questa sezione descrive i passaggi per creare, configurare e avviare una missione con un drone, dalla creazione della missione fino al controllo preliminare e all'avvio.
Disponibile solo con almeno una Mission Unit Drone configurata e permessi di accesso all'App.
Creare una nuova missione
1. Dalla pagina principale dei progetti, apri il progetto in cui vuoi creare la missione.
![]()
3. Clicca sulla Classe Oggetto Missions per visualizzare l'elenco delle missioni.
4. Clicca su Nuovo oggetto.
![]()
5. Si aprirà il modale di creazione missione, che richiede l'inserimento dei seguenti dati:
-
Nome
Il nome identificativo della missione. -
Mission unit type
Seleziona Drone dall'elenco. -
Take off security height
La quota di sicurezza che il drone raggiungerà al decollo prima di procedere verso il primo Waypoint. - Take off speed
La velocità di salita verticale durante il decollo. - Global height
L'altezza di crociera predefinita che il drone manterrà durante la missione. - Global speed
La velocità di spostamento predefinita tra i Waypoint. - Mission Units
Seleziona il drone che dovrà eseguire questa missione e l'hangar. - Profiles
Seleziona il profilo per la missione. Questo campo diventa attivo solo dopo aver selezionato la Mission Unit.
6. Per creare la missione, clicca Salva.
Modifica delle missioni
Puoi modificare ed eliminare le missioni nell'inventory, nella lista delle missioni.
Modifica
Per modificare una missione non ancora eseguita, apri il dettaglio cliccando sul pulsante blu, visibile al passaggio del mouse sull'elemento.
Per aggiornare i dati della missione, clicca Modifica.
Alcuni attributi possono essere modificati, a seconda dello stato della missione e della presenza di Waypoint.
Eliminazione
Per eliminare una missione:
- Apri il dettaglio della missione e clicca sul pulsante Elimina in alto a destra della finestra.
- Seleziona una o più missioni dalla lista e clicca sul pulsante Elimina in alto a destra della vista.
In entrambi i casi, apparirà una finestra di conferma per l'operazione.
L'eliminazione è consentita solo per le missioni non avviate.
Le missioni archiviate non possono essere eliminate, ma solo consultate o duplicate.
Inserire elementi in mappa
Per rendere una missione operativa, è necessario definire l'Hangar e almeno due Drone Waypoint.
Per inserirli, clicca Go to Mission dal pannello di dettaglio della missione.
Impostare l'Hangar
L'Hangar rappresenta il punto di decollo e atterraggio del drone. Viene posizionato manualmente sulla mappa come un punto non orientato, da collocare quanto più vicino possibile alla posizione reale dell'hangar.
Per ogni missione, l'Hangar deve essere reinserito.
Per aggiungere l'Hangar, seleziona lo strumento Disegna dalla toolbar e scegli la Classe Oggetto corrispondente.
Per posizionare il punto, clicca con il tasto sinistro del mouse sulla mappa.
Dopo il posizionamento, compila gli attributi richiesti:
- Mission Seleziona la missione attuale a cui vuoi associare l'Hangar.
- Mission Unit Seleziona l'hangar specifico che verrà utilizzato.
Clicca Salva per confermare.
Per modificare l'Hangar, elimina quello esistente e reinseriscilo.
Aggiungere Drone Waypoint in mappa
I Drone Waypoint definiscono il percorso operativo e la quota che il drone seguirà durante la missione.
1. Per aggiungere un Drone Waypoint, seleziona lo strumento Disegna dalla toolbar e scegli la Classe Oggetto corrispondente.
2. Per posizionare il punto, clicca con il tasto sinistro del mouse sulla mappa.
3. Per definire l'orientamento del Waypoint, muovi il mouse.
4. Per confermare l'inserimento, clicca con il tasto destro del mouse.
I Drone Waypoint sono visibili sia in mappa che nell'elenco nel pannello laterale. Ogni Waypoint viene numerato automaticamente, in base all'ordine di creazione. L'ordine dei Waypoint indica anche l'ordine in cui il drone li raggiungerà.
Nella card di ciascun Waypoint nel pannello laterale sono visibili le impostazioni principali, tra cui l'altezza globale di volo, il gimbal e lo zoom della camera.
Per modificare l'orientamento, seleziona un Waypoint in mappa e clicca Ruota dalla toolbar.
Per eliminare i Waypoint selezionali in mappa e clicca Elimina dalla toolbar, o clicca su Elimina che appare andando in hover sull'elemento dell'elenco.
Per cambiare l'ordine dei Waypoint, trascinali nell'elenco del pannello laterale.
Per modificare le impostazioni di un Waypoint, clicca sulla sua card nel pannello laterale per aprirlo. Da lì è possibile:
- aggiornare l'altezza di volo specifica per quel Waypoint, sovrascrivendo la Global Height della missione
- regolare il gimbal, ovvero l'inclinazione della camera
- regolare lo zoom della camera
- aggiungere o modificare le azioni associate al Waypoint
Se modifichi l’ordine o le impostazioni dei waypoint dopo averli salvati, verrà visualizzato un avviso relativo a modifiche non salvate. Ricordati di premere Salva nella parte inferiore del pannello.
Impostare azioni sui Waypoint
Per ogni Waypoint è possibile configurare una o più azioni, che il drone esegue dopo aver raggiunto il punto.
Per aggiungere un'azione a un Waypoint, porta il cursore sopra una delle card azione nel pannello laterale sinistro e clicca sul pulsante +Action.
Le azioni disponibili in piattaforma sono:
- Scatta foto
Acquisisce un'immagine con la camera del drone.
Per ogni waypoint è possibile aggiungere più azioni, ma è anche possibile salvare senza aver impostato alcuna azione. Le azioni vengono eseguite in sequenza, nell'ordine in cui sono state create e in cui sono visibili nella lista.
Per salvare la configurazione del waypoint e delle azioni, clicca sul pulsante Salva, in basso.
Controlli pre-missione
Prima di avviare la missione è necessario effettuare un pre-check.
Cliccando su Controlli pre-missione, il sistema effettuerà una verifica sullo stato di connessione del drone e dell'hangar e sulla correttezza della sequenza dei Drone Waypoint.
Il sistema potrebbe rilevare le seguenti tipologie di errori:
Errori bloccanti
Riguardano la connessione con il drone o con l'hangar.
In questo caso non sarà possibile avviare la missione finché il problema non viene risolto.
Errori non bloccanti
Riguardano singoli Waypoint.
In questo caso è comunque possibile avviare la missione, ma il sistema richiede uno scarico di responsabilità prima di procedere.
Ogni volta che riaprirai la missione, verrà eseguito un controllo automatico sullo stato di connessione. Inoltre, il Controllo pre-missione dovrà essere nuovamente effettuato.
Avvio della missione
Se la verifica non ha presentato errori bloccanti, puoi avviare la missione cliccando il pulsante Inizia la missione.
All'avvio il drone decolla e inizia ad eseguire il percorso e le azioni configurate per la missione.
Da questo momento è possibile monitorare la missione in tempo reale.
Collegamenti
Last update: 14 May 2026
No comments to display
No comments to display