
Managing objects in the project
![]() English version
English version
This section explains how to create objects within the project. Objects can be vector geometries, such as points, lines or polygons, or non-vector objects, known as forms.
Object types
In the project you can create different types of objects:
- Points
Single elements that can be placed in the 2D and 3D views, such as sensors or markers. - Lines
Sequences of connected points forming paths, such as infrastructure routes. - Polygons
Areas delimited by multiple vertices, such as work zones or perimeters. - Forms
Non-vector objects, without geometry, used to enter data through attributes, such as information forms.
Any data entered in the platform is managed on an on-premise cloud infrastructure, unless different agreements have been made with the provider. It is always possible to download all project data locally and delete any associated media at any time. For further support on data management, contact helpdesk@eaglearca.it
Creating objects
Form (non-vector objects)
1. Open the Inventory view of the desired object class.

2. Click the New object button in the top-right corner.
3. The attribute panel opens for data entry.
Geometries (vector objects)
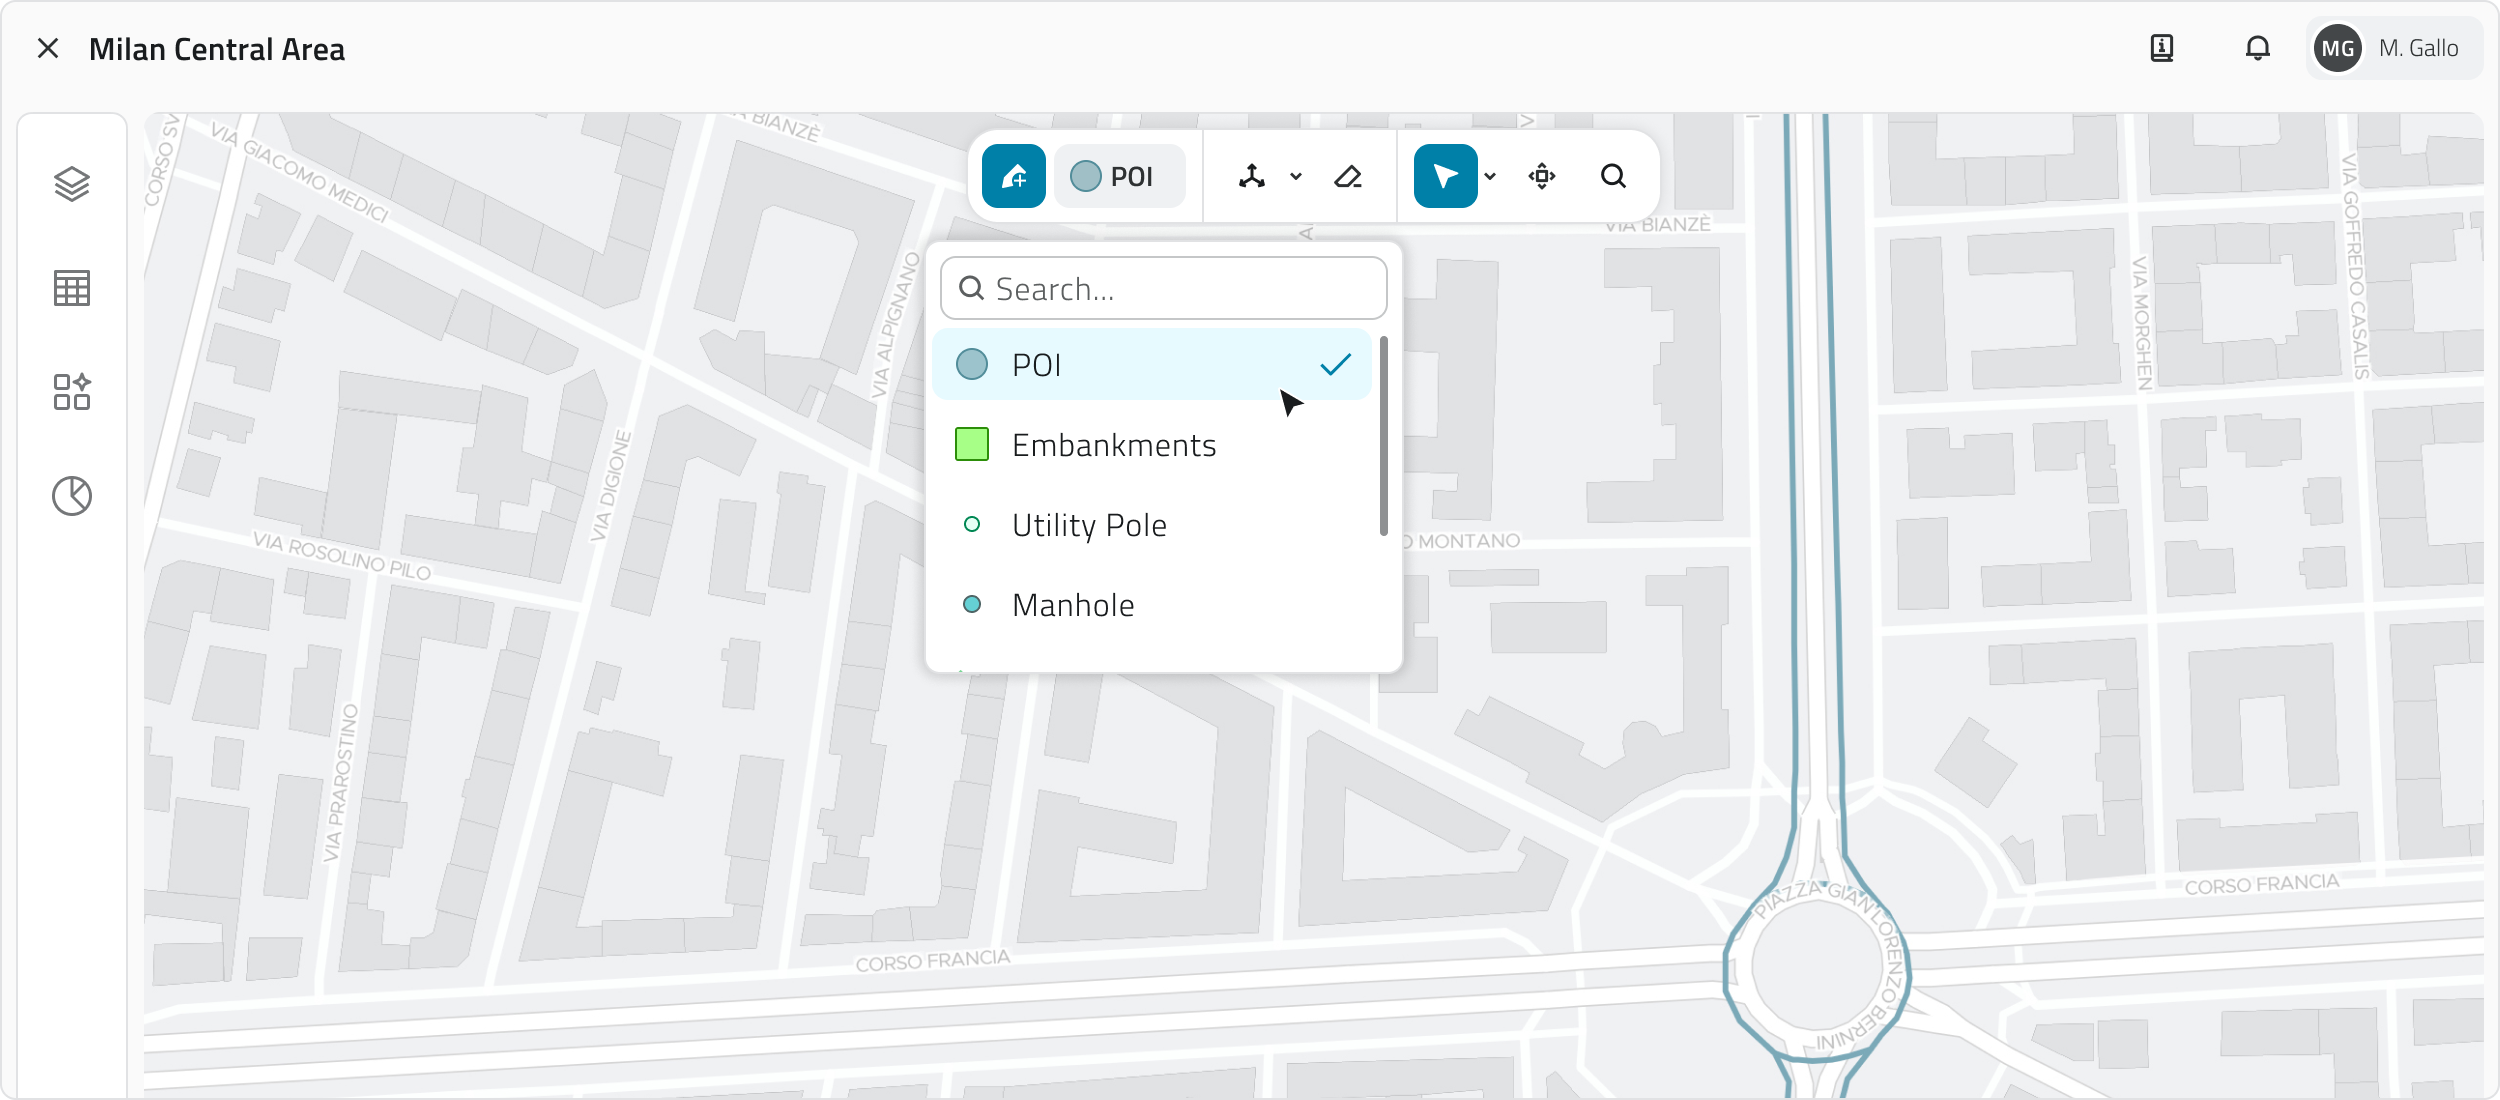
1. Hover over the 2D or 3D view to reveal the toolbar, then select the Draw tool.
2. To choose the object class, click the arrow next to the tool. Use the search bar at the top of the list to filter quickly, you can see a style preview to help with the selection.
3. Draw the object on the map:
-
Point
Click with the left mouse button. -
Line
To add vertices, click with the left mouse button; to close the geometry, click with the right mouse button. -
Polygon
Polygon To add vertices, click with the left mouse button; after the third vertex the polygon preview appears. To close the geometry, click with the right mouse button.
n the 3D view, objects must be created on the surface of the mesh or point cloud.
4. Once the geometry is confirmed, the attribute panel opens.
Filling in attributes
After creation, the attribute panel allows you to enter the required information.
The object cannot be saved until all required fields have been filled in.
At the top left is the Expand button to open the panel in full screen. The Cancel and Save buttons are positioned at the top right.
If the object class has attributes organised into groups, tabs appear at the top of the panel that allow you to filter attributes by category. Clicking on a tab shows only the attributes belonging to that group. Next to the groups there is a button to expand the search bar.

Attribute types
Objects can have the following attribute types:
- Text: Letters and numbers (possible maximum length).
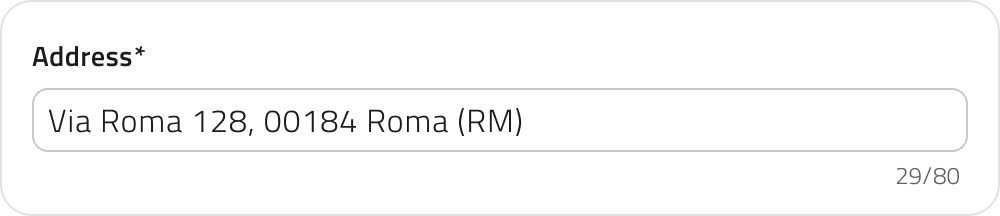
-
Numbers: Numeric values (possible predefined range).
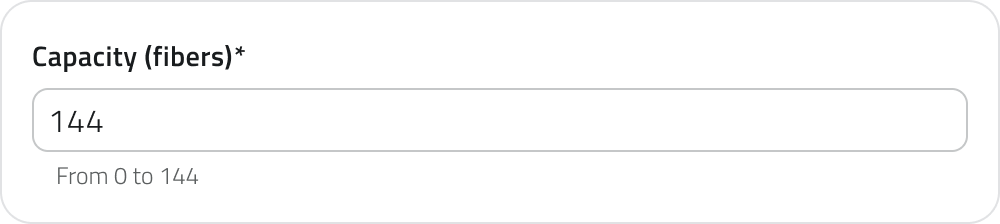
-
Value list: Selection of one or more values from a dropdown menu.
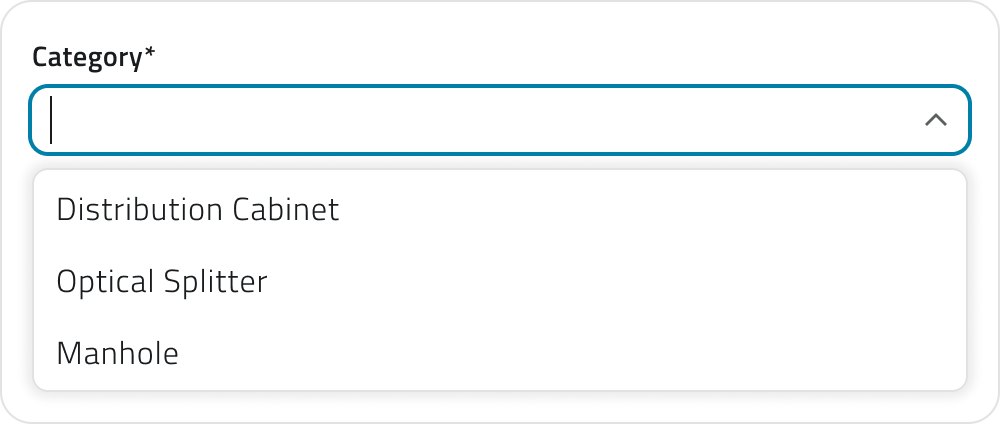
-
Date: Selection of a date ora date and time.

-
Attachments: Upload of images, documents or videos.

-
Size: (Vector only) Automatically calculated by the system (coordinates/length/area).

-
True/False: Choice between the two true/false values.

-
Object list: Addition of related sub-attributes (can be of type Text, Numbers, Value list, Date, True/False).
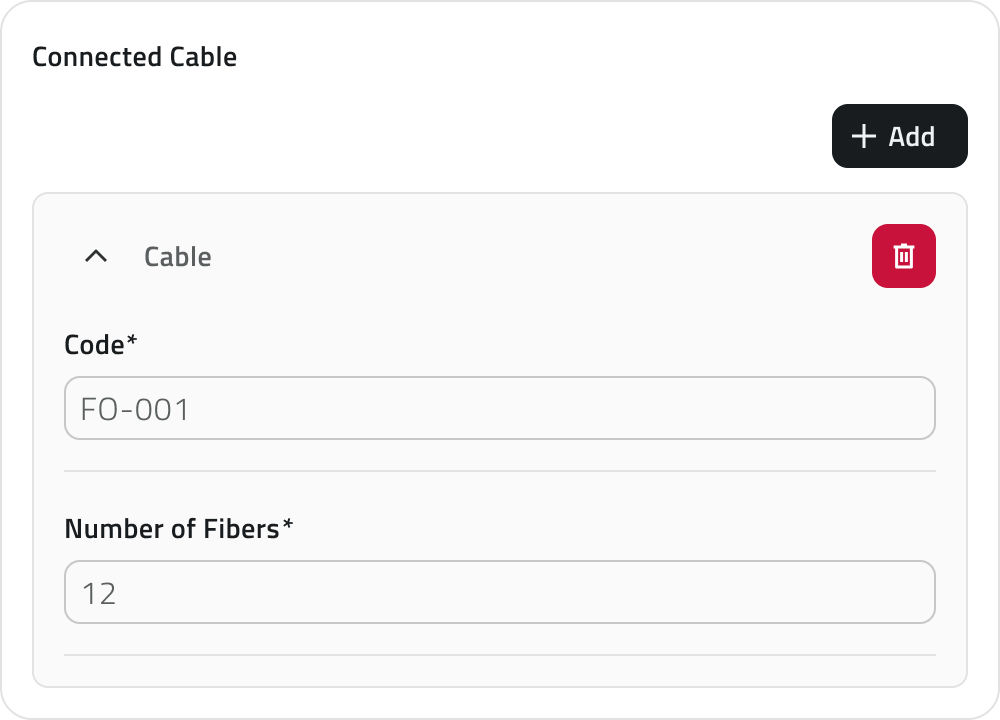
- Relation: link to one or more objects of another object class. Allows you to represent logical connections between project elements (e.g. a road linked to the lighting poles along its route).

Some attributes may be pre-filled with a default value: in this case they may already be ready for saving or locked and not editable.
💡 Tip: use the search bar in the attribute panel to quickly find the desired field. Make sure that any pre-filled values in mandatory fields are correct before saving.
Attribute properties
| Icon/Indicator | Property | Description |
| * (Asterisk) | Mandatory | The field must be filled in to save the object. It may have an editable pre-filled value. |
| 🔒 (Padlock) | Locked | The field cannot be edited. |
| ⚡ (Blue lightning) | Main attribute | It is mandatory and helps to quickly identify the instance. |
Assigning a data source to an object
Available only with sensors already associated with the project.
A data source is a source that collects data over time; associated with an object, it allows you to display that data as charts in the Attribute details panel.
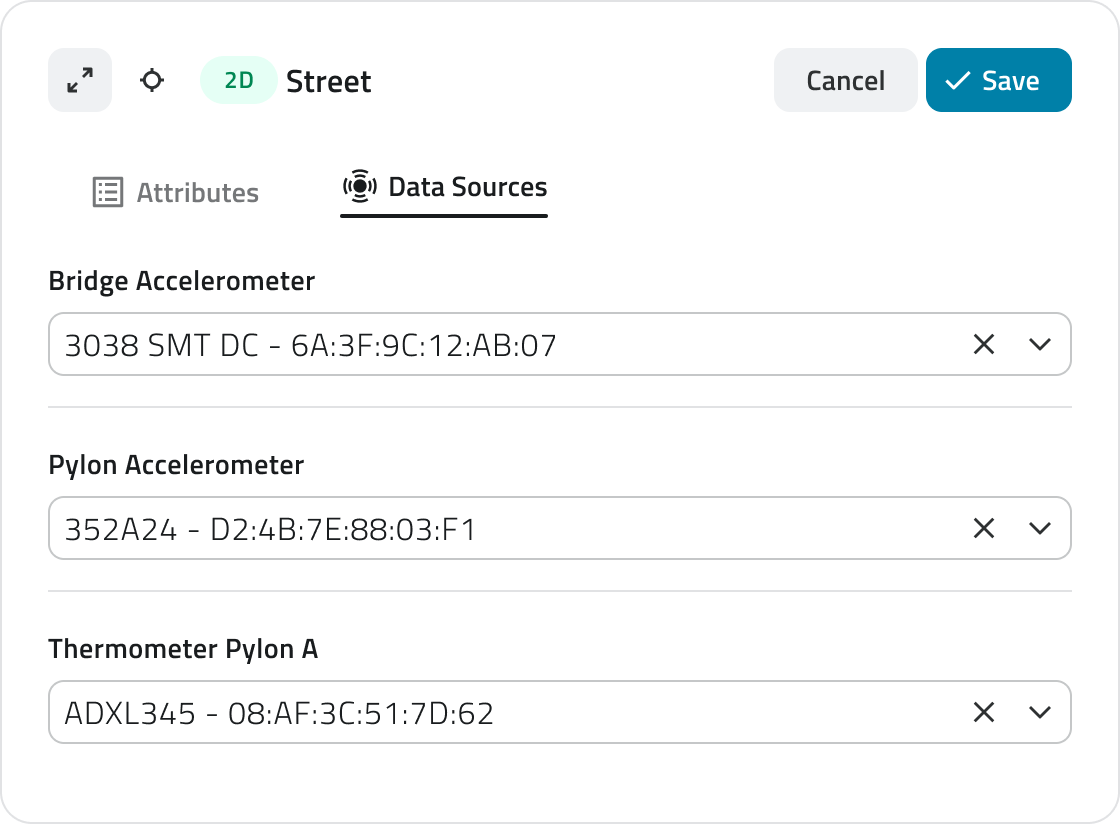
It is possible to assign a data source at two different points: during object creation or afterwards by editing an existing object.
Assignment during creation
1. During object insertion, the attribute details panel opens in configuration mode.
3. Click the selection field and choose one of the available options from the list.
Assignment during editing
1. Open the Attribute details panel of the object by clicking the blue Open button that appears when hovering over the element in the Inventory view, or select it in the 2D or 3D view and click Expand in the info card.
2. Click the Edit button.
4. Click the selection field and choose one of the available options from the list.
Managing and editing objects in the 2D view
This section provides guidance on moving, rotating, editing vertices and deleting objects.
Moving an object
The Move tool allows you to reposition selected objects with precision.
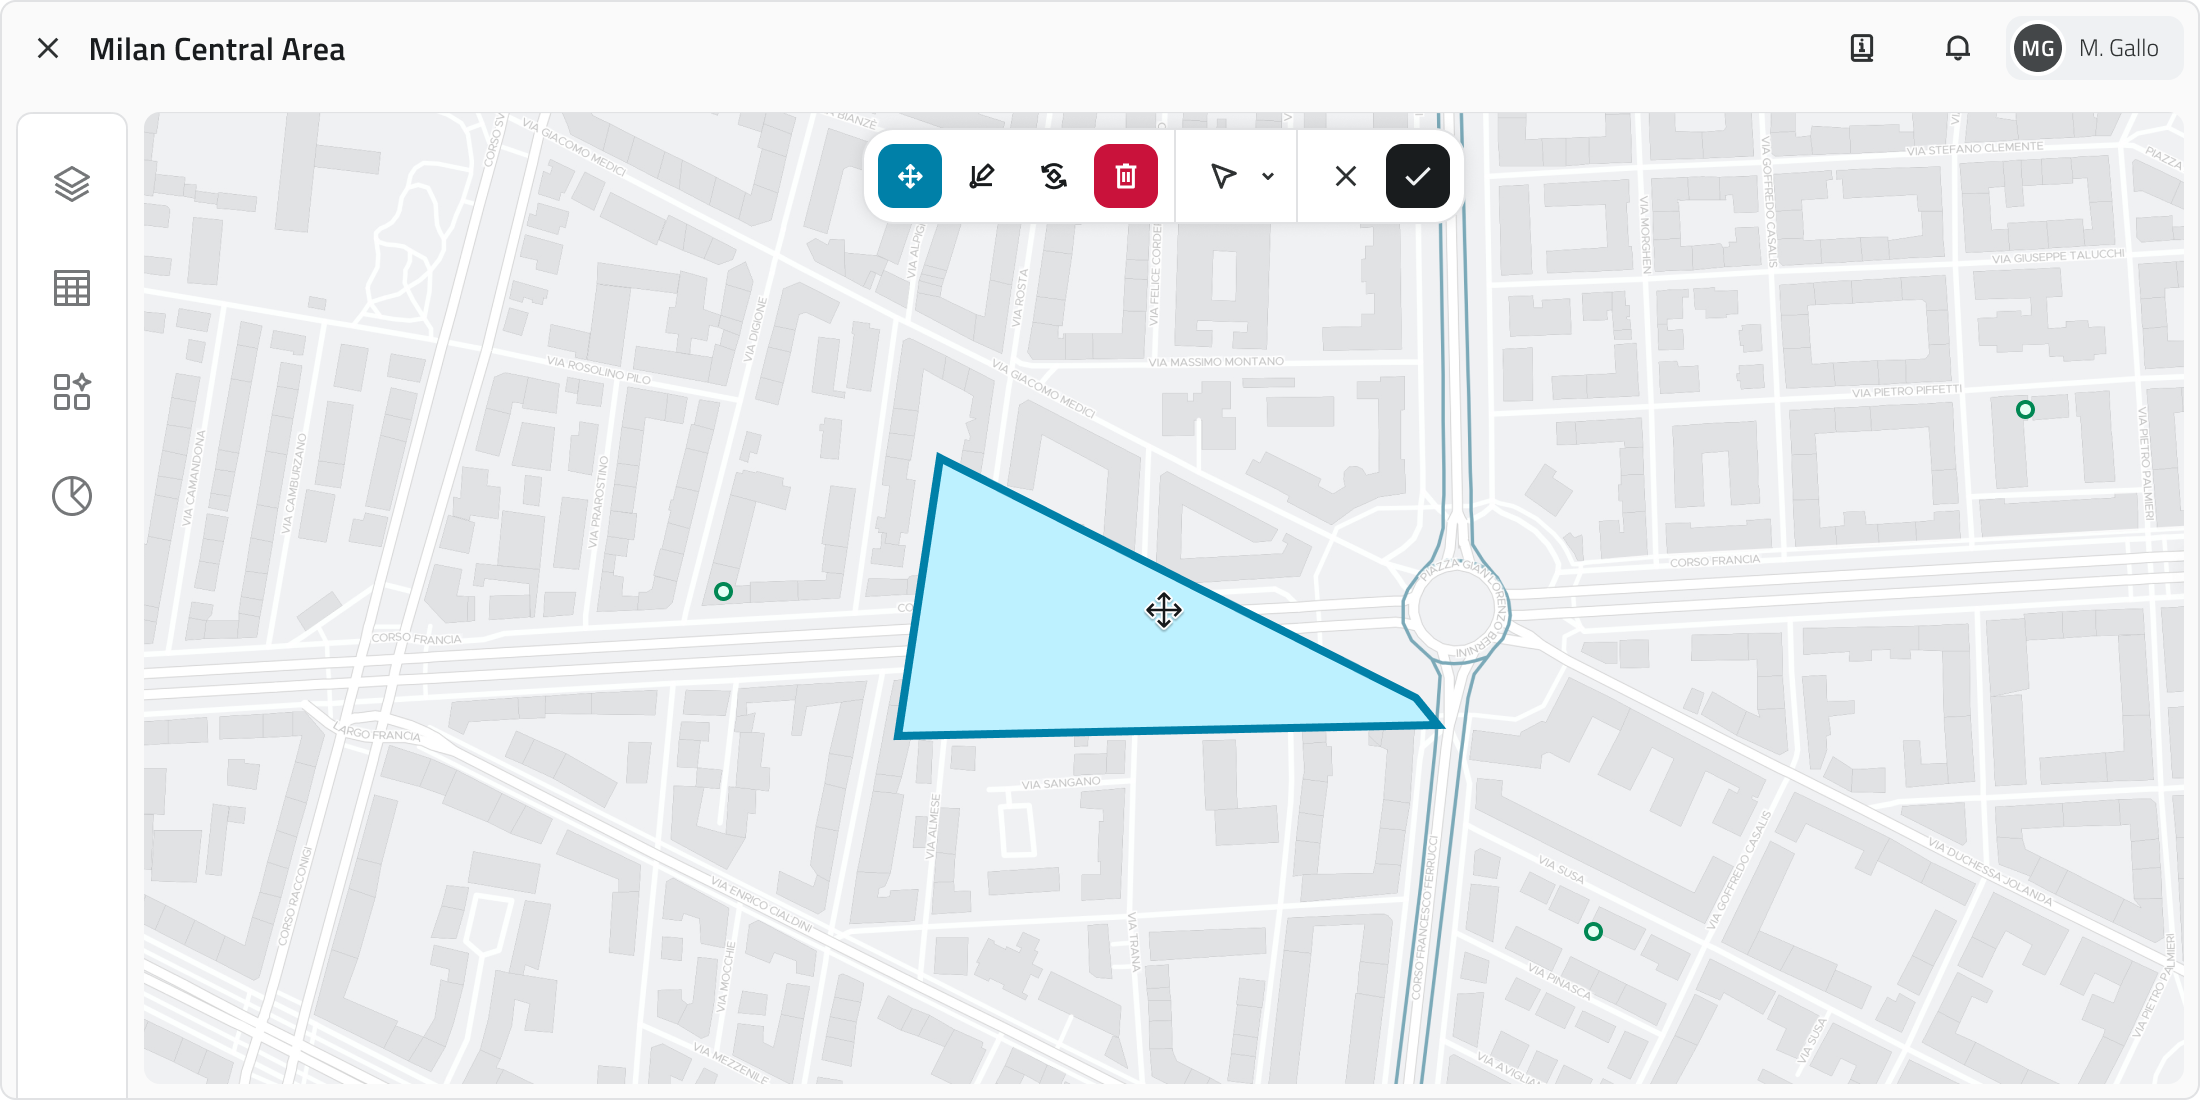
1. Select one or more objects.
2. Click the Move button in the toolbar.
3. Grab and freely move the object; snap with other objects on the map is supported.
4. To save the new position click Confirm. If the object has not been moved the button remains disabled. To restore the original position click Cancel.
Rotating an object
Rotation modifies the orientation of Line or Polygon objects.
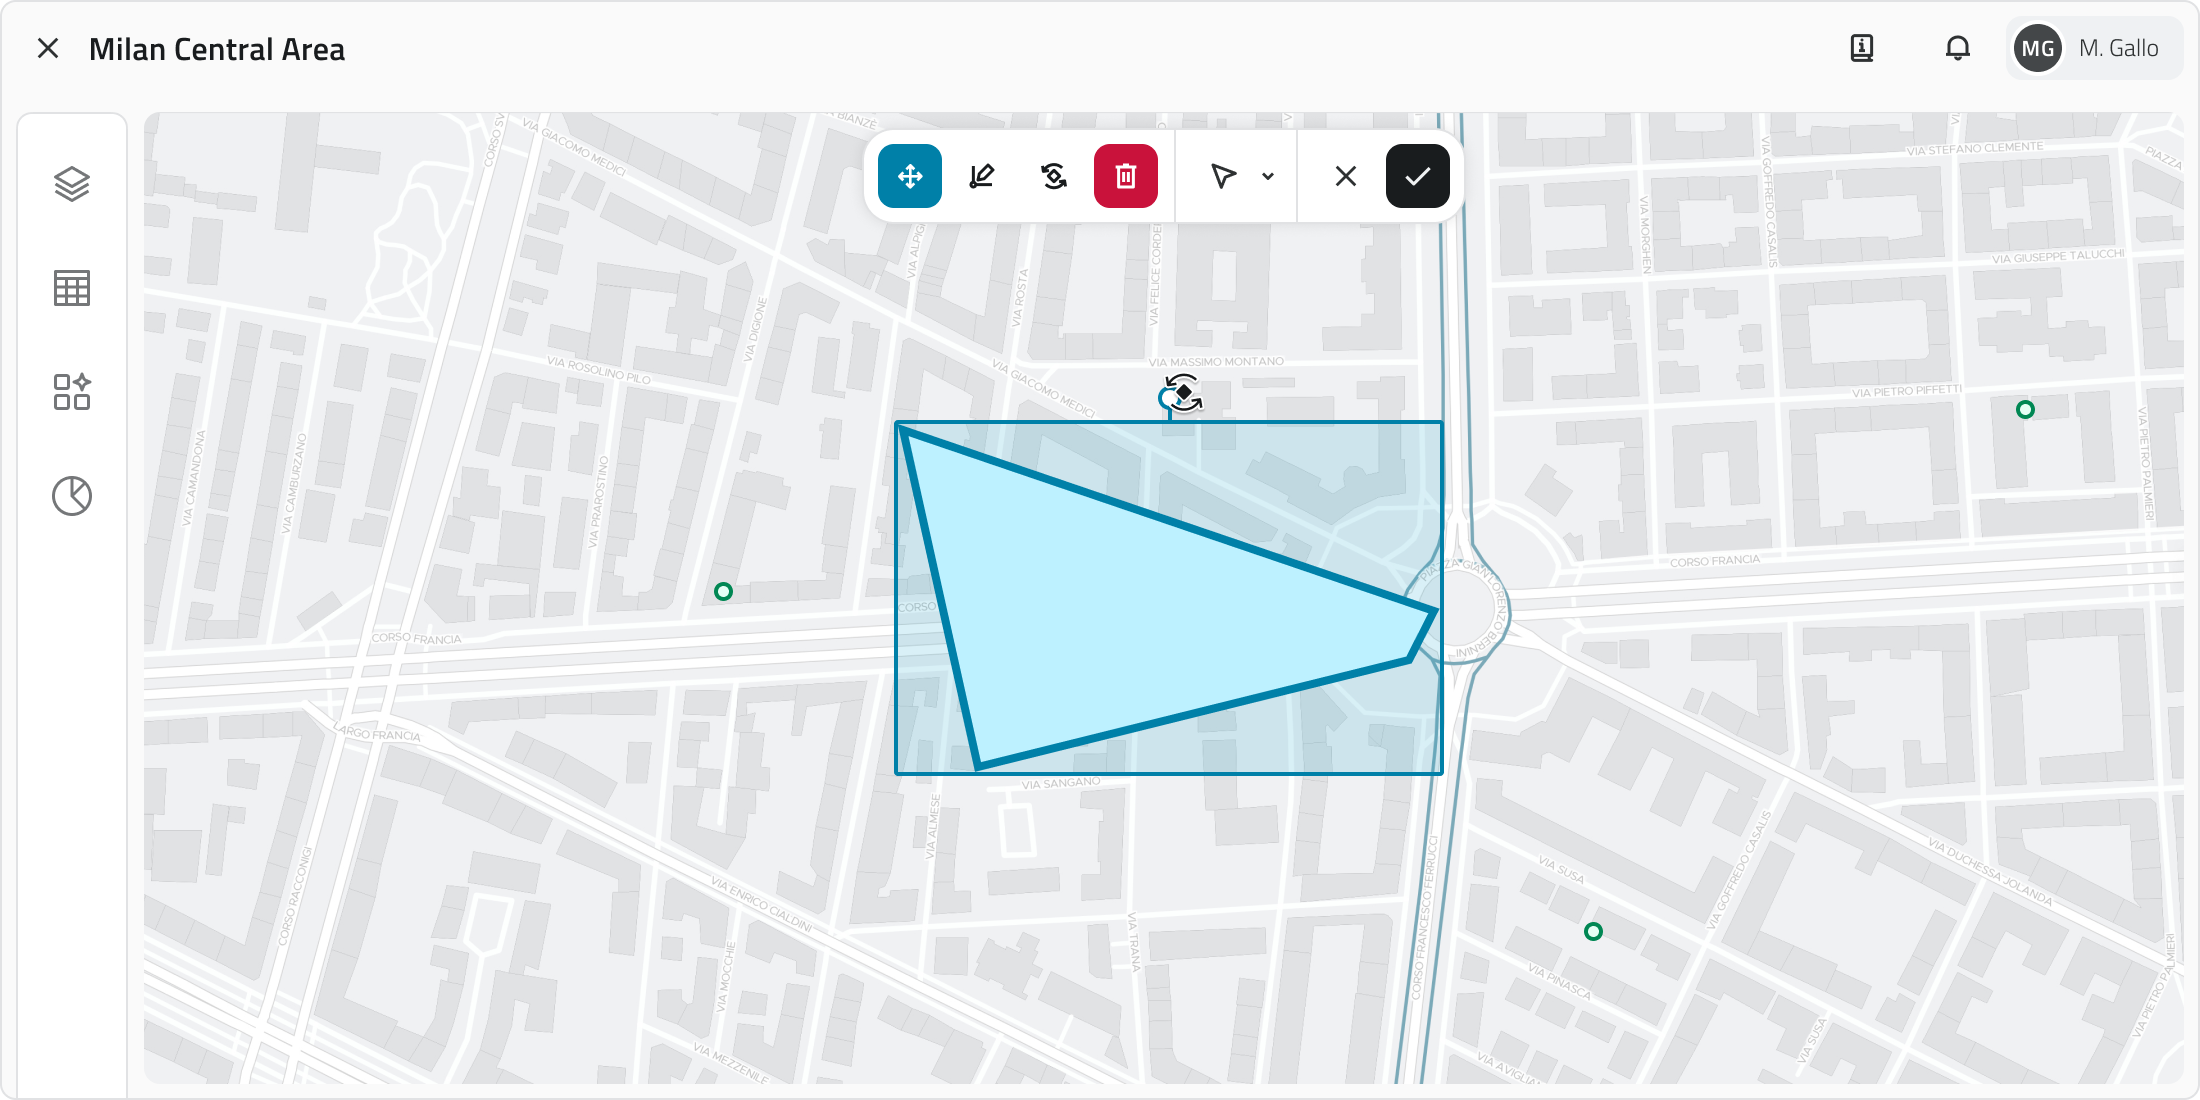
1. Select one or more objects.
2. Click the Rotate button in the toolbar. A rectangle with a handle appears around the object.
3. Drag the handle to rotate the object. Multiple rotation occurs around the central pivot point.
4. To save the new orientation click Confirm. If the object has not been rotated the button remains disabled. To restore the original orientation click Cancel.
Editing object vertices
This tool allows you to move, add or correct the vertices of Lines and Polygons.
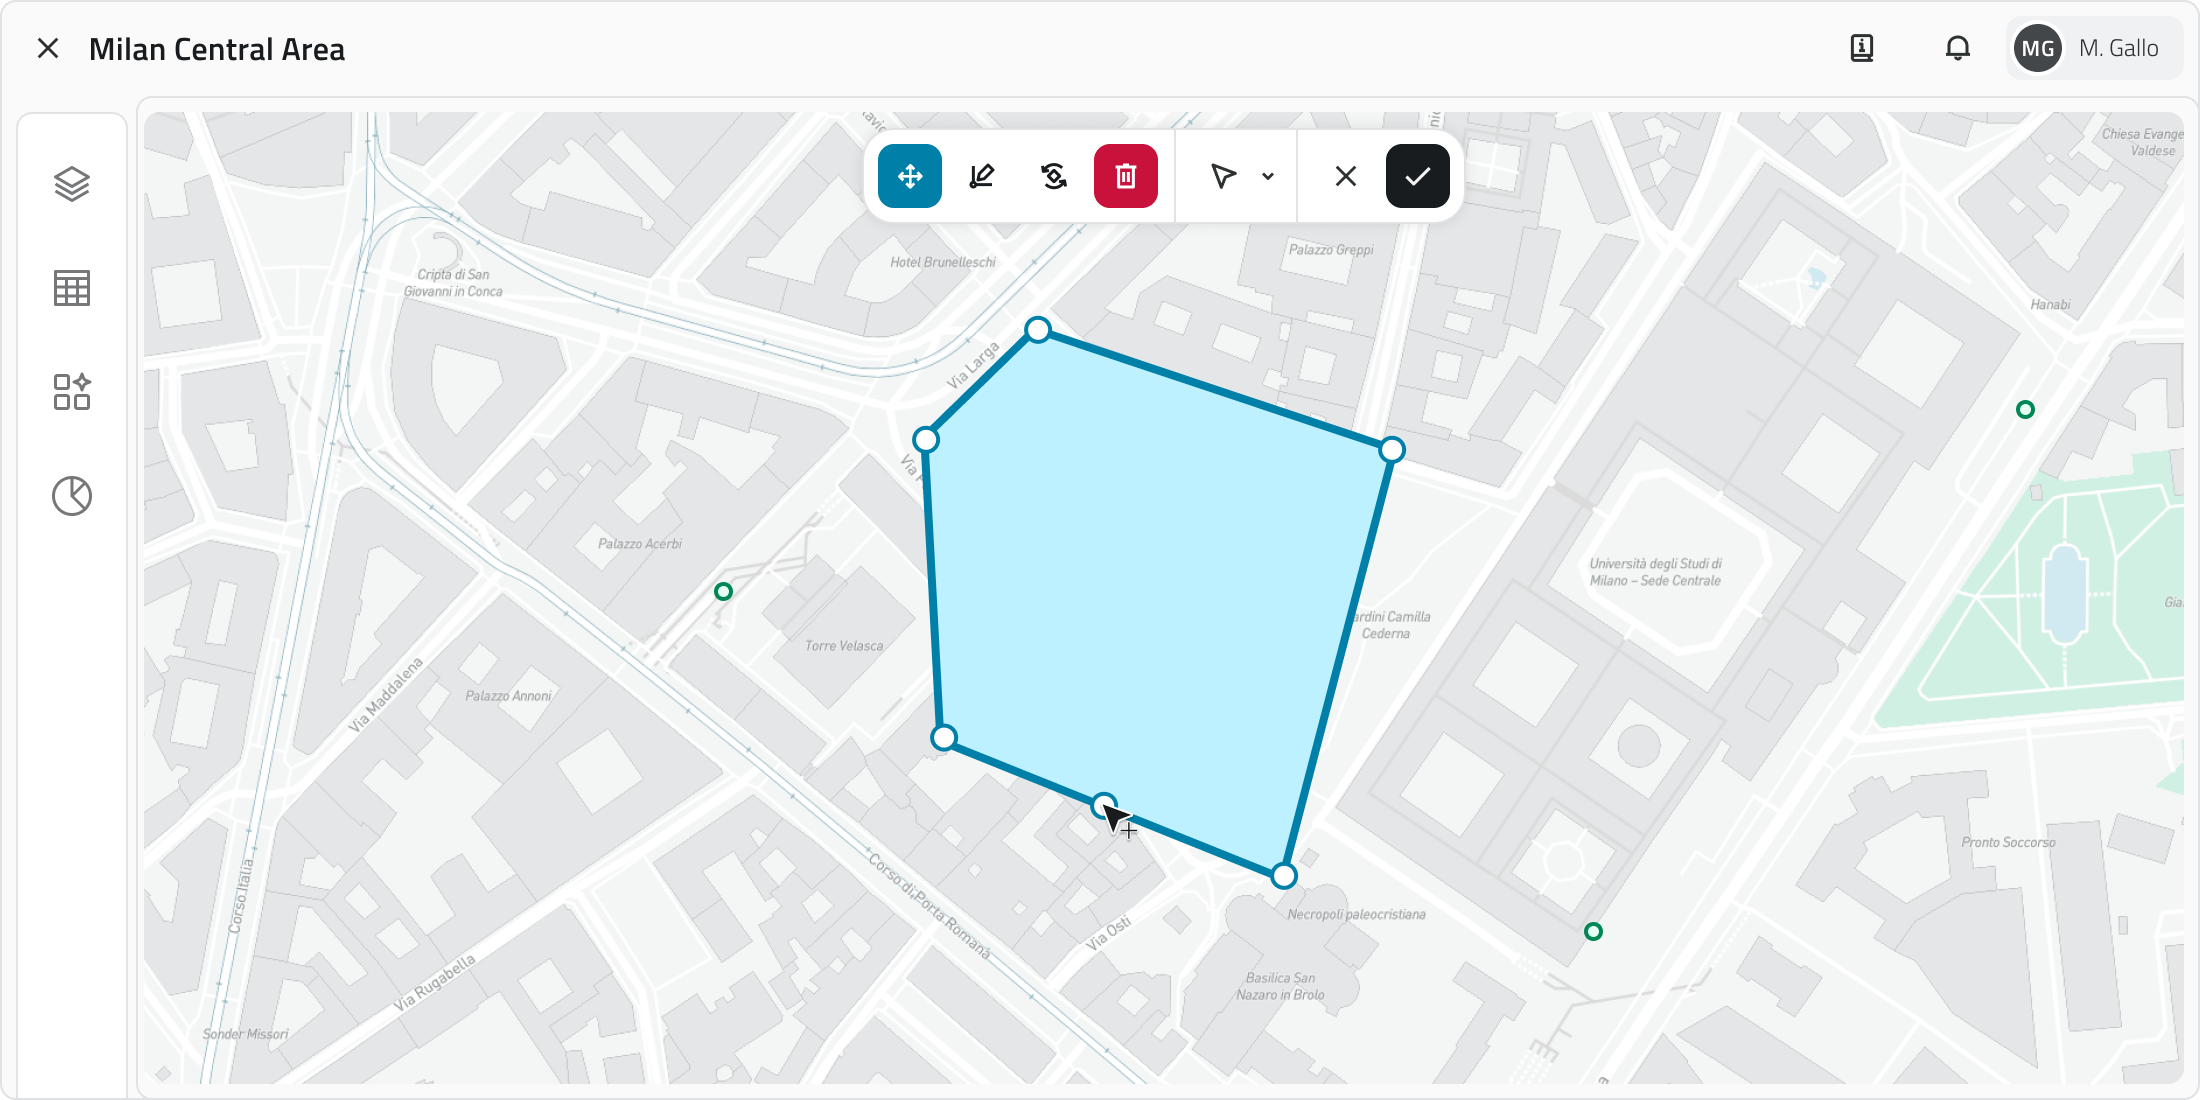
1. Select a line or polygon.
2. Click the Edit vertices button in the toolbar. All vertices become visible.
3. Drag an existing vertex to move it. To add a new vertex, click the midpoint that appears along the segment. Snap with other geometries is supported.
4. To save the changes click Confirm. If the object has not been modified the button remains disabled. To restore the original shape click Cancel.
Deleting an object
This function permanently deletes the selected objects in all views.
1. Select one or more objects in the 2D, 3D or Inventory view.
2. Click the Delete button: in the 2D and 3D views it is located in the toolbar, in the Inventory view at the top right.
3. A window opens with the list of object classes involved in the selection, each with a checkbox.
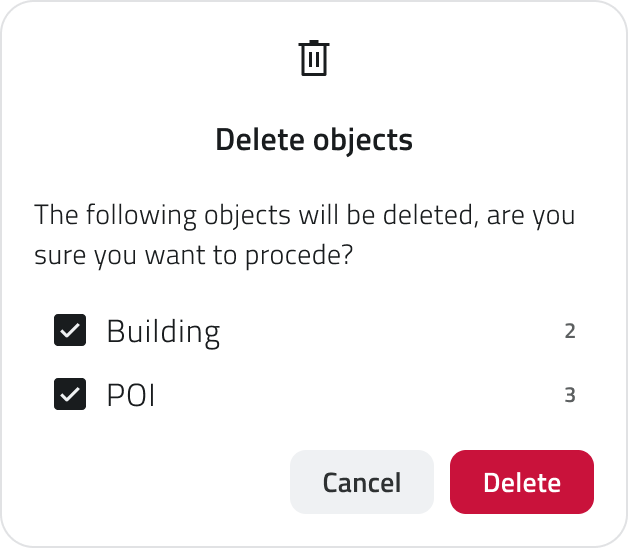
4. Select the checkboxes corresponding to the objects to delete.
5. Click Confirm to proceed, or Cancel to close the window without making any changes. The Confirm button is disabled if all checkboxes are deselected.
At the end of the operation a notification appears at the bottom left with the outcome of the deletion.
💡 Tip: always check the checkboxes in the confirmation window before proceeding to avoid deleting unwanted objects.
Links
![]() Italian version
Italian version
Questa sezione spiega come creare oggetti all’interno del progetto. Gli oggetti possono essere geometrie vettoriali, come punti, linee o poligoni, oppure oggetti non vettoriali, detti form.
Tipi di oggetti
Nel progetto puoi creare diverse tipologie di oggetti:
- Punti
Elementi singoli posizionabili nelle viste 2D e 3D, come sensori o segnaposto. - Linee
Sequenze di punti collegati per formare percorsi, come tracciati di infrastrutture. - Poligoni
Aree delimitate da più vertici, come zone di lavoro o perimetri. - Form
Oggetti non vettoriali, senza geometria, usati per inserire dati tramite attributi, come moduli informativi.
Qualsiasi dato immesso in piattaforma viene gestito su un’infrastruttura cloud on-premise, a meno di differenti accordi con il fornitore. È sempre possibile scaricare in locale tutti i dati del progetto ed eliminare qualsiasi media associato in qualsiasi momento. Per ulteriore supporto alla gestione dati, contatta l'indirizzo helpdesk@eaglearca.it
Creazione di Oggetti
Form (Oggetti non vettoriali)
1. Apri la vista Inventory della classe oggetto desiderata.
2. Clicca sul bottone Nuovo oggetto in alto a destra.
3. Si apre il pannello attributi per la compilazione dei dati.
Geometrie (Oggetti vettoriali)
1. Passa con il mouse sulla vista 2D o 3D per far comparire la barra degli strumenti, quindi seleziona lo strumento Disegna.
2. Per scegliere la classe oggetto clicca sulla freccia accanto allo strumento. Usa la barra di ricerca in cima alla lista per filtrare rapidamente, puoi vedere l'anteprima dello stile per facilitare la selezione.
3. Disegna l’oggetto sulla mappa:
-
Punto
Clicca con il tasto sinistro del mouse. -
Linea
Per inserire i vertici, clicca con il tasto sinistro del mouse, per chiudere la geometria, clicca con il tasto destro. -
Poligono
Per inserire i vertici, clicca con il tasto sinistro del mouse, dopo il terzo vertice appare l'anteprima del poligono. Per chiudere la geometria, clicca con il tasto destro.
Nella vista 3D gli oggetti devono essere creati necessariamente sulla superficie della mesh o della nuvola di punti.
4. Confermata la geometria, si apre il pannello attributi.
Compilazione degli Attributi
Dopo la creazione, il pannello attributi permette di inserire le informazioni richieste.
L'oggetto non può essere salvato finché tutti i campi obbligatori non sono compilati.
In alto a sinistra si trova il bottone Espandi per aprire il pannello a schermo intero. I bottoni Annulla e Salva sono posizionati in alto a destra.
Se la classe oggetto ha attributi organizzati in gruppi, nella parte superiore del pannello compaiono delle schede che permettono di filtrare gli attributi per categoria. Cliccando su una scheda vengono mostrati solo gli attributi appartenenti a quel gruppo. Accanto ai gruppi è presente un bottone per espandere la barra di ricerca.
Tipi di Attributi
Gli oggetti possono avere i seguenti tipi di attributi:
-
Testo: Lettere e numeri (possibile lunghezza massima).
-
Numeri: Valori numerici (possibile range predefinito).
-
Lista valori: Selezione di uno o più valori da un menu a tendina.
-
Data: Scelta di una data o data e ora.
-
Allegati: Caricamento di immagini, documenti o video.
-
Dimensione: (Solo vettoriali) Calcolata automaticamente dal sistema (coordinate/lunghezza/area).
-
Vero/Falso: Scelta tra i due valori vero/falso.
-
Lista oggetti: Aggiunta di sotto-attributi correlati (possono essere di tipo Testo, Numeri, Lista valori, Data, Vero/Falso).
- Relazione: collegamento a uno o più oggetti di un'altra classe oggetto. Permette di rappresentare legami logici tra elementi del progetto (es. una strada collegata ai pali dell'illuminazione lungo il suo tracciato).
Alcuni attributi possono essere precompilati con un valore di default: in questo caso potrebbero essere già pronti per il salvataggio oppure bloccati e non modificabili.
💡 Suggerimento: usa la barra di ricerca nel pannello attributi per trovare rapidamente il campo desiderato. Verifica che i valori precompilati nei campi obbligatori siano corretti prima di salvare.
Proprietà degli Attributi
| Icona/Indicatore | Proprietà | Descrizione |
| * (Asterisco) | Obbligatorio | Il campo deve essere compilato per salvare l’oggetto. Può avere un valore precompilato modificabile. |
| 🔒 (Lucchetto) | Bloccato | Il campo non è modificabile. |
| ⚡ (Fulmine azzurro) | Attributo principale | È obbligatorio e aiuta a riconoscere rapidamente l’istanza. |
Assegnare Data Source ad un oggetto
Disponibile solo con sensori già associati al progetto.
Una data source è una fonte che raccoglie dati nel tempo; associata a un oggetto, consente di visualizzare tali dati come grafici nel pannello Dettaglio attributi.
È possibile assegnare una data source in due momenti distinti: durante la creazione dell'oggetto oppure in un secondo momento modificando un oggetto già esistente.
Assegnazione in creazione
1. Durante l'inserimento dell'oggetto si apre il dettaglio attributi in configurazione.
2. Spostati nella sezione Data Sources.
3. Clicca nel campo di selezione e scegli una delle opzioni disponibili dall'elenco.
Assegnazione in modifica
2. Clicca sul bottone Modifica
3. Spostati nella sezione Data Sources.
4. Clicca nel campo di selezione e scegli una delle opzioni disponibili dall'elenco.
Gestione e modifica di oggetti nella vista 2D
Questa sezione fornisce le indicazioni relative allo spostamento, alla rotazione, alla modifica dei vertici e all'eliminazione degli oggetti.
Spostare un oggetto
Lo strumento Sposta consente di riposizionare con precisione gli oggetti selezionati.
1. Seleziona uno o più oggetti.
2. Clicca sul bottone Sposta nella barra degli strumenti.
3. Afferra e sposta liberamente l'oggetto; è supportato lo snap con altri oggetti sulla mappa.
4. Per salvare la nuova posizione clicca Conferma. Se l'oggetto non è stato spostato il bottone rimane disabilitato. Per ripristinare la posizione originale clicca Annulla.
Ruotare un oggetto
La rotazione modifica l'orientamento di oggetti di tipo Linea o Poligono.
1. Seleziona uno o più oggetti.
2. Clicca sul bottone Ruota nella barra degli strumenti. Appare un rettangolo con una maniglia attorno all'oggetto.
3. Trascina la maniglia per ruotare l'oggetto. La rotazione multipla avviene attorno al punto di pivot centrale.
4. Per salvare il nuovo orientamento clicca Conferma. Se l'oggetto non è stato ruotato il bottone rimane disabilitato. Per ripristinare l'orientamento originale clicca Annulla.
Modificare i vertici di un oggetto
Questo strumento consente di spostare, aggiungere o correggere i vertici di Linee e Poligoni.
1. Seleziona una linea o un poligono.
2. Clicca sul bottone Modifica vertici nella barra degli strumenti. Tutti i vertici diventano visibili.
3. Trascina un vertice esistente per spostarlo. Per aggiungere un nuovo vertice, clicca sul punto intermedio che compare lungo il segmento. È possibile usare lo snap con altre geometrie.
4. Per salvare la modifica clicca Conferma. Se l'oggetto non è stato modificato il bottone rimane disabilitato. Per ripristinare la forma originale clicca Annulla.
Eliminare un Oggetto
Questa funzione elimina definitivamente gli oggetti selezionati in tutte le viste.
1. Seleziona uno o più oggetti nella vista 2D, 3D o Inventory.
2. Clicca sul bottone Elimina: nelle viste 2D e 3D si trova nella barra degli strumenti, nella vista Inventory in alto a destra.
3. Si apre una finestra con l'elenco delle classi oggetto coinvolte nella selezione, ciascuna con una casella di spunta.
4. Seleziona le caselle corrispondenti agli oggetti da eliminare.
5. Clicca Conferma per procedere, oppure Annulla per chiudere la finestra senza apportare modifiche.
Il bottone Conferma è disabilitato se tutte le caselle sono deselezionate.
Al termine dell'operazione compare una notifica in basso a sinistra con l'esito dell'eliminazione.
💡 Suggerimento: controlla sempre le caselle nella finestra di conferma prima di procedere per evitare di eliminare oggetti non desiderati.
Collegamenti
Last update: 22 May 2026