
Managing objects in the project

 English

 Italiano
ThisNavigation section360 explainstakes howyou to create objects withininside the project.360 Objectsphotos cantaken beduring vectora geometries,survey, such as points, lines or polygons, or non-vector objects, known as forms.
Object types
In the projectso you can createwalk differentthrough typesa project as if you were on site instead of objects:flying over its point cloud.
To
Any data entered in the platform is managed on an on-premise cloud infrastructure, unless different agreements have been made with the provider. It is always possible to download all project data locally and delete any associated media at any time. For further support on data management, contact helpdesk@eaglearca.it
Creating objects
Form (non-vector objects)
1. Openfor the Inventoryexplorer viewat the bottom of the desired object class.
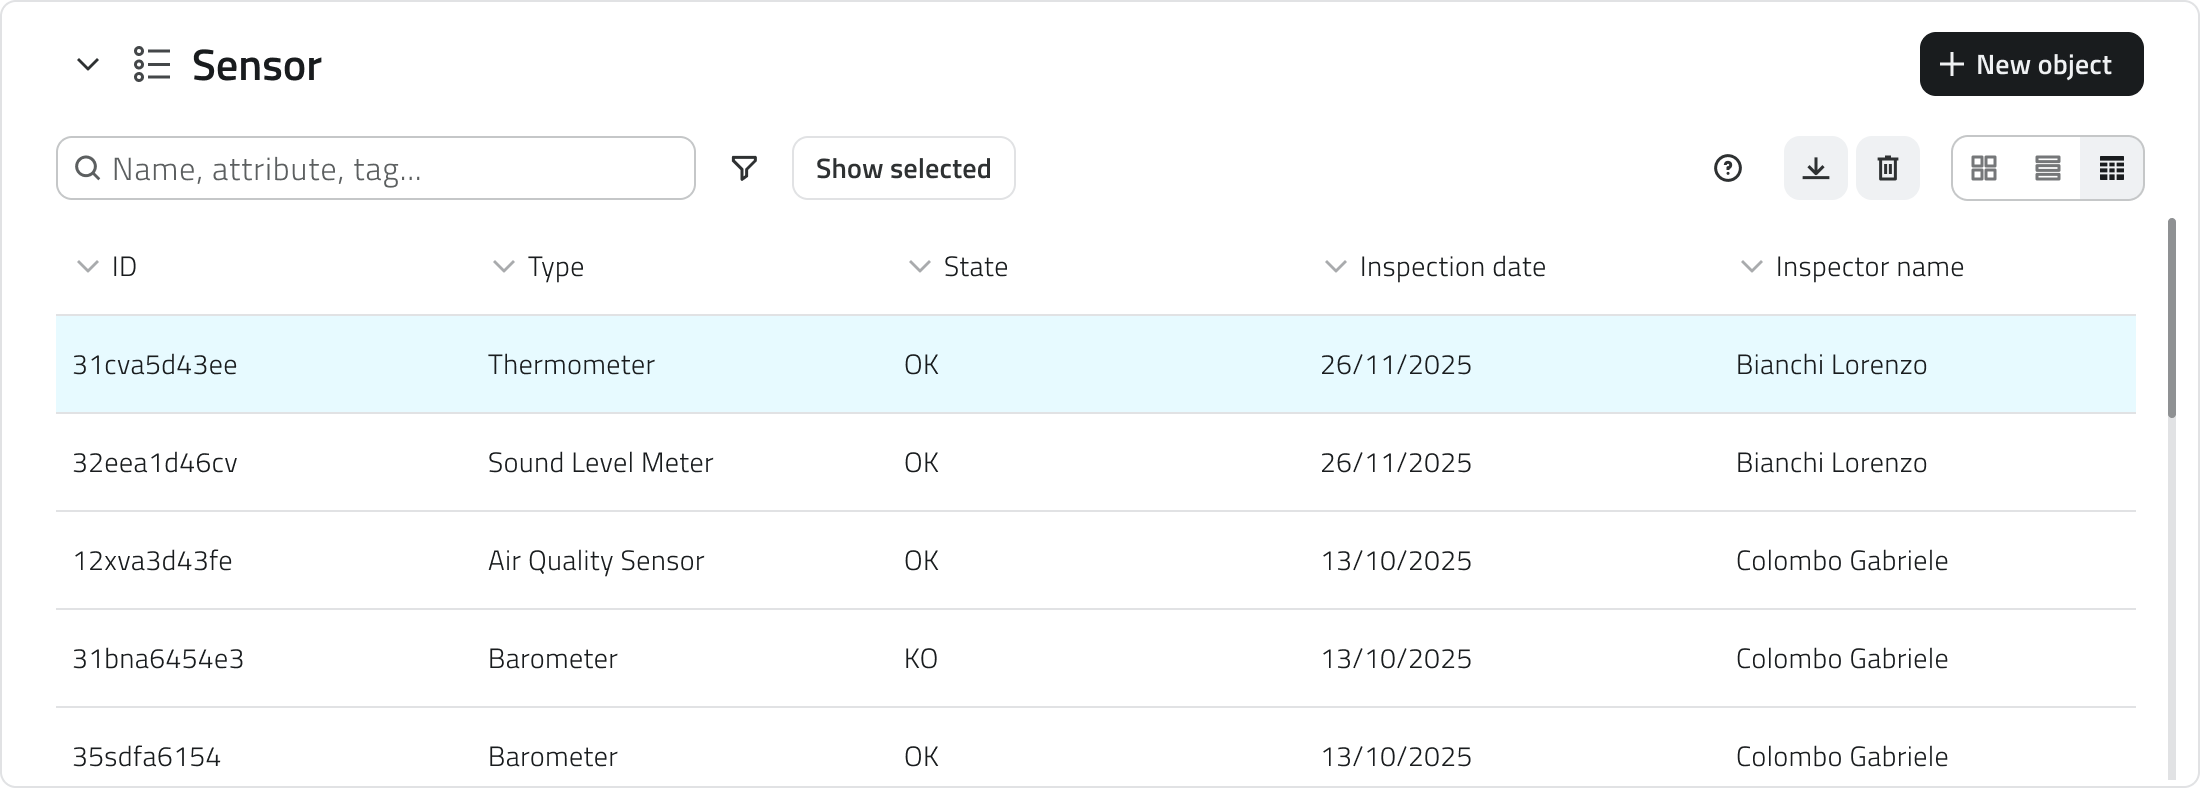
2. Click the New object button in the top-right corner.
3. The attribute panel opens for data entry.
Geometries (vector objects)
1. Hover over the 2D or 3D view to reveal the toolbar, then select the Draw tool.
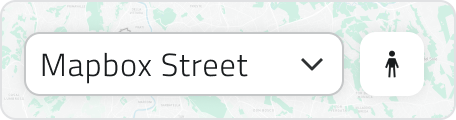
2. To choose the object class, click the arrowmap, next to the tool.basemap Use the search bar at the top of the list to filter quickly, you can see a style preview to help with the selection.selector.
Entering a photo
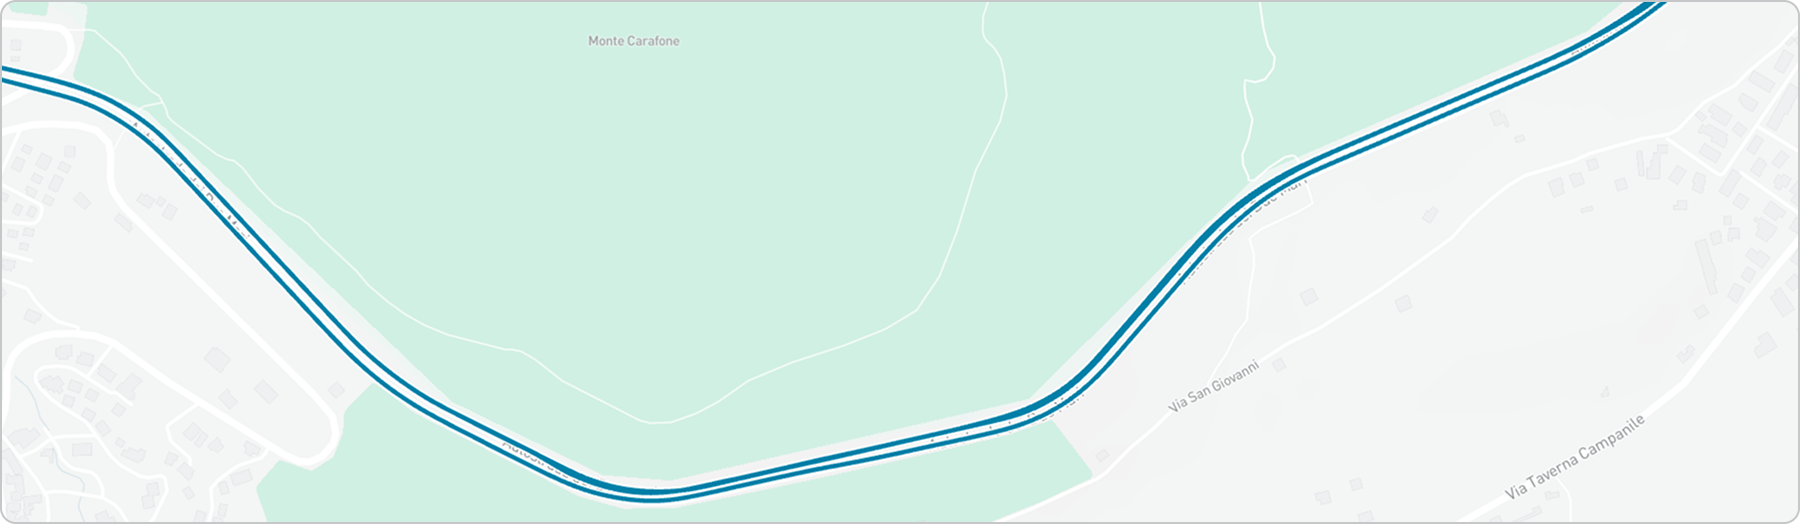
3. DrawPress the objectexplorer onbutton: the map:
PointClick withshows the left mouse button.
LineTo add vertices, click with the left mouse button; to close the geometry, click with the right mouse button.
PolygonPolygon To add vertices, click with the left mouse button; after the third vertex the polygon preview appears. To close the geometry, click with the right mouse button.
n the 3D view, objects must be created on the surface of the mesh or point cloud.
4. Once the geometry is confirmed, the attribute panel opens.
Automatic object creation
Some object classes can be configured from the Backoffice to create objects automatically.
When this function is active, it is indicated by a dedicated icon in the following places:
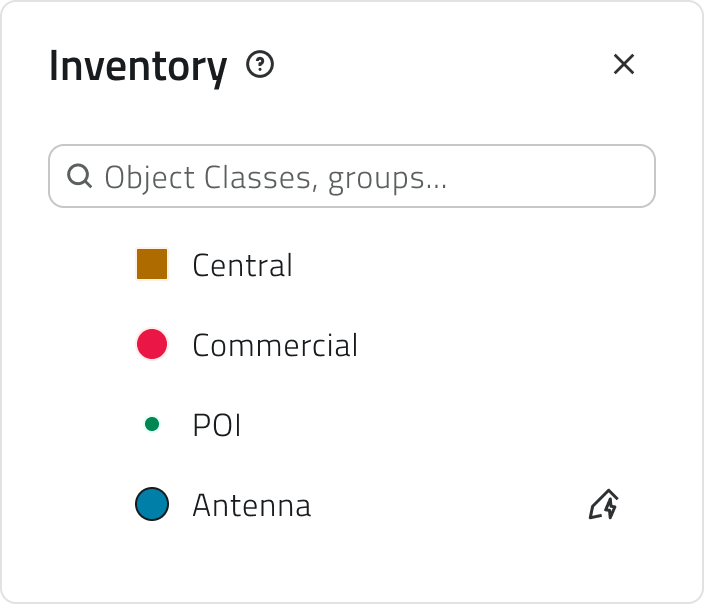
available
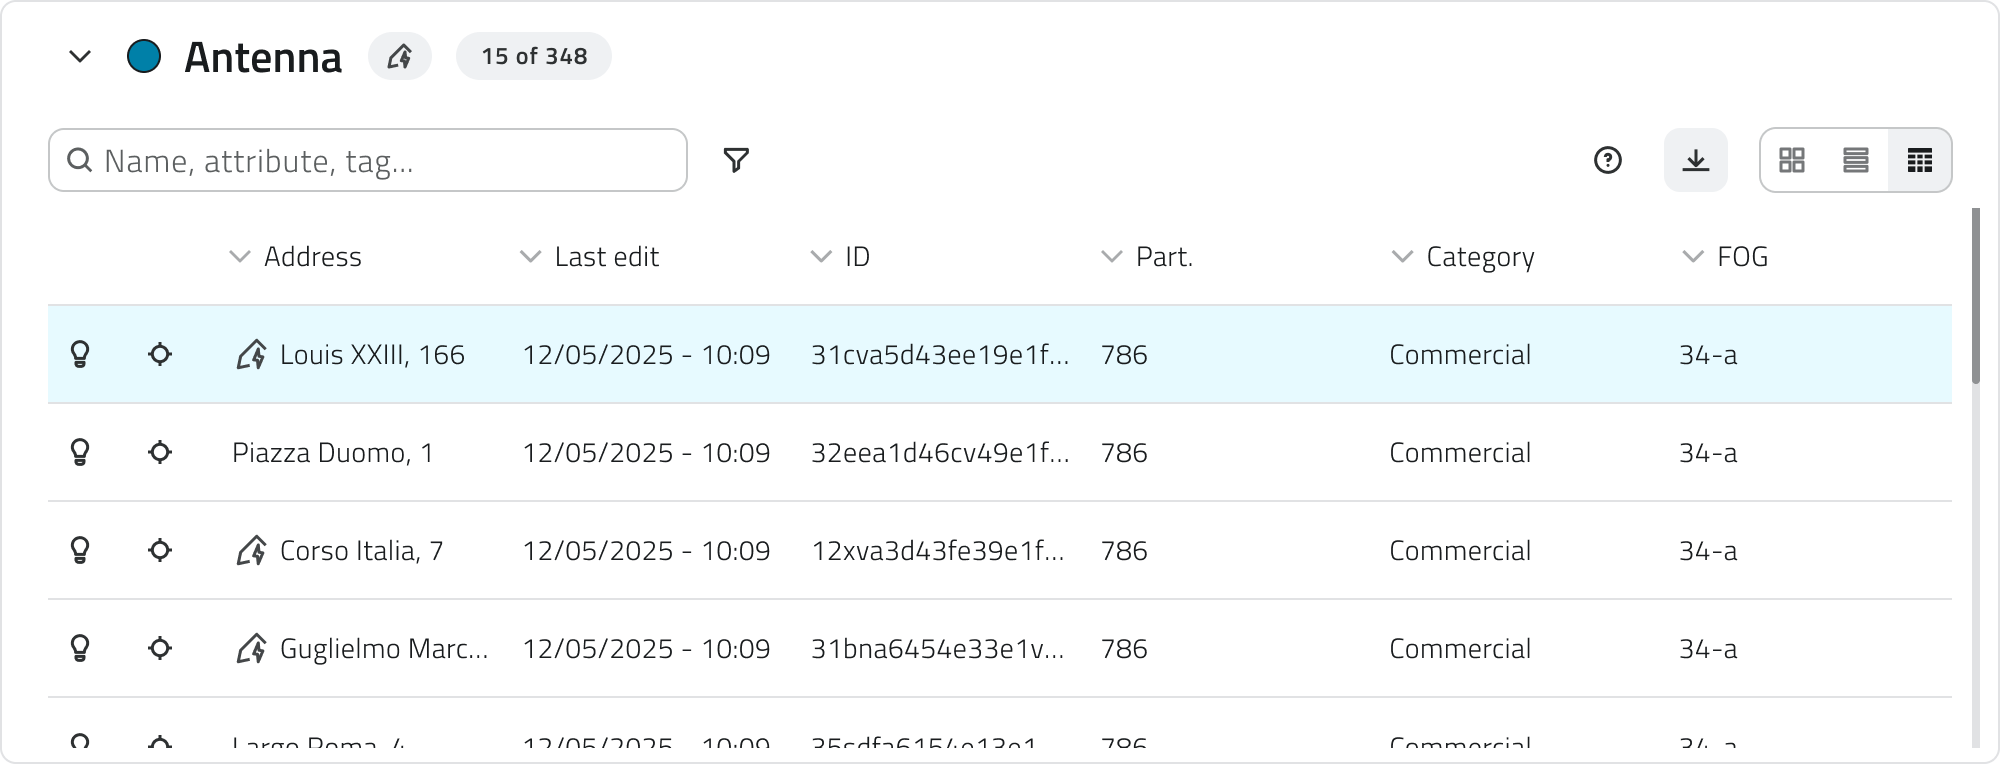
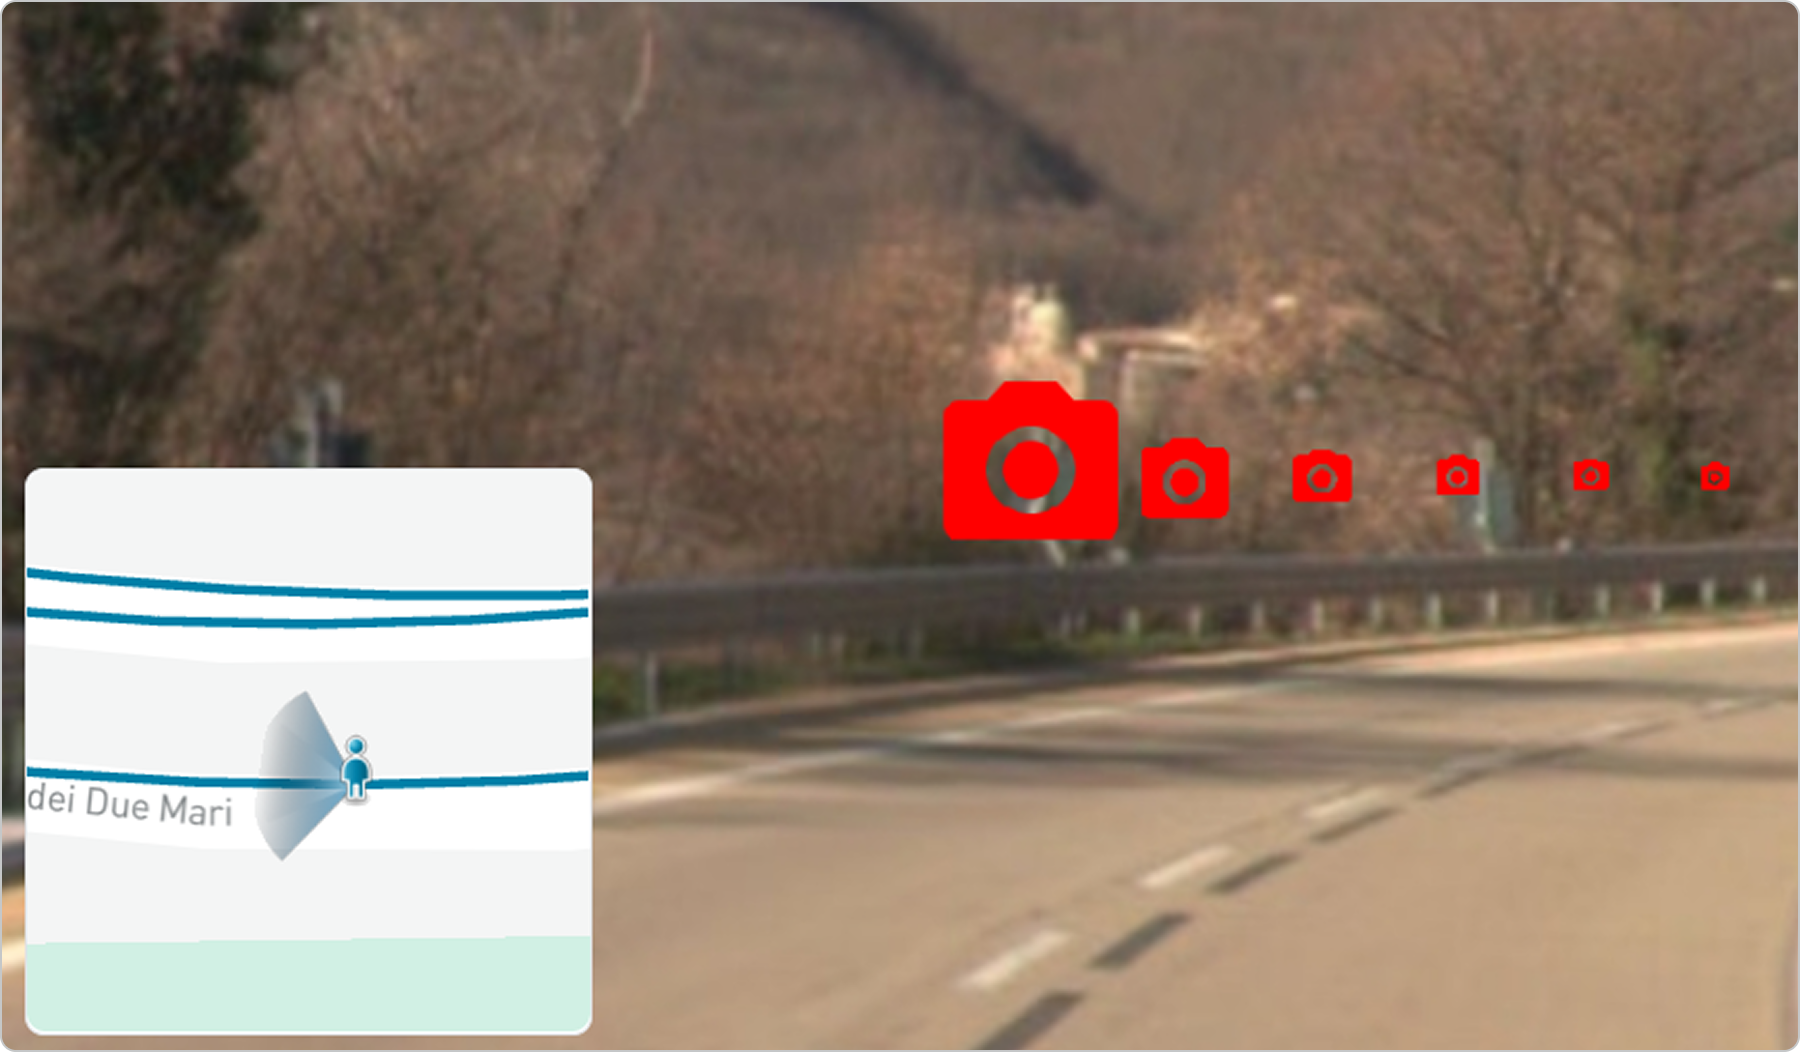
Bring the attributeexplorer details,close forto vectora objectspath: nextit snaps to the 2Dnearest orphoto 3Dand text.a Insmall thebox caseshows you a preview of automaticwhat creation,you theare label,about showingto only the icon, will also be available for Form objects.
Automatically created objects can be edited and, if needed, also created manually withinRelease the same object class.
Filling in attributes
After creation, the attribute panel allows you to enter the required information.
The object cannot be saved until all required fields have been filled in.
At the top left is the Expand buttonexplorer to open the panelphoto. The 3D view expands to full screen, while the 2D map becomes a minimap in full screen. The Cancel and Save buttons are positioned at the top right.
If the object class has attributes organised into groups, tabs appear at the topcorner of the panelscreen.
The allowexplorer and its direction cone help you tofind your bearings, showing where you are and which way you are looking. The filter360 attributesphoto bymarkers, category.red Clickingand oncamera-shaped, ashow tab shows onlywhere the attributesother belonging360 tophotos that group. Next to the groups there is a button to expand the search bar.are.
Attribute
types
Moving between photos
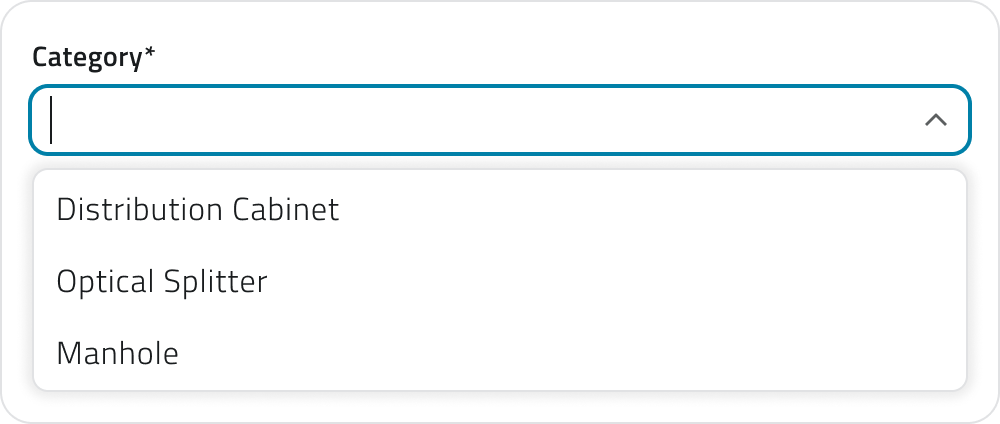
ObjectsOnce inside a photo, you can have the following attribute types:
Numbers: Numeric values (possible predefined range).
Value list: Selection of one or more values from a dropdown menu.
Date: Selection of a date or date and time.

Attachments: Upload of images, documents or videos.

Size: (Vector only) Automatically calculated by the system (coordinates/length/area).

True/False: Choicemove between the360 two true/false values.

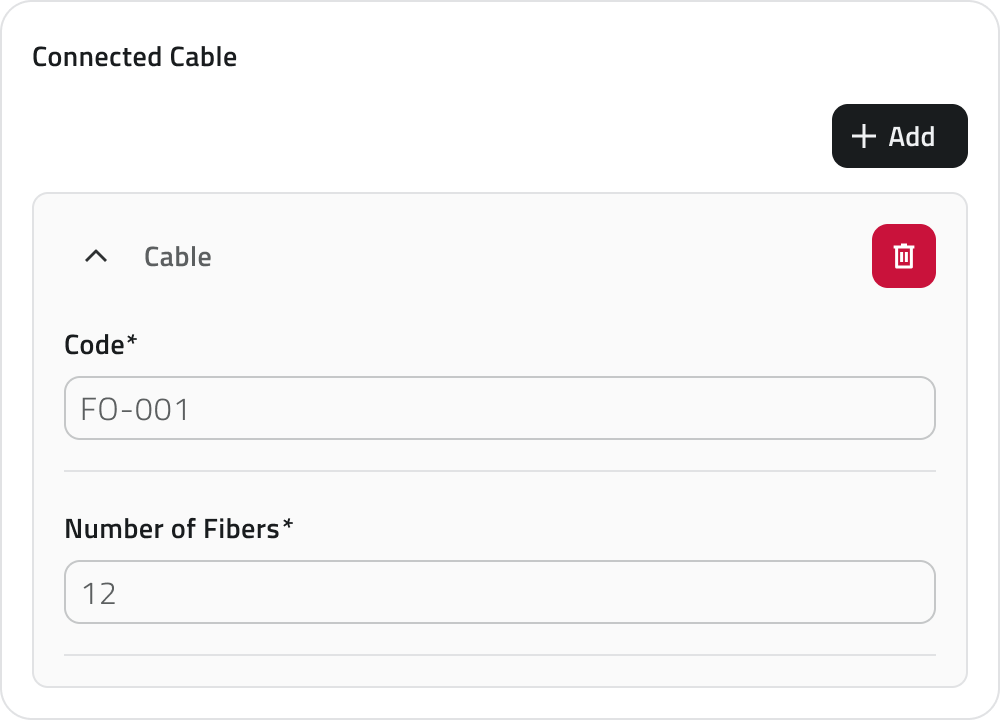
Object list: Addition of related sub-attributes (can be of type Text, Numbers, Value list, Date, True/False).

Some attributes may be pre-filled with a default value:photos in thisseveral case they may already be ready for saving or locked and not editable.ways:
💡 Tip: use the search bar in the attribute panel to quickly find the desired field. Make sure that any pre-filled values in mandatory fields are correct before saving.
Attribute properties
AssigningLeaving athe data source to an objectphoto
AvailableTo only with sensors already associated withleave the project.
A data source is a source that collects data over time; associated with an object, it allowsphoto you toare displayin, that data as charts inclick the Attributeclose detailsbutton panel.at the top right of the 3D view: you go back above the point cloud.

Assignment during creation
1. During object insertion,click the attributeexplorer detailsbutton: panelon opensthe inmap, configurationthe mode.
3.Either Clickway, theto selectionget fieldback andinside choosea photo, click one of the available360 optionsphoto from the list.
Assignment during editing
1. Open the Attribute details panel of the object by clicking the blue Open button that appears when hovering over the elementmarkers in the Inventory view, or select it in the 2D or 3D view andor click Expand indrag the infoexplorer card.onto a path again.
2. Click the Edit button.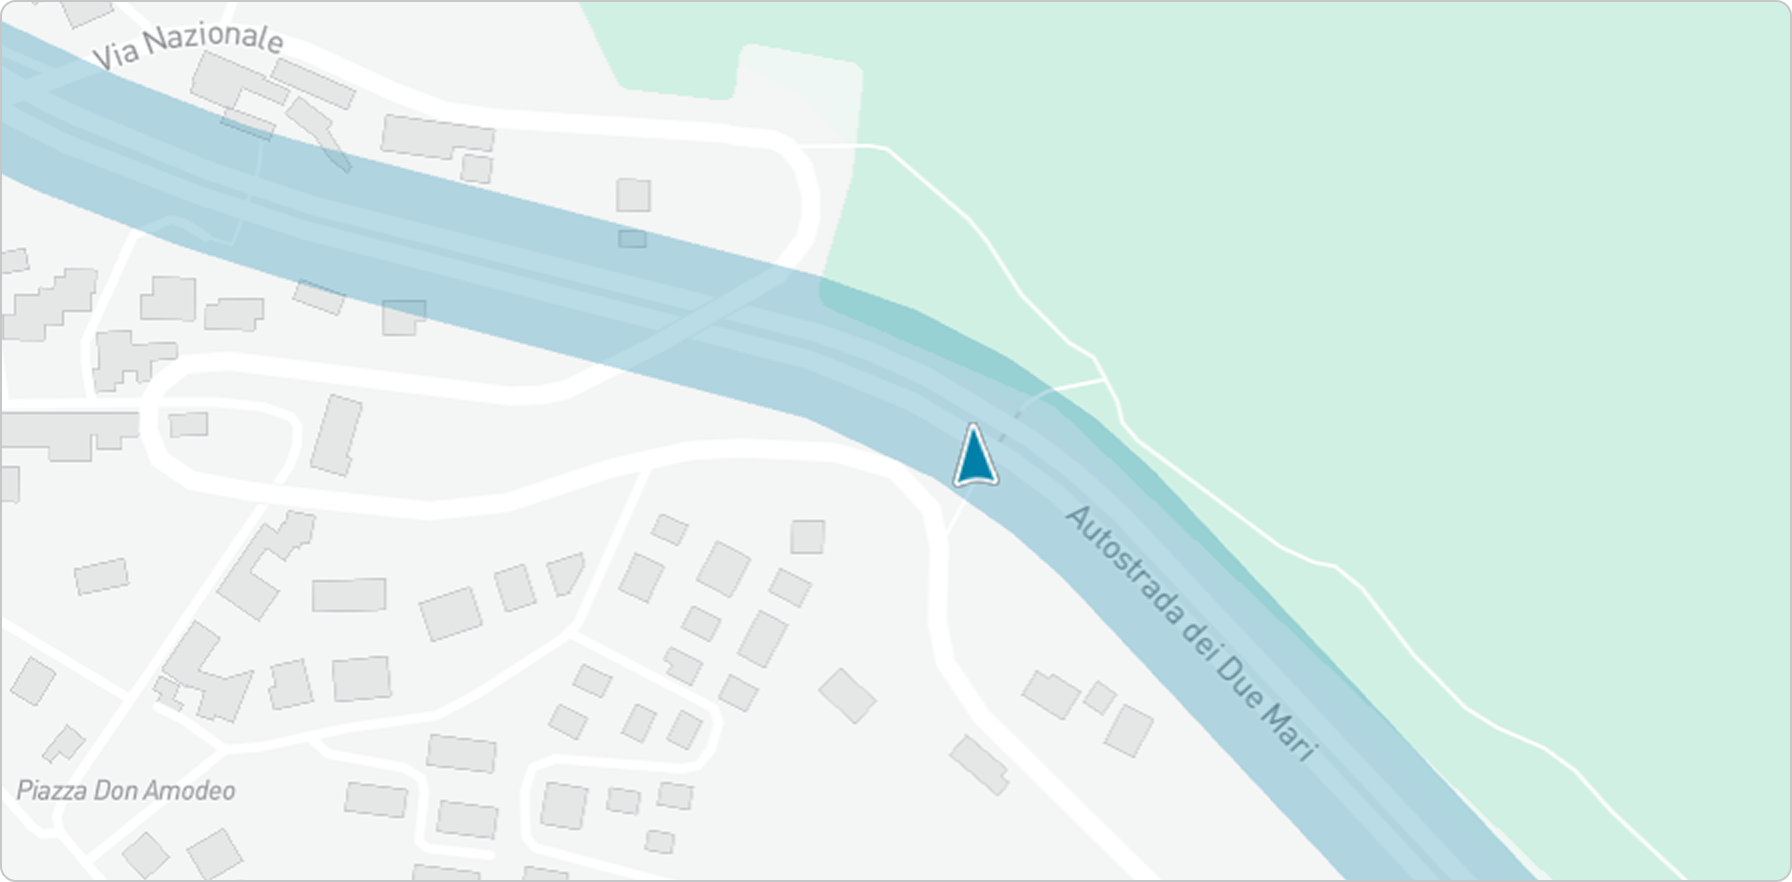
Resources
3.The Navigatephotos belong to the Data Sourcesresources section.
4. Clickof the selectionLayers fieldpanel. andIf chooseyou hide a resource, its path leaves the map and, if you were inside one of theits available options fromphotos, the list.
Managing and editing objects in the 2D view
This section provides guidance on moving, rotating, editing vertices and deleting objects.
Moving an object
The Move tool allows you to reposition selected objects with precision.
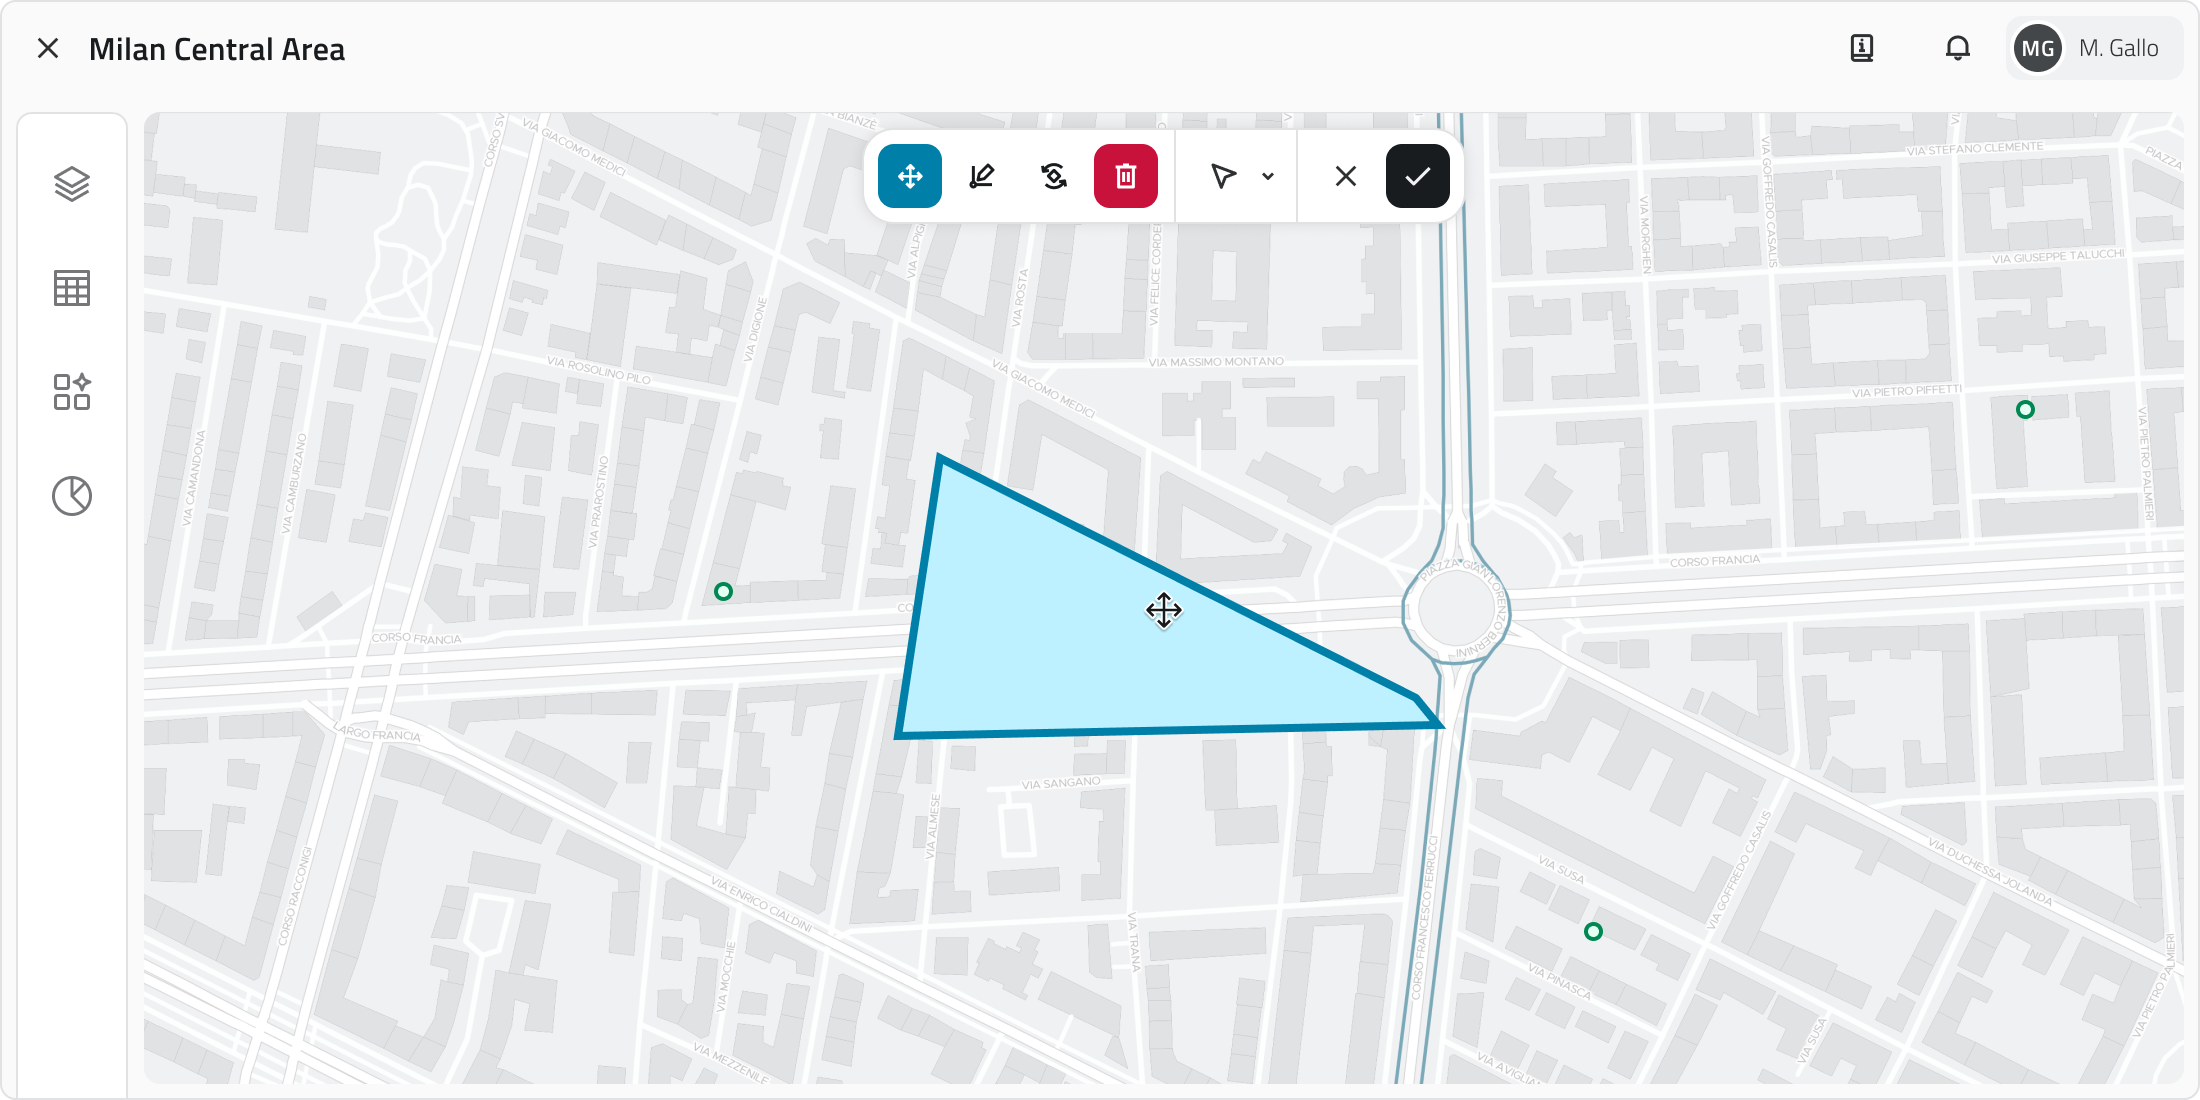
1. Select one or more objects.
2. Click the Move button in the toolbar.
3. Grab and freely move the object; snap with other objects on the map is supported.
4. To save the new position click Confirm. If the object has not been moved the button remains disabled. To restore the original position click Cancel.
Rotating an object
Rotation modifies the orientation of Line or Polygon objects.
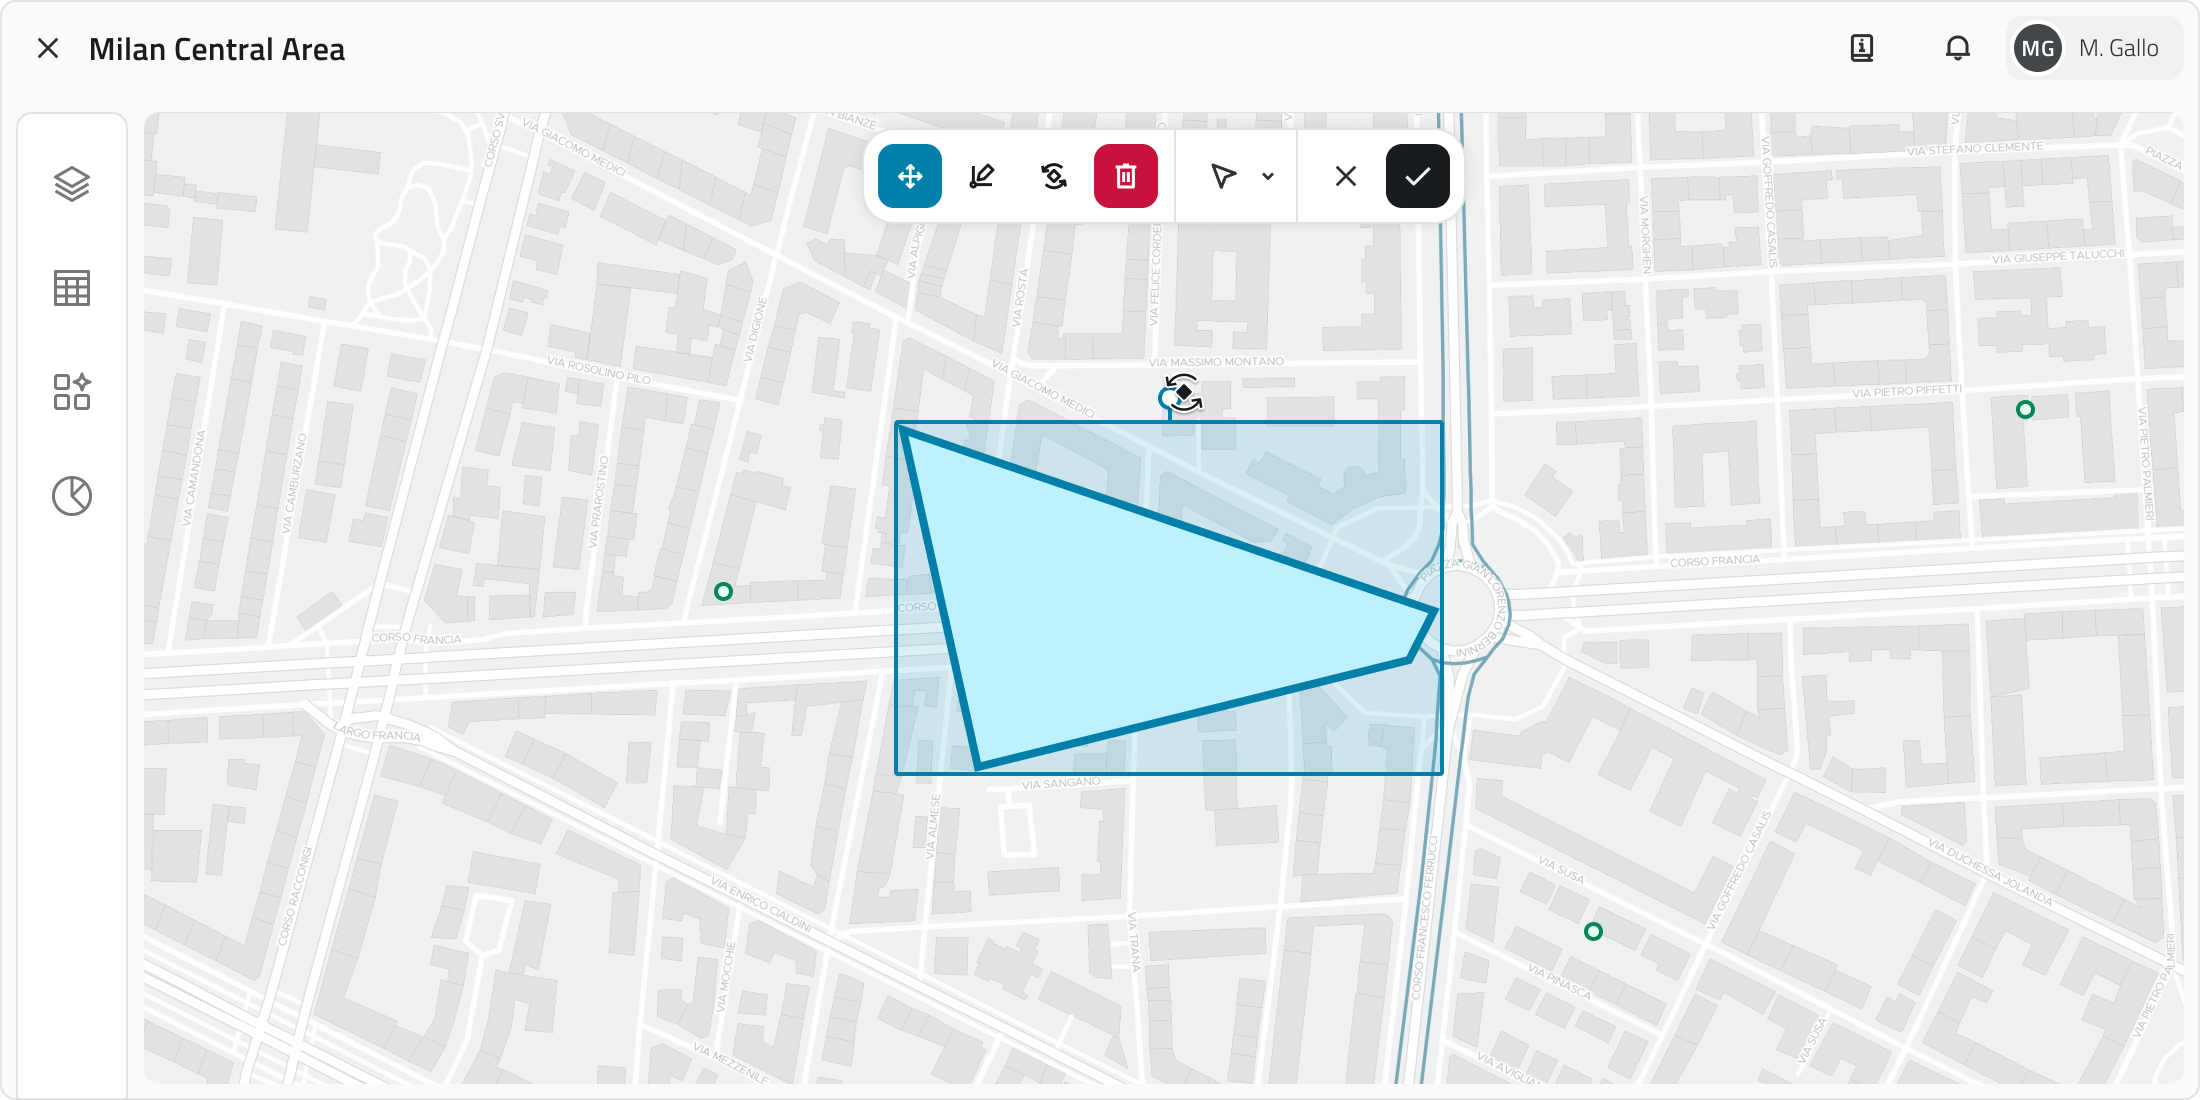
1. Select one or more objects.
2. Click the Rotate button in the toolbar. A rectangle with a handle appears around the object.
3. Drag the handle to rotate the object. Multiple rotation occurs around the central pivot point.
4. To save the new orientation click Confirm. If the object has not been rotated the button remains disabled. To restore the original orientation click Cancel.
Editing object vertices
This tool allows you to move, add or correct the vertices of Lines and Polygons.
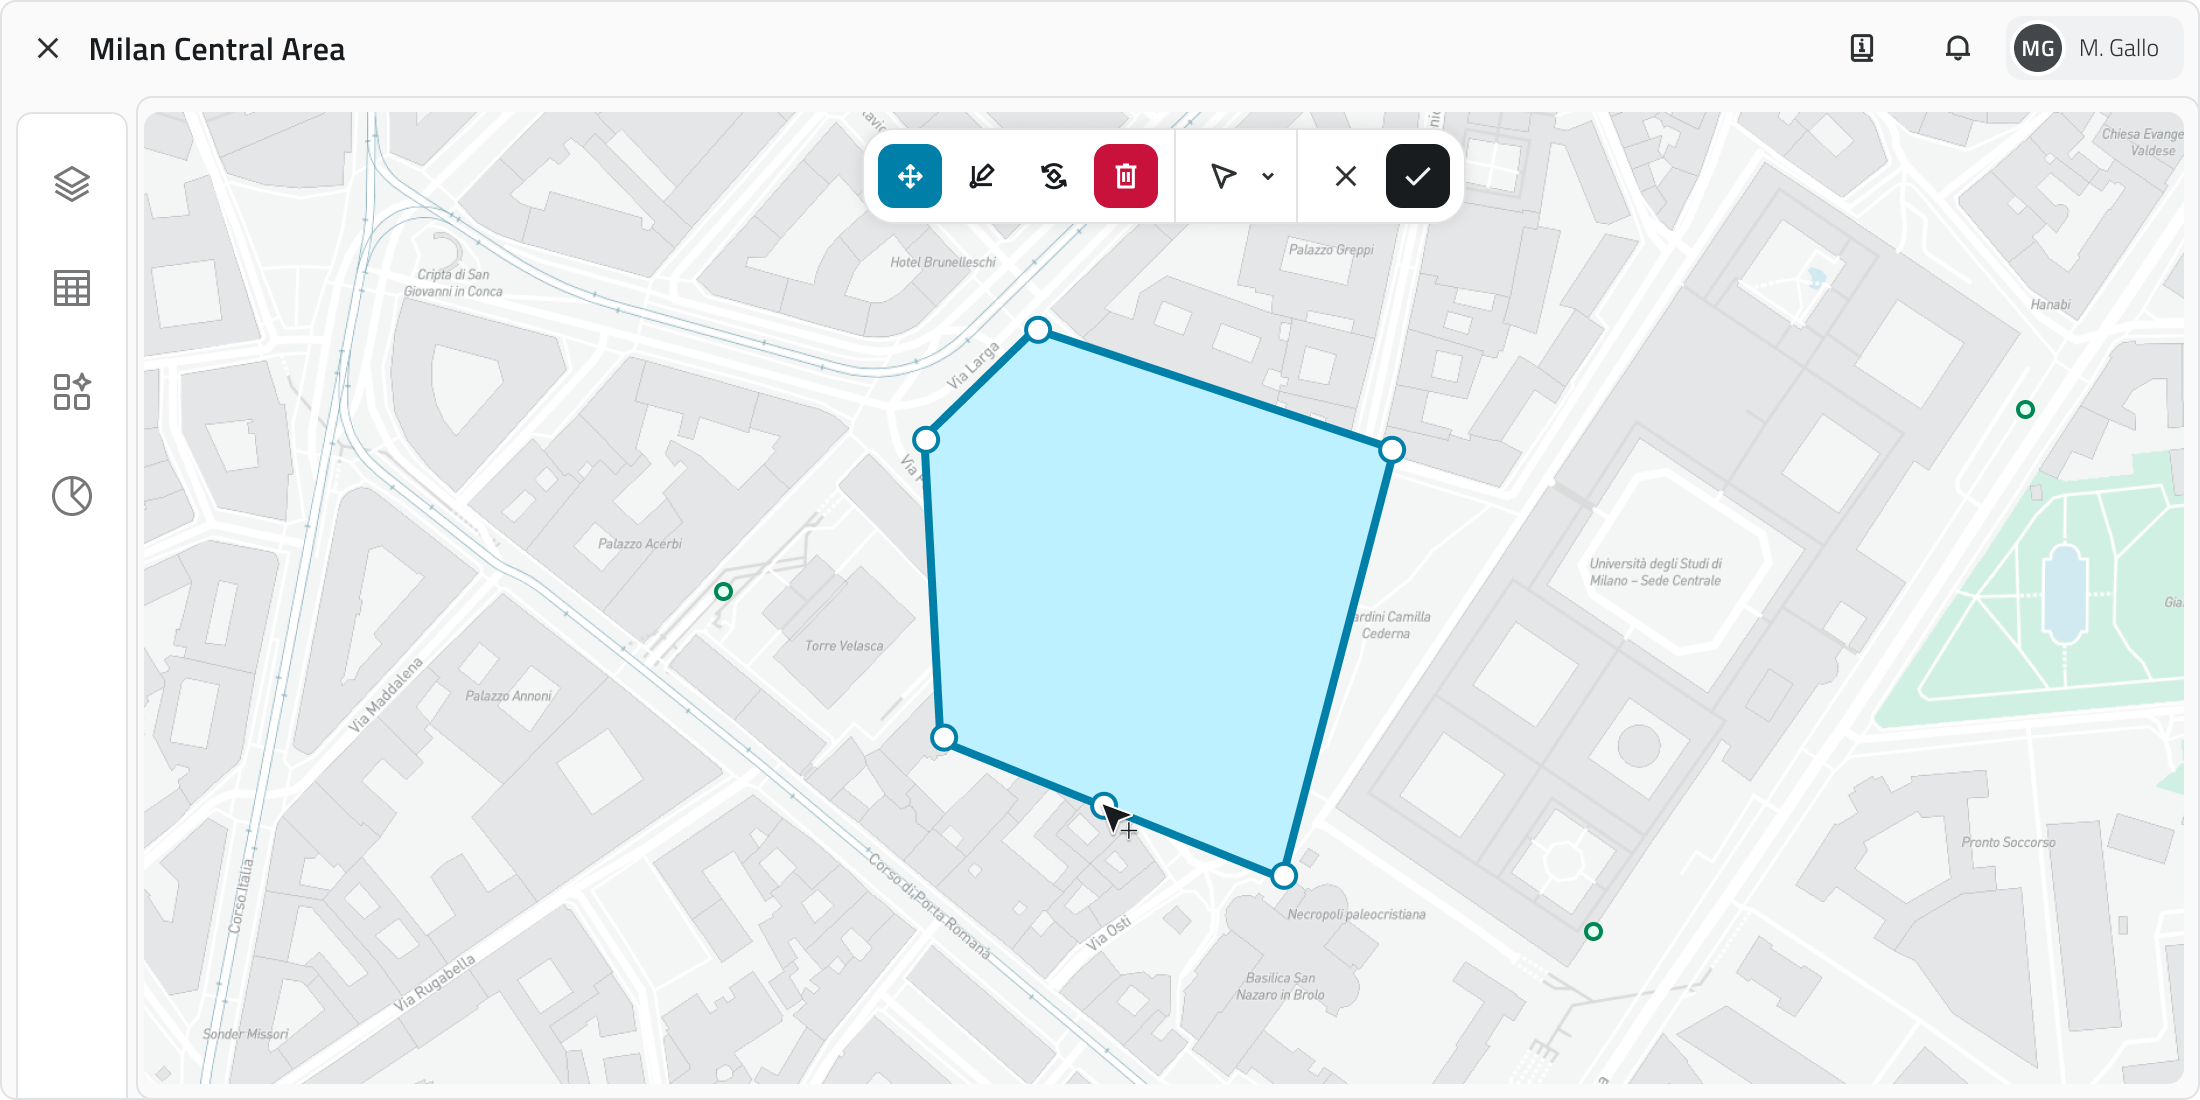
1. Select a line or polygon.
2. Click the Edit vertices button in the toolbar. All vertices become visible.
3. Drag an existing vertex to move it. To add a new vertex, click the midpoint that appears along the segment. Snap with other geometries is supported.
4. To save the changes click Confirm. If the object has not been modified the button remains disabled. To restore the original shape click Cancel.
Deleting an object
This function permanently deletes the selected objects in all views.
1. Select one or more objects in the 2D, 3D or Inventory view. In the Inventory view, hold CTRL and click to add objectsmoves to the selectionnearest orphoto removestill them from it.
2. Click the Delete button: in the 2D and 3D views it is located in the toolbar, in the Inventory view at the top right.
3. A window opens with the list of object classes involved in the selection, each with a checkbox.
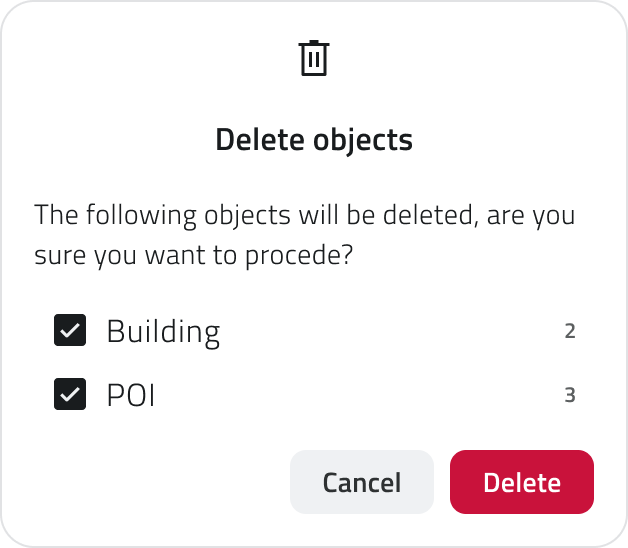
4. Select the checkboxes corresponding to the objects to delete.
5. Click Confirm to proceed, or Cancel to close the window without making any changes. The Confirm button is disabled if all checkboxes are deselected.
At the end of the operation a notification appears at the bottom left with the outcome of the deletion.
💡 Tip: always check the checkboxes in the confirmation window before proceeding to avoid deleting unwanted objects.visible.
Links
 English
 Italiano
GestioneEsplorare degli oggetti nelun progetto in navigazione 360
QuestaLa sezionenavigazione spiega360 cometi crearepermette oggettidi all’esplorare le foto 360° scattate durante un rilievo, muovendoti all'interno del progetto. Gli oggetti possono essere geometrie vettoriali,progetto come punti,se lineefossi osul poligoni,posto, oppureanziché sorvolare la nuvola di punti.
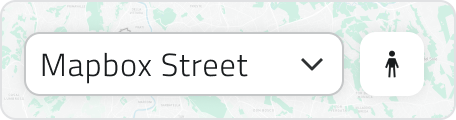
Per iniziare, cerca il pulsante oggettiExplorer nonin vettoriali,basso dettinella form.vista 2D, accanto al selettore della mappa di base.
TipiEntrare in una foto
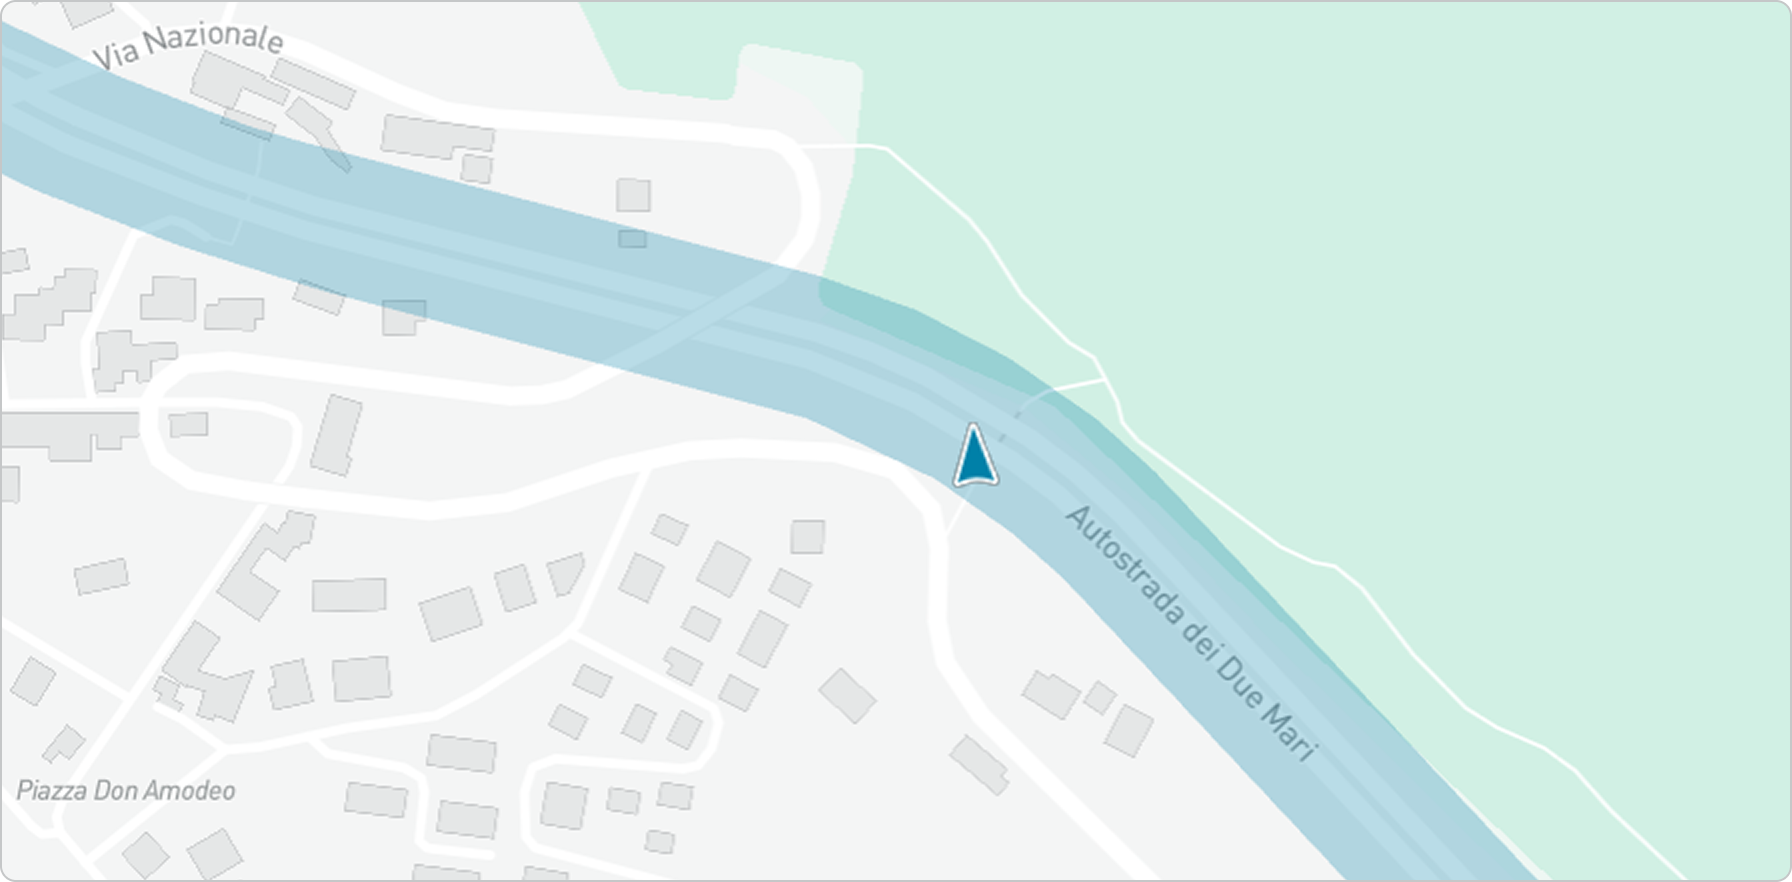
Premi il pulsante Explorer: sulla mappa compaiono i percorsi delle foto disponibili, rappresentati da linee azzurre che seguono gli itinerari del rilievo. I percorsi compaiono anche trascinando l'Explorer sulla mappa.
Avvicina l'Explorer a un percorso: si aggancerà automaticamente alla foto più vicina e comparirà un piccolo riquadro con un'anteprima di oggetticiò che stai per visualizzare.
Nel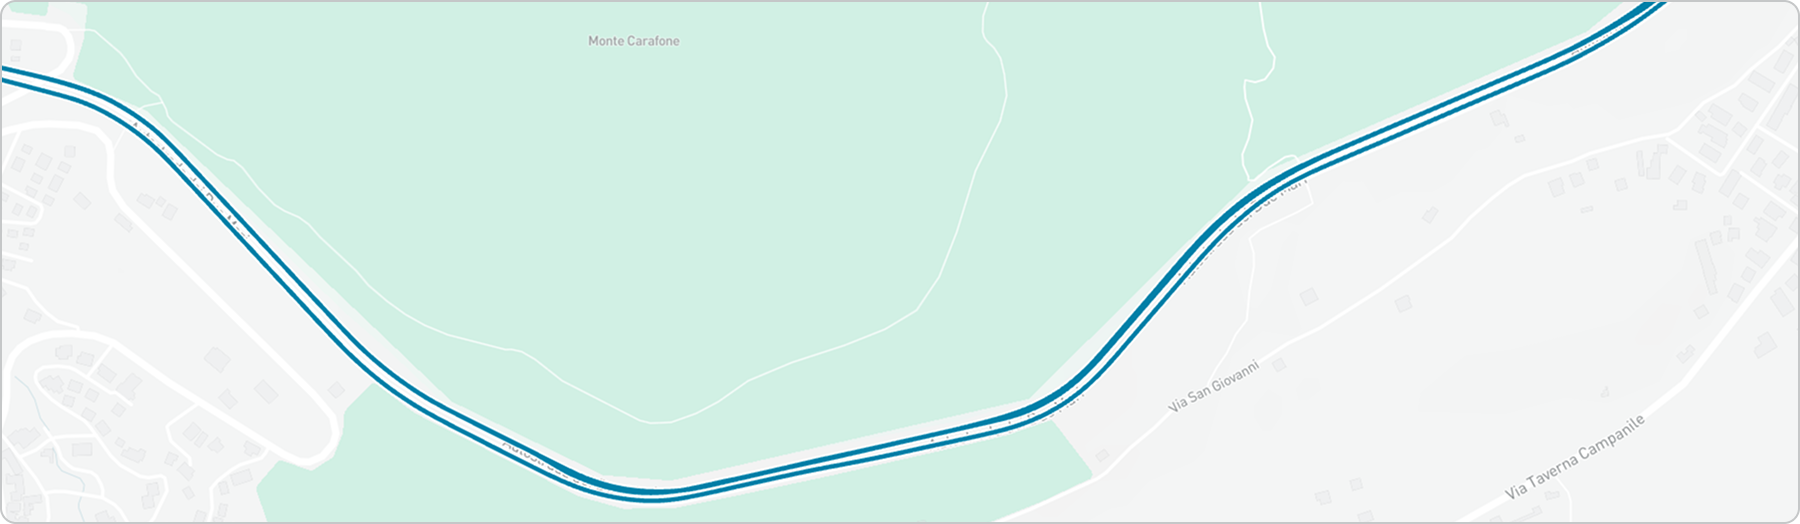
Rilascia puoil'Explorer creareper diverseaprire tipologiela foto. La vista 3D si espande a schermo intero, mentre la mappa 2D diventa una minimappa nell'angolo dello schermo.
L'Explorer e il cono direzionale ti aiutano a orientarti, mostrando la tua posizione e la direzione in cui stai guardando. I marker foto 360, rossi e a forma di oggetti:fotocamera, indicano invece la posizione delle altre foto 360°.
Qualsiasi dato immesso in piattaforma viene gestito su un’infrastruttura cloud on-premise, a meno di differenti accordi con il fornitore. È sempre possibile scaricare in locale tutti i dati del progetto ed eliminare qualsiasi media associato in qualsiasi momento. Per ulteriore supporto alla gestione dati, contatta l'indirizzo helpdesk@eaglearca.it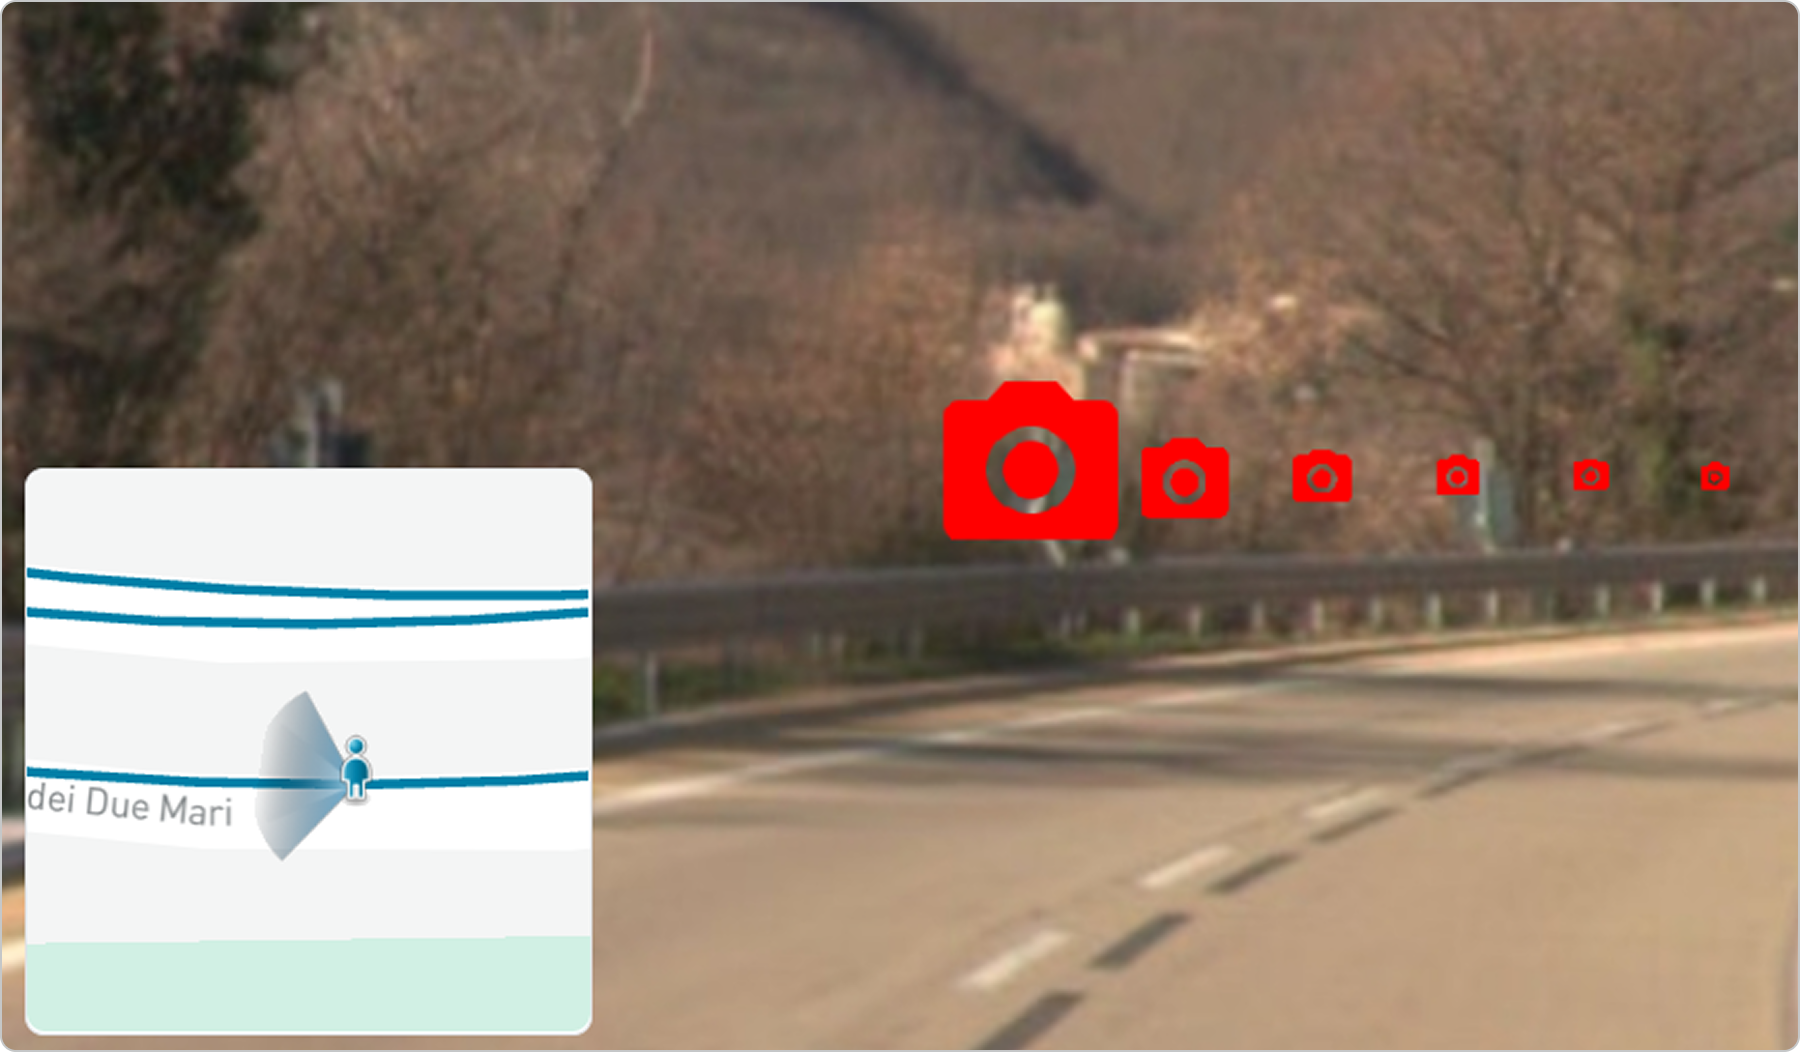
CreazioneSpostarsi ditra Oggettile foto
Form
Una (Oggettivolta non vettoriali)
1. Apri la vista Inventory della classe oggetto desiderata.
2. Clicca sul pulsante Nuovo oggetto in alto a destra.
3. Si apre il pannello attributi per la compilazione dei dati.
Compilazione degli Attributi ↓
Geometrie (Oggetti vettoriali)
1. Passa con il mouse sulla vista 2D o 3D per far comparire la barra degli strumenti, quindi seleziona lo strumento Disegna.
2. Per scegliere la classe oggetto clicca sulla freccia accanto allo strumento. Usa la barra di ricercaentrato in cimauna alla lista per filtrare rapidamente,foto, puoi vederespostarti l'anteprimatra dellole stilefoto per facilitare la selezione.
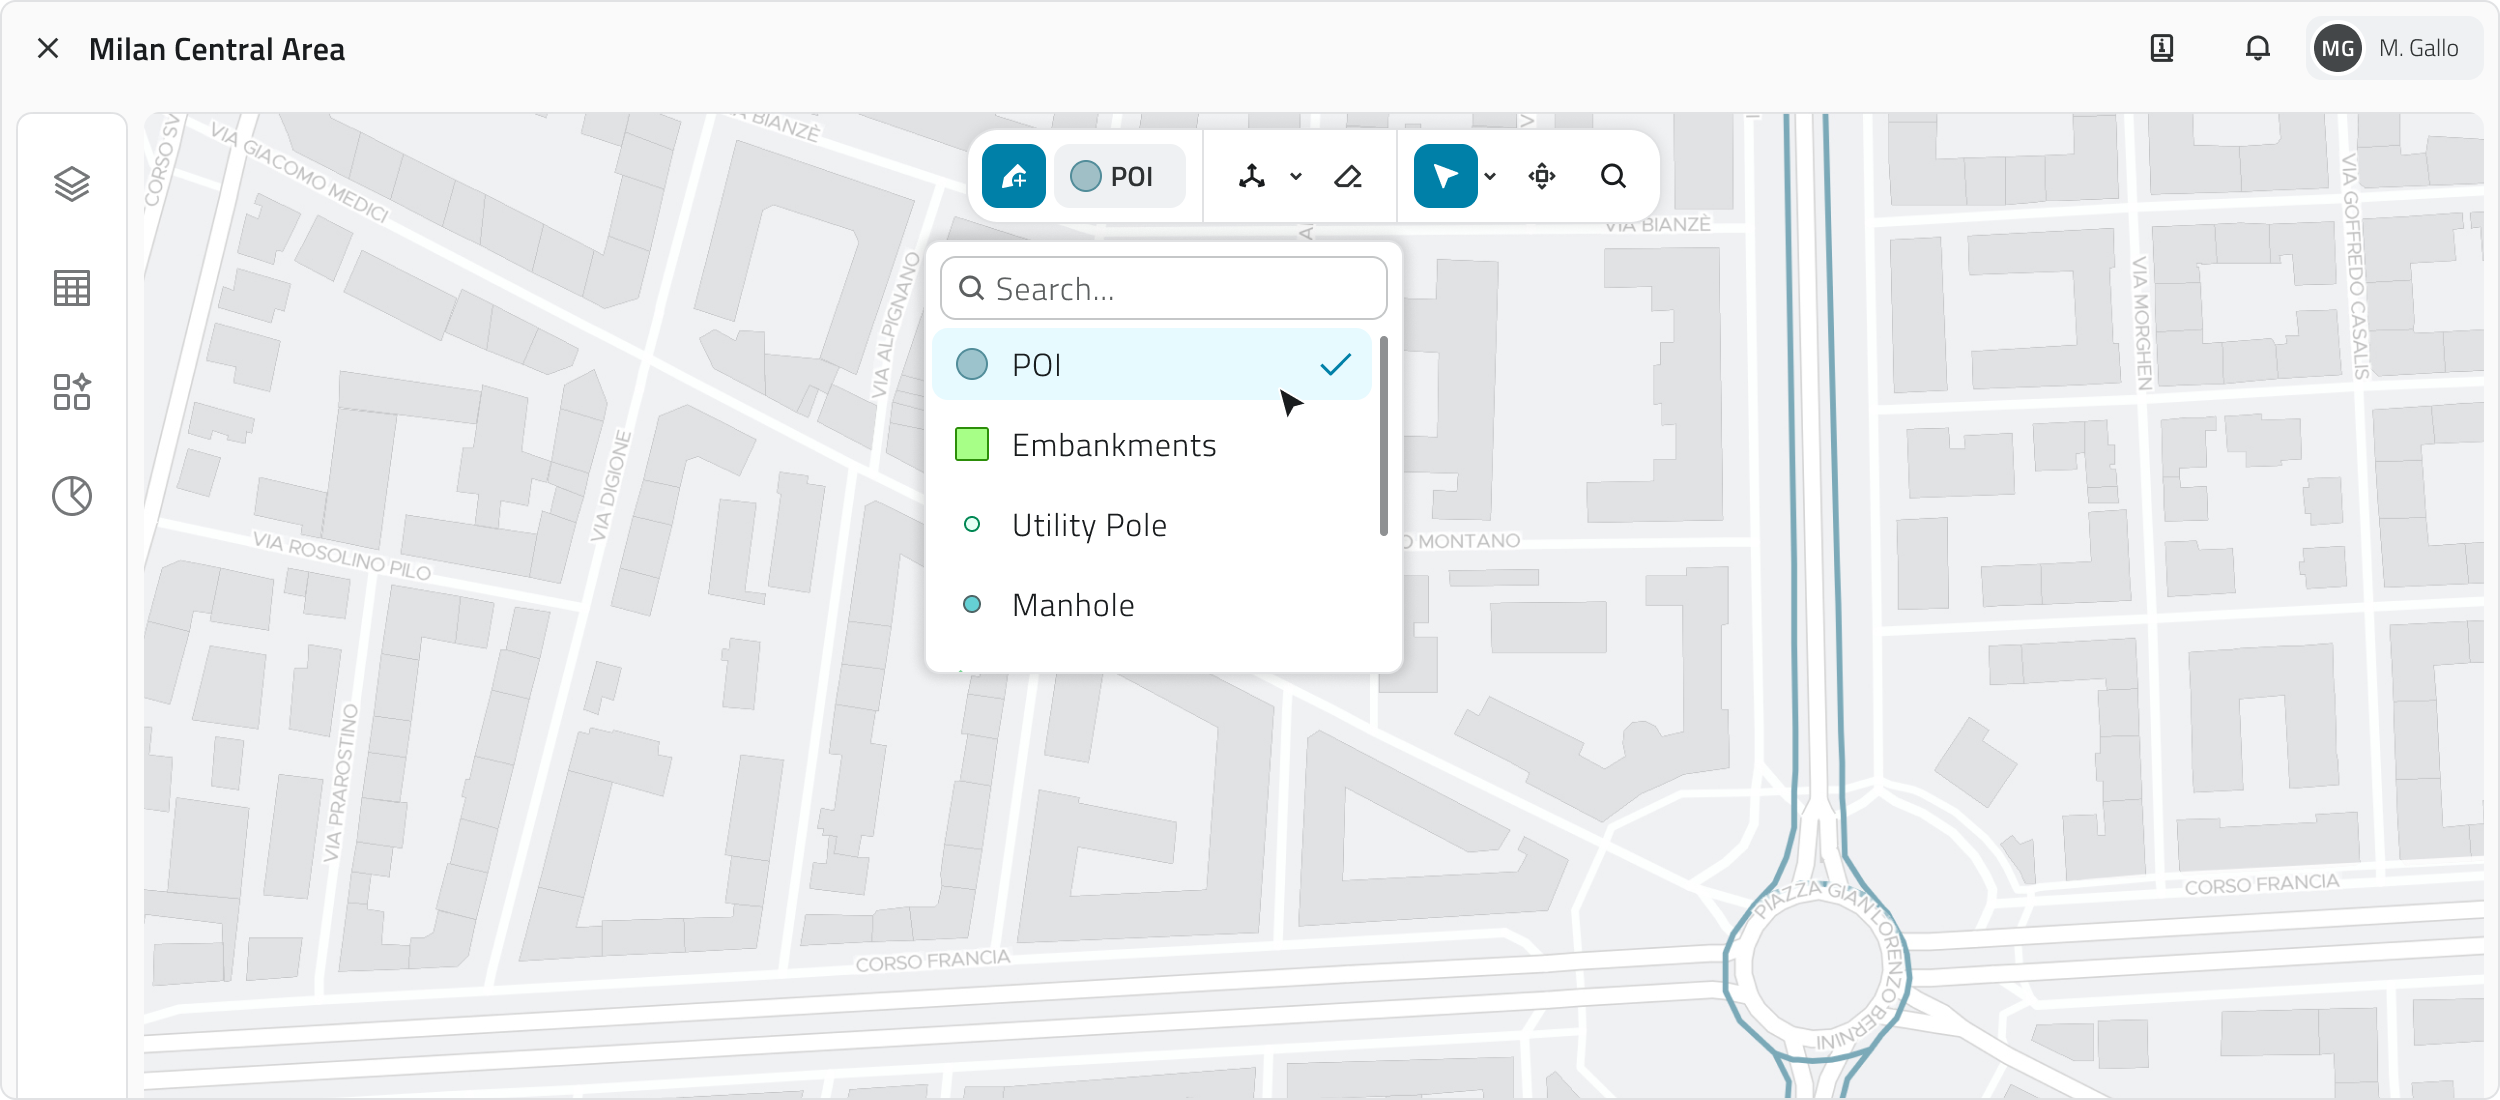
3. Disegna l’oggetto sulla mappa:
PuntoClicca con il tasto sinistro del mouse.
LineaPer inserire i vertici, clicca con il tasto sinistro del mouse, per chiudere la geometria, clicca con il tasto destro.
PoligonoPer inserire i vertici, clicca con il tasto sinistro del mouse, dopo il terzo vertice appare l'anteprima del poligono. Per chiudere la geometria, clicca con il tasto destro.
Nella vista 3D gli oggetti devono essere creati necessariamente sulla superficie della mesh o della nuvola di punti.
4. Confermata la geometria, si apre il pannello attributi.
Compilazione degli Attributi ↓
Creazione automatica degli oggetti
Alcune classi oggetto possono essere configurate dal Backoffice per creare oggetti360° in automatico.diversi modi:
Quando questa funzione è attiva, è segnalata da un'icona dedicata individuabile nei seguenti punti:
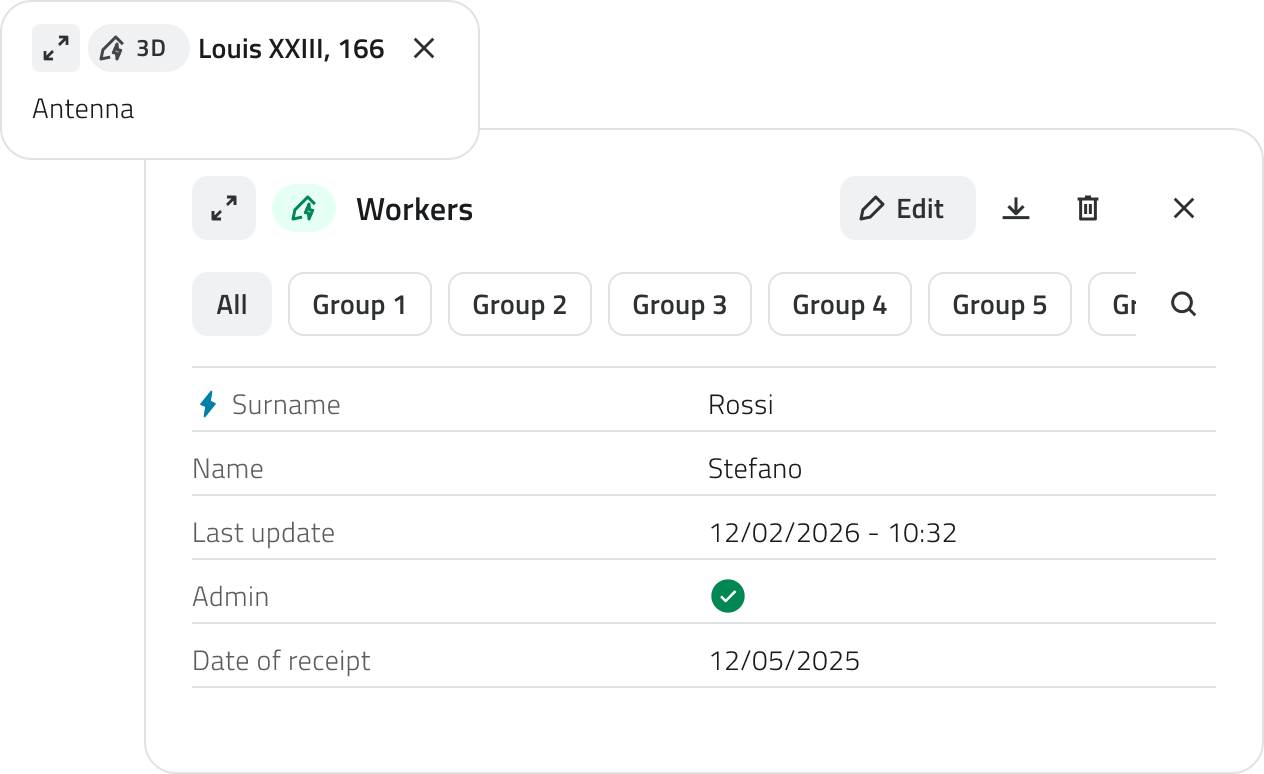
Gli oggetti creati automaticamente possono essere modificati e, se necessario, creati anche manualmente nella stessa classe oggetto.
Compilazione degli Attributi
Dopo la creazione, il pannello attributi permette di inserire le informazioni richieste.
L'oggetto non può essere salvato finché tutti i campi obbligatori non sono compilati.
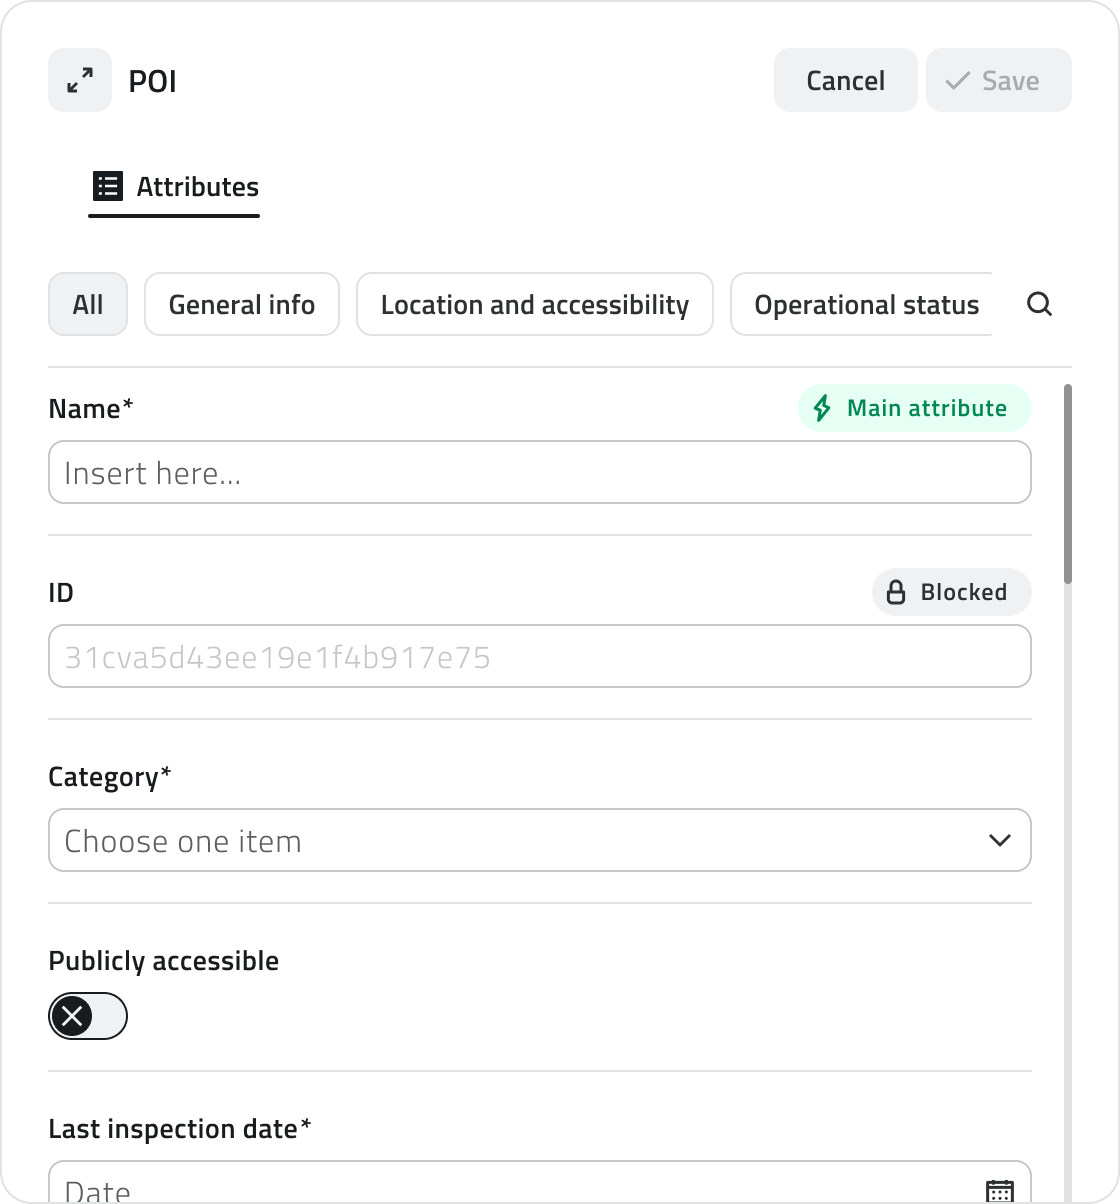
In alto a sinistra si trova il pulsante Espandi per aprire il pannello a schermo intero. I bottoni Annulla e Salva sono posizionati in alto a destra.
Se la classe oggetto ha attributi organizzati in gruppi, nella parte superiore del pannello compaiono delle schede che permettono di filtrare gli attributi per categoria. Cliccando su una scheda vengono mostrati solo gli attributi appartenenti a quel gruppo. Accanto ai gruppi è presente un pulsante per espandere la barra di ricerca.
Tipi di Attributi
Gli oggetti possono avere i seguenti tipi di attributi:
Testo: Lettere e numeri (possibile lunghezza massima).
Numeri: Valori numerici (possibile range predefinito).
Lista valori: Selezione di uno o più valori da un menu a tendina.
Data: Scelta di una data o data e ora.
Allegati: Caricamento di immagini, documenti o video.
Dimensione: (Solo vettoriali) Calcolata automaticamente dal sistema (coordinate/lunghezza/area).
Vero/Falso: Scelta tra i due valori vero/falso.
Lista oggetti: Aggiunta di sotto-attributi correlati (possono essere di tipo Testo, Numeri, Lista valori, Data, Vero/Falso).
Alcuni attributi possono essere precompilati con un valore di default: in questo caso potrebbero essere già pronti per il salvataggio oppure bloccati e non modificabili.
💡 Suggerimento: usa la barra di ricerca nel pannello attributi per trovare rapidamente il campo desiderato. Verifica che i valori precompilati nei campi obbligatori siano corretti prima di salvare.
Proprietà degli Attributi
AssegnareUscire Sorgentidalla dati ad un oggettofoto
DisponibilePer solouscire condalla sensorifoto già associati al progetto.
Una sorgente dati è una fonte che raccoglie dati nel tempo; associata a un oggetto, consente di visualizzare tali dati come grafici nel pannello Dettaglio attributi.
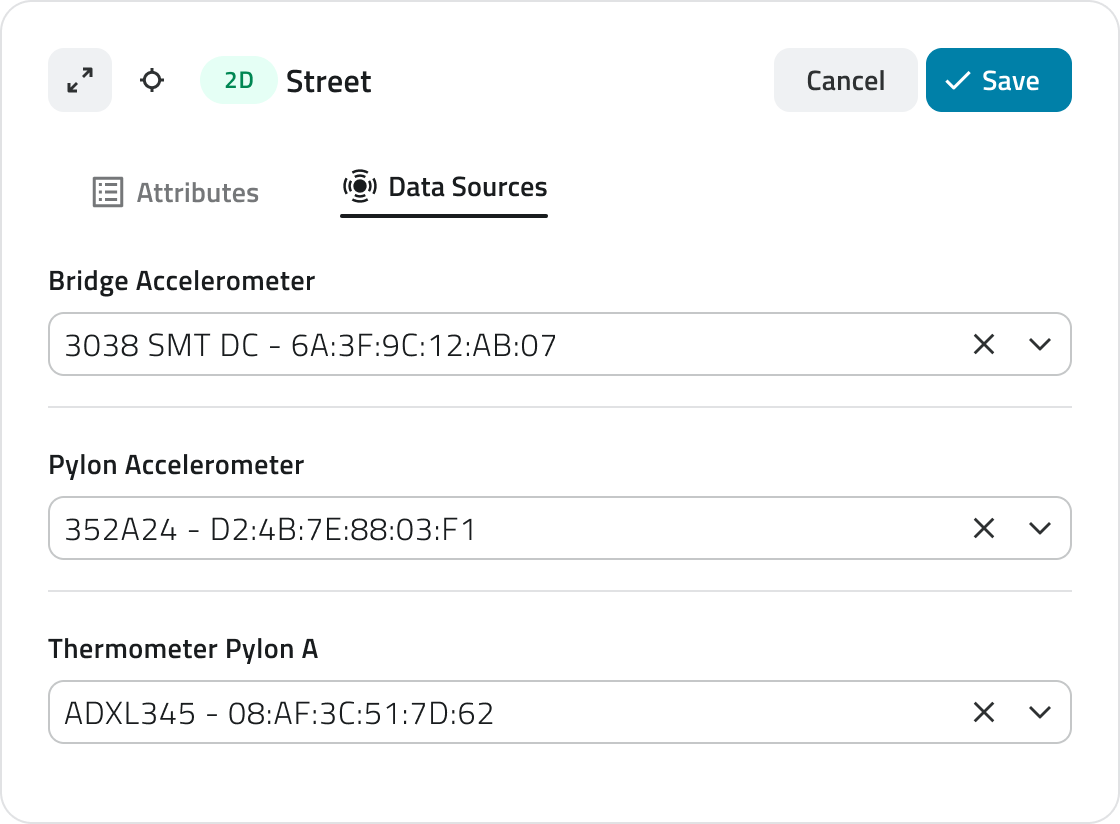
È possibile assegnare una sorgente dati in due momenti distinti: durante la creazione dell'oggetto oppure in un secondo momento modificando un oggetto già esistente.
Assegnazione in creazione
1. Durante l'inserimento dell'oggetto si apre il dettaglio attributi in configurazione.
2. Spostati nella sezione Sorgente dati.
3. Clicca nel campo di selezione e scegli una delle opzioni disponibili dall'elenco.
Assegnazione in modifica
2. Clicca sul pulsante Modifica.
3. Spostati nella sezione Sorgente dati.
4. Clicca nel campo di selezione e scegli una delle opzioni disponibili dall'elenco.
Gestione e modifica di oggetti nella vista 2D
Questa sezione fornisce le indicazioni relative allo spostamento, alla rotazione, alla modifica dei vertici e all'eliminazione degli oggetti.
Spostare un oggetto
Lo strumento Sposta consente di riposizionare con precisione gli oggetti selezionati.
1. Seleziona uno o più oggetti.
2. Clicca sul pulsante Sposta nella barra degli strumenti.
3. Afferra e sposta liberamente l'oggetto; è supportato lo snap con altri oggetti sulla mappa.
4. Per salvare la nuova posizione clicca Conferma. Se l'oggetto non è stato spostato il pulsante rimane disabilitato. Per ripristinare la posizione originale clicca Annulla.
Ruotare un oggetto
La rotazione modifica l'orientamento di oggetti di tipo Linea o Poligono.
1. Seleziona uno o più oggetti.
2. Clicca sul pulsante Ruota nella barra degli strumenti. Appare un rettangolo con una maniglia attorno all'oggetto.
3. Trascina la maniglia per ruotare l'oggetto. La rotazione multipla avviene attorno al punto di pivot centrale.
4. Per salvare il nuovo orientamento clicca Conferma. Se l'oggetto non è stato ruotato il pulsante rimane disabilitato. Per ripristinare l'orientamento originale clicca Annulla.
Modificare i vertici di un oggetto
Questo strumento consente di spostare, aggiungere o correggere i vertici di Linee e Poligoni.
1. Seleziona una linea o un poligono.
2. Clicca sul pulsante Modifica vertici nella barra degli strumenti. Tutti i vertici diventano visibili.
3. Trascina un vertice esistente per spostarlo. Per aggiungere un nuovo vertice, clicca sul punto intermedio che compare lungo il segmento. È possibile usare lo snap con altre geometrie.
4. Per salvare la modifica clicca Conferma. Se l'oggetto non è stato modificato il pulsante rimane disabilitato. Per ripristinare la forma originale clicca Annulla.
Eliminare un Oggetto
Questa funzione elimina definitivamente gli oggetti selezionati in tutte le viste.
1. Seleziona uno o più oggetti nella vista 2D, 3D o Inventory. Nella vista Inventory, tieni premuto CTRL e clicca per aggiungere oggetti alla selezione o toglierli.
2. Clicca sul pulsante Elimina: nelle viste 2D e 3D si trova nella barra degli strumenti, nella vista Inventorychiusura in alto a destra.
3. Si apre una finestra con l'elenco delle classi oggetto coinvoltedestra nella selezione,vista ciascuna3D. conTornerai unacosì casellaalla vista dall'alto della nuvola di spunta.punti.

5.In Cliccaentrambi Confermai percasi, procedere,puoi rientrare in una foto cliccando su uno dei marker foto 360 nella vista 3D oppure trascinando nuovamente l'Explorer su un percorso.
Risorse
Le foto sono associate alle Annullarisorse perdisponibili chiuderenel pannello Layers. Se nascondi una risorsa, il relativo percorso scompare dalla mappa. Se ti trovi all'interno di una delle sue foto, la finestravisualizzazione senzapassa apportareautomaticamente modifiche.Ilalla pulsantefoto Confermavisibile èpiù disabilitato se tutte le caselle sono deselezionate.
Al termine dell'operazione compare una notifica in basso a sinistra con l'esito dell'eliminazione.
💡 Suggerimento: controlla sempre le caselle nella finestra di conferma prima di procedere per evitare di eliminare oggetti non desiderati.vicina.
Collegamenti
Last update: 2221 MayOctober 2026