
Draw the mission on the map
 English
  Italiano
 On the planning screen you place the mission on the map: the Home Position the unit returns to, the Waypoints it travels through, the actions it performs along the way, and any areas that limit where it may go.
You reach this screen in two ways: at the end of the configuration of a new mission, or by opening a Draft mission from the mission list.
The panel on the left holds four tabs (Waypoints, Details, In view and Streaming), and the map fills the rest of the screen. At the bottom, Save as a Draft keeps your work and Pre Check moves on to the checks before the start.
The connection to the Mission Unit
When you open the mission, the platform automatically connects to the assigned Mission Unit: it's the unit that reports its own position, and without it you can't set the Home Position or run the Pre Check.
If the connection fails, check that the unit is switched on and in range, then select Retry Mission Unit connection.
The Home Position
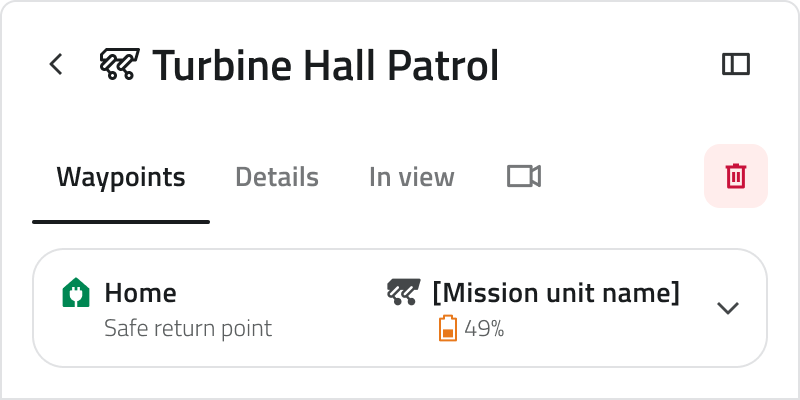
The Home Position is the point the unit starts from and returns to at the end of the mission. It appears at the top of the Waypoints tab, together with the unit assigned to the mission.
Robot Dog
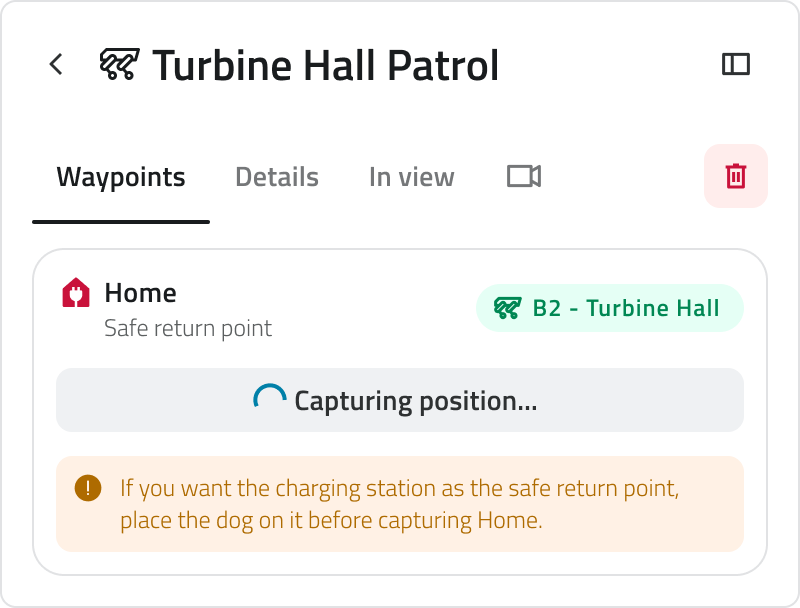
For a robot dog, the Home Position is set automatically at the point where the unit stands, with no need to place it manually. Once acquired, it can be removed or updated to the current position of the unit by selecting Recapture Home Position.
For the robot dog, once the Mission Unit is connected, click Capture Home Position: the platform records the point where the unit currently stands. If you want the robot dog to return to the charging station at the end of the mission, place it on the station before capturing the position.
Starting from the charging station is strongly recommended for Discovery missions.
Once captured, you can update the Home Position using Recapture Home Position.
Drone
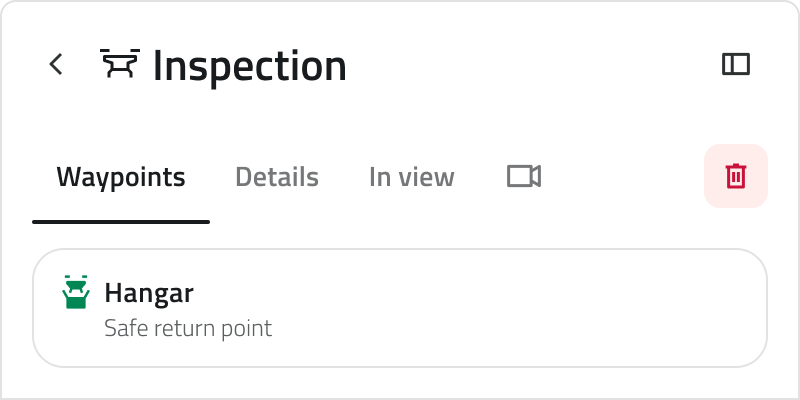
For a drone, the point of return is the Hangar: select that object class and place it on the map, in the same way a waypoint is added.
Waypoints
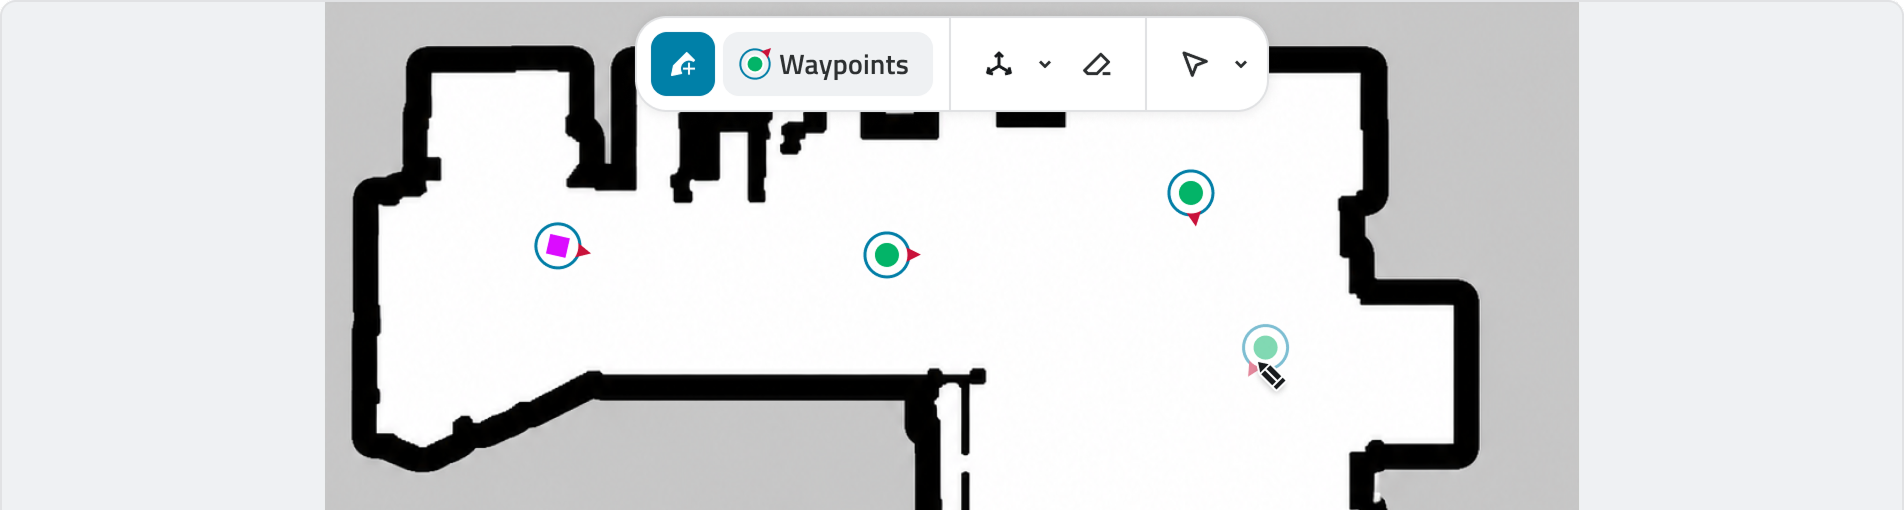
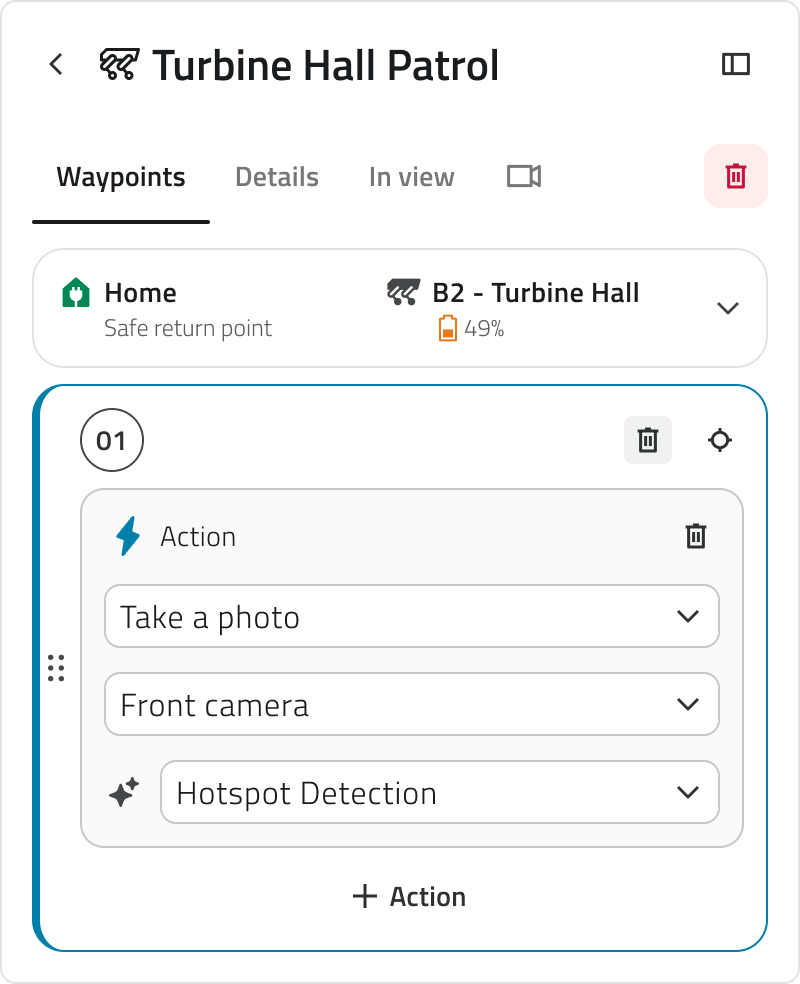
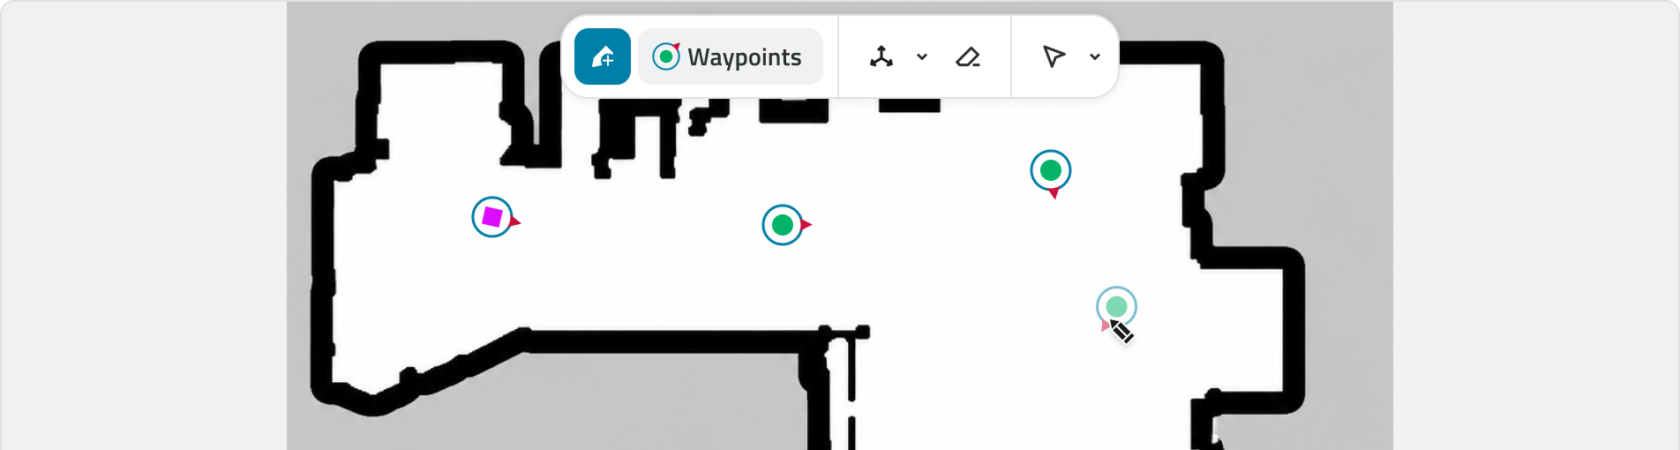
Waypoints are the points the unit travels through, in the order you place them. Draw the first one on the map and the route starts to take shape: each waypoint is numbered and appears both on the map and in the list on the left.
Each waypoint carries an orientation, which is the direction the unit faces when it arrives there.
Actions on a waypoint
A waypoint can carry one or more actions, performed when the unit reaches it. Open the waypoint and add an action, then choose what it does, which add-on performs it and, where it applies, the algorithm that runs on it.
In the list, each waypoint shows how many actions it carries, so you can read the whole route at a glance.
Danger Zones and Geofencing
Besides the route, you can draw two kinds of area on the map to better define the mission:
| Area | What it does |
| Danger Zones | Marks an area the unit must keep out of. |
| Geofencing | Bounds the area the mission may take place in. |
Both are drawn as polygons and appear among the elements in the In View tab, where you can show or hide them as you work.
Looking up an element on the map
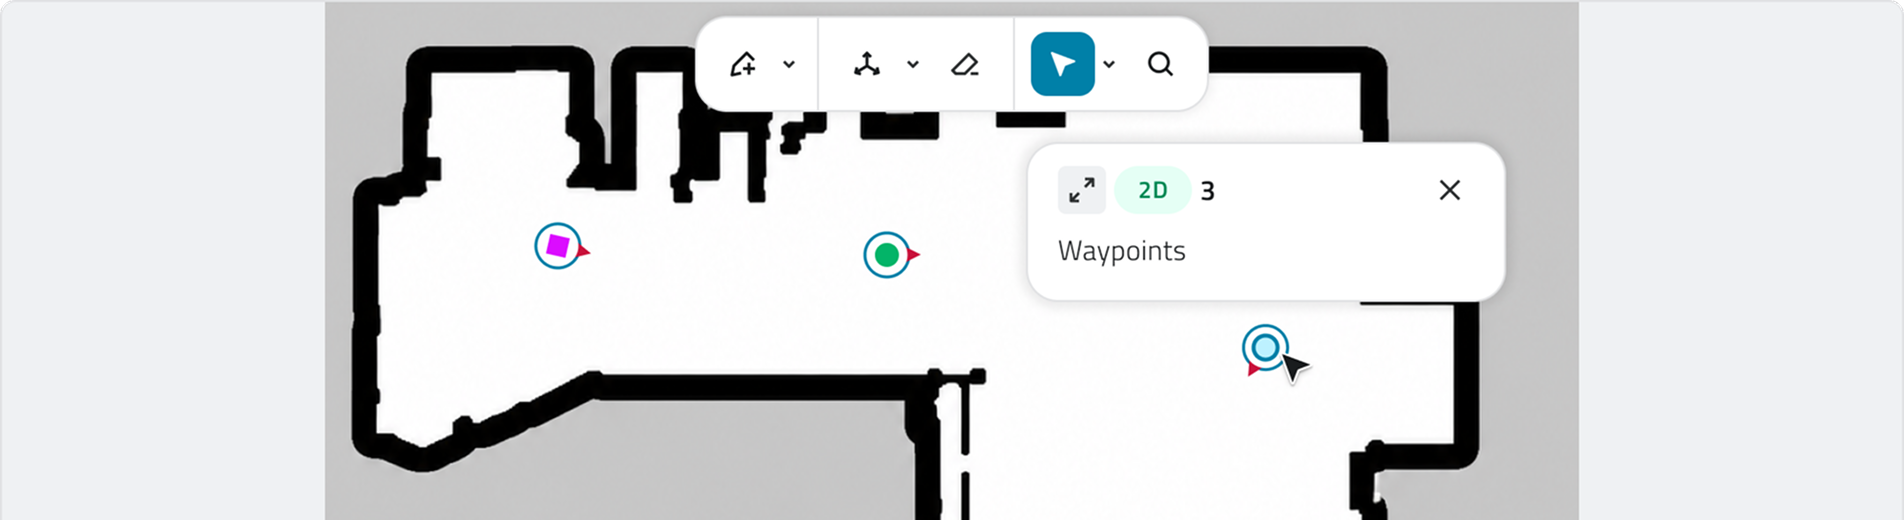
Selecting an element on the map opens a card with its essentials. Expanding the card shows its full attributes: for a waypoint, its identifier, the date of its last change, its orientation and the mission it belongs to.
In view: what you see on the map
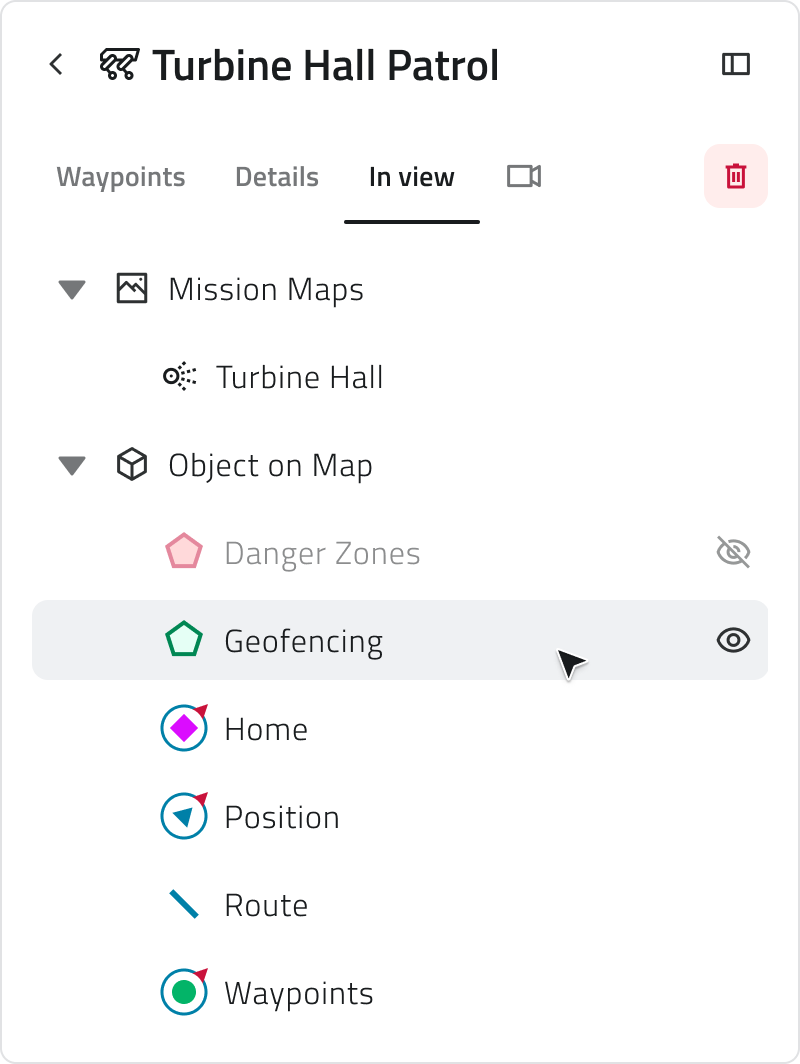
The In view tab governs what the map shows while you work. It holds two groups:
| Group | What it contains |
| Mission Maps | The map the mission runs on. In a multi-floor mission it lists the floors and the stairs between them. |
| Object on Map | The elements of the mission: Danger Zones, Geofencing, Home, Position, Route and Waypoints. |
Show or hide any entry with the eye next to it, and collapse a group with the arrow next to its name when you need more room for the rest.
In a mission with a drone the elements are the Hangar and the Drone Waypoints.
Expanding the map entry reveals Map Opacity: lower it to see what lies beneath the mission map, raise it to bring the map back to the front.
Details of the mission
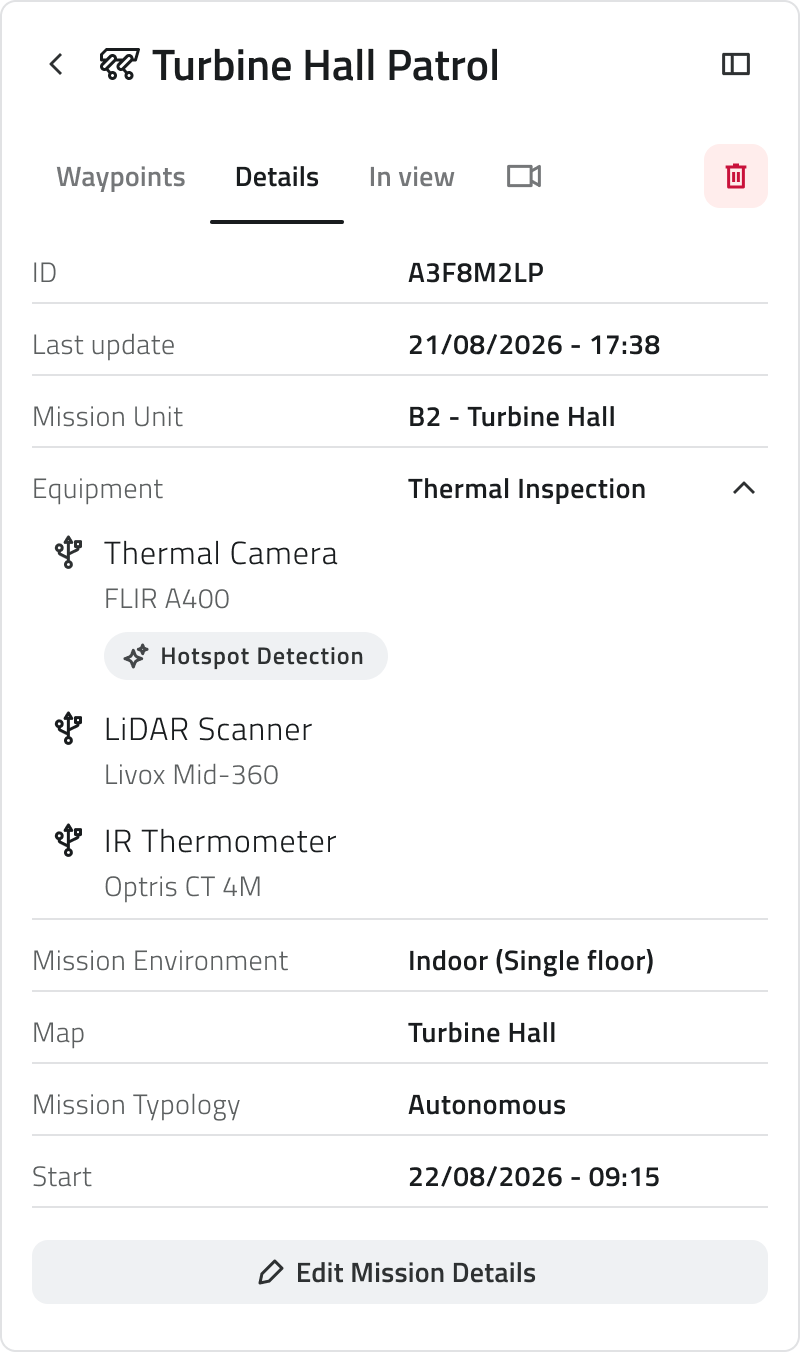
The Details tab collects all the mission information: the Mission Unit, the Equipment with the add-ons it includes and the algorithm assigned to each one, the Mission Environment, the map, the mission typology and the start date.
From this tab, the Edit Mission Details button takes you back to the configuration to change any of these choices.
Saving and deleting
Save as a Draft keeps the mission with everything you have placed so far, and you find it again under Draft in the mission list. You can save whenever there is something new to keep.
Deleting the mission removes it from the project together with the route, the areas and the actions defined on it. A confirmation is asked before it happens.
Deletion is permanent and cannot be undone.
Discovery missions
In a Discovery mission the robot dog explores the environment and builds the map on its own, so there's no route to draw.
Waypoints, geofences and danger zones can't be drawn in this type of mission.
Links
- Run the pre-check and start a mission: the checks before the start.
- Create a mission: the configuration that comes before this screen.
- Find and manage your missions: where drafts and planned missions live.
Disegnare la missione sulla mappa
Nella schermata di pianificazione disegni la missione sulla mappa: la Home Position a cui l'unità rientra, i Waypoints che attraversa, le azioni che esegue lungo il percorso ed eventuali aree che ne limitano il movimento.
A questa schermata si arriva in due modi: al termine della configurazione di una nuova missione, oppure aprendo una missione Bozza dall'elenco delle missioni.
Il pannello a sinistra contiene quattro sezioni (Waypoints, Dettagli, In vista e Streaming), e la mappa occupa il resto della schermata. In basso, Salva come bozza conserva il lavoro e Pre Check porta ai controlli che precedono l'avvio.
Il collegamento alla Mission Unit
All'apertura della missione la piattaforma si collega automaticamente alla Mission Unit assegnata: è l'unità a comunicare la propria posizione, e senza collegamento non puoi impostare la Home Position né eseguire il Pre Check.
Se il collegamento non riesce, verifica che l'unità sia accesa e a portata, poi seleziona Riprova la connessione alla Mission Unit.
La Home Position
La Home Position è il punto da cui l'unità parte e a cui rientra a fine missione. Compare in cima alla sezione Waypoints, insieme all'unità assegnata alla missione.
Robot Dog
Per il robot dog, una volta collegata la Mission Unit, clicca Cattura la Home Position: la piattaforma registra il punto in cui l'unità si trova in quel momento. Se vuoi che il robot dog rientri alla stazione di ricarica a fine missione, posizionalo sulla stazione prima di catturare la posizione.
Per le missioni esplorative la partenza dalla stazione di ricarica è fortemente consigliata.
Una volta acquisita, puoi aggiornare la posizione della Home Position con con Ricattura la Home Position.
Drone
Per il drone, invece, il punto di rientro è l'Hangar: seleziona quella classe di oggetto e posizionala sulla mappa, con la stessa modalità utilizzata per aggiungere un waypoint.
Waypoints
I waypoint sono i punti che l'unità attraversa, nell'ordine in cui li disegni. Il percorso prende forma dal primo waypoint che disegni sulla mappa: ciascuno viene numerato e compare sia sulla mappa sia nell'elenco a sinistra.
Ogni waypoint ha un orientamento, cioè la direzione verso cui l'unità è rivolta quando lo raggiunge.
Azioni su un waypoint
A un waypoint puoi assegnare una o più azioni, che l'unità esegue quando lo raggiunge. Apri il waypoint, aggiungi un'azione e indica in cosa consiste, quale add-on la esegue e, se serve, con quale algoritmo.
Nell'elenco ogni waypoint riporta il numero di azioni che contiene, così vedi subito com'è composto il percorso.
Danger Zones e Geofencing
Oltre al percorso, in mappa puoi disegnare due tipi di area che definiscono meglio la missione:
| Area | Cosa fa |
| Zone di pericolo | Segnala un'area in cui l'unità non deve entrare. |
| Geofencing | Delimita l'area entro cui la missione può svolgersi. |
Entrambe si disegnano come poligoni e compaiono tra gli elementi della sezione In vista, dove puoi mostrarle o nasconderle mentre lavori.
Consultare un elemento in mappa
Selezionando un elemento sulla mappa si apre una card con le informazioni essenziali. Espandendola vedi tutti gli attributi: per un waypoint l'identificativo, la data dell'ultima modifica, l'orientamento e la missione a cui appartiene.
In vista: cosa si vede in mappa
Dalla sezione In vista decidi cosa mostrare sulla mappa mentre lavori. Contiene due gruppi:
| Gruppo | Cosa contiene |
| Mappe della missione | La mappa su cui si svolge la missione. In una missione multipiano elenca i piani e le scale che li collegano. |
| Oggetti sulla mappa | Gli elementi della missione: Zone di pericolo, Geofencing, Home, Posizione, Percorso e Waypoints. |
L'occhio accanto a una voce la mostra o la nasconde, mentre la freccia accanto al nome di un gruppo lo comprime quando ti serve più spazio.
In una missione con drone gli elementi sono l'Hangar e i Waypoints del drone.
Espandendo la voce della mappa compare Opacità della mappa: abbassala per vedere cosa c'è sotto la mappa della missione, alzala per riportarla in primo piano.
I dettagli della missione
La scheda Dettagli raccoglie tutte le informazioni della missione: la Mission Unit, l'Equipment con gli add-on che contiene e l'algoritmo assegnato a ciascuno, l'Ambiente di missione, la mappa, la tipologia e la data di avvio.
Da questa sezione, il pulsante Modifica i dettagli della missione riporta alla configurazione, dove puoi modificare ognuna di queste scelte.
Salvare ed eliminare
Salva come bozza conserva la missione con tutto ciò che hai disegnato fino a quel momento, e la ritrovi sotto Bozza nell'elenco delle missioni. Puoi salvare ogni volta che c'è qualcosa di nuovo.
Eliminando la missione, dal progetto vengono rimossi anche il percorso, le aree e le azioni che hai definito. L'operazione richiede una conferma.
L'eliminazione è permanente e non può essere annullata.
Missioni Esplorative
In una missione Esplorativa è il robot dog a esplorare l'ambiente e a costruirne la mappa, quindi non c'è un percorso da disegnare.
In questo tipo di missione non è possibile disegnare waypoint, geofence o danger zone.
Collegamenti
- Eseguire il pre-check e avviare una missione: i controlli che precedono l'avvio.
- Creare una missione: la configurazione che precede questa schermata.
- Trovare e gestire le missioni: dove trovi le bozze e le missioni pianificate.
Last update: 31 July 2026
No comments to display
No comments to display