
Create and manage Projects
 English
  Italiano
 Creating a new project lets you structure and manage the organisation's operational activities in an orderly way. A project can contain Object classes, Resources, Groups and Sensor sites.
Available only to users with backoffice permission. The elements you want to associate must already exist in the system.
Create a new project
To create a new project, open the Backoffice and click Projects in the left sidebar. The list that opens shows each project's name, last-update date, linked groups and tags.
Click New project in the top-right corner to begin, then fill in the main fields:
- Enter a unique Project name, which is required.
- Click the Tags field to see the tags already saved, then pick one or type a new value. The tag appears inside the field.
- Click a Module to turn it on or off.

Add elements to the project
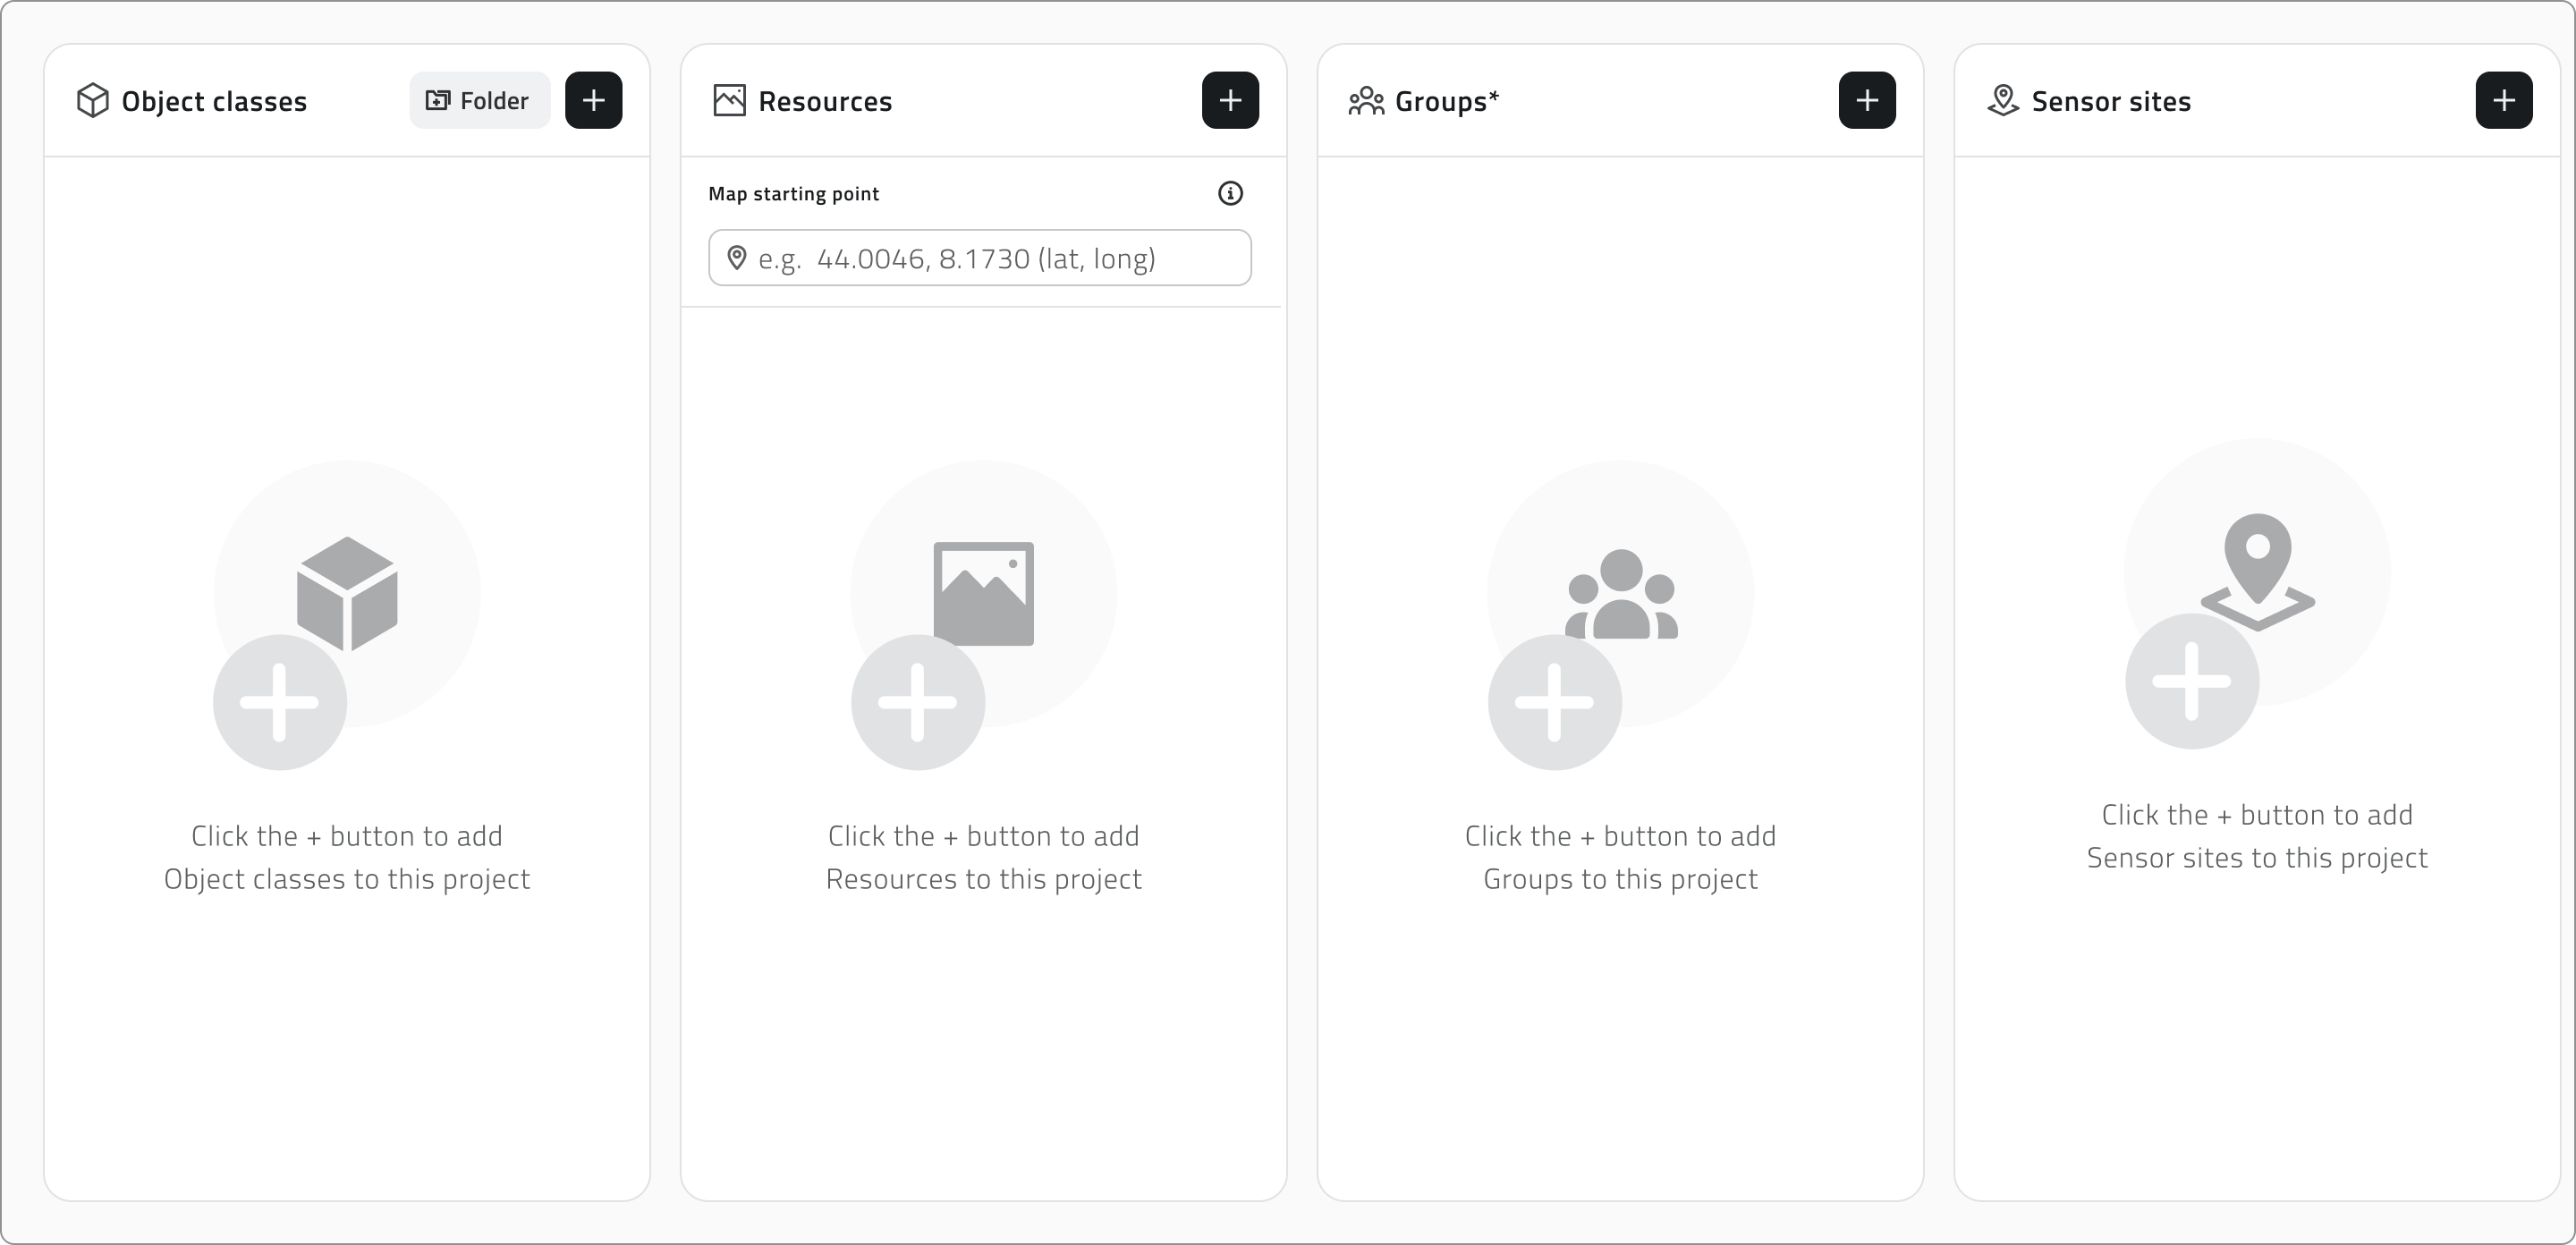
Drag elements from the left list to the right to add them. Hold Ctrl and click to add elements to the selection or remove them, one at a time, or click an element and then Shift-click another to select every element between the two.
As you work, a single search bar filters both lists together, while the counters above each list track how many elements are available and how many are associated. Click Apply to confirm.
Organise object classes
The Object classes panel keeps the two kinds of class apart in separate tabs. Vector holds the Point, Line and Polygon classes that appear in the 2D and 3D views, while Form holds the form-based ones.
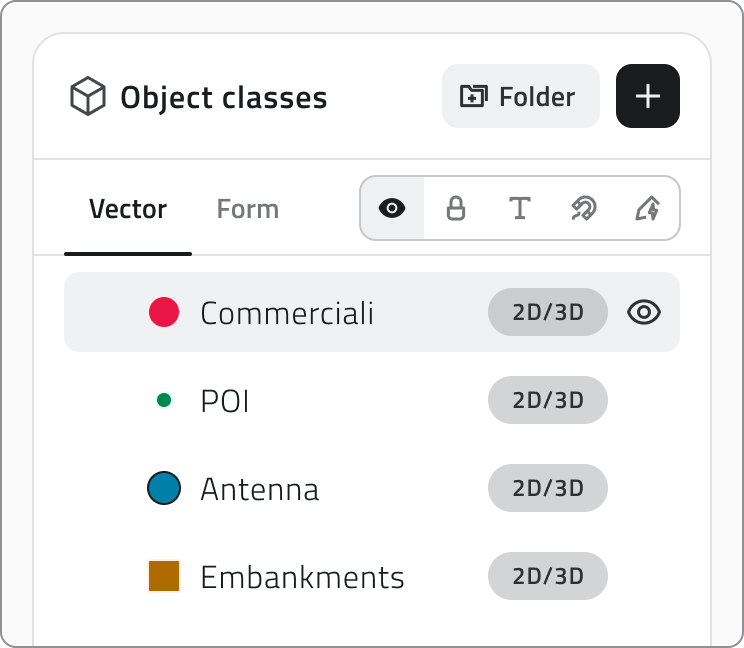
In the Vector tab you arrange the layers as a tree and decide how each one appears when the project opens. Drag a layer to reorder it or to move it into or out of a folder: a blue line follows the cursor to show where it will land, and dropping it onto a folder places it inside.
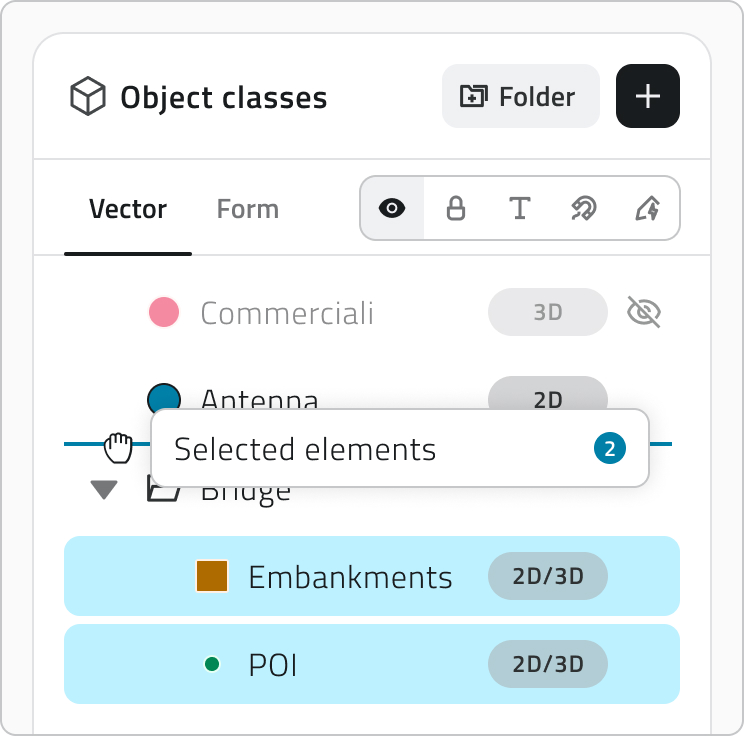
To work on several layers at once, hold Ctrl and click each layer you want to add to or remove from the selection. You can also click one layer and then Shift-click another to select every layer between the two.
- Click the Folder button to create one.
- Double-click a folder name to rename it. A name is required.
- Use the arrow on its left to expand or collapse it, and nest folders on as many levels as you need.
- Hover a folder and choose Ungroup to dissolve it. Its layers move up one level.
- Switch a folder's Visibility to show or hide everything it holds at once, while each layer keeps its own setting.
To set a layer's properties, pick the property in the properties component, then hover the layers to turn it on or off.
| Property | What it sets | Default |
| Visibility | Whether the layer is on or off when the project opens | ON |
| Lock | Whether the layer is protected from user interaction in the viewer | OFF |
| Snap | Whether the layer's geometries work as a snapping reference while drawing or editing | OFF |
| Labels | Whether the layer's labels are shown in the viewer when the project opens | OFF |
| Render Scope | The views the layer belongs to: 2D, 3D or both | BOTH |
Turning on the Mission planner module adds a Mission Planner folder to the Vector tab, holding the object classes needed to use the module. Use the arrow to expand it and see what it contains.
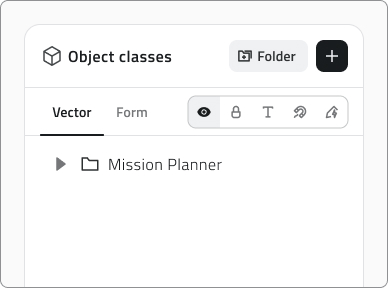
The Mission Planner folder is read-only: the classes it holds cannot be moved or removed.
The Form tab lets you order the form classes and, where a class supports it, set Automatic Object Creation.
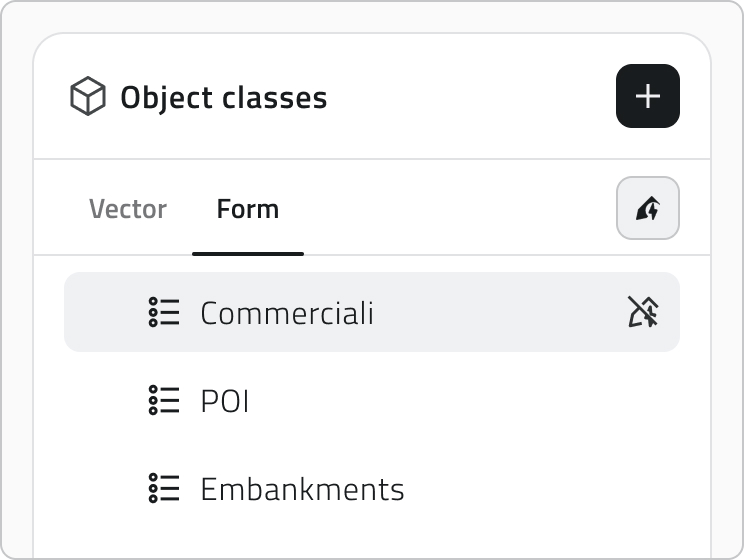
Automatic object creation
Some object classes have automatic object creation configured, and their icon appears next to the name once you add them. Click the icon to enable or disable automatic object creation for this project.

Configure resources and the initial map focus
The Resources panel splits resources between a 2D tab and a 3D tab. Drag them to set the order they appear in the project's side panel, and use Visibility to decide whether each one is active when the project opens.
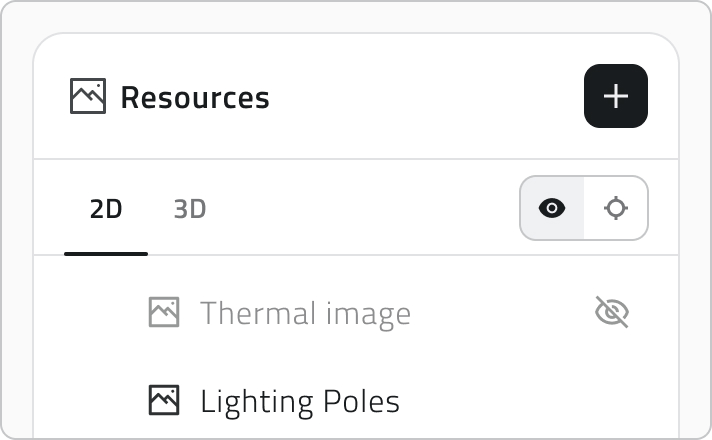
Auto-Center sets what the viewer centres on when the project opens, and you set it separately for each view:
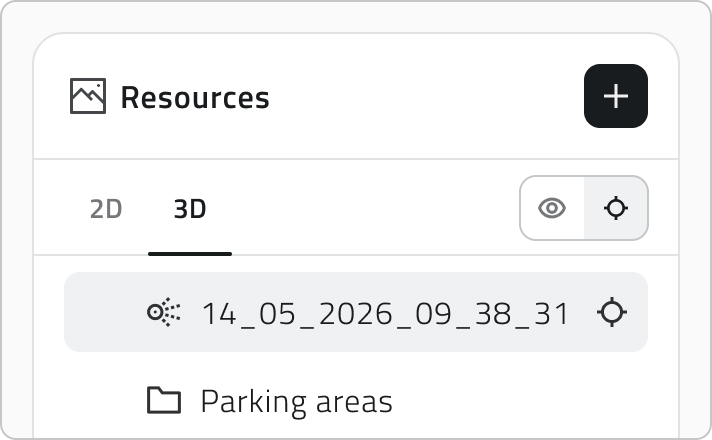
- In the 3D tab, hover a resource and click the crosshair icon to use it as the reference. The crosshair then stays visible on the resource you chose.
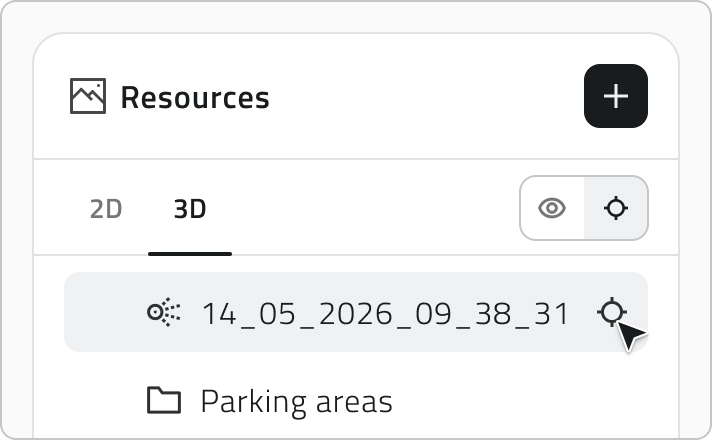
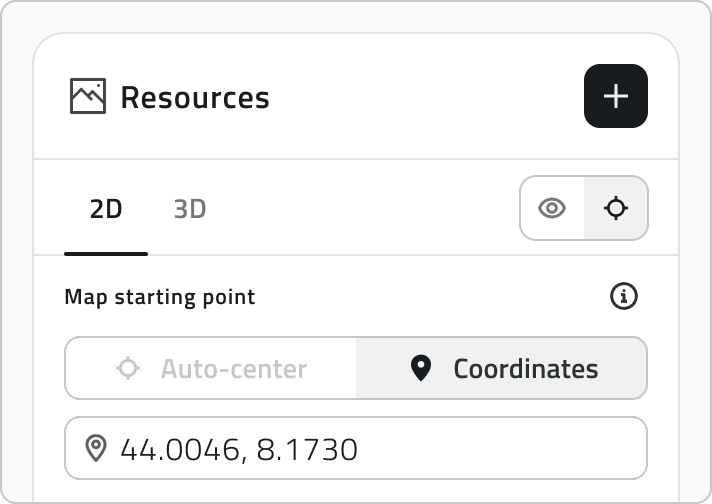
- In the 2D tab, enter the geographic coordinates the map should open on.
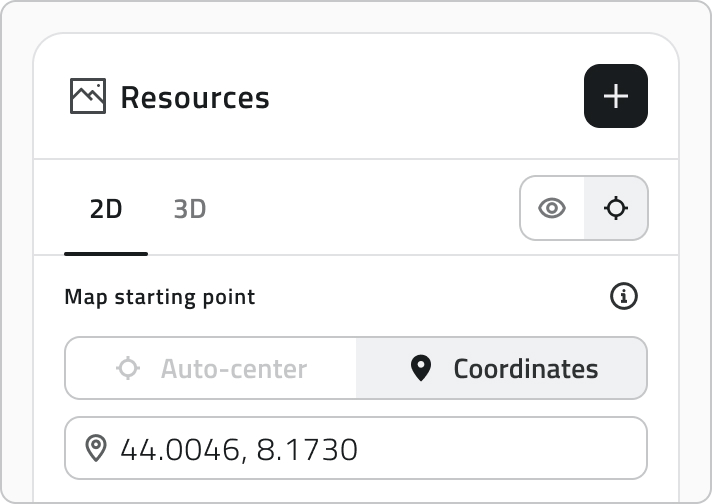
The object class hierarchy, order, visibility, Render Scope, and Auto-Center settings you configure here determine how layers and resources are presented when the project is opened.
Groups and sensor sites
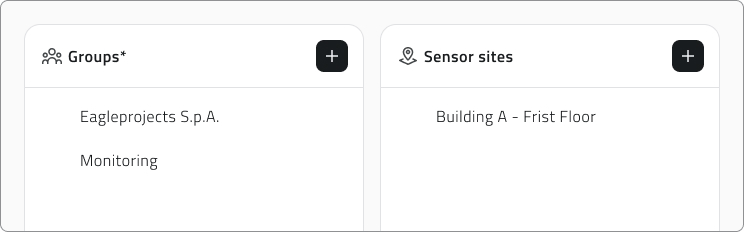
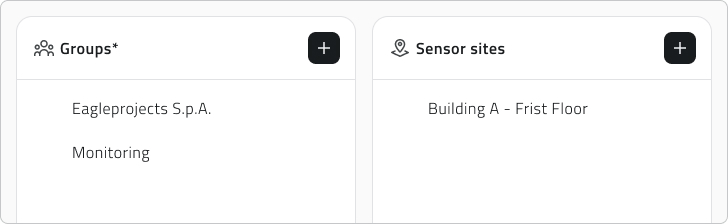
The Groups panel controls who can reach the project: only the users who belong to an associated group can open it.
The Sensor sites panel associates sets of sensors with the project.
Save the project
Click Save in the top-right corner to save the project. The button stays disabled until you have entered a name and at least one group.

If you remove Object classes that already have created instances, those instances are hidden from the project. A label at the top of the Object classes section keeps this information: hover it to see which classes are hidden.
💡 Tip: Before saving, check that the associated groups are correct: only their members can access the project.
Edit and manage elements
- To edit a project, hover it in the list and click the blue arrow button.
- To duplicate one, select it, click Duplicate and choose which elements to include in the copy.
- To delete projects, select one or more of them, click Delete and type the project name to confirm.
Links
Creare e gestire i progetti
Creare un nuovo progetto permette di strutturare e gestire in modo ordinato le attività operative dell'organizzazione. Un progetto può contenere Classi oggetto, Risorse, Gruppi e Siti sensore.
Disponibile solo per gli utenti con permesso backoffice. Gli elementi da associare devono essere già presenti nel sistema.
Creare un nuovo progetto
Per creare un nuovo progetto, apri il Backoffice e clicca Progetti nella barra laterale sinistra. La lista che si apre mostra nome, data dell'ultima modifica, gruppi collegati e tag di ciascun progetto.
Clicca Nuovo progetto in alto a destra per iniziare, poi compila i campi principali:
- Inserisci un Nome univoco, che è obbligatorio.
- Clicca nel campo Tag progetto per vedere i tag già salvati, poi scegline uno o digitane uno nuovo. Il tag comparirà dentro il campo.
- Clicca un Modulo per attivarlo o disattivarlo.

💡 Suggerimento: I tag classificano i progetti e ne facilitano la ricerca. Quelli che crei vengono salvati e riproposti nei progetti futuri.
Aggiungere elementi al progetto
Il pulsante Aggiungi presente in ogni sezione apre il relativo pannello di selezione.
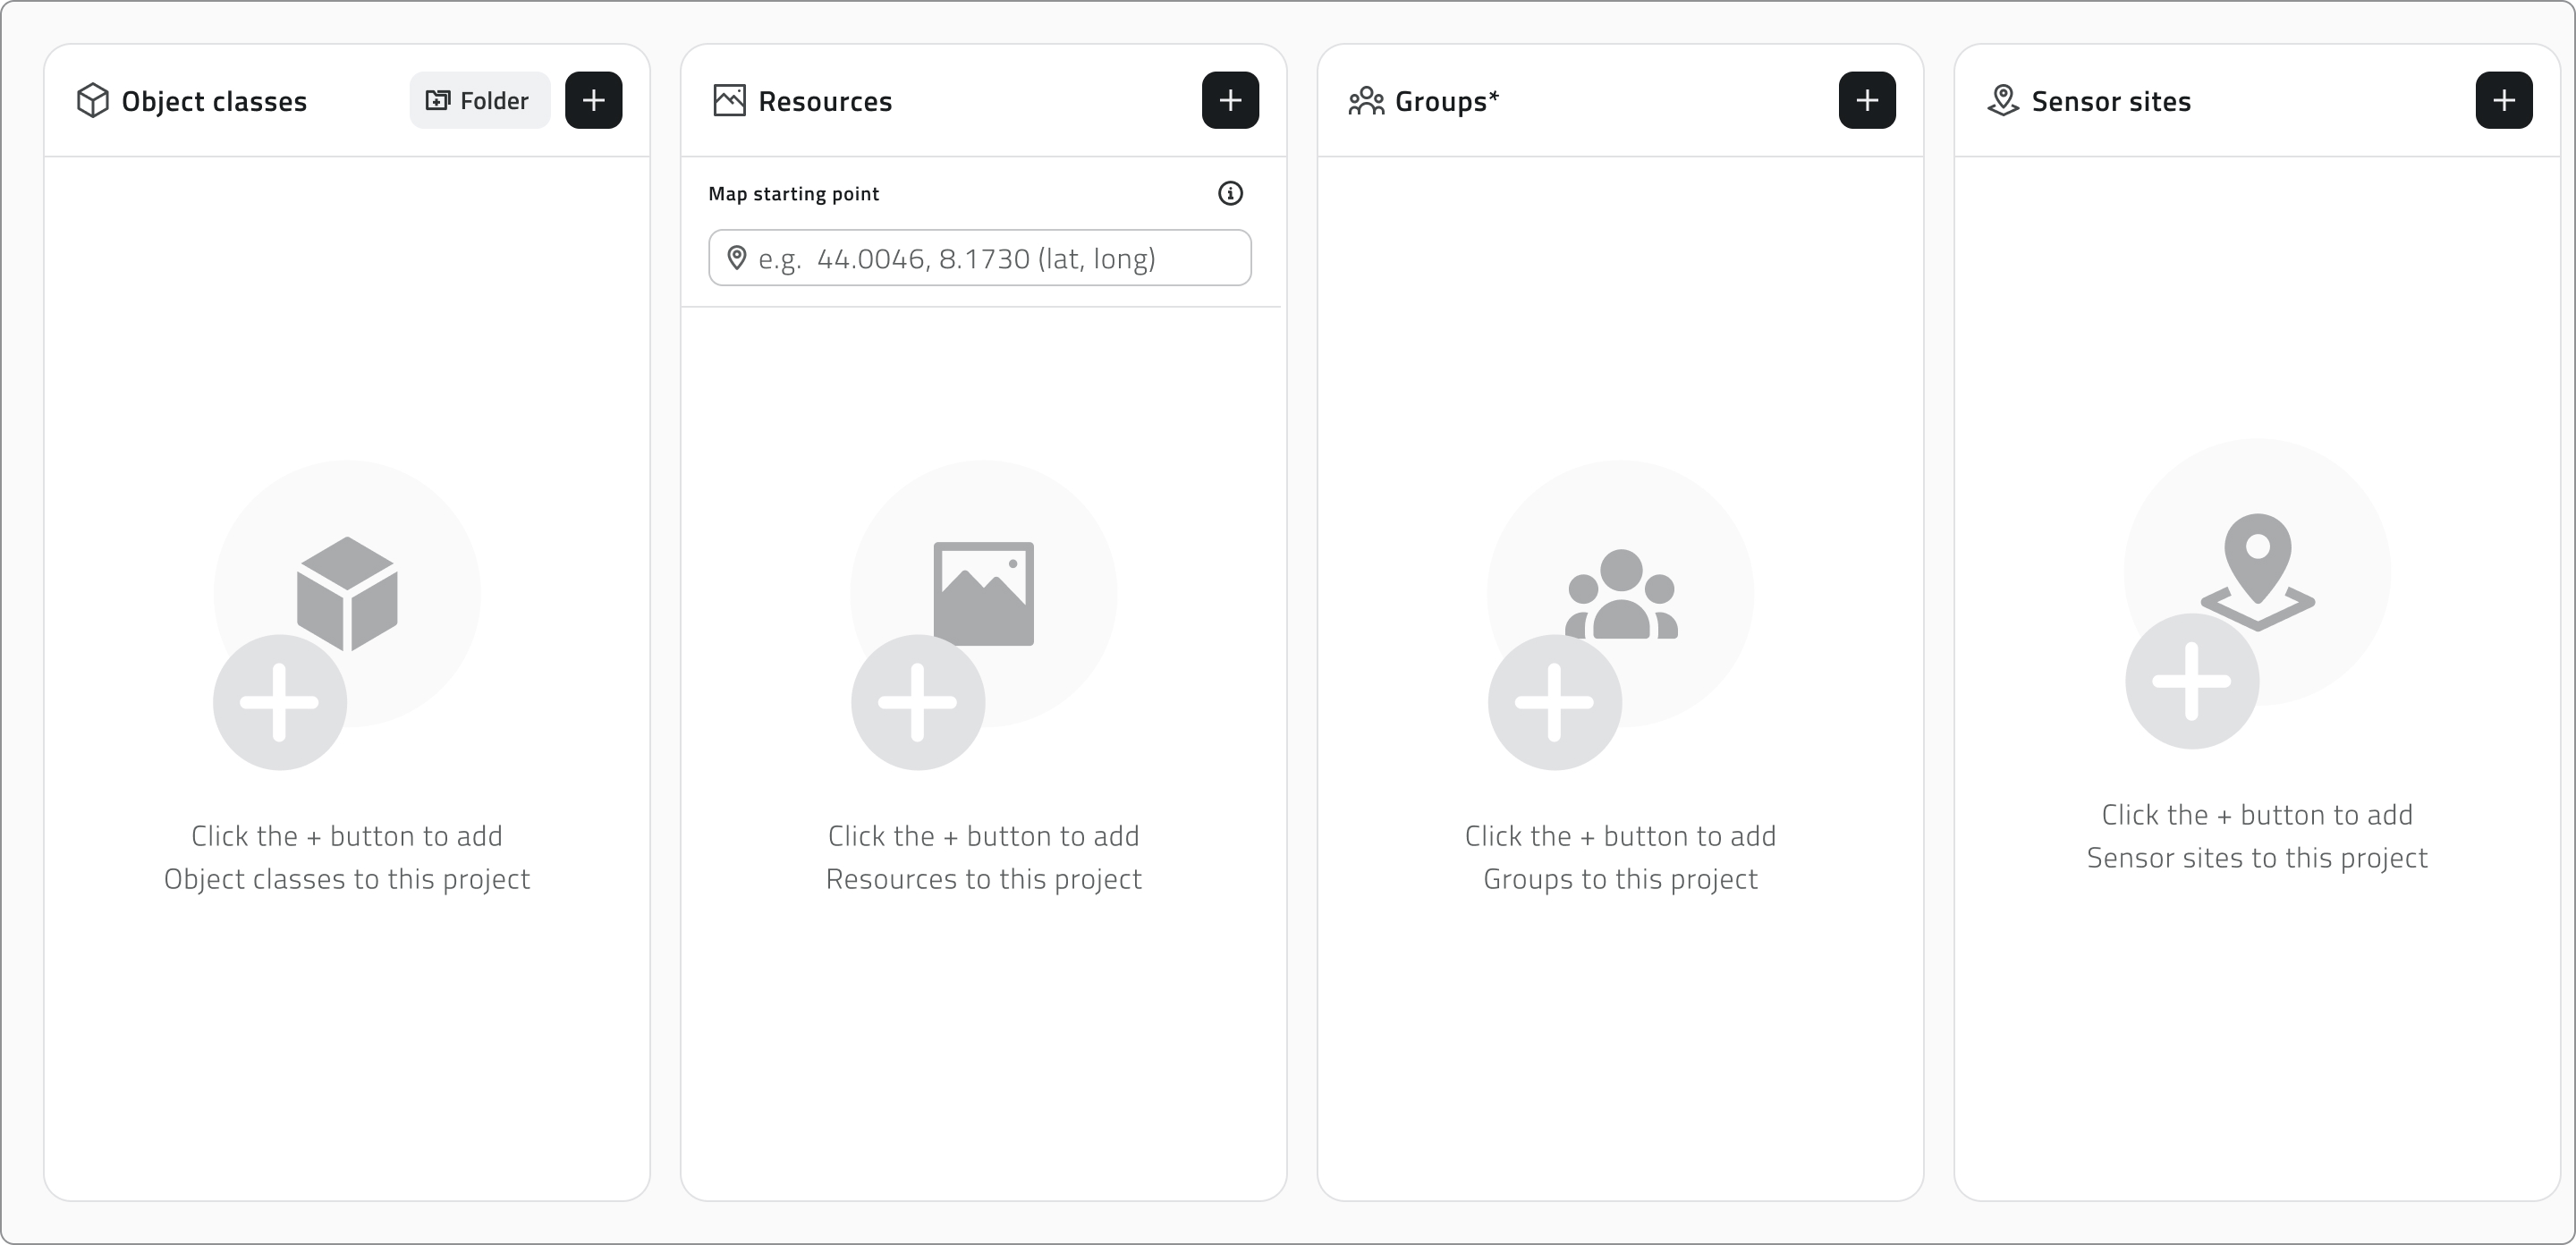
Trascina gli elementi dalla lista di sinistra a quella di destra per aggiungerli. Tieni premuto Ctrl e clicca per aggiungerli alla selezione o toglierli, uno alla volta, oppure clicca un elemento e poi fai Shift+clic su un altro per selezionare tutti gli elementi compresi tra i due.
Mentre lavori, un'unica barra di ricerca filtra entrambe le liste, mentre i contatori sopra ciascuna lista tengono traccia di quanti elementi sono disponibili e quanti associati. Clicca Applica per confermare.
Organizzare le classi oggetto
Il pannello Classi oggetto mantiene distinti i due tipi di classe in tab separate. Vettoriale raccoglie le classi Punto, Linea e Poligono che compaiono nelle viste 2D e 3D, mentre Form raccoglie quelle di tipo Form.
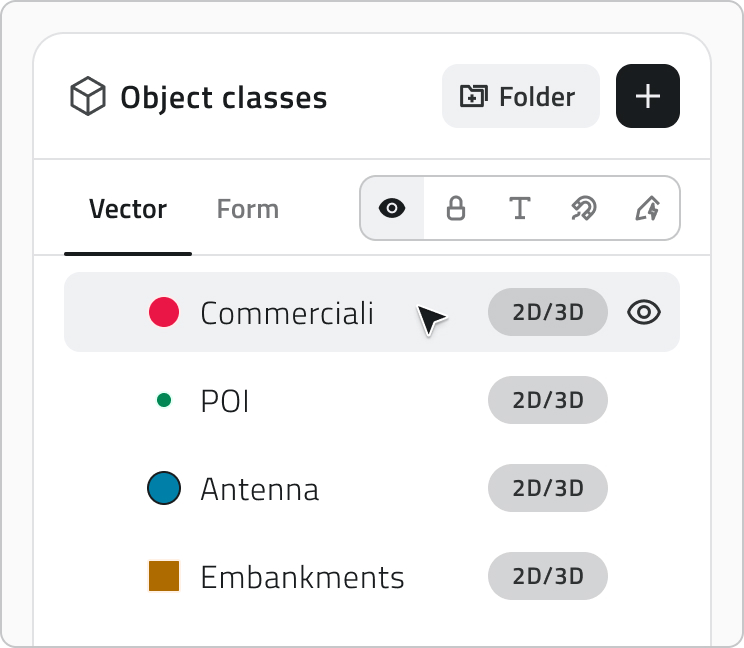
Nella tab Vettoriale disponi i layer ad albero e decidi come ciascuno si presenta all'apertura del progetto. Trascina un layer per riordinarlo o per spostarlo dentro o fuori da una cartella: una linea blu segue il cursore e mostra dove verrà collocato, e rilasciandolo su una cartella lo inserisci al suo interno.
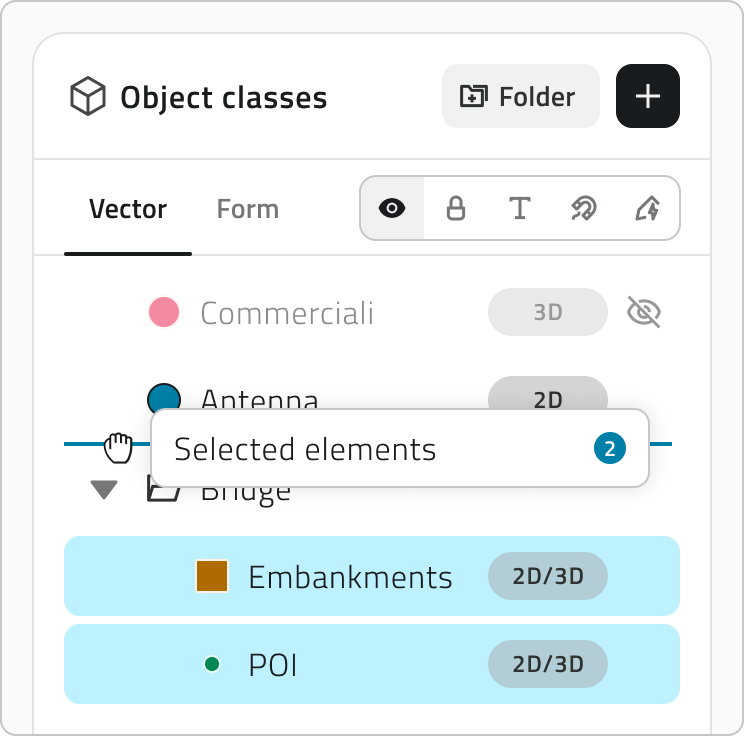
Per lavorare su più layer insieme, tieni premuto Ctrl e clicca ogni layer che vuoi aggiungere o togliere dalla selezione. In alternativa, clicca un layer e poi fai Shift+clic su un altro per selezionare tutti i layer compresi tra i due.
Le cartelle servono a tenere insieme i layer correlati:
- Clicca il pulsante Cartella per crearne una.
- Fai doppio clic sul nome di una cartella per rinominarla. Il nome è obbligatorio.
- Usa la freccia a sinistra per espanderla o comprimerla, e annida le cartelle su quanti livelli ti servono.
- Passa il mouse su una cartella e scegli Separa per scioglierla. I suoi layer salgono di un livello.
- Cambia la visibilità di una cartella per mostrare o nascondere in blocco tutto ciò che contiene, mentre ogni layer conserva la propria impostazione.
Per impostare le proprietà di un layer, scegli la proprietà e passa il mouse sui layer per attivarla o disattivarla.
| Proprietà | Cosa imposta | Default |
| Visibilità | Se il layer è acceso o spento all'apertura del progetto | ON |
| Blocco | Se il layer è protetto dalle interazioni dell'utente nel viewer | OFF |
| Snap | Se le geometrie del layer funzionano da riferimento di aggancio durante disegno ed editing | OFF |
| Etichette | Se le etichette del layer sono mostrate nel viewer all'apertura del progetto | OFF |
| Render Scope | Le viste a cui appartiene il layer: 2D, 3D o entrambe | 2D e 3D |
Attivando il modulo Mission planner, nella tab Vector compare la cartella Mission Planner con le classi oggetto necessarie all'utilizzo del modulo. Usa la freccia per espanderla e vederne il contenuto.
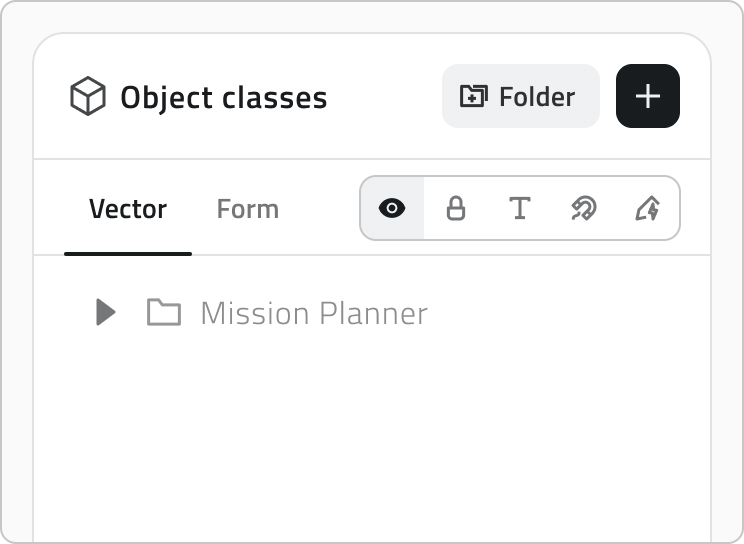
La cartella Mission Planner è in sola lettura: le classi che contiene non si possono spostare né rimuovere.
La tab Form permette di ordinare le classi form e, dove la classe lo supporta, di impostare la Creazione automatica degli oggetti.
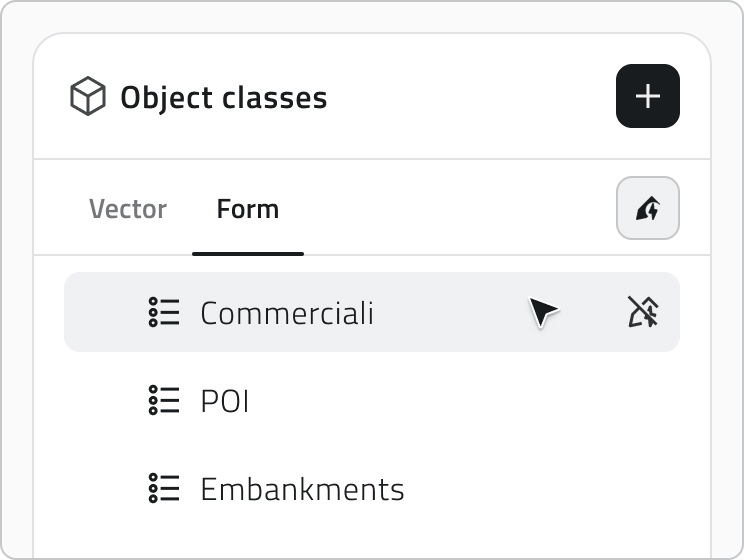
Creazione automatica degli oggetti
Alcune classi oggetto hanno la creazione automatica degli oggetti configurata e, quando le aggiungi, la relativa icona compare accanto al nome. Clicca l'icona per attivare o disattivare la creazione automatica per questo progetto.

Configurare le risorse e il focus iniziale della mappa
Il pannello Risorse divide le risorse tra una tab 2D e una tab 3D. Trascinale per definire l'ordine con cui appaiono nel pannello laterale del progetto e usa la visibility mode per decidere se ciascuna è attiva all'apertura.
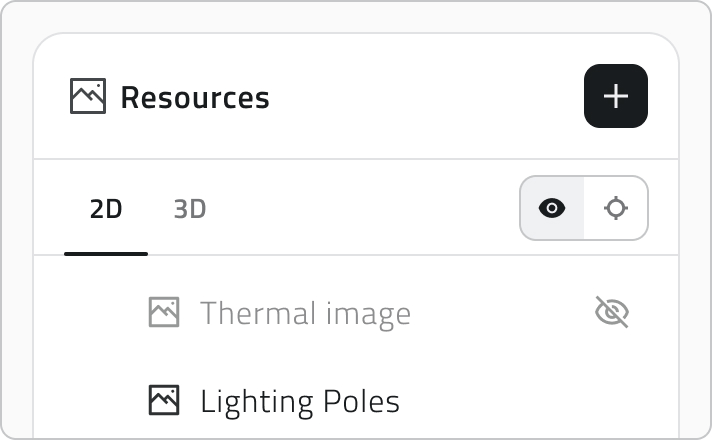
L'Auto-Center definisce su cosa si centra il viewer all'apertura del progetto e si imposta separatamente per ciascuna vista:
- Nella tab 3D, passa il mouse su una risorsa e clicca l'icona a mirino per usarla come riferimento. Il mirino resta poi visibile sulla risorsa scelta.
- Nella tab 2D, inserisci le coordinate geografiche su cui deve aprirsi la mappa.
L'alberatura delle classi oggetto, l'ordine, la visibilità, il Render Scope e l'Auto-Center che imposti qui definiscono come layer e risorse si presentano all'apertura del progetto.
Groups e sensor sites
Il pannello Gruppi regola chi può raggiungere il progetto: solo gli utenti che fanno parte di un gruppo associato possono aprirlo.
Il pannello Siti sensore associa al progetto insiemi di sensori.
Salvare il progetto
Clicca Salva in alto a destra per salvare il progetto. Il pulsante resta disabilitato finché non hai inserito un nome e almeno un gruppo.
Se rimuovi Object classes che hanno già istanze create, queste vengono nascoste dal progetto. Un'etichetta in cima alla sezione Object classes conserva l'informazione: passaci sopra per vedere quali classi sono nascoste.
💡 Suggerimento: Prima di salvare, controlla che i gruppi associati siano corretti: solo i loro membri potranno accedere al progetto.
Modificare e gestire elementi
- Per modificare un progetto, passa il mouse sulla sua riga nella lista e clicca il pulsante blu con la freccia.
- Per duplicarlo, selezionalo, clicca Duplica e scegli quali elementi includere nella copia.
- Per eliminare uno o più progetti, selezionali, clicca Elimina e scrivi il nome del progetto per confermare.
Collegamenti
Last update: 6 July 2026
No comments to display
No comments to display